模块,就是一堆实现了某个功能的代码的集合。
一、time & datetime
time.time()
返回当前时间的时间戳,时间戳表示的是从1970年1月1日00:00:00开始按秒计算的偏移量。
1473344512.2949986
time.sleep(秒数)
使用该方法可以让程序休眠n秒,n可以是小数。
time.clock()
计算CPU执行时间。
time.gmtime()
结构化时间。Python time gmtime() 函数将一个时间戳转换为UTC时区(0时区)的struct_time,可选的参数sec表示从1970-1-1以来的秒数。其默认值为 time.time(),函数返回time.struct_time类型的对象。(struct_time是在time模块中定义的表示时间的对象)。
1 print(time.gmtime())
输出:
time.struct_time(tm_year=2016, tm_mon=9, tm_mday=8, tm_hour=14, tm_min=37, tm_sec=16, tm_wday=3, tm_yday=252, tm_isdst=0)
#            年      月      日    小时     分钟    秒  本周第4天(0表示周日)  本年第252天
time.localtime()
将一个时间戳转换为当前时区的struct_time。secs参数未提供,则以当前时间为准。
time.struct_time(tm_year=2016, tm_mon=9, tm_mday=8, tm_hour=22, tm_min=44, tm_sec=25, tm_wday=3, tm_yday=252, tm_isdst=0)


 1 import time
 2
 3
 4 # print(time.clock()) #返回处理器时间,3.3开始已废弃 , 改成了time.process_time()测量处理器运算时间,不包括sleep时间,不稳定,mac上测不出来
 5 # print(time.altzone)  #返回与utc时间的时间差,以秒计算
 6 # print(time.asctime()) #返回时间格式"Fri Aug 19 11:14:16 2016",
 7 # print(time.localtime()) #返回本地时间 的struct time对象格式
 8 # print(time.gmtime(time.time()-800000)) #返回utc时间的struc时间对象格式
 9
10 # print(time.asctime(time.localtime())) #返回时间格式"Fri Aug 19 11:14:16 2016",
11 #print(time.ctime()) #返回Fri Aug 19 12:38:29 2016 格式, 同上
12
13
14
15 # 日期字符串 转成  时间戳
16 # string_2_struct = time.strptime("2016/05/22","%Y/%m/%d") #将 日期字符串 转成 struct时间对象格式
17 # print(string_2_struct)
18 # #
19 # struct_2_stamp = time.mktime(string_2_struct) #将struct时间对象转成时间戳
20 # print(struct_2_stamp)
21
22
23
24 #将时间戳转为字符串格式
25 # print(time.gmtime(time.time()-86640)) #将utc时间戳转换成struct_time格式
26 # print(time.strftime("%Y-%m-%d %H:%M:%S",time.gmtime()) ) #将utc struct_time格式转成指定的字符串格式
27
28
29
30
31
32 #时间加减
33 import datetime
34
35 # print(datetime.datetime.now()) #返回 2016-08-19 12:47:03.941925
36 #print(datetime.date.fromtimestamp(time.time()) )  # 时间戳直接转成日期格式 2016-08-19
37 # print(datetime.datetime.now() )
38 # print(datetime.datetime.now() + datetime.timedelta(3)) #当前时间+3天
39 # print(datetime.datetime.now() + datetime.timedelta(-3)) #当前时间-3天
40 # print(datetime.datetime.now() + datetime.timedelta(hours=3)) #当前时间+3小时
41 # print(datetime.datetime.now() + datetime.timedelta(minutes=30)) #当前时间+30分
42
43
44 #
45 # c_time  = datetime.datetime.now()
46 # print(c_time.replace(minute=3,hour=2)) #时间替换
random
随机数:
import random
print(random.random())
print(random.randint(1,2))
print(random.randrange(1,10))
生成随机验证码:
import random
checkcode = ''
for i in range(4):
    current = random.randrange(0,4)
    if current != i:
        temp = chr(random.randint(65,90))
    else:
        temp = random.randint(0,9)
    checkcode += str(temp)
print(checkcode)
OS
提供对操作系统调用的接口。
os.getcwd() 获取当前工作目录,即当前python脚本工作的目录路径
os.chdir("dirname")  改变当前脚本工作目录;相当于shell下cd
os.curdir  返回当前目录: ('.')
os.pardir  获取当前目录的父目录字符串名:('..')
os.makedirs('dirname1/dirname2')    可生成多层递归目录
os.removedirs('dirname1')    若目录为空,则删除,并递归到上一级目录,如若也为空,则删除,依此类推
os.mkdir('dirname')    生成单级目录;相当于shell中mkdir dirname
os.rmdir('dirname')    删除单级空目录,若目录不为空则无法删除,报错;相当于shell中rmdir dirname
os.listdir('dirname')    列出指定目录下的所有文件和子目录,包括隐藏文件,并以列表方式打印
os.remove()  删除一个文件
os.rename("oldname","newname")  重命名文件/目录
os.stat('path/filename')  获取文件/目录信息
os.sep    输出操作系统特定的路径分隔符,win下为"\",Linux下为"/"
os.linesep    输出当前平台使用的行终止符,win下为"
",Linux下为"
"
os.pathsep    输出用于分割文件路径的字符串
os.name    输出字符串指示当前使用平台。win->'nt'; Linux->'posix'
os.system("bash command")  运行shell命令,直接显示
os.environ  获取系统环境变量
os.path.abspath(path)  返回path规范化的绝对路径
os.path.split(path)  将path分割成目录和文件名二元组返回
os.path.dirname(path)  返回path的目录。其实就是os.path.split(path)的第一个元素
os.path.basename(path)  返回path最后的文件名。如何path以/或结尾,那么就会返回空值。即os.path.split(path)的第二个元素
os.path.exists(path)  如果path存在,返回True;如果path不存在,返回False
os.path.isabs(path)  如果path是绝对路径,返回True
os.path.isfile(path)  如果path是一个存在的文件,返回True。否则返回False
os.path.isdir(path)  如果path是一个存在的目录,则返回True。否则返回False
os.path.join(path1[, path2[, ...]])  将多个路径组合后返回,第一个绝对路径之前的参数将被忽略
os.path.getatime(path)  返回path所指向的文件或者目录的最后存取时间
os.path.getmtime(path)  返回path所指向的文件或者目录的最后修改时间
sys
sys.argv           命令行参数List,第一个元素是程序本身路径
sys.exit(n)        退出程序,正常退出时exit(0)
sys.version        获取Python解释程序的版本信息
sys.maxint         最大的Int值
sys.path           返回模块的搜索路径,初始化时使用PYTHONPATH环境变量的值
sys.platform       返回操作系统平台名称
sys.stdout.write('please:')
val = sys.stdin.readline()[:-1]
hashlib
用于加密相关的操作,3.x里代替了md5模块和sha模块,主要提供 SHA1, SHA224, SHA256, SHA384, SHA512 ,MD5 算法。
import hashlib

m = hashlib.md5()
m.update(b"Hello")
m.update(b"It's me")
print(m.digest())
m.update(b"It's been a long time since last time we ...")

print(m.digest()) #2进制格式hash
print(len(m.hexdigest())) #16进制格式hash
'''
def digest(self, *args, **kwargs): # real signature unknown
    """ Return the digest value as a string of binary data. """
    pass

def hexdigest(self, *args, **kwargs): # real signature unknown
    """ Return the digest value as a string of hexadecimal digits. """
    pass

'''
import hashlib

# ######## md5 ########

hash = hashlib.md5()
hash.update('admin')
print(hash.hexdigest())

# ######## sha1 ########

hash = hashlib.sha1()
hash.update('admin')
print(hash.hexdigest())

# ######## sha256 ########

hash = hashlib.sha256()
hash.update('admin')
print(hash.hexdigest())


# ######## sha384 ########

hash = hashlib.sha384()
hash.update('admin')
print(hash.hexdigest())

# ######## sha512 ########

hash = hashlib.sha512()
hash.update('admin')
print(hash.hexdigest())
python 还有一个 hmac 模块,它内部对我们创建 key 和 内容 再进行处理然后再加密
散列消息鉴别码,简称HMAC,是一种基于消息鉴别码MAC(Message Authentication Code)的鉴别机制。使用HMAC时,消息通讯的双方,通过验证消息中加入的鉴别密钥K来鉴别消息的真伪;
一般用于网络通信中消息加密,前提是双方先要约定好key,就像接头暗号一样,然后消息发送把用key把消息加密,接收方用key + 消息明文再加密,拿加密后的值 跟 发送者的相对比是否相等,这样就能验证消息的真实性,及发送者的合法性了。
import hmac
h = hmac.new(b'天王盖地虎', b'宝塔镇河妖')
print h.hexdigest()
https://www.tbs-certificates.co.uk/FAQ/en/sha256.html
paramiko
http://www.cnblogs.com/franknihao/p/6536255.html
pip3 install paramiko
1 用户名密码--执行命令
import paramiko

ssh = paramiko.SSHClient()
ssh.set_missing_host_key_policy(paramiko.AutoAddPolicy())
ssh.connect('127.0.0.1', 22, 'oliver', '123456')
stdin, stdout, stderr = ssh.exec_command('df -h')
print stdout.read()
ssh.close();
2 秘钥--执行命令
import paramiko

private_key_path = '/home/auto/.ssh/id_rsa'
key = paramiko.RSAKey.from_private_key_file(private_key_path)

ssh = paramiko.SSHClient()
ssh.set_missing_host_key_policy(paramiko.AutoAddPolicy())
ssh.connect('127.0.0.1 ', 22, 'oliver', key)

stdin, stdout, stderr = ssh.exec_command('df -h')
print stdout.read()
ssh.close()
3 用户名密码--上传下载
import os,sys
import paramiko

t = paramiko.Transport(('192.168.1.46',22))
t.connect(username='oliver',password='123456')
sftp = paramiko.SFTPClient.from_transport(t)
sftp.put('/tmp/test.py','/tmp/test.py')
t.close()


import os,sys
import paramiko

t = paramiko.Transport(('192.168.1.46',22))
sftp = paramiko.SFTPClient.from_transport(t)
sftp.get('/tmp/test.py','/tmp/test2.py')
t.close()
4 秘钥--上传下载
import paramiko

pravie_key_path = '/home/auto/.ssh/id_rsa'
key = paramiko.RSAKey.from_private_key_file(pravie_key_path)

t = paramiko.Transport(('192.168.1.46',22))
t.connect(username='oliver',pkey=key)

sftp = paramiko.SFTPClient.from_transport(t)
sftp.put('/tmp/test3.py','/tmp/test3.py')

t.close()

import paramiko

pravie_key_path = '/home/auto/.ssh/id_rsa'
key = paramiko.RSAKey.from_private_key_file(pravie_key_path)

t = paramiko.Transport(('192.168.1.46',22))
t.connect(username='oliver',pkey=key)

sftp = paramiko.SFTPClient.from_transport(t)
sftp.get('/tmp/test3.py','/tmp/test4.py')

t.close()
subprocess
#执行命令,返回命令执行状态 , 0 or 非0
>>> retcode = subprocess.call(["ls", "-l"])

#执行命令,如果命令结果为0,就正常返回,否则抛异常
>>> subprocess.check_call(["ls", "-l"])
0

#接收字符串格式命令,返回元组形式,第1个元素是执行状态,第2个是命令结果
>>> subprocess.getstatusoutput('ls /bin/ls')
(0, '/bin/ls')

#接收字符串格式命令,并返回结果
>>> subprocess.getoutput('ls /bin/ls')
'/bin/ls'

#执行命令,并返回结果,注意是返回结果,不是打印,下例结果返回给res
>>> res=subprocess.check_output(['ls','-l'])
>>> res
b'total 0
drwxr-xr-x 12 alex staff 408 Nov 2 11:05 OldBoyCRM
'

#上面那些方法,底层都是封装的subprocess.Popen
poll()
Check if child process has terminated. Returns returncode

wait()
Wait for child process to terminate. Returns returncode attribute.


terminate() 杀掉所启动进程
communicate() 等待任务结束

stdin 标准输入

stdout 标准输出

stderr 标准错误

pid
The process ID of the child process.

#例子
>>> p = subprocess.Popen("df -h|grep disk",stdin=subprocess.PIPE,stdout=subprocess.PIPE,shell=True)
>>> p.stdout.read()
b'/dev/disk1 465Gi 64Gi 400Gi 14% 16901472 104938142 14% /
'
>>> subprocess.run(["ls", "-l"])  # doesn't capture output
CompletedProcess(args=['ls', '-l'], returncode=0)

>>> subprocess.run("exit 1", shell=True, check=True)
Traceback (most recent call last):
  ...
subprocess.CalledProcessError: Command 'exit 1' returned non-zero exit status 1

>>> subprocess.run(["ls", "-l", "/dev/null"], stdout=subprocess.PIPE)
CompletedProcess(args=['ls', '-l', '/dev/null'], returncode=0,
stdout=b'crw-rw-rw- 1 root root 1, 3 Jan 23 16:23 /dev/null
')
调用subprocess.run(...)是推荐的常用方法,在大多数情况下能满足需求,但如果你可能需要进行一些复杂的与系统的交互的话,你还可以用subprocess.Popen(),语法如下:
p = subprocess.Popen("find / -size +1000000 -exec ls -shl {} ;",shell=True,stdout=subprocess.PIPE)
print(p.stdout.read())
可用参数:
args:shell命令,可以是字符串或者序列类型(如:list,元组)
bufsize:指定缓冲。0 无缓冲,1 行缓冲,其他 缓冲区大小,负值 系统缓冲
stdin, stdout, stderr:分别表示程序的标准输入、输出、错误句柄
preexec_fn:只在Unix平台下有效,用于指定一个可执行对象(callable object),它将在子进程运行之前被调用
close_sfs:在windows平台下,如果close_fds被设置为True,则新创建的子进程将不会继承父进程的输入、输出、错误管道。
所以不能将close_fds设置为True同时重定向子进程的标准输入、输出与错误(stdin, stdout, stderr)。
shell:同上
cwd:用于设置子进程的当前目录
env:用于指定子进程的环境变量。如果env = None,子进程的环境变量将从父进程中继承。
universal_newlines:不同系统的换行符不同,True -> 同意使用
startupinfo与createionflags只在windows下有效
将被传递给底层的CreateProcess()函数,用于设置子进程的一些属性,如:主窗口的外观,进程的优先级等等
终端输入的命令分为两种:
输入即可得到输出,如:ifconfig
输入进行某环境,依赖再输入,如:python
需要交互的命令示例:
import subprocess

obj = subprocess.Popen(["python"], stdin=subprocess.PIPE, stdout=subprocess.PIPE, stderr=subprocess.PIPE)
obj.stdin.write('print 1
 ')
obj.stdin.write('print 2
 ')
obj.stdin.write('print 3
 ')
obj.stdin.write('print 4
 ')

out_error_list = obj.communicate(timeout=10)
print out_error_list
subprocess实现sudo 自动输入密码:
import subprocess

def mypass():
    mypass = '123' #or get the password from anywhere
    return mypass

echo = subprocess.Popen(['echo',mypass()],
                        stdout=subprocess.PIPE,
                        )

sudo = subprocess.Popen(['sudo','-S','iptables','-L'],
                        stdin=echo.stdout,
                        stdout=subprocess.PIPE,
                        )

end_of_pipe = sudo.stdout

print "Password ok
 Iptables Chains %s" % end_of_pipe.read()
re
'.'     默认匹配除
之外的任意一个字符,若指定flag DOTALL,则匹配任意字符,包括换行
'^'     匹配字符开头,若指定flags MULTILINE,这种也可以匹配上(r"^a","
abc
eee",flags=re.MULTILINE)
'$'     匹配字符结尾,或e.search("foo$","bfoo
sdfsf",flags=re.MULTILINE).group()也可以
'*'     匹配*号前的字符0次或多次,re.findall("ab*","cabb3abcbbac")  结果为['abb', 'ab', 'a']
'+'     匹配前一个字符1次或多次,re.findall("ab+","ab+cd+abb+bba") 结果['ab', 'abb']
'?'     匹配前一个字符1次或0次
'{m}'   匹配前一个字符m次
'{n,m}' 匹配前一个字符n到m次,re.findall("ab{1,3}","abb abc abbcbbb") 结果'abb', 'ab', 'abb']
'|'     匹配|左或|右的字符,re.search("abc|ABC","ABCBabcCD").group() 结果'ABC'
'(...)' 分组匹配,re.search("(abc){2}a(123|456)c", "abcabca456c").group() 结果 abcabca456c


'A'    只从字符开头匹配,re.search("Aabc","alexabc") 是匹配不到的
''    匹配字符结尾,同$
'd'    匹配数字0-9
'D'    匹配非数字
'w'    匹配[A-Za-z0-9]
'W'    匹配非[A-Za-z0-9]
's'     匹配空白字符、	、
、
 , re.search("s+","ab	c1
3").group() 结果 '	'

'(?P<name>...)' 分组匹配 re.search("(?P<province>[0-9]{4})(?P<city>[0-9]{2})(?P<birthday>[0-9]{4})","371481199306143242").groupdict("city") 结果{'province': '3714', 'city': '81', 'birthday': '1993'}
最常用的匹配语法:
e.match 从头开始匹配
re.search 匹配包含
re.findall 把所有匹配到的字符放到以列表中的元素返回
re.splitall 以匹配到的字符当做列表分隔符
re.sub      匹配字符并替换
反斜杠的困扰
与大多数编程语言相同,正则表达式里使用""作为转义字符,这就可能造成反斜杠困扰。假如你需要匹配文本中的字符"",那么使用编程语言表示的正则表达式里将需要4个反斜杠"\\":前两个和后两个分别用于在编程语言里转义成反斜杠,转换成两个反斜杠后再在正则表达式里转义成一个反斜杠。Python里的原生字符串很好地解决了这个问题,这个例子中的正则表达式可以使用r"\"表示。同样,匹配一个数字的"\d"可以写成r"d"。有了原生字符串,你再也不用担心是不是漏写了反斜杠,写出来的表达式也更直观。
仅需轻轻知道的几个匹配模式:
re.I(re.IGNORECASE): 忽略大小写(括号内是完整写法,下同)
M(MULTILINE): 多行模式,改变'^'和'$'的行为(参见上图)
S(DOTALL): 点任意匹配模式,改变'.'的行为
ConfigParser
http://www.open-open.com/lib/view/open1398169869203.html
Python中有ConfigParser类,可以很方便的从配置文件中读取和写入数据(如DB的配置,路径的配置)。
常见的配置文件格式ini文件,其他格式还有conf文件。ini文件示例:
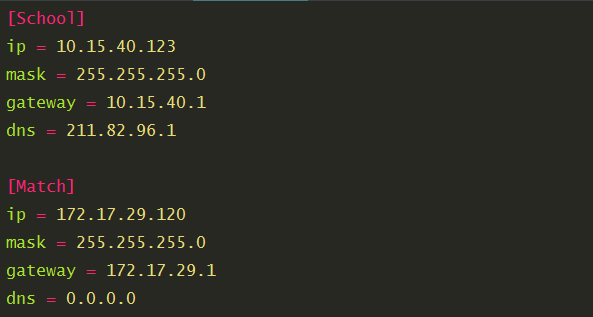
[School]
ip = 10.15.40.123
mask = 255.255.255.0
gateway = 10.15.40.1
dns = 211.82.96.1

[Match]
ip = 172.17.29.120
mask = 255.255.255.0
gateway = 172.17.29.1
dns = 0.0.0.0
配置文件的写入和读取:
import configparser

config = configparser.ConfigParser()
config.read("IpConfig.ini")  # 如果文件不存在,则自动创建

# 在School节下面添加参数
try:
    config.add_section("School")    # 注意:如果文件中已经存在相应的项目,则不能再增加同名的节。
    config.set("School","IP","10.15.40.123")
    config.set("School","Mask","255.255.255.0")
    config.set("School","Gateway","10.15.40.1")
    config.set("School","DNS","211.82.96.1")
except configparser.DuplicateSectionError:
    print("Section 'School' already exists")

#由于ini文件中可能有同名项,所以做了异常处理
try:
    config.add_section("Match")
    config.set("Match","IP","172.17.29.120")
    config.set("Match","Mask","255.255.255.0")
    config.set("Match","Gateway","172.17.29.1")
    config.set("Match","DNS","0.0.0.0")
except configparser.DuplicateSectionError:
    print("Section 'Match' already exists")

# 添加完参数后,要写入文件
config.write(open("IpConfig.ini", "w"))

ip=config.get("School","IP")
mask=config.get("School","mask")
gateway=config.get("School","Gateway")
dns=config.get("School","DNS")

print((ip,mask+"
"+gateway,dns))
生成的文件:
自己封装一个类,调用时更方便:
# encoding:utf-8
# name:mod_config.py

import configparser
import os


class Config(object):
    def __init__(self, filename):
        self.config = configparser.ConfigParser()
        self.path = os.path.split(os.path.realpath(__file__))[0] + '/' + filename
        # 其中 os.path.split(os.path.realpath(__file__))[0] 得到的是当前文件模块的目录
        self.config.read(self.path)

    # 设置config配置文件
    def setConfig(self, section, option, value):
        # 由于ini文件中可能有同名项,所以做了异常处理
        try:
            self.config.add_section(section)
        except configparser.DuplicateSectionError:
            print("Section '%s' already exists" % section)
            self.config.set(section, option, value)

    def writeConfig(self):
        # 添加完参数后,要写入文件
        return self.config.write(open(self.path, "w"))

    # 获取config配置文件
    def getConfig(self, section, key):
        return self.config.get(section, key)


if __name__ == '__main__':
    # import pdb;pdb.set_trace()
    conf_obj = Config("IpConfig.ini")
    conf_obj.setConfig("DB", "host", "127.0.0.1")
    conf_obj.setConfig("School", "description", "")
    gw = conf_obj.getConfig("School", "gateway")
    mask = conf_obj.getConfig("Match", "mask")
    print gw, mask
yaml
http://blog.csdn.net/Marksinoberg/article/details/52979419
csv
http://www.cnblogs.com/liujinhong/p/5937527.html
argparse、docopt、click
https://python.freelycode.com/contribution/detail/643
prettytable
http://www.cnblogs.com/xiao1/p/5878680.html
http://blog.csdn.net/bellwhl/article/details/9066493
colorama
命令行着色工具。
collections
略
matplotlib
https://www.ibm.com/developerworks/cn/linux/l-matplotlib/
numpy
sklearn
FileDialog
tkinter
scipy
opencv-python