定义:碎片是一种可以嵌入在活动当中的UI片段;
作用:让程序更合理运用大屏幕空间。
例如:
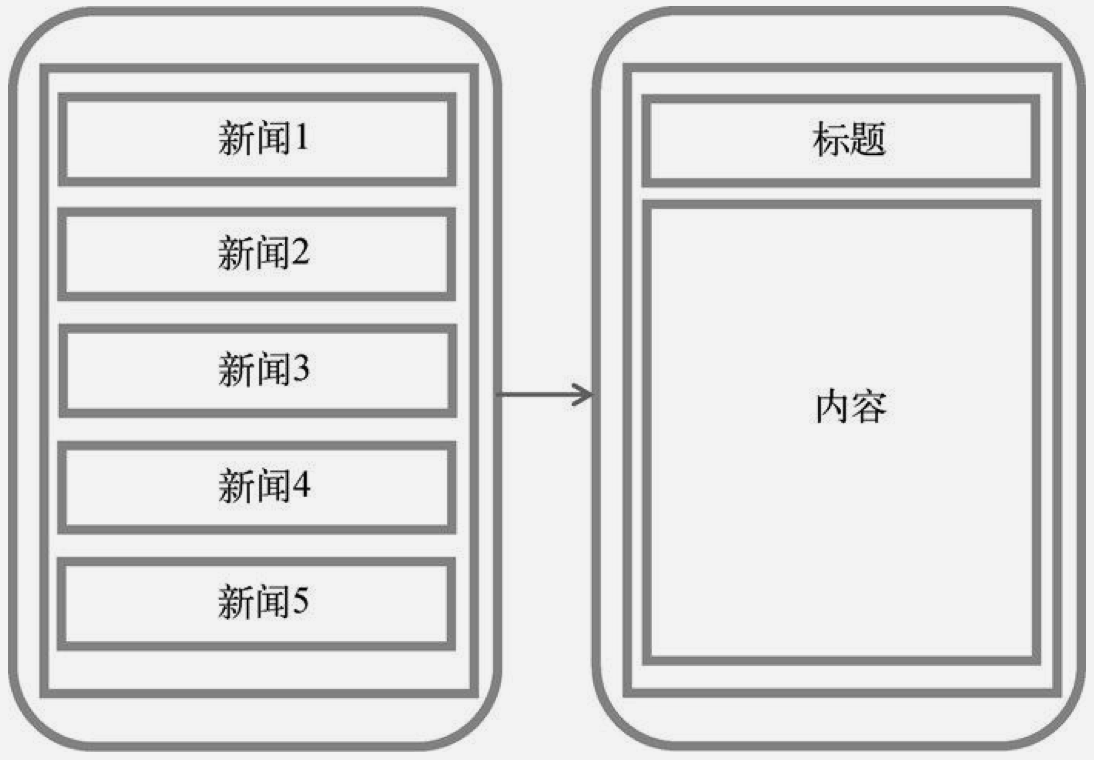
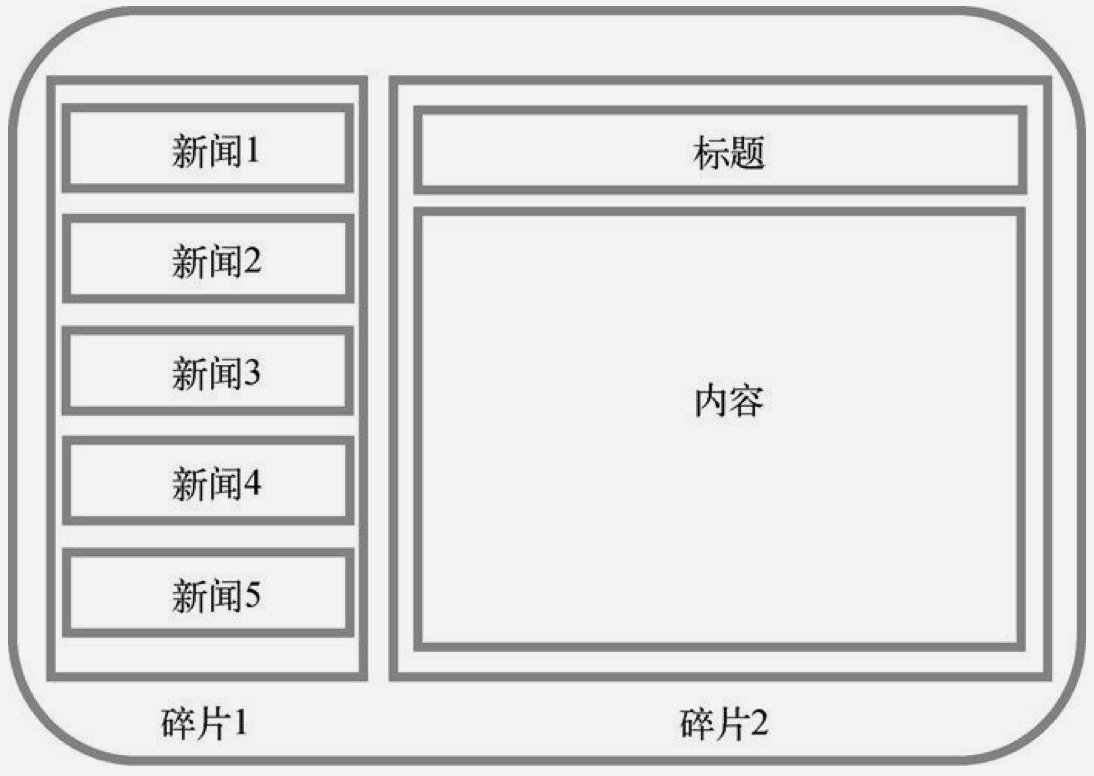
在同一活动中引入2个碎片,避免因设备屏幕尺寸过大而造成界面美观受到影响,如:
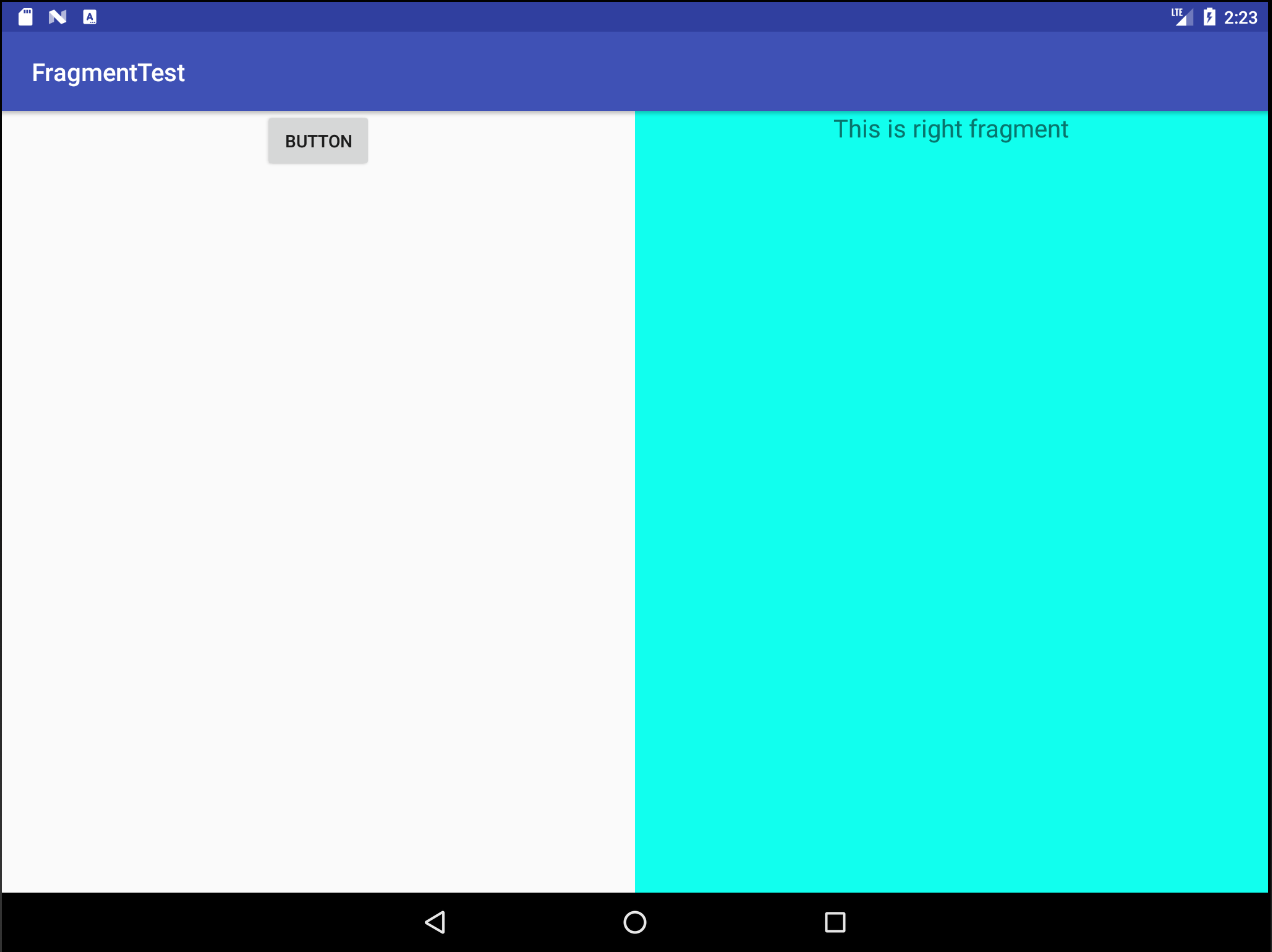
一、静态添加碎片
左侧碎片布局left_fragment.xml
<?xml version="1.0" encoding="utf-8"?>
<LinearLayout xmlns:android="http://schemas.android.com/apk/res/android"
    android:orientation="vertical"
    android:layout_width="match_parent"
    android:layout_height="match_parent">

    <Button
        android:id="@+id/button"
        android:layout_width="wrap_content"
        android:layout_height="wrap_content"
        android:layout_gravity="center_horizontal"
        android:text="Button"
        />

</LinearLayout>
右侧碎片布局right_fragment.xml
<?xml version="1.0" encoding="utf-8"?>
<LinearLayout xmlns:android="http://schemas.android.com/apk/res/android"
    android:orientation="vertical"
    android:background="#11ffee"
    android:layout_width="match_parent"
    android:layout_height="match_parent">

    <TextView
        android:layout_width="wrap_content"
        android:layout_height="wrap_content"
        android:layout_gravity="center_horizontal"
        android:textSize="20sp"
        android:text="This is right fragment"
        />
</LinearLayout>
LeftFragment.java
public class LeftFragment extends Fragment {

    @Nullable
    @Override
    public View onCreateView(LayoutInflater inflater, @Nullable ViewGroup container, @Nullable Bundle savedInstanceState) {
        View view = inflater.inflate(R.layout.left_fragment,container,false);
        return view;
    }
}
RightFragment.java
public class RightFragment extends Fragment {

    @Nullable
    @Override
    public View onCreateView(LayoutInflater inflater, @Nullable ViewGroup container, @Nullable Bundle savedInstanceState) {
        View view = inflater.inflate(R.layout.right_fragment,container,false);
        return view;
    }
}
总结上述,重写onCreateView()方法,通过inflater的inflate()方法将left_fragment和right_fragment布局加载进来。
然后,修改activity_main.xml中代码:
<?xml version="1.0" encoding="utf-8"?>
<LinearLayout xmlns:android="http://schemas.android.com/apk/res/android"
    android:orientation="horizontal"
    android:layout_width="match_parent"
    android:layout_height="match_parent"
    >

    <fragment
        android:id="@+id/left_fragment"
        android:name="com.example.fragmenttest.LeftFragment"
        android:layout_height="match_parent"
        android:layout_width="0dp"
        android:layout_weight="1"
        />

    <fragment
        android:id="@+id/right_fragment"
        android:name="com.example.fragmenttest.RightFragment"
        android:layout_height="match_parent"
        android:layout_width="0dp"
        android:layout_weight="1"
        />

</LinearLayout>
效果:

二、动态添加碎片
新建another_right_fragment.xml
<?xml version="1.0" encoding="utf-8"?>
<LinearLayout xmlns:android="http://schemas.android.com/apk/res/android"
    android:orientation="vertical"
    android:layout_width="match_parent"
    android:layout_height="match_parent"
    android:background="#ffff00"
    >

    <TextView
        android:layout_width="wrap_content"
        android:layout_height="wrap_content"
        android:layout_gravity="center_horizontal"
        android:textSize="20sp"
        android:text="This is another right fragment"
        />

</LinearLayout>
新建AnotherRightFragment.java
public class AnotherRightFragment extends Fragment {
    @Nullable
    @Override
    public View onCreateView(LayoutInflater inflater, @Nullable ViewGroup container, @Nullable Bundle savedInstanceState) {
        View view = inflater.inflate(R.layout.another_right_fragment,container,false);
        return view;
    }
}
修改activity_main.xml
<?xml version="1.0" encoding="utf-8"?>
<LinearLayout xmlns:android="http://schemas.android.com/apk/res/android"
    android:orientation="horizontal"
    android:layout_width="match_parent"
    android:layout_height="match_parent"
    >

    <fragment
        android:id="@+id/left_fragment"
        android:name="com.example.fragmenttest.LeftFragment"
        android:layout_height="match_parent"
        android:layout_width="0dp"
        android:layout_weight="1"
        />

    <FrameLayout
        android:id="@+id/right_layout"
        android:layout_width="0dp"
        android:layout_height="match_parent"
        android:layout_weight="1"
        ></FrameLayout>

    <!--<fragment-->
        <!--android:id="@+id/right_fragment"-->
        <!--android:name="com.example.fragmenttest.RightFragment"-->
        <!--android:layout_height="match_parent"-->
        <!--android:layout_width="0dp"-->
        <!--android:layout_weight="1"-->
        <!--/>-->

</LinearLayout>
添加MainActivity.java代码
import android.support.v4.app.Fragment;
import android.support.v4.app.FragmentManager;
import android.support.v4.app.FragmentTransaction;
import android.support.v7.app.AppCompatActivity;
import android.os.Bundle;
import android.view.View;
import android.widget.Button;

public class MainActivity extends AppCompatActivity implements View.OnClickListener{

    @Override
    protected void onCreate(Bundle savedInstanceState) {
        super.onCreate(savedInstanceState);
        setContentView(R.layout.activity_main);
        Button button = (Button)findViewById(R.id.button);
        button.setOnClickListener(this);
        replaceFragment(new RightFragment());
    }

    @Override
    public void onClick(View v) {
        switch (v.getId()){
            case R.id.button:
                replaceFragment(new AnotherRightFragment());
                break;
            default:
                break;

        }
    }

    private void replaceFragment(Fragment fragment){
        /*
         *此方法实现动态添加碎片,参数为待添加的碎片实例
         */

        FragmentManager fragmentManager = getSupportFragmentManager();
        //通过调用getSupportFragmentManager()方法获取FragmentManager实例
        FragmentTransaction transaction = fragmentManager.beginTransaction();
        //开启事务,通过调用beginTransaction()方法开启
        transaction.replace(R.id.right_layout,fragment);
        //向容器内添加或替换碎片,一般使用replace()方法实现,其中2个参数分别为容器ID和待添加碎片的实例        transaction.commit();
        //提交事务

    }
}
效果:
 之后
之后 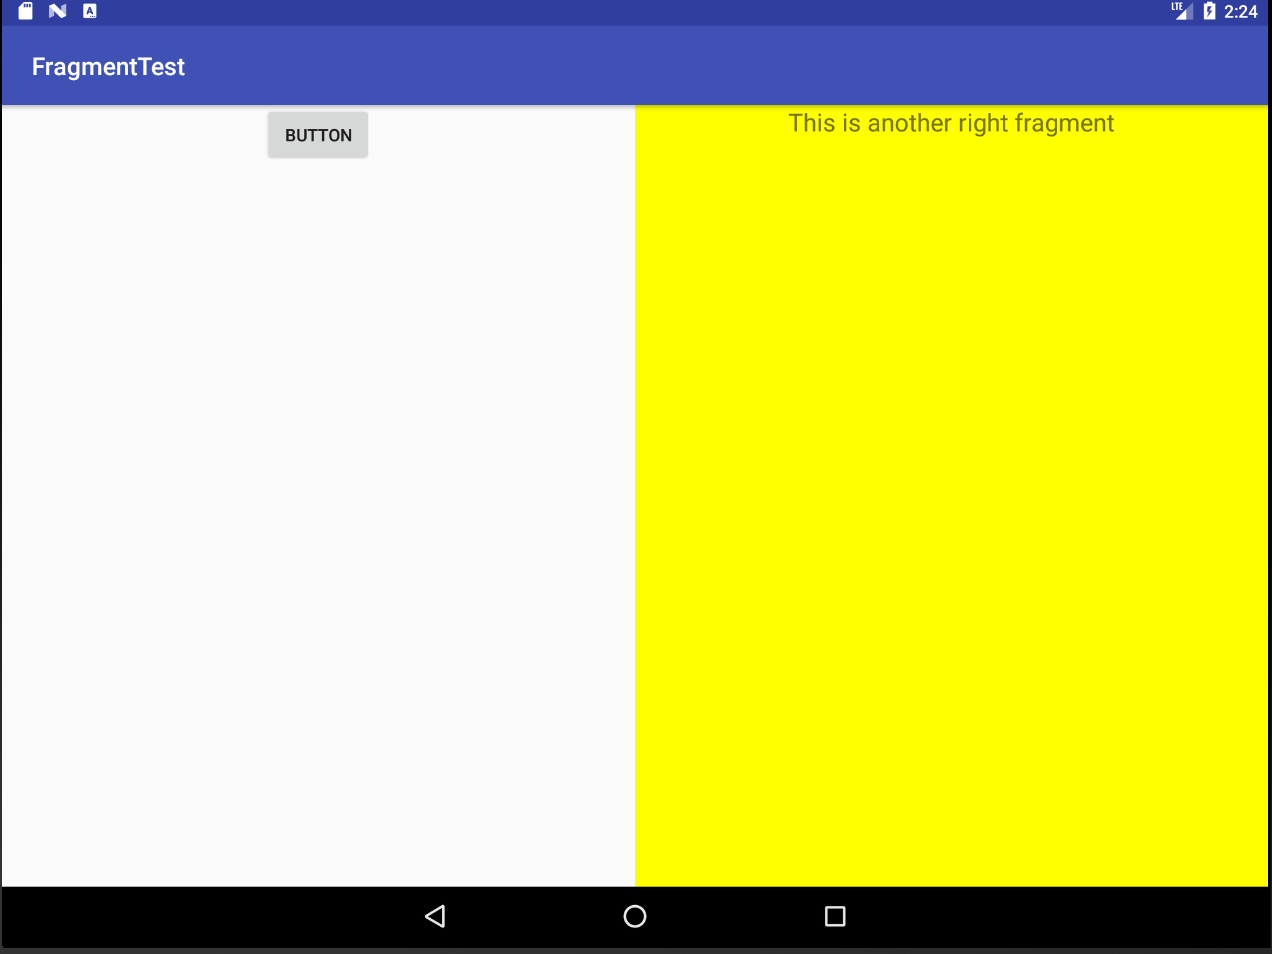
碎片生命周期
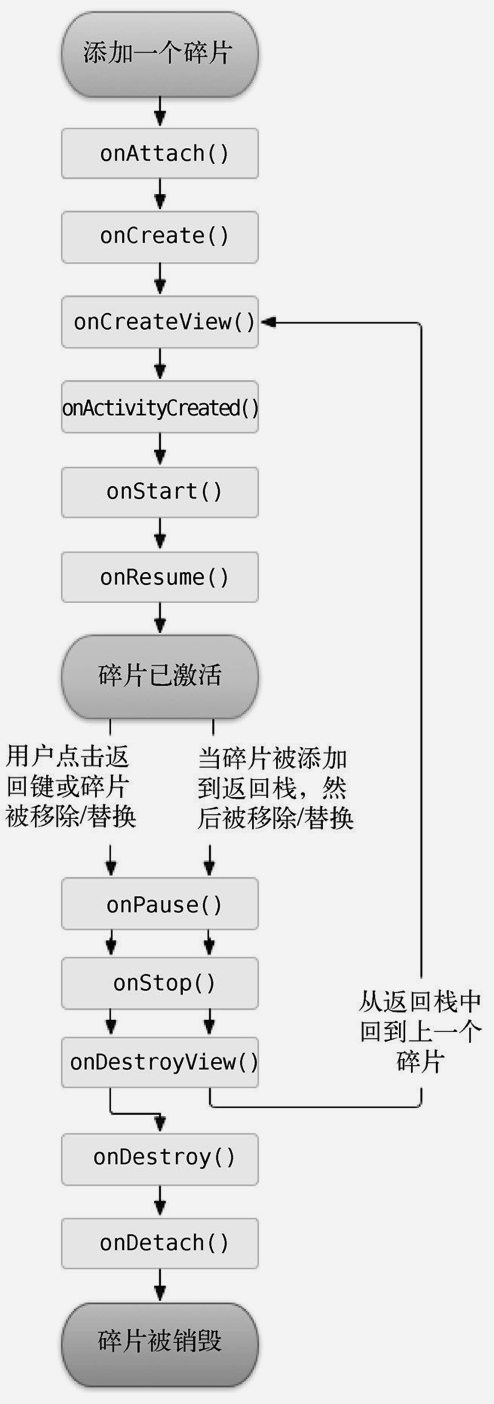
其中:
onAttach( Context context ) : 当碎片和活动建立关联的时候调用;
onCreate( Bundle savedInstanceState ): 当第一次创建fragment的时候调用,同时在里面实例化一些变量(这些变量主要是:当你暂停、停止的时候你想保持的数据);
onCreateView( LayoutInflater inflater , ViewGroup container , Bundle savedInstanceState ): 给当前fragment加载视图;
onActivityCreated( Bundle savedInstanceState ): 当Activity中的onCreate方法执行完后调用(也就是说:当碎片调用onCreateView方法时,Activity中的onCreate方法还没被调用。所以不能在onCreateView方法中进行与activity有交互的UI操作,UI操作应该在onActivityCreated中进行。);
onStart(): 和activity一致,可见;
onResume(): 和activity一致,可见;
onPause(): 和activity一致,可见;
onStop(): 和activity一致,不可见,当activity被stop或fragment被移除但被加入到栈中;
onDestroyView(): 与fragment相关的视图被移除时调用;
onDestroy(): 和activity一致,销毁fragment对象时调用;
onDetach(): 当碎片和活动解除关联的时候调用;
生命周期参考:https://www.cnblogs.com/purediy/p/3276545.html