1 爬虫是什么?
1.1 爬虫定义
爬虫:一段自动抓取互联网信息的程序。
爬虫可以从一个URL出发,访问它所关联的所有URL,并且从每个页面上提取出有价值的数据。
1.2 爬虫技术的价值
价值:互联网数据,为我所用!
2 Python简单爬虫构架
2.1 三大模块
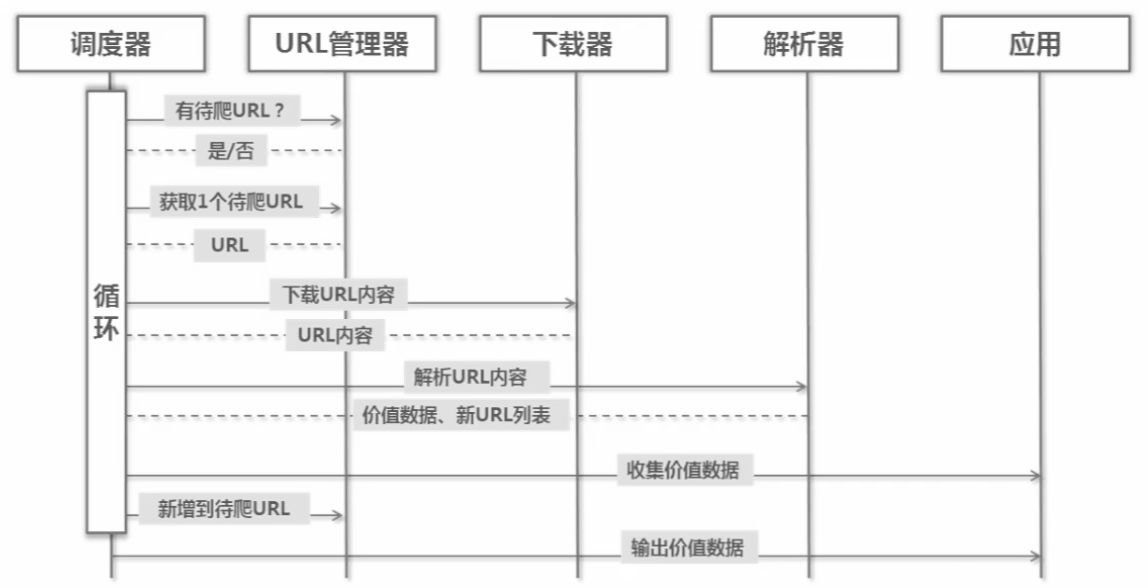
爬虫调度端:URL管理器、网页下载器、网页解析器。
URL管理器:保存已爬过的网页URL和待爬网页的URL,待爬网页的URL将传递给网页下载器。
网页下载器:网页下载器会把URL管理器传递过来的URL网页下载下来,存储成一个字符串,这个字符串将传送给网页解析器进行解析。
网页解析器:一方面,将从该网页提取有价值的数据;另一方面,该网页也会存在一些URL,会把这个URL补充进URL管理器。
2.2 运行流程
2.3 URL管理器
URL管理器:管理待爬取URL集合和已抓取URL集合。
之所以用URL管理器,是为了防止抓取、防止循环抓取。
URL管理器:
- 添加新URL到待爬取集合中。
- 判断待添加阞是否在容器中。
- 获取待爬取URL。
- 判断是否还有待爬取URL。
- 将URL从待爬取移动到已爬取。
实现方式:
- 内存(Python内存:set())
- 关系数据库(MySQL)
- 缓存数据库(redistribute:set)
2.4 网页下载器
2.4.1 简介
网页下载器:将互联网上URL对应的网页下载到本地的工具。
实现方法:网页下载器访问该URL,将对应的HTML文件保存到本地或内存字符串中。
Python网页下载器:
- urllib2(Python官方基础模块,只能Python2使用,Python3需要使用urllib.request)
- requests(第三方包更强大)
2.4.2 urllib2下载网页方法1:最简洁的方法
根据URL,用urllib2.urlopen(url)方法。
1 import urllib2
2 #直接请求
3 response = urllib2.urlopen('http://www.baidu.com')
4 #获取状态码,如果是200表示获取成功
5 print response.getcode()
6 #读取内容
7 cont = response.read()
2.4.3 urllib2下载网页方法2:添加data、http header
根据url、data、header,创建urllib2.Request对象,用urllib2.urlopen(request)方法。
1 import urllib2
2 #创建Request对象
3 request = urllib2.Request(url)
4 #添加数据
5 request.add_data('a','1')
6 #添加http的header
7 request .add_header('User-Agent','Mozilla/5.0')
8 #发送请求获取结果
9 response = urllib2.urlopen(request)
2.4.4 urllib2下载网页方法3:添加特殊情景的处理器
有些网页需要登陆或代理服务才能访问,所以需要HTTPCookieProcessor、ProxyHandler、HTTPSHandler、HTTPRedirectHandler。
1 import urllib2,cookielib
2 #创建cookie容器
3 cj = urllib2.build_opener(urllib2.HTTPCookieProcessor(cj))
4 #给urllib2安装opener
5 urllib2.install_opener(opener)
6 #使用带有cookie的urllib2访问网页
7 response = urllib2.urlopen("http://www.baidu.com/")
2.4.5 三种方法程序实例
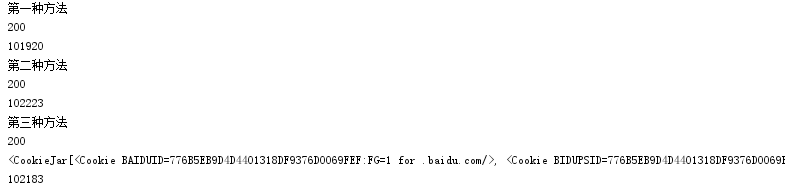
 1 #coding:utf-8
 2 import urllib.request
 3 import http.cookiejar
 4
 5 url = "http://www.baidu.com"
 6
 7 print('第一种方法')
 8 response1 = urllib.request.urlopen(url)
 9 print(response1.getcode())
10 print(len(response1.read()))
11
12 print('第二种方法')
13 request = urllib.request.Request(url)
14 request.add_header("user-agent","Mozilla/5.0")
15 response2 = urllib.request.urlopen(request)
16 print(response2.getcode())
17 print(len(response2.read()))
18
19 print('第三种方法')
20 cj = http.cookiejar.CookieJar()
21 opener = urllib.request.build_opener(urllib.request.HTTPCookieProcessor(cj))
22 urllib.request.install_opener(opener)
23 response3 = urllib.request.urlopen(url)
24 print(response3.getcode())
25 print(cj)
26 print(len(response3.read()))
运行结果:
注意:
- Python3.x中urllib库和urilib2库合并成了urllib库。其中,urllib2.urlopen()变成了urllib.request.urlopen(), urllib2.Request()变成了urllib.request.Request()。
- Python3.x中没有cookiejar库,替换为http.cookiejar。
- 链接1
- 链接2
- 链接3
2.5 网页解释器
2.5.1 简介
网页解释器:从网页中提取出有价值数据的工具。
Python网页解释器:
- 正则表达式(模糊查询)
- html.parser(Python自带)(结构化查询)
- Beautiful Soup(第三方库,很强大)(结构化查询)
- lxml(结构化查询)
结构化查询:
安装Beautiful Soup模块:
- 运行cmd
- cd C:UsersAdministratorAppDataLocalProgramsPythonPython36Scripts
- dir
- pip install beautifulsoup4
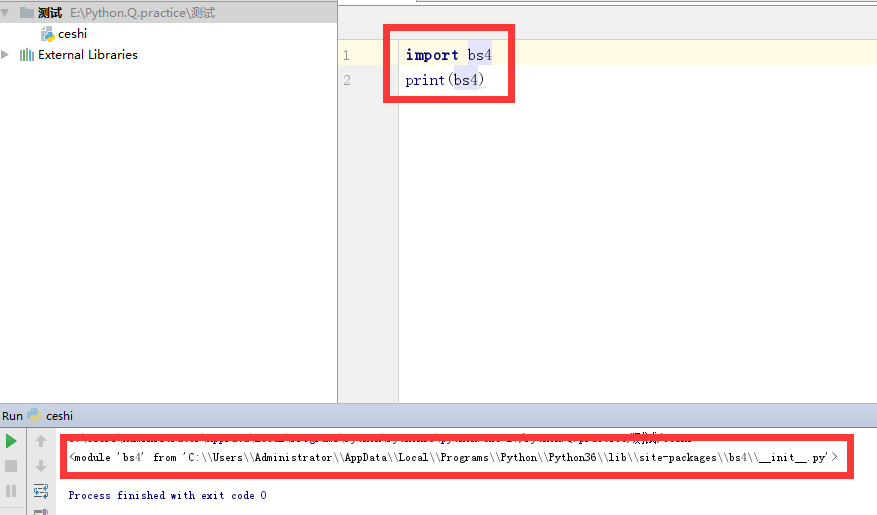
测试:
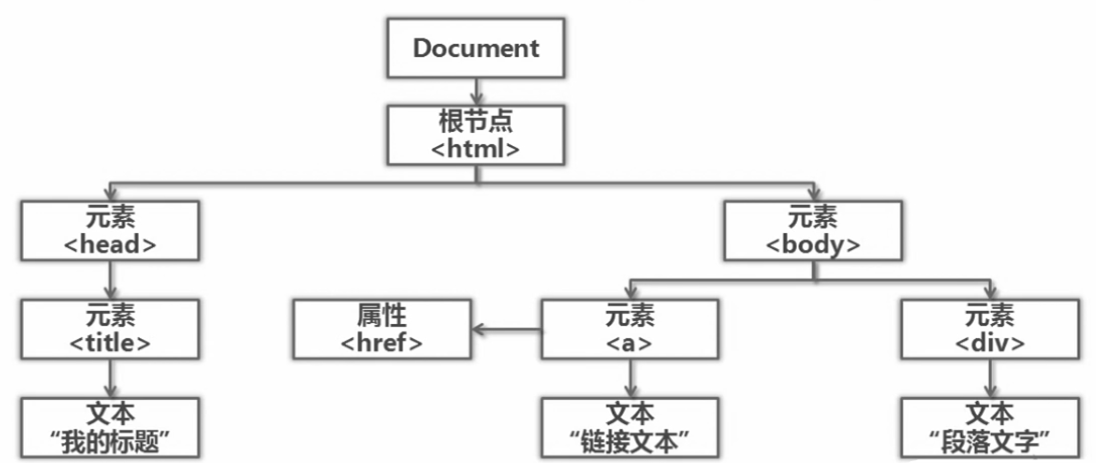
2.5.2 Beautiful Soup语法
- 根据HTML网页,创建一个BeautifulSoup对象
- 搜索节点(find_all、find两种方法)(同时,可以按照节点名称、节点属性、节点文字等进行搜索)
- 最后访问节点(名称、属性、文字等)
例如:
1 <a href="123.html" class='article_link'> Python </a>
- 若按照节点名称:a
- 若按照节点属性:href='123.html'或'class=article_link'
- 若按照节点文字:Python
创建一个BeautifulSoup对象:
 1 from bs4 import BeautifulSoup
 2 #根据HTML网页字符串创建BeautifulSoup对象
 3 soup = BeautifulSoup(
 4     #HTML文档字符串
 5     html_doc,
 6     #HTML解析器
 7     'html.parser',
 8     #HTML文档的编码
 9     from_encoding='utf-8'
10     )
搜索节点:
1 #方法:find_all(name,sttrs,string)
2 #查找所有标签为a的节点
3 soup.find_all('a')
4 #查找所有标签为a,链接符合/view/123.htm形式的节点
5 soup.find_all('a',href='/view/123.htm')
6 soup.find_all('a',href=re.compile(r'/view/d+.htm'))
7 #查找所有标签为div,class为abc,文字为Python的节点
8 soup.find_all('div',class_='abc',string='Python')
访问节点信息:
1 #得到节点<a href='1.html'>Python</a>
2 #获取查找到的节点的标签名称
3 node.name
4 #获取查找到的a节点的href属性
5 node['href']
6 #获取查找到的a节点的链接文字
7 node.get_text()
2.5.3 BeautifulSoup实例
 1 from bs4 import BeautifulSoup
 2 import re
 3
 4 html_doc = """
 5 <html><head><title>The Dormouse's story</title></head>
 6 <body>
 7 <p class="title"><b>The Dormouse's story</b></p>
 8 <p class="story">Once upon a time there were three little sisters; and their names were
 9 <a href="http://example.com/elsie" class="sister" id="link1">Elsie</a>,
10 <a href="http://example.com/lacie" class="sister" id="link2">Lacie</a> and
11 <a href="http://example.com/tillie" class="sister" id="link3">Tillie</a>
12 and they lived at the bottom of a well.</p>
13 <p class="story">...</p>
14 """
15
16 #soup = BeautifulSoup(html_doc, 'html.parser', from_encoding='utf-8')
17 #python3 缺省的编码是unicode, 再在from_encoding设置为utf8, 会被忽视掉,故去掉【from_encoding="utf-8"】
18 soup = BeautifulSoup(html_doc, 'html.parser')
19
20 print('获取所有链接')
21 links = soup.find_all('a')
22 for link in links:
23     print(link.name, link['href'], link.get_text())
24
25 print('获取Lacie链接')
26 linknode = soup.find_all('a', href='http://example.com/lacie')
27 for link in linknode:
28     print(link.name, link['href'], link.get_text())
29
30 print('正则匹配')
31 #引入正则表达式
32 linknode = soup.find_all('a', href=re.compile(r'ill'))
33 for link in linknode:
34     print(link.name, link['href'], link.get_text())
35
36 print('获取P')
37 pnode = soup.find_all('p', class_='title')
38 for link in pnode:
39     print(link.name, link.get_text())
运行结果:

3 爬取百度百科100个页面的数据(标题和简介)
确定目标->分析目标->编写代码->执行爬虫
3.1 分析目标
- URL格式
- 数据格式
- 网页编码(右键,审查元素)
- 目标:百度百科Python词条相关词条网页(标题和简介)
- 入口页:http://baike.baidu.com/item/Python(可能随着更新,此URL也会更新)
- URL格式
- 数据格式
3.2 程序
见附件:https://pan.baidu.com/s/1kW2oXD1
3.3 运行结果