日常开发中难免会碰到需要开启定时任务处理业务。这时我们第一时间想到的是Spring的Task,但是很不方便,这里可以列出几点:
1.一旦需要更改定时任务时间,我们就要打开IDE修改cron表达式;
2.在特殊的情况下代码报错了,我们就要打开Log查看是什么导致的问题;
3.需要很多定时任务去处理业务就要新建多个,突然不想执行这个任务了,我们就要再打开IDE注释那些代码。
就特别不好管理。
可能又有人要说了:
1.我可以用Redis进行动态修改cron表达式;-------- 看下面代码!!!
2.我写个Aop,只要出现异常了我就记录相关信息;-------- 牛掰!Aop固然好,但是你觉得真的方便了吗?
3.······我就是不闲麻烦,咋地。-------- 打扰了!!!
package cn.chenghao.config;

import lombok.AllArgsConstructor;
import org.springframework.context.annotation.Configuration;
import org.springframework.data.redis.core.StringRedisTemplate;
import org.springframework.scheduling.annotation.EnableScheduling;
import org.springframework.scheduling.annotation.SchedulingConfigurer;
import org.springframework.scheduling.config.ScheduledTaskRegistrar;
import org.springframework.scheduling.support.CronTrigger;

import javax.annotation.PostConstruct;

/**
 * 自定义定时任务
 *
 * @Author chenghao
 * @Date 2020/4/14 11:56
 **/
@Configuration
@EnableScheduling
@AllArgsConstructor
public class CompleteScheduleConfig implements SchedulingConfigurer {

    /**
     * StringRedis模板
     */
    private final StringRedisTemplate stringRedisTemplate;

    /**
     * 初始化
     */
    @PostConstruct
    private void init() {
        // redis中不存在则创建
        stringRedisTemplate.opsForValue().setIfAbsent("cron", "0/3 * * * * ?");
    }

    /**
     * 配置任务
     */
    @Override
    public void configureTasks(ScheduledTaskRegistrar scheduledTaskRegistrar) {
        // 给定cron表达式,触发Runnable任务
        scheduledTaskRegistrar.addTriggerTask(
                () -> {
                    System.out.println("执行定时任务中.......");
                },
                triggerContext -> {
                    // 获取cron表达式
                    String cron = stringRedisTemplate.opsForValue().get("cron");
                    // 返回执行周期
                    return new CronTrigger(cron).nextExecutionTime(triggerContext);
                });
    }
}
!(真的是太方便了)
----------------------------------好,废话不再多说----------------------------------
XXL-JOB地址:
Gitee:https://gitee.com/xuxueli0323/xxl-job
GitHub:https://github.com/xuxueli/xxl-job/
XXL社区:https://www.xuxueli.com/xxl-job/
概述:XXL-JOB是一个分布式任务调度平台,其核心设计目标是开发迅速、学习简单、轻量级、易扩展。现已开放源代码并接入多家公司线上产品线,开箱即用。
首先将项目clone下来后,再打开社区文档,根据文档引导先将 doc/db/tables_xxl_job.sql 脚本在自己的数据库中执行
确认无误后,再继续看文档: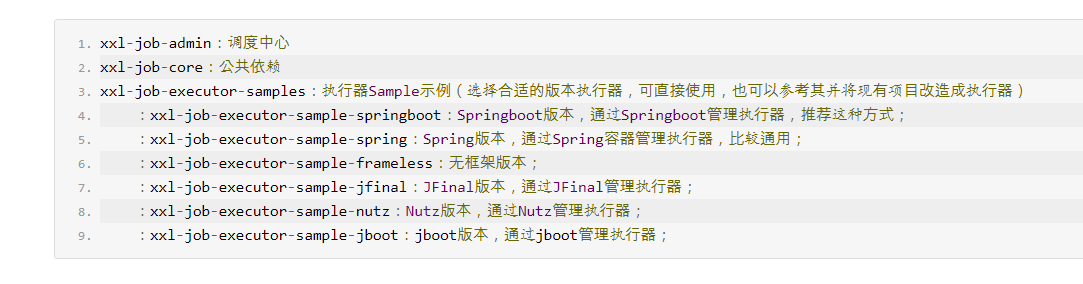
XXL-JOB分为三个大模块:调度中心、公共依赖、执行器
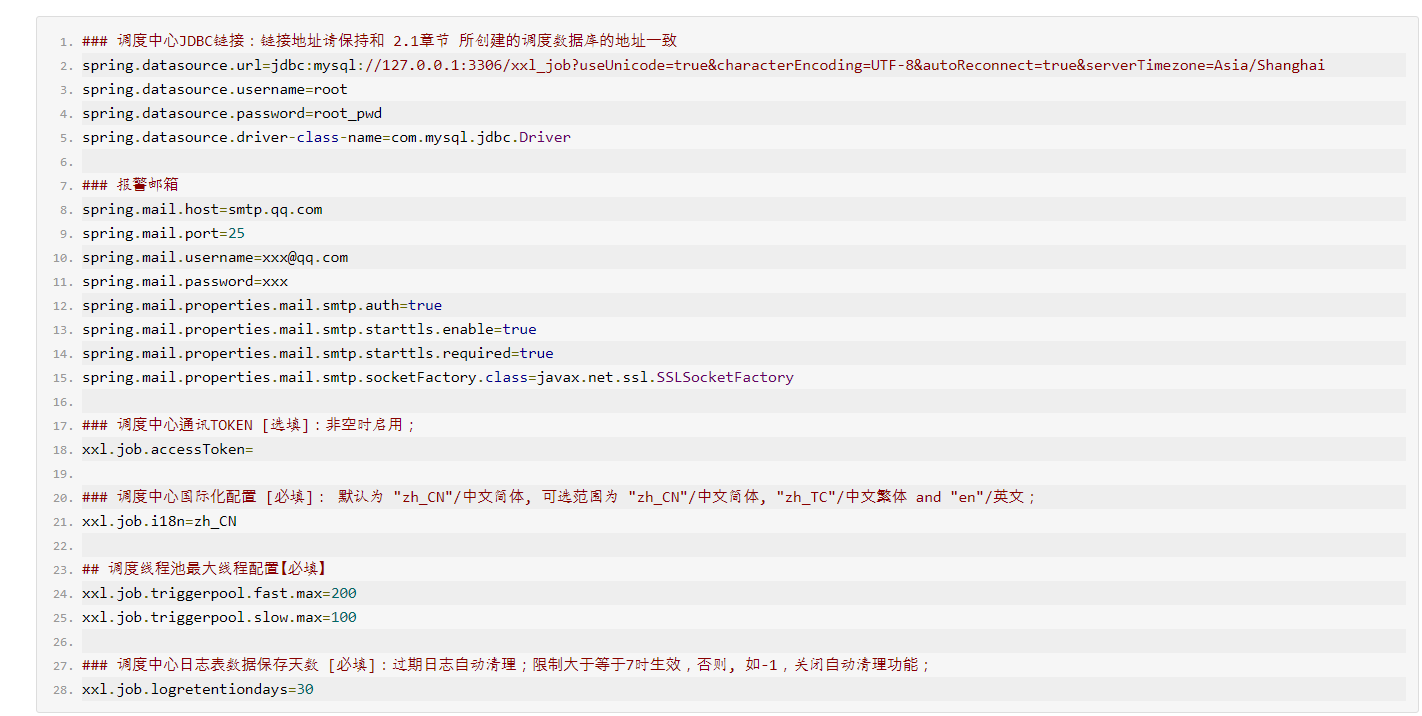
首先我们根据文档引导,配置调度中心
/xxl-job/xxl-job-admin/src/main/resources/application.properties
想想还是截个图:
相应配置完成后,直接运行admin模块,浏览器输入:http://localhost:8080/xxl-job-admin 默认登录账号 admin/123456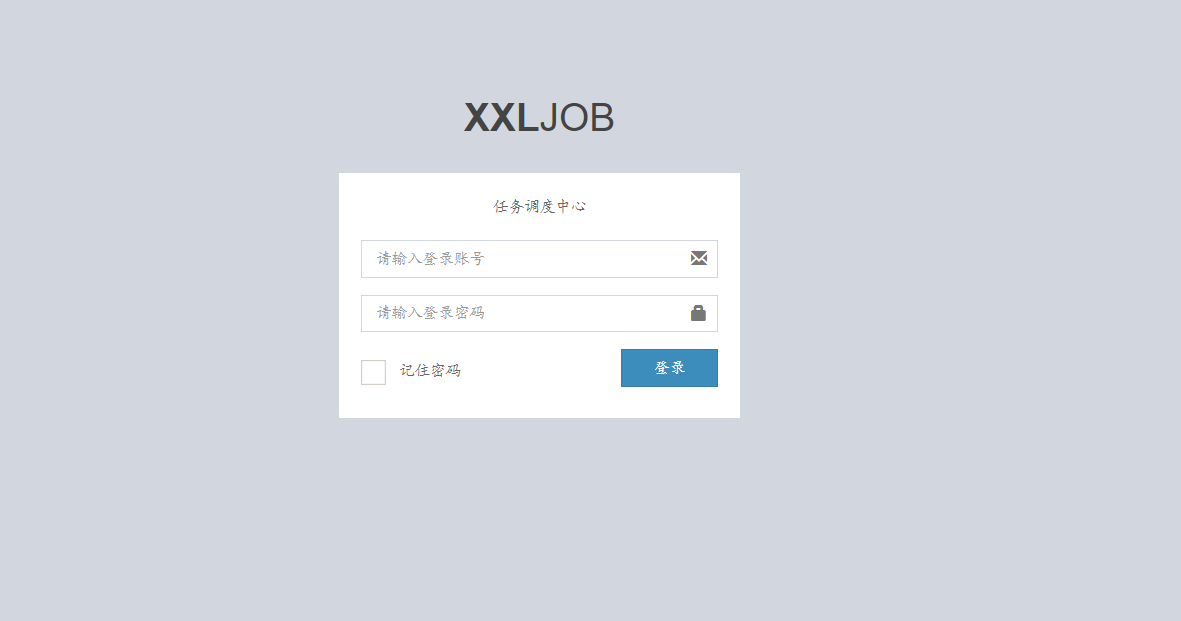
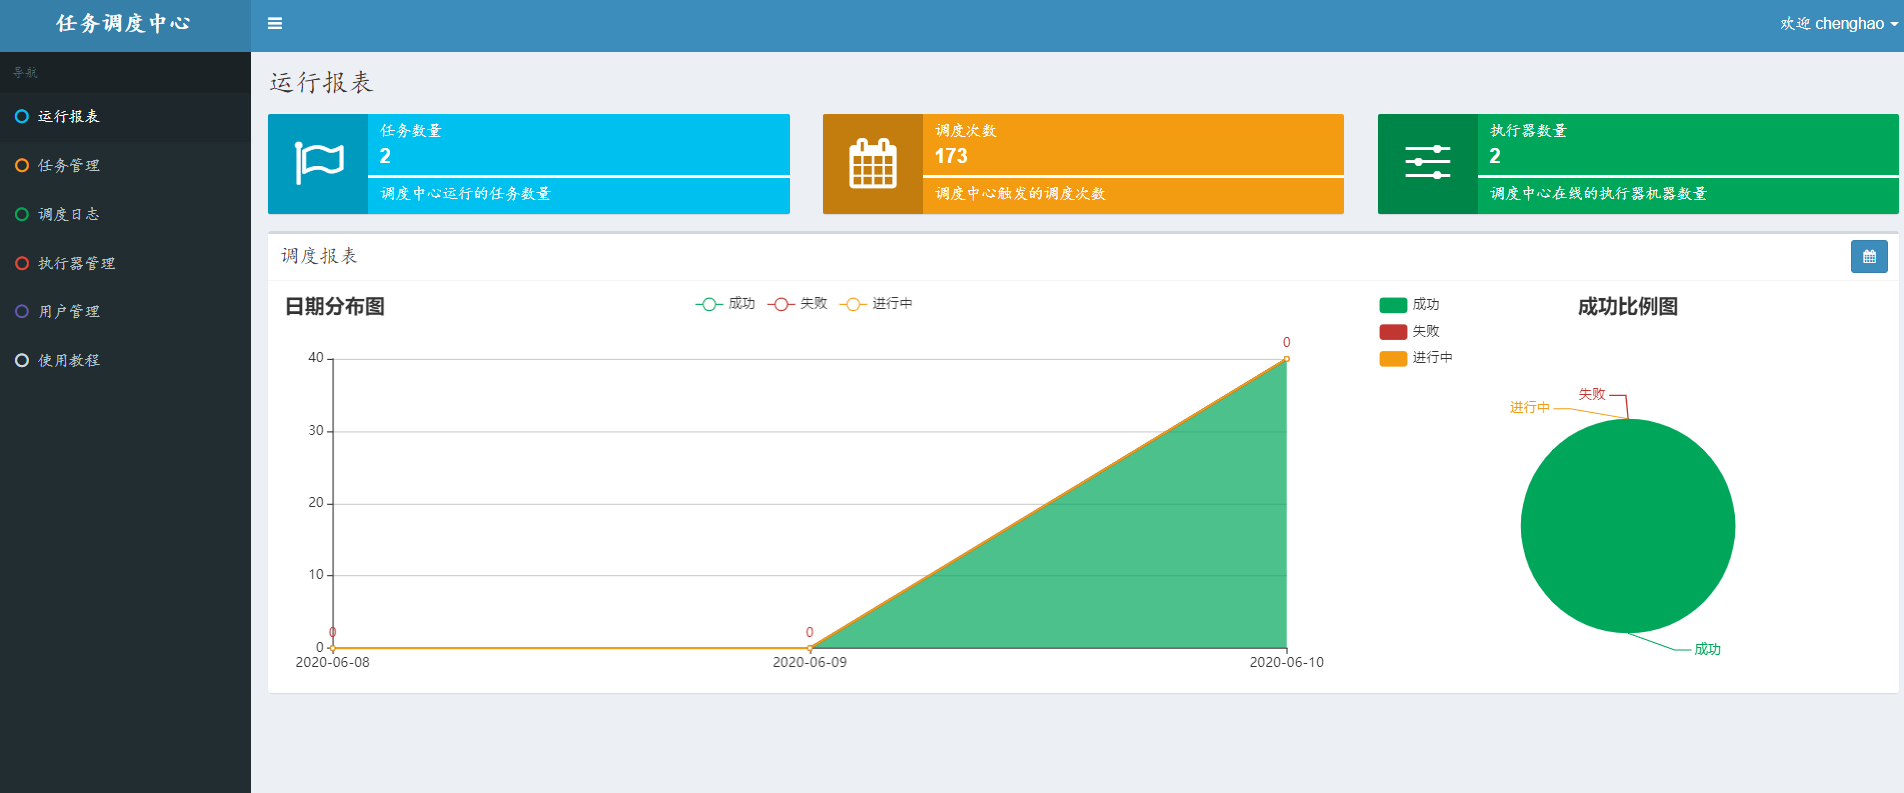
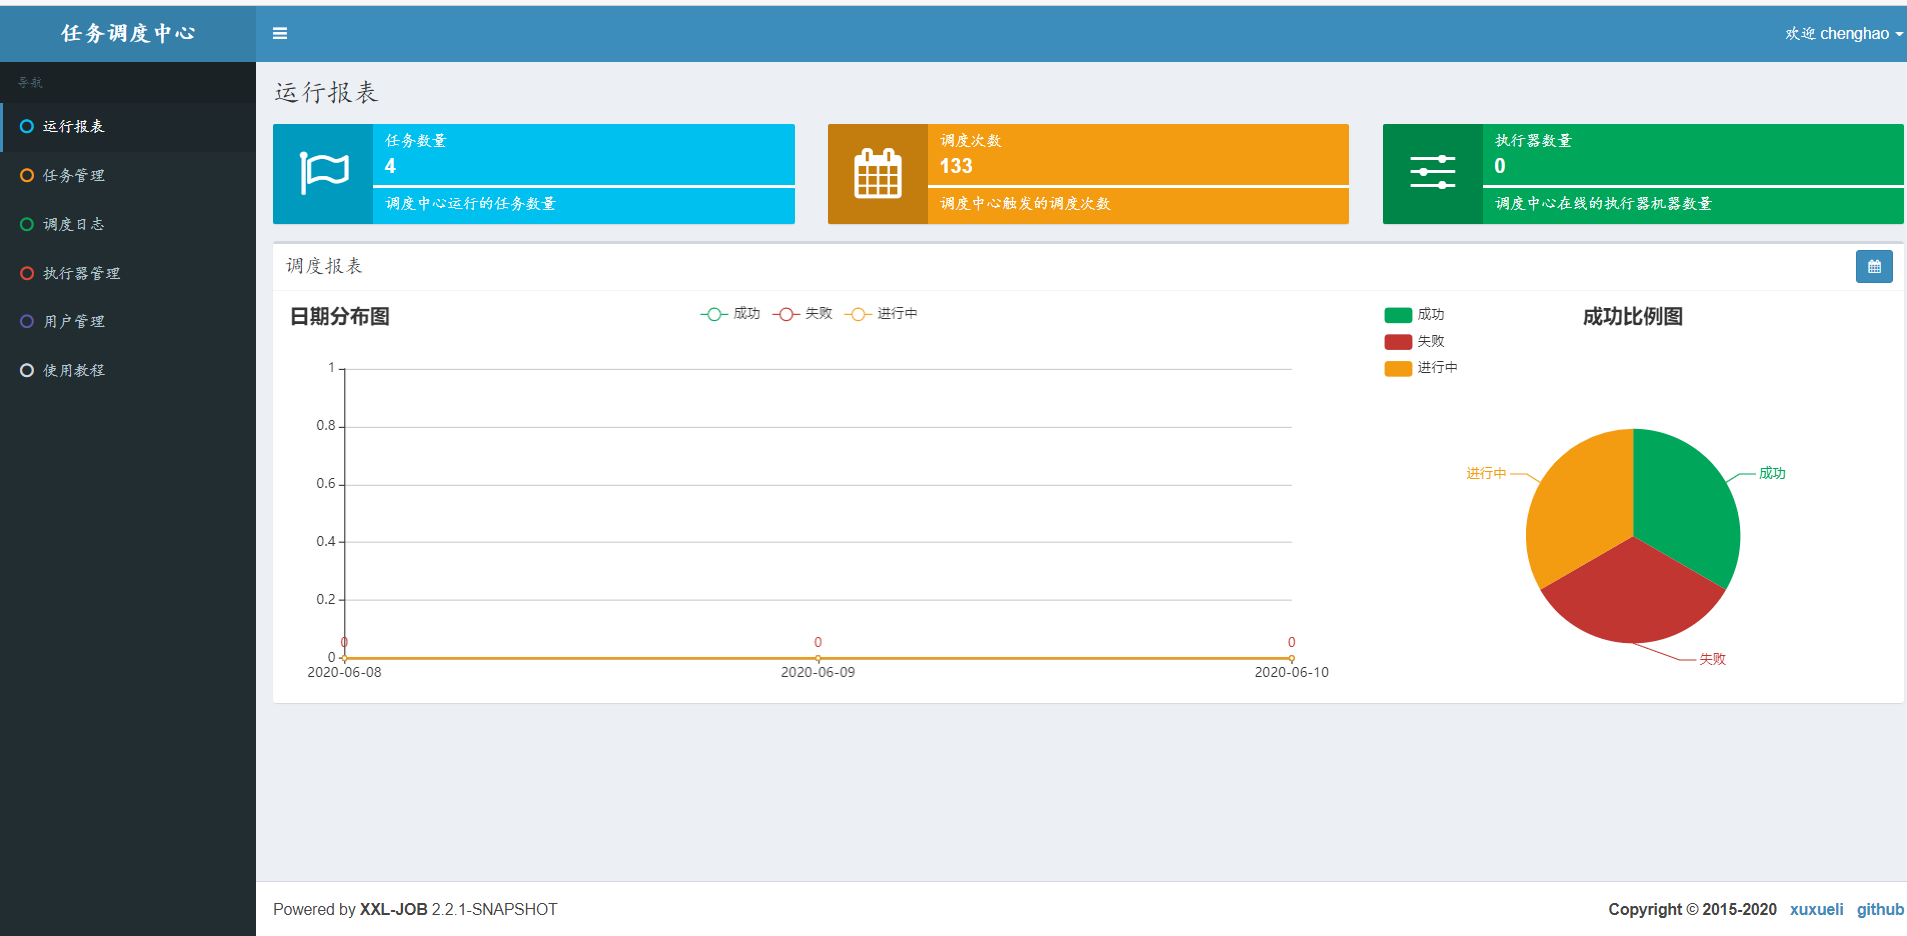
刚进去这首页我还是很吃惊的!!!
调度器配置、运行都成功了现在我们就要新建个任务看看效果了,在这之前我们还要配置执行器,也就是执行任务的容器
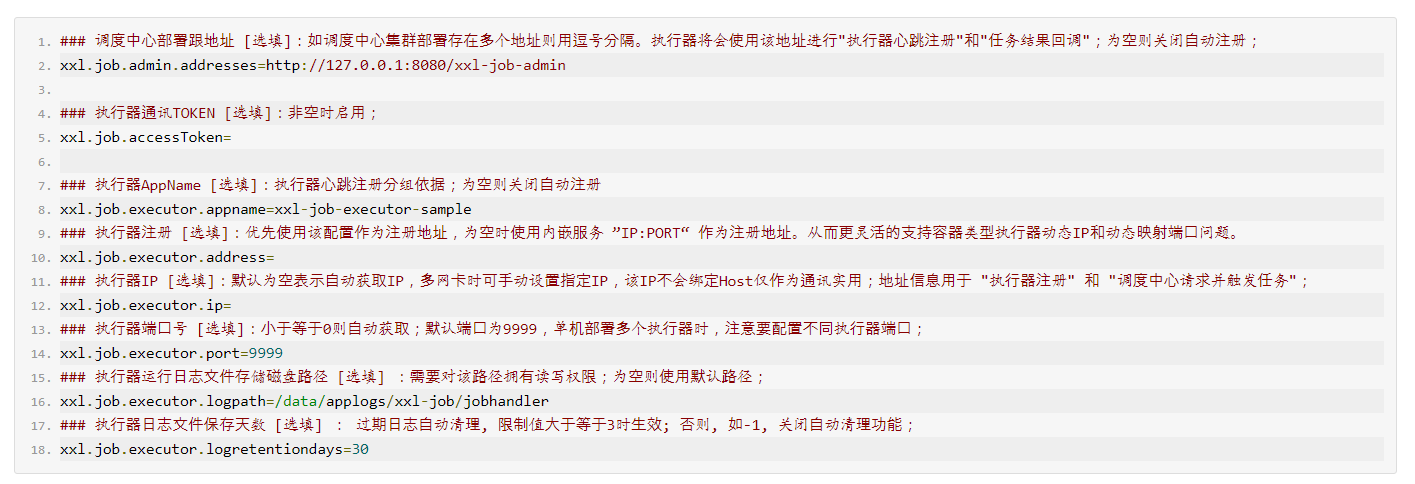
/xxl-job/xxl-job-executor-samples/xxl-job-executor-sample-springboot/src/main/resources/application.properties
想来想去我又截了:
配置好对应调度中心的信息后,我们在运行执行器
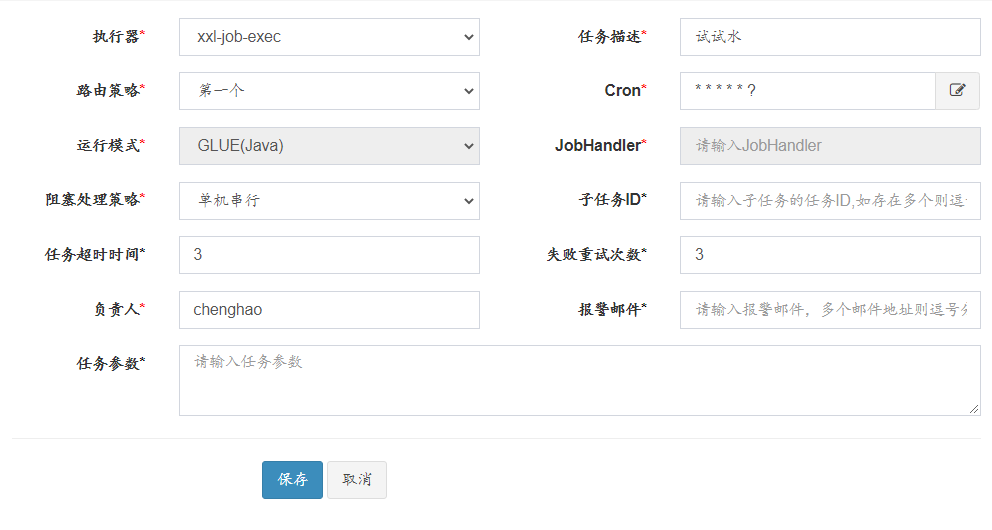
运行没问题后,我们来新建个任务试试水:
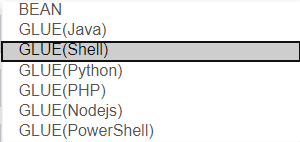

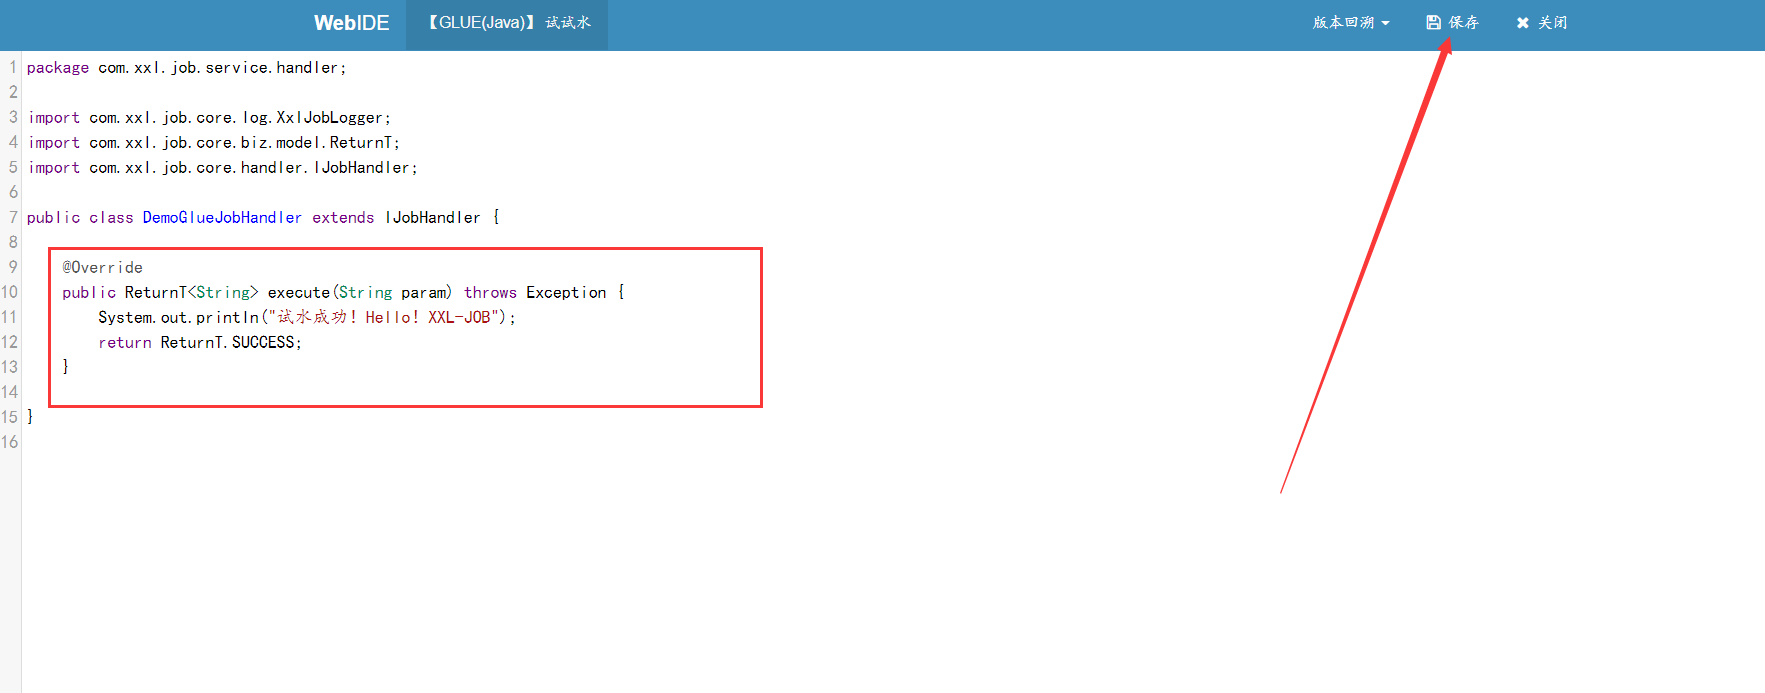
我们就先用GLUE模式试试吧
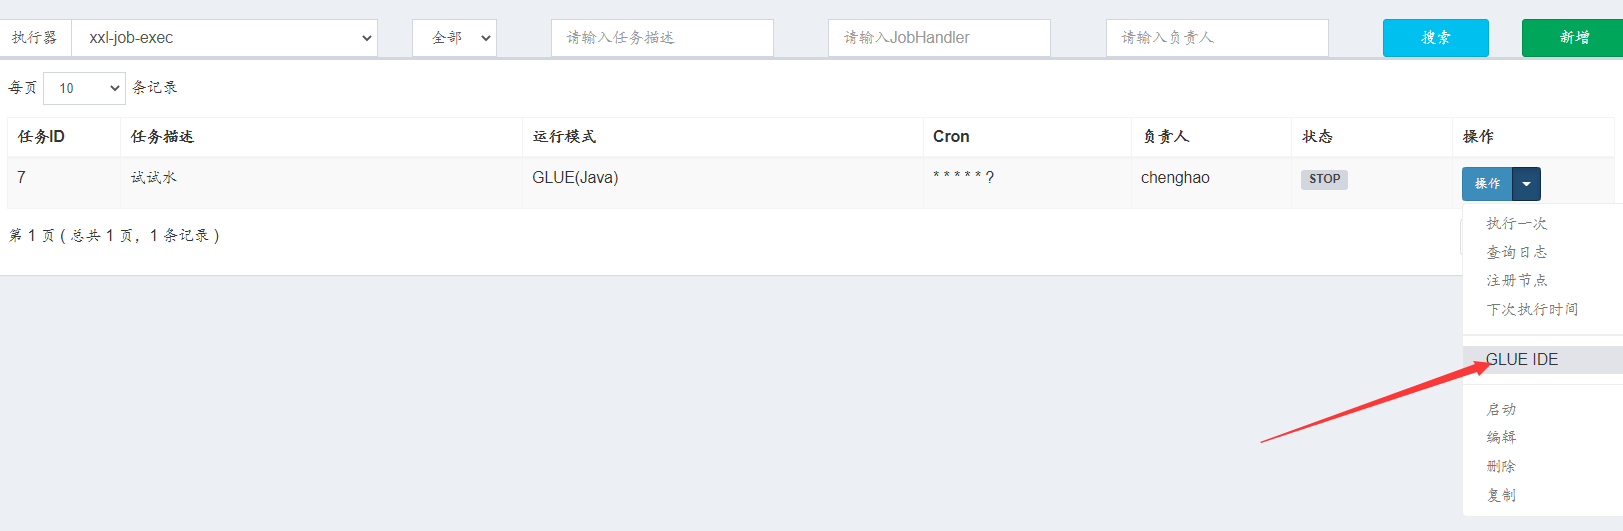
保存完后,直接点击启动!!!
看控制台:

看日志:
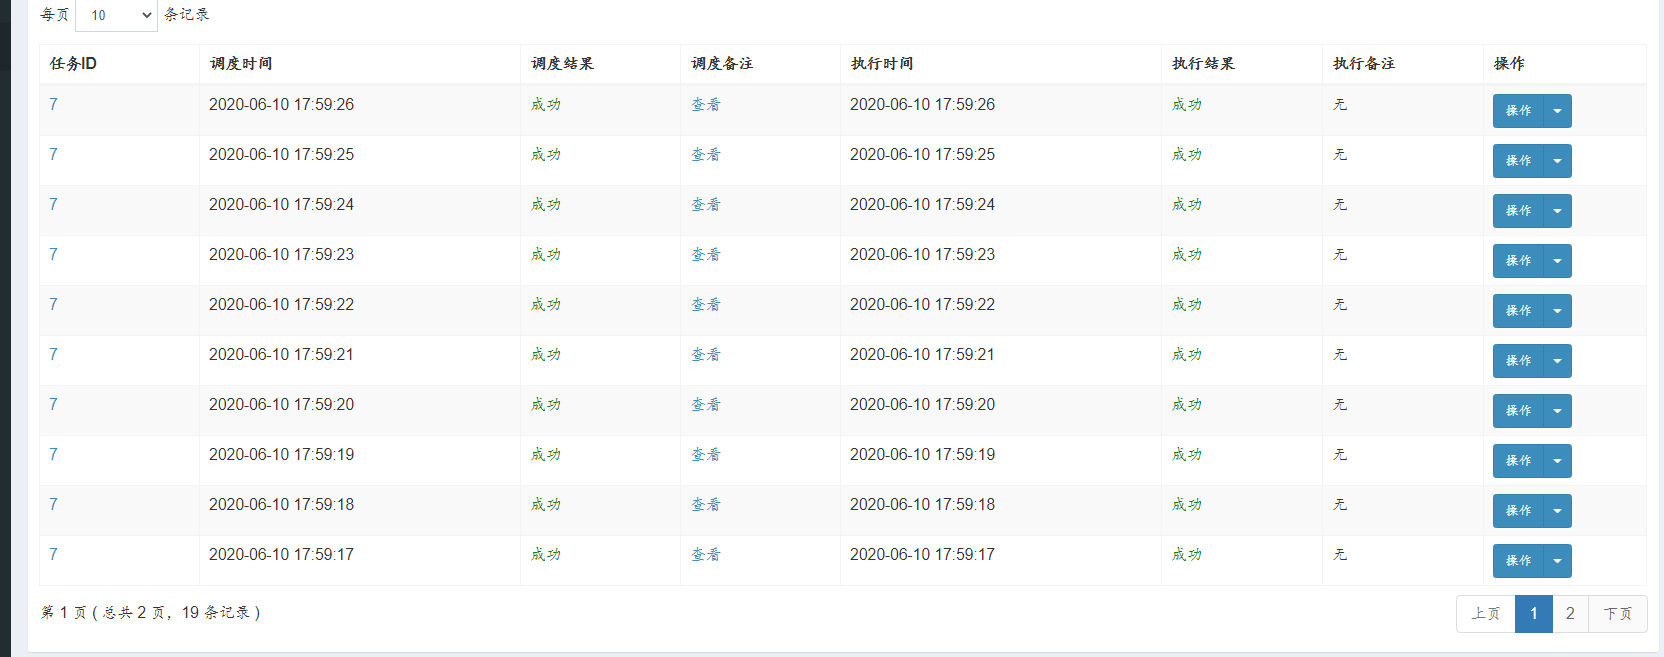
任何操作一目了然!!!
现在我们知道了XXL-JOB的作用了,就在想怎么对接到自己的项目运行,其实想想就是将公共依赖模块移出来
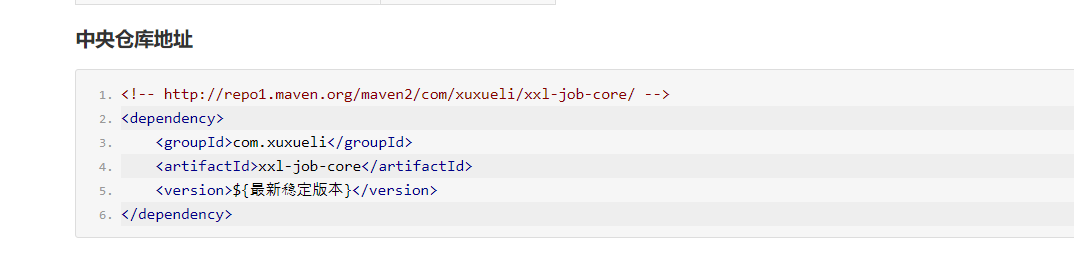
<!-- xxl-job 任务调度 -->
        <dependency>
            <groupId>com.xuxueli</groupId>
            <artifactId>xxl-job-core</artifactId>
            <version>2.2.0</version>
        </dependency>
随后根据clone下来项目中的springboot版本的执行器复制 application.properties
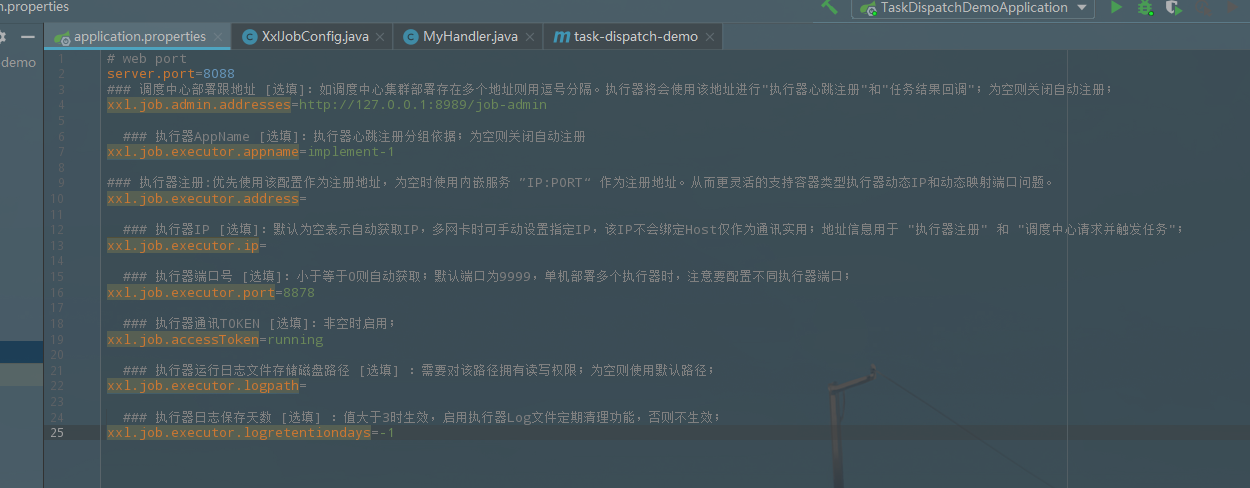
package cn.running.taskdispatchdemo.config;

import com.xxl.job.core.executor.impl.XxlJobSpringExecutor;
import lombok.extern.java.Log;
import org.springframework.beans.factory.annotation.Value;
import org.springframework.context.annotation.Bean;
import org.springframework.context.annotation.ComponentScan;
import org.springframework.context.annotation.Configuration;

/**
 * 执行器配置
 *
 * @author chenghao
 * @createTime 2020/5/21
 */
@Log
@Configuration
@ComponentScan(basePackages = "cn.running.taskdispatchdemo.handler")
public class XxlJobConfig {

    @Value("${xxl.job.admin.addresses}")
    private String adminAddresses;

    @Value("${xxl.job.executor.appname}")
    private String appName;

    @Value("${xxl.job.executor.ip}")
    private String ip;

    @Value("${xxl.job.executor.port}")
    private int port;

    @Value("${xxl.job.accessToken}")
    private String accessToken;

    @Value("${xxl.job.executor.logpath}")
    private String logPath;

    @Value("${xxl.job.executor.logretentiondays}")
    private int logRetentionDays;

    @Bean(initMethod = "start")
    public XxlJobSpringExecutor xxlJobSpringExecutor() {
        log.info("》》》》》 XXL-JOB init 《《《《《");
        XxlJobSpringExecutor xxlJobSpringExecutor = new XxlJobSpringExecutor();
        xxlJobSpringExecutor.setAdminAddresses(adminAddresses);
        xxlJobSpringExecutor.setAppname(appName);
        xxlJobSpringExecutor.setIp(ip);
        xxlJobSpringExecutor.setPort(port);
        xxlJobSpringExecutor.setAccessToken(accessToken);
        xxlJobSpringExecutor.setLogPath(logPath);
        xxlJobSpringExecutor.setLogRetentionDays(logRetentionDays);

        return xxlJobSpringExecutor;
    }

}
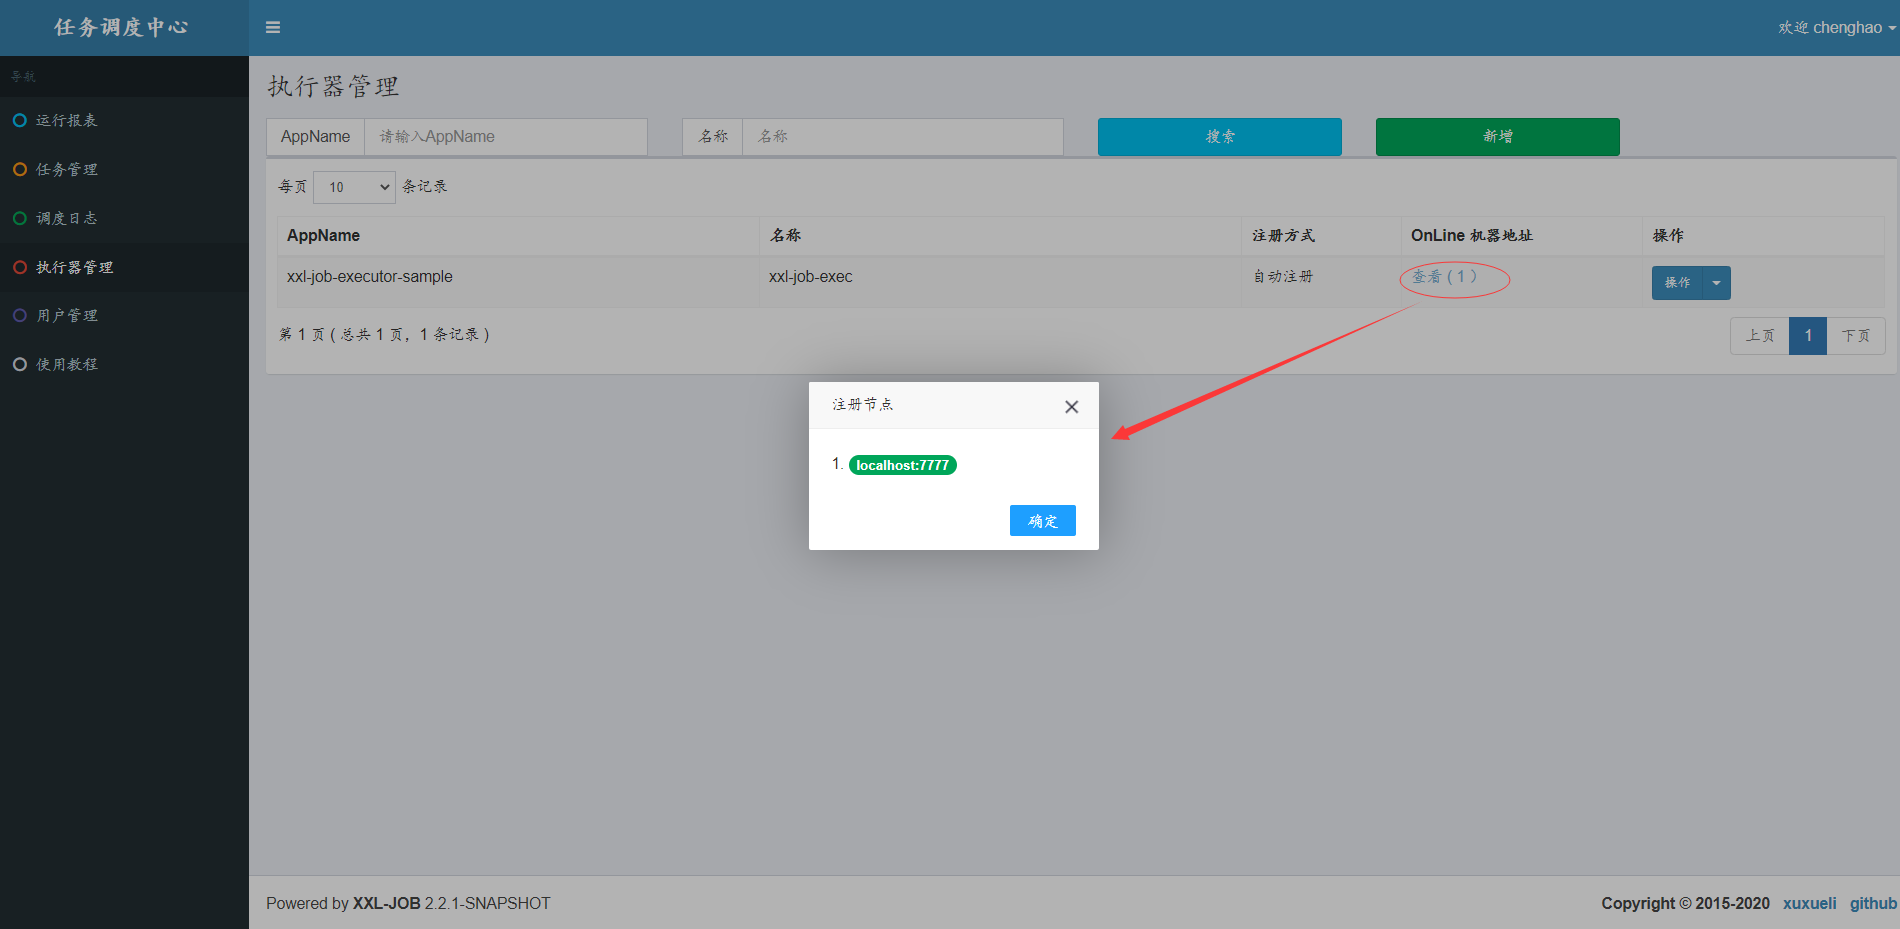
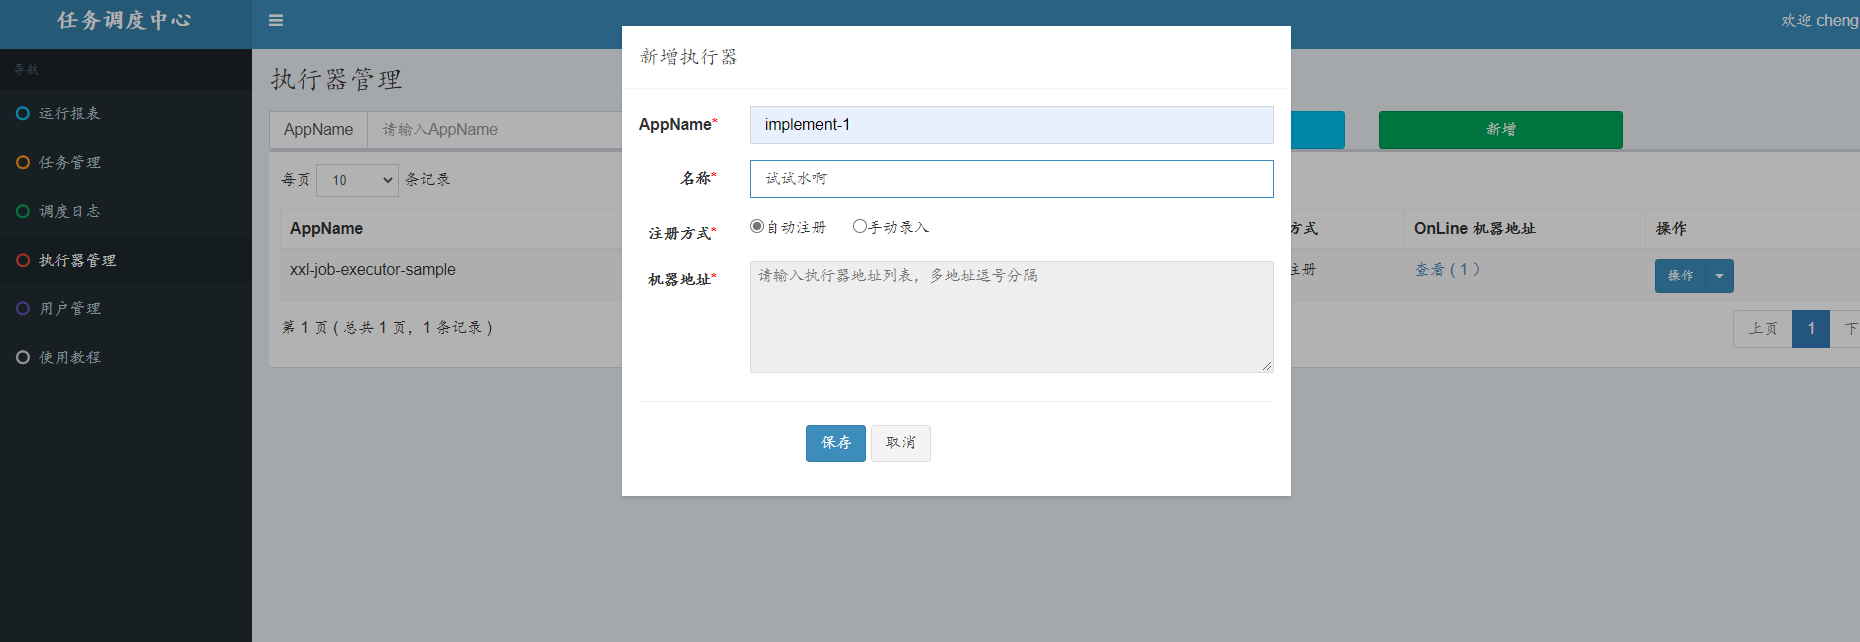
基本配置完成后,现在调度中心新增执行器,再启动我们新建的执行器保存后,稍微等待一点时间,就自动注册上去了!!!
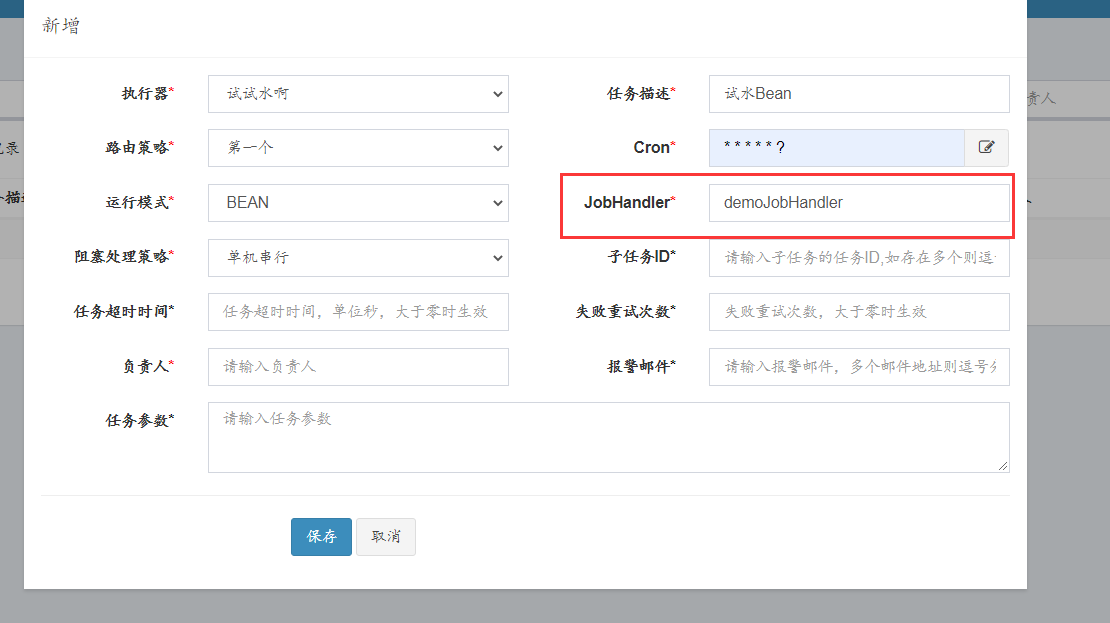
在调度中心页面新增个任务:
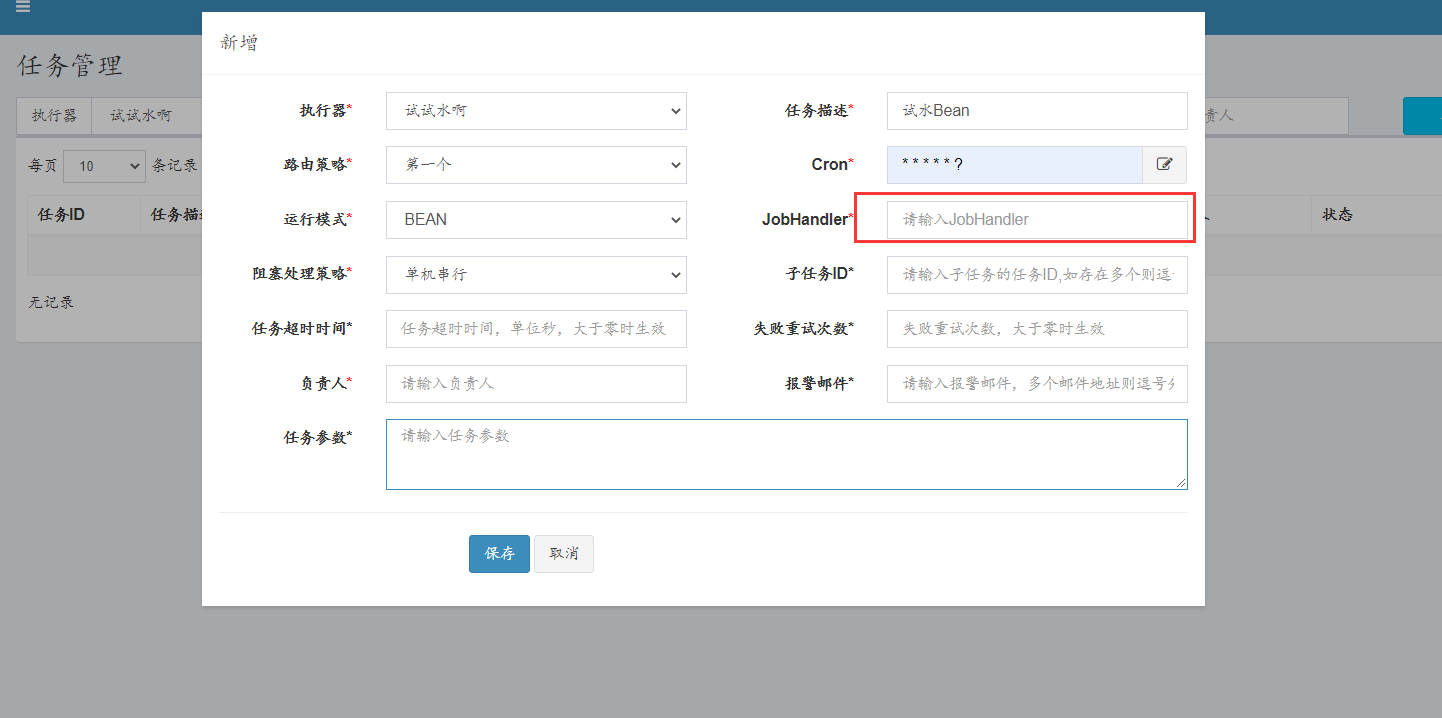
缺少JobHandler 需要我们去新建
package cn.running.taskdispatchdemo.handler;

import com.xxl.job.core.biz.model.ReturnT;
import com.xxl.job.core.handler.annotation.XxlJob;
import org.springframework.stereotype.Component;

import java.time.LocalDateTime;

/**
 * 任务处理
 *
 * @author chenghao
 * @createTime 2020/5/21
 */
@Component("myHandler")
public class MyHandler {

    @XxlJob("demoJobHandler")
    public ReturnT<String> execute(String s) {
        System.out.println("任务执行成功,执行参数:" + s + "当前时间是:" + LocalDateTime.now());
        return ReturnT.SUCCESS;
    }
}
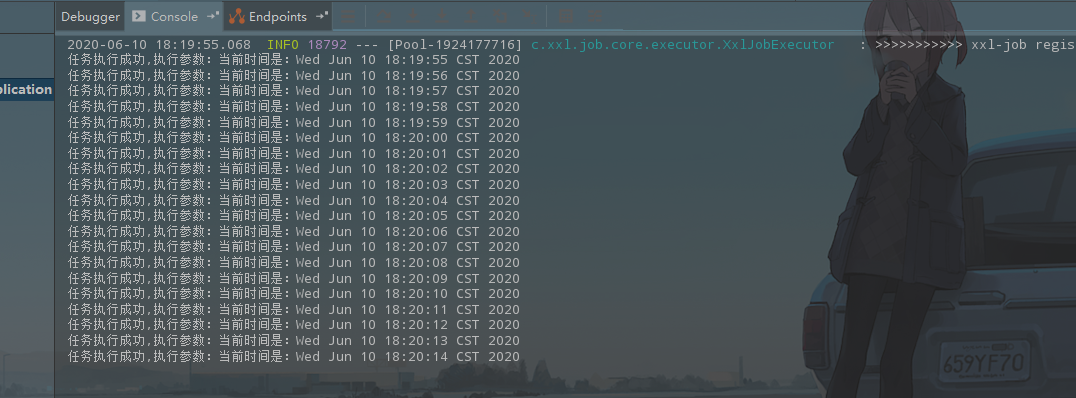
这样就ok了,重启执行器就行了。再启动任务
看控制台:
看日志:
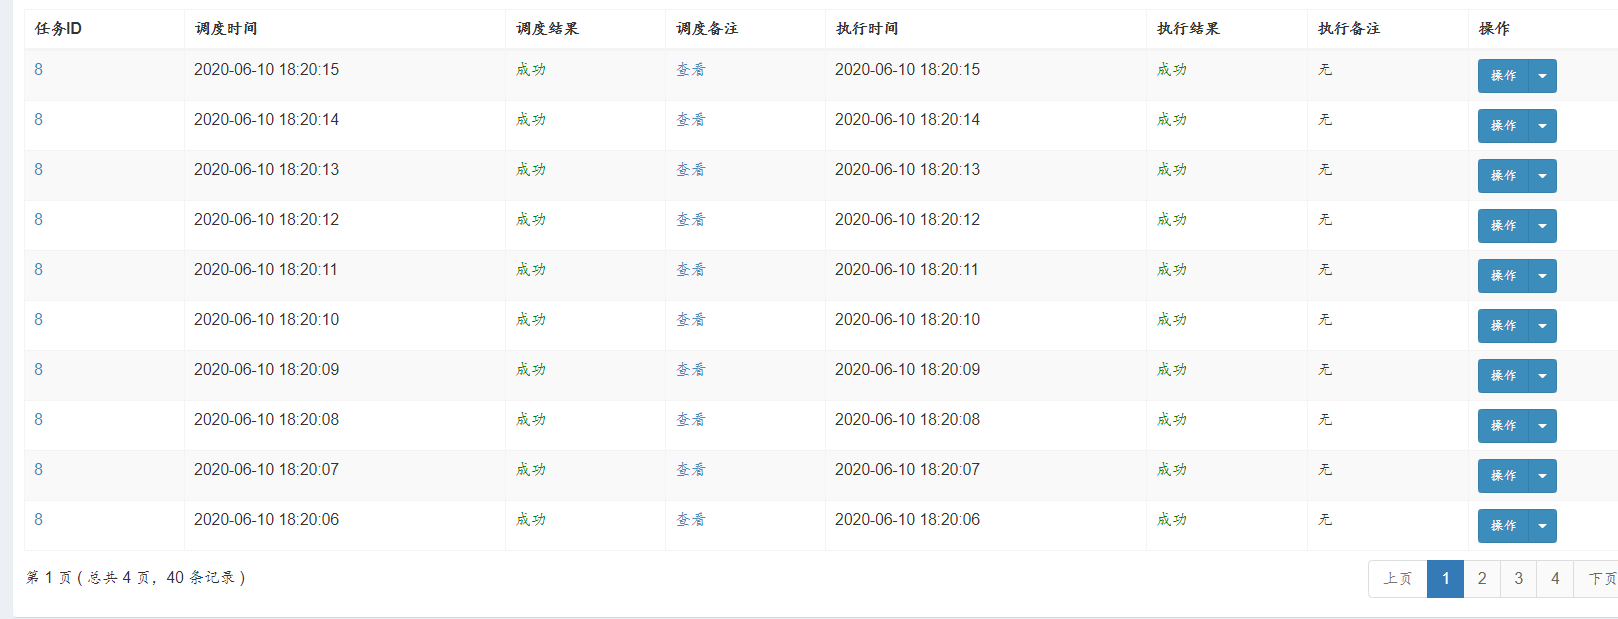
至此,我们再来看看首页的样子