一,开发环境配置
众所周知,万事开头难,配置开发环境是所有开发项目最基本且必须要做的一步。
所用的所有软件及开发平台:Win7+NetBeans+Vmware+ubuntu+NDK+android SDK
首先,在Win7平台下面配置好开发android的环境,具体细节参照博客:http://blog.csdn.net/tianshuai11/article/details/7367700
然后,在Vmware中的ubuntu系统中下载android-ndk-r7b的NDK开发包http://developer.android.com/sdk/ndk/index.html 选择Linux版本。下载后解压到/usr文件夹下面,接着配置环境变量:vi .bashrc 在最后添加:NDK=/usr/android-ndk-r7b export NDK---》然后让更改生效:source .bashrc---》最后在终端测试:echo $NDK 看是否输出:/usr/android-ndk-r7b 如果输出则代表配置成功
二,代码编写
在看接下来文章之前,希望你已经对Jni有所了解。如果不是很了解希望你能八这篇博文中的例子实现,http://blog.csdn.net/tianshuai11/article/details/7367881
1)在netBeans中新建工程:Project Name:hello ; Package Name:tianshuai.hello ;Activity Name :hello ;Target Platform 选 Android 2.3.3
2)在hello文件中添加代码如下:
import android.app.Activity;
import android.os.Bundle;
import android.widget.TextView;

public class hello extends Activity
{
    /** Called when the activity is first created. */
    @Override
    public void onCreate(Bundle savedInstanceState)
    {
        super.onCreate(savedInstanceState);
        setContentView(R.layout.main);
        TextView tv=(TextView)findViewById(R.id.tv);
        // TextView  tv = new TextView(this);
        // tv.setText("sss");
        tv.setText(stringFromJNI());
    }
     public native String  stringFromJNI();
     static {
        System.loadLibrary("hello");
    }
}
main.xml中做相应更改
3)编译C的头文件
右键->hello工程->生成,在hello\bin\classes\tianshuai\hello中生成 hello.class
然后在终端Dos窗口中 cd 到\hello\bin\classes 目录下:输入javah -classpath C:\Users\tianshuai\Desktop\hello\bin\classes -jni tianshuai.hello.hello
在classes文件夹下会生成 tianshuai_hello_hello.h 文件:
/* DO NOT EDIT THIS FILE - it is machine generated */
#include <jni.h>
/* Header for class tianshuai_hello_hello */

#ifndef _Included_tianshuai_hello_hello
#define _Included_tianshuai_hello_hello
#ifdef __cplusplus
extern "C" {
#endif
/*
 * Class:     tianshuai_hello_hello
 * Method:    stringFromJNI
 * Signature: ()Ljava/lang/String;
 */
JNIEXPORT jstring JNICALL Java_tianshuai_hello_hello_stringFromJNI
  (JNIEnv *, jobject);

#ifdef __cplusplus
}
#endif
#endif
PS:这里假设你已经配置好java环境变量,具体参见博文http://blog.csdn.net/tianshuai11/article/details/7367700
4)手动更改工程
在hello工程的根目录下新建 jni文件夹,然后将tianshuai_hello_hello.h 文件拷进去
添加接口实现文件:tianshuai_hello_hello.c
#include <string.h>
#include <jni.h>
#include "tianshuai_hello_hello.h"
jstring
Java_tianshuai_hello_hello_stringFromJNI( JNIEnv* env,
jobject thiz )
{
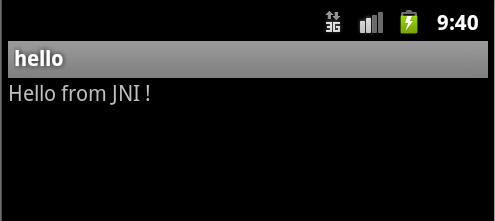
return (*env)->NewStringUTF(env, "Hello from JNI !");
}
添加生成处理文件:Android.mkLOCAL_PATH := $(call my-dir) include $(CLEAR_VARS) LOCAL_MODULE := hello LOCAL_SRC_FILES := tianshuai_hello_hello.c include $(BUILD_SHARED_LIBRARY)
5)将所有以上工程及文件保存好,拷贝到vmware下的ubuntu 操作系统下面
cd /hello
./$NDK/ndk-build
在/hello/libs中会生成armeabi/libhello.so文件
6)测试:
将Linux中更改好的工程文件,拷贝到windows下,用Netbeans打开,运行
三,总结
1)目标,通过java调用已经用C写好的源文件
2)步骤,1>已知写好的c文件
2>编写java代码,调用特定函数名的c文件
3>将写好的java代码,编译成.class文件,然后生成 .h 文件
4>ndk编译一下 .h .c然后 通过java调用c目标实现
如果你经过千辛万苦,看到以上结果的时候,相信你一定内牛满面……
程序员的快乐就在这里……
希望有什么建议和意见给我留言,我一定积极听取大家意见,并将博文疏漏之处改正。