1. OAuth2简易实战(三)-JWT
1.1. 与OAuth2授权码模式差别
- 授权服务器代码修改
@Configuration
@EnableAuthorizationServer
public class OAuth2AuthorizationServer extends AuthorizationServerConfigurerAdapter {

    @Autowired
    private AuthenticationManager authenticationManager;

    @Bean
    public JwtAccessTokenConverter accessTokenConverter() {
        JwtAccessTokenConverter converter = new JwtAccessTokenConverter();
        converter.setSigningKey("test-secret");
        return converter;
    }

    @Bean
    public JwtTokenStore jwtTokenStore() {
        return new JwtTokenStore(accessTokenConverter());
    }

    @Override
    public void configure(AuthorizationServerEndpointsConfigurer endpoints) throws Exception {
        endpoints
            .authenticationManager(authenticationManager)
            .tokenStore(jwtTokenStore())
            .accessTokenConverter(accessTokenConverter());
    }

    @Override
    public void configure(ClientDetailsServiceConfigurer clients) throws Exception {
        clients.inMemory()
            .withClient("clientapp")
            .secret("112233")
            .scopes("read_userinfo")
            .authorizedGrantTypes(
                "password",
                "authorization_code",
                "refresh_token");
    }

}
- 可以看到主要是增加了 JwtAccessTokenConverter JWT访问令牌转换器和JwtTokenStore JWT令牌存储组件,通过AuthorizationServerEndpointsConfigurer 授权服务器端点配置加入两个实例
1.2. 操作步骤
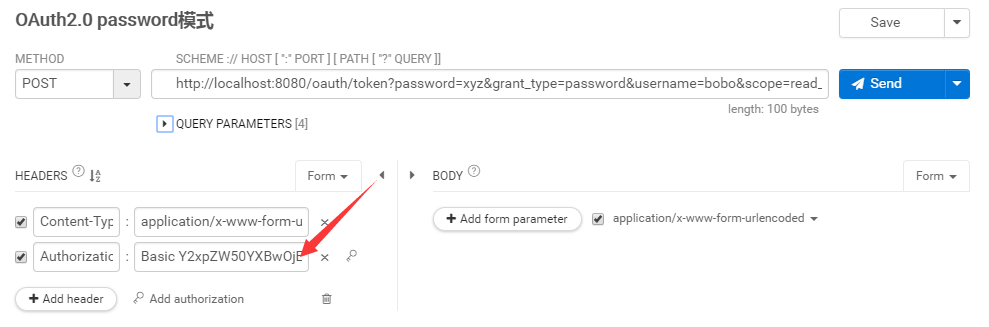
- 使用password模式,访问以下链接,获得token,记得加上授权账户密码
http://localhost:8080/oauth/token?password=xyz&grant_type=password&username=bobo&scope=read_userinfo
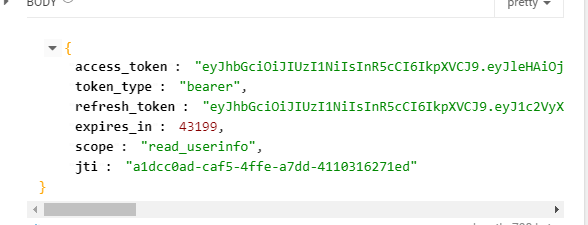
- 返回值
- 使用access_token调用,成功

1.3. JWT的特殊性
- 可以看到代码改动其实不大,jwt具有自解释的特性,客户端不需要再去授权服务器认证这个token的合法性
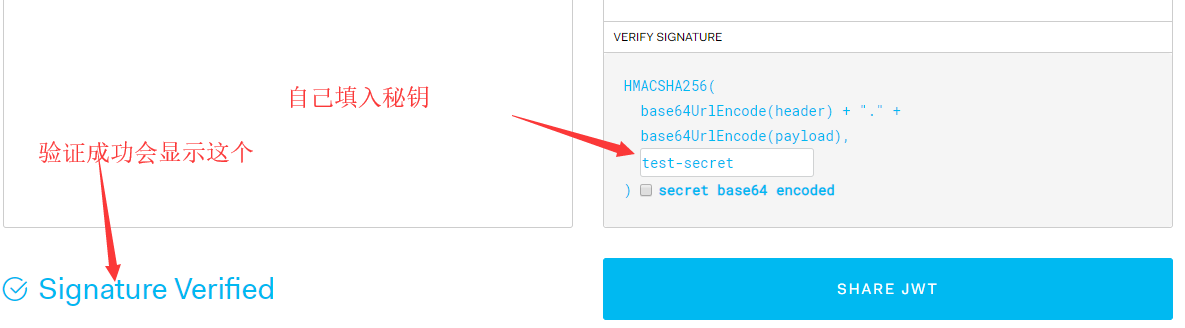
- 代码中可以看到我们添加了一个签名秘钥test-secret,这个秘钥需要自己保管好
- 通过访问 https://jwt.io 把我试验中返回的access_token加入,填上签名秘钥,可以看到验证成功

4. 可以看出来,通过token的解码,参数中带有请求的一些信息,我们通过解码可以直接获取