在区块链或数字货币领域,Python并不是主流的开发语言。但是如果 你的目的是研究区块链技术的原理,或者需要在自己的笔记本上仿真一个 区块链网络并进行一些研究性的实验,比如完成自己的毕业设计项目 或科研课题,那么Python就是合适的。在这个教程里,我们将学习如何 使用Python从零开发一个多节点的区块链网络,并基于这个仿真区块链网络, 开发一个去中心化的数据分享应用。
一、Python开发区块链:用区块分批保存交易
- 我们首先要把数据以JSON格式存入区块链。JSON是一种常用的跨语言的 数据交换格式,例如一篇博客的JSON表示看起来就像这样:
{
  "author": "some_author_name",
  "content": "Some thoughts that author wants to share",
  "timestamp": "The time at which the content was created"
}
-
在区块链领域,我们经常使用 交易 来代替上面说到的数据。因此,为了 避免引起混乱并保持一致,在这个教程里我们将使用交易这个术语 来表示要存入区块链的数据。
-
交易被分批打包进区块,一个区块可以包含一个或多个交易。包含交易的区块会 定期生成并加入区块链。因为会有很多区块,所以每个区块都应当有一个唯一 的ID。下面是我们的Python仿真区块链的Block类定义代码:
class Block:
    def __init__(self, index, transactions, timestamp):
        """
        Constructor for the `Block` class.
        :param index: Unique ID of the block.
        :param transactions: List of transactions.
        :param timestamp: Time of generation of the block.
        """
        self.index = index
        self.transactions = transactions
        self.timestamp = timestamp
二、Python开发块链:为区块添加抗篡改的数字指纹
-
区块链的一个特点就是存储在区块中的交易不可篡改,为了实现这个特性, 首先需要能够检测出区块数据被篡改。为此目的,我们需要使用密码学中 的哈希(Hash)函数。
-
哈希函数可以把任意大小的输入数据转换为固定大小的输出数据,也就是 数据的哈希,而且不同的输入数据(基本上)会得到不同的输出数据,因此 可以使用输出的哈希作为输入数据的标识。一个理想的哈希函数具有如下 特点:
- 应当易于计算
- 应当是确定性的,对于相同的输入数据总是生成相同的哈希
- 应当具有均匀随机性,输入数据的一点变化也会导致输出哈希的显著改变
这样我们就可以保证:
- 从哈希猜测出输入数据是什么基本是不可能的,唯一的办法是尝试所有可能的组合
- 如果同时知道输入和输出,那么你可以通过简单地重算来验证哈希是否正确
- 显然,从输入数据推导出哈希很简单,然而从哈希推导出输入数据则是几乎 不可能的,这一非对称性值就是区块链用来获取期望的抗篡改能力的关键。
目前有很多流行的哈希函数,下面是一个使用SHA-256哈希函数的Python示例:
>>> from hashlib import sha256
>>> data = b"Some variable length data"
>>> sha256(data).hexdigest()
'b919fbbcae38e2bdaebb6c04ed4098e5c70563d2dc51e085f784c058ff208516'
>>> sha256(data).hexdigest() # no matter how many times you run it, the result is going to be the same 256 character string
'b919fbbcae38e2bdaebb6c04ed4098e5c70563d2dc51e085f784c058ff208516'
>>>  data = b"Some variable length data2" # Added one character at the end.
'9fcaab521baf8e83f07512a7de7a0f567f6eef2688e8b9490694ada0a3ddeec8'
注意在上面的示例中,输入数据的一点变化就得到完全不同的哈希!
- 在教程的Python仿真区块链项目中,我们将把区块哈希保存为区块的一个字段, 用它作为区块数据的数字指纹(Digital Fingerprint),或者说签名(Signature)。
下面是计算区块哈希的Python实现代码:
from hashlib import sha256
import json

def compute_hash(block):
    """
    Returns the hash of the block instance by first converting it
    into JSON string.
    """
    block_string = json.dumps(self.__dict__, sort_keys=True)
    return sha256(block_string.encode()).hexdigest()
- 注意:在大多数数字加密货币实现中,区块中的每个交易也需要计算哈希并 利用一个树形结构(merkle树)来计算一组交易的根哈希。不过这对于区块链 来说并不是必需的,因此我们暂时忽略这一特性。
三、Python开发区块链:将区块一个个链接起来
-
现在我们已经搞定区块类Block的Python实现了,现在来看看如何 用Ptyhon实现区块链结构。
-
区块链就是区块的集合,我们可以使用Python列表来保存所有的区块。 不过这还不够,因为如果有人故意用一个较早的区块替换掉集合中的新区块 还会导致数据被篡改。
-
我们需要一个办法来保证对较早的区块的修改会导致整条区块链的无效。 比特币使用的办法是让后面区块的哈希依赖于前面较早的区块。为将 区块链接起来,我们需要在区块结构中增加一个新的字段来保存前一个 区块的哈希:previous_hash。
-
如果每个区块都通过previous_hash字段链接到前一个区块,那么 第一个区块怎么办?在区块链领域,第一个区块被称为创世区块(Genesis Block), 可以手工生成创世区块或者使用一些特定的逻辑。现在让我们为Block类 添加previous_hash字段并实现区块链结构定义,下面是Blockchain类的 Python实现代码:
from hashlib import sha256
import json
import time


class Block:
    def__init__(self, index, transactions, timestamp, previous_hash):
        """
        Constructor for the `Block` class.
        :param index:         Unique ID of the block.
        :param transactions:  List of transactions.
        :param timestamp:     Time of generation of the block.
        :param previous_hash: Hash of the previous block in the chain which this block is part of.
        """
        self.index = index
        self.transactions = transactions
        self.timestamp = timestamp
        self.previous_hash = previous_hash # Adding the previous hash field

    def compute_hash(self):
        """
        Returns the hash of the block instance by first converting it
        into JSON string.
        """
        block_string = json.dumps(self.__dict__, sort_keys=True) # The string equivalent also considers the previous_hash field now
        return sha256(block_string.encode()).hexdigest()

class Blockchain:

    def __init__(self):
        """
        Constructor for the `Blockchain` class.
        """
        self.chain = []
        self.create_genesis_block()

    def create_genesis_block(self):
        """
        A function to generate genesis block and appends it to
        the chain. The block has index 0, previous_hash as 0, and
        a valid hash.
        """
        genesis_block = Block(0, [], time.time(), "0")
        genesis_block.hash = genesis_block.compute_hash()
        self.chain.append(genesis_block)

    @property
    def last_block(self):
        """
        A quick pythonic way to retrieve the most recent block in the chain. Note that
        the chain will always consist of at least one block (i.e., genesis block)
        """
        return self.chain[-1]
-
如果任何较早的区块被修改,那么:
- 该较早区块的哈希会变化
- 这会导致与后面区块的previous_hash字段记录的内容不一致
- 由于计算区块哈希的输入数据包含了previous_hash字段的内容,因此下一个区块的哈希也会变化
-
最终,从被替换掉的区块开始的整条链都失效了,修复这一问题的唯一 办法是重算整条链。
四、Python仿开发区块链:实现工作量证明算法
-
过还有一个问题。如果我们修改了之前的区块,如果重算后面的其他 区块非常简单的话,那么篡改区块链也不是什么难事了。为了避免这一问题, 我们可以利用前面提到的哈希函数的非对称性来加大区块哈希计算工作的 难度和随机性。我们要做的是:只接受符合特定约束条件的区块哈希。 现在让我们增加一个约束条件,要求区块哈希的开始部分至少有n个0, 其中n是一个正整数。
-
我们知道,除非改变区块数据的内容,否则区块哈希不会变化,当然 我们也不希望修改已有的数据。那么我们该怎么做?很简单!我们再增加 一些我们可以随便修改的数据就是了。因此我们需要为Block类增加一个 新的字段nonce,我们可以通过改变这个字段的值来得到不同的区块哈希, 直到满足指定的约束条件,而这时的nonce值就是我们工作量的证明。
-
上面的这一过程就是比特币使用的hashcash算法的简化版本。约束条件 中指定的前导0的数量决定了我们的工作量证明算法的难度:前导0的数量 越多,就越难找到合适的nonce。
-
同时,由于哈希函数的非对称性,工作量证明不容易计算,但是容易进行验证。
下面是工作量证明算法(PoW:Proof of Work)的Python实现代码:
class Blockchain:
    # difficulty of PoW algorithm
    difficulty = 2

    """
    Previous code contd..
    """

    def proof_of_work(self, block):
        """
        Function that tries different values of the nonce to get a hash
        that satisfies our difficulty criteria.
        """
        block.nonce = 0

        computed_hash = block.compute_hash()
        while not computed_hash.startswith('0' * Blockchain.difficulty):
            block.nonce += 1
            computed_hash = block.compute_hash()

        return computed_hash
需要指出的是,没有简单的逻辑可以快速找到满足约束条件的nonce值,因此 只能进行暴力计算。
五、Python开发区块链:将区块加入区块链
-
要将区块加入区块链,我们首先需要验证:
- 区块中的数据没有被篡改,所提供的工作量证明是正确的
- 交易的顺序是正确的,previous_hash字段指向我们链上最新区块的哈希
-
现在让我们看一下将区块上链的Python实现代码:
class Blockchain:
    """
    Previous code contd..
    """

    def add_block(self, block, proof):
        """
        A function that adds the block to the chain after verification.
        Verification includes:
        * Checking if the proof is valid.
        * The previous_hash referred in the block and the hash of a latest block
          in the chain match.
        """
        previous_hash = self.last_block.hash

        if previous_hash != block.previous_hash:
            return False

        if not Blockchain.is_valid_proof(block, proof):
            return False

        block.hash = proof
        self.chain.append(block)
        return True

    def is_valid_proof(self, block, block_hash):
        """
        Check if block_hash is valid hash of block and satisfies
        the difficulty criteria.
        """
        return (block_hash.startswith('0' * Blockchain.difficulty) and
                block_hash == block.compute_hash())
六、Python开发区块链:挖矿
- 交易一开始是保存在未确认交易池中的。将未确认交易放入区块并计算工作量 证明的过程,就是广为人知的挖矿。一旦找出了满足指定约束条件的nonce,我们 就可以说挖出了一个可以上链的区块。
在大多数数字加密货币中,包括比特币,矿工都会得到加密货币奖励,以回报 其为计算工作量证明所投入的算力。下面是我们的挖矿函数的Python实现代码:
class Blockchain:

    def __init__(self):
        self.unconfirmed_transactions = [] # data yet to get into blockchain
        self.chain = []
        self.create_genesis_block()

    """
    Previous code contd...
    """

    def add_new_transaction(self, transaction):
        self.unconfirmed_transactions.append(transaction)

    def mine(self):
        """
        This function serves as an interface to add the pending
        transactions to the blockchain by adding them to the block
        and figuring out proof of work.
        """
        if not self.unconfirmed_transactions:
            return False

        last_block = self.last_block

        new_block = Block(index=last_block.index + 1,
                          transactions=self.unconfirmed_transactions,
                          timestamp=time.time(),
                          previous_hash=last_block.hash)

        proof = self.proof_of_work(new_block)
        self.add_block(new_block, proof)
        self.unconfirmed_transactions = []
        return new_block.index
我们就快要完成这个Python仿真区块链项目了!
七、Python开发区块链:为节点添加API接口
- 现在该为我们的仿真区块链节点添加API接口了,这样应用程序就可以利用 这些API开发具体的应用。我们将使用流行的Python微框架Flask来创建 REST API。如果你以前使用过其他web框架,那么下面的代码应当不难理解。
from flask import Flask, request
import requests

# Initialize flask application
app =  Flask(__name__)

# Initialize a blockchain object.
blockchain = Blockchain()
我们需要一个可以提交新交易的访问端节点,这样我们的应用就可以 利用这个API来将新数据添加到区块链中。下面是节点的/new_transaction 访问端节点的Python实现代码:
# Flask's way of declaring end-points
@app.route('/new_transaction', methods=['POST'])
def new_transaction():
    tx_data = request.get_json()
    required_fields = ["author", "content"]

    for field in required_fields:
        if not tx_data.get(field):
            return "Invalid transaction data", 404

    tx_data["timestamp"] = time.time()

    blockchain.add_new_transaction(tx_data)

    return "Success", 201
另一个端节点/chain可以返回区块链的数据。我们的应用将利用这个API 来查询要显示的数据。下面是这个端节点的Python实现代码:
@app.route('/chain', methods=['GET'])
def get_chain():
    chain_data = []
    for block in blockchain.chain:
        chain_data.append(block.__dict__)
    return json.dumps({"length": len(chain_data),
                       "chain": chain_data})
- 挖矿很费CPU,因此我们不希望让节点一直挖矿,而是提供一个 访问端节点/mine来提供按需挖矿服务。 下面是Python实现代码:
@app.route('/mine', methods=['GET'])
def mine_unconfirmed_transactions():
    result = blockchain.mine()
    if not result:
        return "No transactions to mine"
    return "Block #{} is mined.".format(result)

@app.route('/pending_tx')
def get_pending_tx():
    return json.dumps(blockchain.unconfirmed_transactions)
- 这些REST访问端节点可以用来操作我们的区块链,比如提交一些交易,然后 通过挖矿确认这些交易等等。
八、Python开发区块链:实现最长链共识与去中心化计算
- 到目前为止,我们用Python从零实现的仿真区块链是运行在一台计算机上的。即使 我们已经利用哈希将区块前后链接起来,并应用了工作量证明约束,我们 还是不能只信任单一的节点。我们需要实现分布式数据存储,我们需要 多个节点来维护区块链。因此,为了从单一节点转向P2P网络,让我们先 创建一个机制来让网络上的节点彼此了解。
首先定义一个新的访问端节点/register_node用来在网络中注册新节点。 下面是Python实现代码:
# Contains the host addresses of other participating members of the network
peers = set()

# Endpoint to add new peers to the network
@app.route('/register_node', methods=['POST'])
def register_new_peers():
    # The host address to the peer node
    node_address = request.get_json()["node_address"]
    if not node_address:
        return "Invalid data", 400

    # Add the node to the peer list
    peers.add(node_address)

    # Return the blockchain to the newly registered node so that it can sync
    return get_chain()

@app.route('/register_with', methods=['POST'])
def register_with_existing_node():
    """
    Internally calls the `register_node` endpoint to
    register current node with the remote node specified in the
    request, and sync the blockchain as well with the remote node.
    """
    node_address = request.get_json()["node_address"]
    if not node_address:
        return "Invalid data", 400

    data = {"node_address": request.host_url}
    headers = {'Content-Type': "application/json"}

    # Make a request to register with remote node and obtain information
    response = requests.post(node_address + "/register_node",
                             data=json.dumps(data), headers=headers)

    if response.status_code == 200:
        global blockchain
        global peers
        # update chain and the peers
        chain_dump = response.json()['chain']
        blockchain = create_chain_from_dump(chain_dump)
        peers.update(response.json()['peers'])
        return "Registration successful", 200
    else:
        # if something goes wrong, pass it on to the API response
        return response.content, response.status_code


def create_chain_from_dump(chain_dump):
    blockchain = Blockchain()
    for idx, block_data in enumerate(chain_dump):
        block = Block(block_data["index"],
                      block_data["transactions"],
                      block_data["timestamp"],
                      block_data["previous_hash"])
        proof = block_data['hash']
        if idx > 0:
            added = blockchain.add_block(block, proof)
            if not added:
                raise Exception("The chain dump is tampered!!")
        else:  # the block is a genesis block, no verification needed
            blockchain.chain.append(block)
    return blockchain
-
新加入网络的节点可以利用/register_with endpoint端节点调用 register_with_existing_node方法进行注册。这有助于解决以下问题:
- 要求远端节点在其已知邻节点中添加一个新的条目
- 使用远端节点的数据初始化新节点上的区块链
- 如果节点中途有下线,而可以重新从网络同步区块链
-
然而,当存在多个区块链节点时有一个问题需要解决:不管有意或无意(例如网络延迟), 不同节点上的区块链可能彼此不同。在这种情况下,节点之间需要就区块链的版本 达成一致,以便维护整个系统的一致性。换句话说,我们需要达成共识。
当不同节点上的区块链出现分化时,一个简单的共识算法是选择最长有效链。 这一方法背后的合理性在于,最长的链包含了最多的已经投入的工作量证明计算。 下面是最长链共识算法的Python实现代码:
class Blockchain
    """
    previous code continued...
    """
    def check_chain_validity(cls, chain):
        """
        A helper method to check if the entire blockchain is valid.
        """
        result = True
        previous_hash = "0"

        # Iterate through every block
        for block in chain:
            block_hash = block.hash
            # remove the hash field to recompute the hash again
            # using `compute_hash` method.
            delattr(block, "hash")

            if not cls.is_valid_proof(block, block.hash) or
                    previous_hash != block.previous_hash:
                result = False
                break

            block.hash, previous_hash = block_hash, block_hash

        return result

def consensus():
    """
    Our simple consensus algorithm. If a longer valid chain is
    found, our chain is replaced with it.
    """
    global blockchain

    longest_chain = None
    current_len = len(blockchain.chain)

    for node in peers:
        response = requests.get('{}/chain'.format(node))
        length = response.json()['length']
        chain = response.json()['chain']
        if length > current_len and blockchain.check_chain_validity(chain):
              # Longer valid chain found!
            current_len = length
            longest_chain = chain

    if longest_chain:
        blockchain = longest_chain
        return True

    return False
- 现在,我们需要提供一个Python方法让节点在挖出区块时可以将这一 消息广播给其他节点,这样我们的仿真区块链网络中的每个参与者都可以 更新其本地区块链,然后接着挖下一个区块。收到区块广播的节点很简单 就可以验证工作量证明,然后将收到区块加入到自己的本地链上。
下面是节点的/add_block访问端节点的Python实现代码:
# endpoint to add a block mined by someone else to
# the node's chain. The node first verifies the block
# and then adds it to the chain.
@app.route('/add_block', methods=['POST'])
def verify_and_add_block():
    block_data = request.get_json()
    block = Block(block_data["index"],
                  block_data["transactions"],
                  block_data["timestamp"],
                  block_data["previous_hash"])

    proof = block_data['hash']
    added = blockchain.add_block(block, proof)

    if not added:
        return "The block was discarded by the node", 400

    return "Block added to the chain", 201


def announce_new_block(block):
    """
    A function to announce to the network once a block has been mined.
    Other blocks can simply verify the proof of work and add it to their
    respective chains.
    """
    for peer in peers:
        url = "{}add_block".format(peer)
        requests.post(url, data=json.dumps(block.__dict__, sort_keys=True))
announce_new_block方法应当在区块被挖出的时候调用,这样其他节点 就可以更新自己本地保存的区块链副本:
@app.route('/mine', methods=['GET'])
def mine_unconfirmed_transactions():
    result = blockchain.mine()
    if not result:
        return "No transactions to mine"
    else:
        # Making sure we have the longest chain before announcing to the network
        chain_length = len(blockchain.chain)
        consensus()
        if chain_length == len(blockchain.chain):
            # announce the recently mined block to the network
            announce_new_block(blockchain.last_block)
        return "Block #{} is mined.".format(blockchain.last_block.index
九、Python开发区块链:开发去中心化应用程序
- 现在我们的仿真区块链的节点软件已经开发完了。现在需要开发 应用程序的用户界面了。我们使用Jinja2模板来渲染网页,并使用一些CSS来 让网页看起来美观一些。
我们的应用需要连接到这个仿真区块链网络中的某个节点以便获取数据或者 提交新数据。下面是应用的初始化部分的Python代码:
import datetime
import json

import requests
from flask import render_template, redirect, request

from app import app

# Node in the blockchain network that our application will communicate with
# to fetch and add data.
CONNECTED_NODE_ADDRESS = "http://127.0.0.1:8000"

posts = []
fetch_posts方法利用节点的/chain端节点获取数据、解析数据并保存在本地:
def fetch_posts():
    """
    Function to fetch the chain from a blockchain node, parse the
    data, and store it locally.
    """
    get_chain_address = "{}/chain".format(CONNECTED_NODE_ADDRESS)
    response = requests.get(get_chain_address)
    if response.status_code == 200:
        content = []
        chain = json.loads(response.content)
        for block in chain["chain"]:
            for tx in block["transactions"]:
                tx["index"] = block["index"]
                tx["hash"] = block["previous_hash"]
                content.append(tx)

        global posts
        posts = sorted(content,
                       key=lambda k: k['timestamp'],
                       reverse=True)
应用程序使用一个HTML表单来接收用户输入然后利用一个POST请求 将交易添加到所连接节点的未确认交易池中。然后交易会被我们的 仿真区块链网络确认并最终当刷新网页时被再次读取:
@app.route('/submit', methods=['POST'])
def submit_textarea():
    """
    Endpoint to create a new transaction via our application
    """
    post_content = request.form["content"]
    author = request.form["author"]

    post_object = {
        'author': author,
        'content': post_content,
    }

    # Submit a transaction
    new_tx_address = "{}/new_transaction".format(CONNECTED_NODE_ADDRESS)
十、Python开发区块链:如何运行应用
-
终于完成了!你可以在github上查看这个Python仿真区块链的 完整源代码。
-
首先克隆项目仓库:
$ git clone https://github.com/ezpod/python-blockchain-sim.git
- 安装必要的Python项目依赖:
$ cd python_blockchain_app
$ pip install -r requirements.txt
- 启动我们的仿真区块链节点:
$ export FLASK_APP=node_server.py
$ flask run --port 8000
- 现在我们的一个仿真区块链节点实例已经启动并在8000端口监听。
开启另一个终端运行我们的去中心化应用:
$ python run_app.py
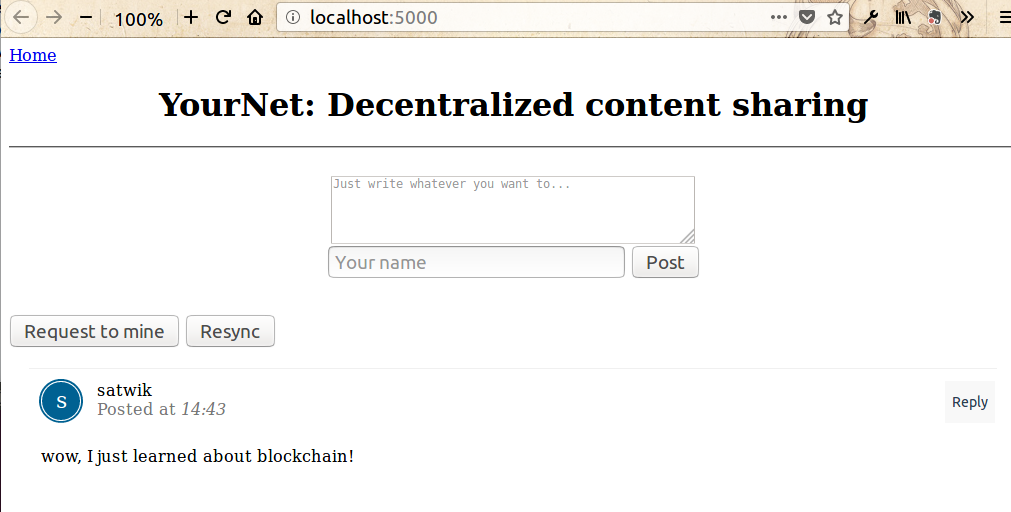
- 现在应用已经启动,可以通过这个网址访问: http://localhost:5000.
下图展示了如何利用web界面向我们的仿真区块链提交内容:

- 下图展示了如何利用web界面启动节点挖矿:

- 下图展示了如何利用web界面重新同步区块链数据:
十一、Python开发区块链:运行多个节点
- 要运行包含多个节点的仿真区块链网络,可以使用register_with/端节点 在网络中注册新节点。
下面是一个多节点的示例场景,我们启动了3个仿真节点,分别在8000、8001和 8002端口监听:
# already running
$ flask run --port 8000 &
# spinning up new nodes
$ flask run --port 8001 &
$ flask run --port 8002 &
- 可以使用下面的cURL请求注册在8001和8002端口监听的两个新节点:
$ curl -X POST
  http://127.0.0.1:8001/register_with
  -H 'Content-Type: application/json'
  -d '{"node_address": "http://127.0.0.1:8000"}'

$ curl -X POST
  http://127.0.0.1:8002/register_with
  -H 'Content-Type: application/json'
  -d '{"node_address": "http://127.0.0.1:8000"}'
-
这样在端口8000监听的节点就可以知道还有8001和8002监听的节点, 反之亦然。新加入的节点也会从原来的在网节点同步区块链数据, 这样新节点就可以参与后续的挖矿过程了。
-
要修改前端应用同步的区块链节点,可以修改views.py文件中的 CONNECTED_NODE_ADDRESS字段。
-
一旦完成上面的操作,你就可以运行应用(python run_app.py)并 通过web界面创建交易了。当你挖矿后,网络中的所有节点都会更新 自己的本地区块链。也可以使用cURL或Postman利用/chain端节点查看 区块链。例如:
$ curl -X GET http://localhost:8001/chain
$ curl -X GET http://localhost:8002/chain
十二、Python开发区块链:如何验证交易
-
你可能注意到我们的基于仿真区块链的去中心化应用还有一点瑕疵:任何人在任何时间都 可以提交任何内容。解决这一问题的一个办法,就是使用非对称密钥技术创建用户账户。 每一个新用户都需要一个公钥(对应账户名)和一个私钥才能在我们的应用 中提交数据。私钥用来创建数据的签名,而公钥用来验证数据的签名,下面是 其工作机制:
-
每一个提交的新交易都使用用户的私钥进行签名。这个签名与用户信息一起 添加到交易数据中
-
在验证阶段,当挖矿时,我们可以使用公钥和签名验证数据中生成的发送方 和签名是否相符,以及验证消息是否被修改。
十三、Python开发区块链:总结
在这个教程中,我们学习了一个公链的基本概念,并利用Python实现了一个仿真区块链 以及基于这个仿真区块链的Flask应用。如果你走完了整个教程,相信应该可以使用Python 从零实现一个区块链,并基于这个仿真的区块链开发自己的去中心化应用,或者利用 这个仿真区块链网络进行一些研究性的实验。教程中的区块链实现没有比特币或以太坊那么复杂, 但相信会有助于理解区块链技术的核心问题和解决思路。