1、创建表
create table t_user(
  id int primary key auto_increment,
  username varchar(50),
  password varchar(32),
  age int
);
2、导入jar包
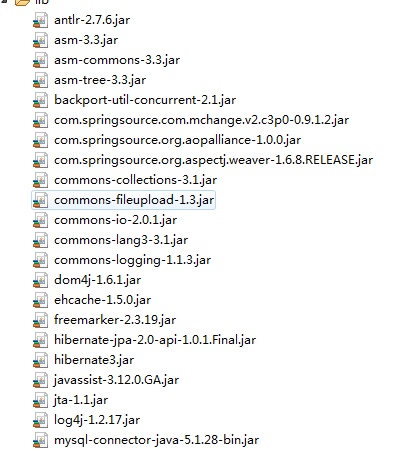
2.1 struts包
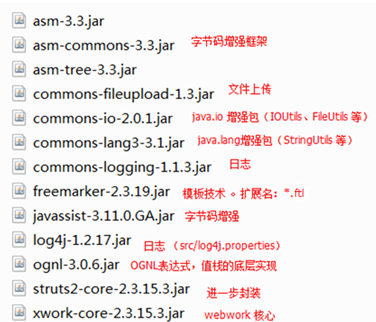
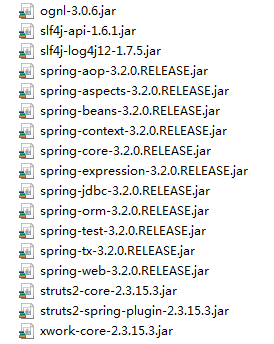
2.2 spring包
1 基础:4+1 , beans、core、context、expression , commons-logging (struts已经导入)
2 AOP:aop联盟、spring aop 、aspect规范、spring aspect
3 db:jdbc、tx
4 测试:test
5 web开发:spring web
6 驱动:mysql
7 连接池:c3p0
8 整合hibernate:spring orm
2.3 hibernate
hibernate3.jar 核心
lib equired 必须
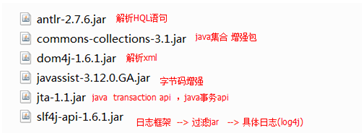
2.4 log日志整合
l 整合log4j
导入 log4j...jar (struts已经导入)
整合(过渡):slf4j-log4j12-1.7.5.jar
2.5 二级缓存
核心:ehcache-1.5.0.jar
依赖:
backport-util-concurrent-2.1.jar
commons-logging (存在)
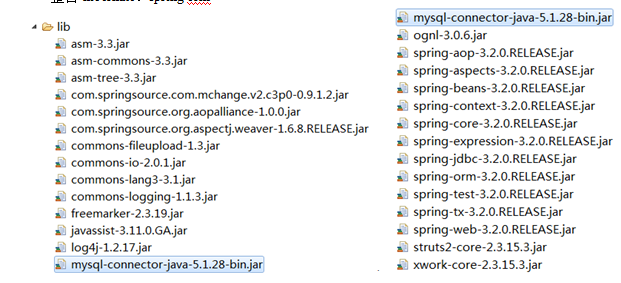
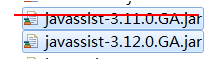
删除重复jar包:版本较低的
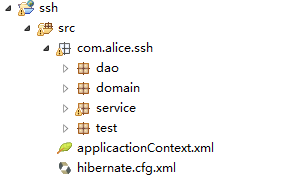
整个项目:

3.spring整合hibernate
3.1 po类

package com.alice.ssh.domain;

public class User {
    private Integer id;
    private String username;
    private String password;
    private Integer age;
    public Integer getId() {
        return id;
    }
    public void setId(Integer id) {
        this.id = id;
    }
    public String getUsername() {
        return username;
    }
    public void setUsername(String username) {
        this.username = username;
    }
    public String getPassword() {
        return password;
    }
    public void setPassword(String password) {
        this.password = password;
    }
    public Integer getAge() {
        return age;
    }
    public void setAge(Integer age) {
        this.age = age;
    }
    @Override
    public String toString() {
        return "User [id=" + id + ", username=" + username + ", password="
                + password + ", age=" + age + "]";
    }


}
<?xml version="1.0" encoding="UTF-8"?>
<!DOCTYPE hibernate-mapping PUBLIC
    "-//Hibernate/Hibernate Mapping DTD 3.0//EN"
    "http://www.hibernate.org/dtd/hibernate-mapping-3.0.dtd">
    <hibernate-mapping package="com.alice.ssh.domain">
       <class name="User" table="t_user">
          <id name="id">
             <generator class="native"></generator>
          </id>
          <property name="username" type="string"></property>
           <property name="password" type="string"></property>
            <property name="age" ></property>

       </class>
    </hibernate-mapping>
3.2 dao层
spring提供 HibernateTemplate 用于操作PO对象,类似Hibernate Session对象
package com.alice.ssh.dao;

import com.alice.ssh.domain.User;

public interface IUserDao {
    public void save(User user);
}
package com.alice.ssh.dao.impl;

import org.springframework.orm.hibernate3.support.HibernateDaoSupport;

import com.alice.ssh.dao.IUserDao;
import com.alice.ssh.domain.User;

//底层需要SessionFactory,自动创建HibernateTemplate模板
public class UserDaoImpl extends HibernateDaoSupport implements IUserDao{

//    private HibernateTemplate hibernateTemplate;

//    public void setHibernateTemplate(HibernateTemplate hibernateTemplate) {
//        this.hibernateTemplate = hibernateTemplate;
//    }


    public void save(User user) {
        this.getHibernateTemplate().save(user);
        System.out.println("dao+"+user);
    }

}
3.3 service层
package com.alice.ssh.service;

import com.alice.ssh.domain.User;

public interface UserService {
   public void register(User user);

}
package com.alice.ssh.service.impl;

import com.alice.ssh.dao.IUserDao;
import com.alice.ssh.domain.User;
import com.alice.ssh.service.UserService;

public class UserServiceImpl implements UserService{

    private IUserDao userDao;

    public void setUserDao(IUserDao userDao) {
        this.userDao = userDao;
    }


    public void register(User user) {
         userDao.save(user);
         System.out.println("service+"+user);
    }

}
spring整合hibernate分两种情况:
一种是有hibernate.cfg.xml
一种没有hibernate.cfg.xml
先说有hibernate配置文件的:
hibernate.cfg.xml文件为:
<?xml version="1.0" encoding="UTF-8"?>
<!DOCTYPE hibernate-configuration PUBLIC
    "-//Hibernate/Hibernate Configuration DTD 3.0//EN"
    "http://www.hibernate.org/dtd/hibernate-configuration-3.0.dtd">
    <hibernate-configuration>
       <session-factory>
         <!-- 基本四项 -->
         <property name="hibernate.connection.driver_class">com.mysql.jdbc.Driver</property>
         <property name="hibernate.connection.url">jdbc:mysql://localhost:3306/spring</property>
         <property name="hibernate.connection.username">root</property>
         <property name="hibernate.connection.password">alice</property>


         <!-- 配置方言 -->
         <property name="hibernate.dialect">org.hibernate.dialect.MySQL5Dialect</property>

         <!-- sql输出 -->
         <property name="hibernate.show_sql">true</property>
         <property name="hibernate.format_sql">true</property>

         <!-- 自生成表格 -->
         <property name="hibernate.hbm2ddl.auto">update</property>

         <!-- 绑定线程 -->
         <property name="hibernate.current_session_context_class">thread</property>


         <!-- 导入映射文件 -->
         <mapping resource="com/alice/ssh/domain/User.hbm.xml"/>
       </session-factory>
    </hibernate-configuration>
这种情况下,spring配置文件写成如下:
<?xml version="1.0" encoding="UTF-8"?>
<beans xmlns="http://www.springframework.org/schema/beans"
       xmlns:xsi="http://www.w3.org/2001/XMLSchema-instance"
       xmlns:aop="http://www.springframework.org/schema/aop"
       xmlns:tx="http://www.springframework.org/schema/tx"
       xmlns:context="http://www.springframework.org/schema/context"
       xsi:schemaLocation="http://www.springframework.org/schema/beans
                              http://www.springframework.org/schema/beans/spring-beans.xsd
                              http://www.springframework.org/schema/tx
                              http://www.springframework.org/schema/tx/spring-tx.xsd
                              http://www.springframework.org/schema/aop
                              http://www.springframework.org/schema/aop/spring-aop.xsd
                              http://www.springframework.org/schema/context
                              http://www.springframework.org/schema/context/spring-context.xsd">
<!--  1.加载hibenrate.cfg.xml 获得SessionFactory
        * configLocation确定配置文件位置
 -->
<bean id="sessionFactory" class="org.springframework.orm.hibernate3.LocalSessionFactoryBean">
   <property name="configLocation" value="classpath:hibernate.cfg.xml"></property>
</bean>

<!-- 2.创建模板
        * 底层使用session,session 有sessionFactory获得
-->
<bean id="hibernateTemplate" class="org.springframework.orm.hibernate3.HibernateTemplate">
   <property name="sessionFactory" ref="sessionFactory"></property>
</bean>

<!-- 3.dao层 -->
<bean id="userDao" class="com.alice.ssh.dao.impl.UserDaoImpl">
    <property name="hibernateTemplate" ref="hibernateTemplate"></property>
</bean>

<!--4.service层  -->
<bean id="userService" class="com.alice.ssh.service.impl.UserServiceImpl">
    <property name="userDao" ref="userDao"></property>
</bean>

<!-- 5.事务管理 -->
<!-- 5.1 事务管理器 :HibernateTransactionManager -->
<bean id="txManager" class="org.springframework.orm.hibernate3.HibernateTransactionManager">
     <property name="sessionFactory" ref="sessionFactory"></property>
</bean>
<!-- 5.2 事务详情 ,给ABC进行具体事务设置 -->
<tx:advice id="txAdvice" transaction-manager="txManager">
     <tx:attributes>
        <tx:method name="register"/>
     </tx:attributes>
</tx:advice>

<!-- 5.3 AOP编程,ABCD 筛选 ABC -->
<aop:config>
   <aop:advisor advice-ref="txAdvice" pointcut="execution(* com.alice.ssh.service..*.*(..))"/>
</aop:config>
</beans>
无hibernate配置文件的,现在比较常用,这种情况如下配置:
删除hibernate.cfg.xml
在applicationContext.xml中配置相应的文件
<?xml version="1.0" encoding="UTF-8"?>
<beans xmlns="http://www.springframework.org/schema/beans"
       xmlns:xsi="http://www.w3.org/2001/XMLSchema-instance"
       xmlns:aop="http://www.springframework.org/schema/aop"
       xmlns:tx="http://www.springframework.org/schema/tx"
       xmlns:context="http://www.springframework.org/schema/context"
       xsi:schemaLocation="http://www.springframework.org/schema/beans
                              http://www.springframework.org/schema/beans/spring-beans.xsd
                              http://www.springframework.org/schema/tx
                              http://www.springframework.org/schema/tx/spring-tx.xsd
                              http://www.springframework.org/schema/aop
                              http://www.springframework.org/schema/aop/spring-aop.xsd
                              http://www.springframework.org/schema/context
                              http://www.springframework.org/schema/context/spring-context.xsd">

<!-- 配置数据源 -->
<bean id="dataSource" class="com.mchange.v2.c3p0.ComboPooledDataSource">
   <property name="driverClass" value="com.mysql.jdbc.Driver"></property>
   <property name="jdbcUrl" value="jdbc:mysql://localhost:3306/spring"></property>
   <property name="user" value="root"></property>
   <property name="password" value="alice"></property>
</bean>


<!-- 1.3配置 LocalSessionFactoryBean,获得SessionFactory
        * configLocation确定配置文件位置
            <property name="configLocation" value="classpath:hibernate.cfg.xml"></property>
        1)dataSource 数据源
        2)hibernateProperties hibernate其他配置项
        3) 导入映射文件
            mappingLocations ,确定映射文件位置,需要“classpath:” ,支持通配符 【】
                <property name="mappingLocations" value="classpath:com/itheima/domain/User.hbm.xml"></property>
                <property name="mappingLocations" value="classpath:com/itheima/domain/*.hbm.xml"></property>
            mappingResources ,加载执行映射文件,从src下开始 。不支持通配符*
                <property name="mappingResources" value="com/itheima/domain/User.hbm.xml"></property>
            mappingDirectoryLocations ,加载指定目录下的,所有配置文件
                <property name="mappingDirectoryLocations" value="classpath:com/itheima/domain/"></property>
            mappingJarLocations , 从jar包中获得映射文件
-->
<bean id="sessionFactory" class="org.springframework.orm.hibernate3.LocalSessionFactoryBean">
   <property name="dataSource" ref="dataSource"></property>
   <property name="hibernateProperties">
      <props>
         <prop key="hibernate.dialec">org.hibernate.dialect.MySQL5Dialect</prop>
         <prop key="hibernate.show_sql">true</prop>
         <prop key="hibernate.format_sql">true</prop>
         <prop key="hibernate.hbm2ddl.auto">update</prop>
         <prop key="hibernate.current_session_context_class">thread</prop>
      </props>
   </property>
   <property name="mappingLocations" value="com/alice/ssh/domain/User.hbm.xml"></property>

</bean>

<!-- 3.dao层 -->
<bean id="userDao" class="com.alice.ssh.dao.impl.UserDaoImpl">
    <property name="sessionFactory" ref="sessionFactory"></property>
</bean>

<!--4.service层  -->
<bean id="userService" class="com.alice.ssh.service.impl.UserServiceImpl">
    <property name="userDao" ref="userDao"></property>
</bean>

<!-- 5.事务管理 -->
<!-- 5.1 事务管理器 :HibernateTransactionManager -->
<bean id="txManager" class="org.springframework.orm.hibernate3.HibernateTransactionManager">
     <property name="sessionFactory" ref="sessionFactory"></property>
</bean>
<!-- 5.2 事务详情 ,给ABC进行具体事务设置 -->
<tx:advice id="txAdvice" transaction-manager="txManager">
     <tx:attributes>
        <tx:method name="register"/>
     </tx:attributes>
</tx:advice>

<!-- 5.3 AOP编程,ABCD 筛选 ABC -->
<aop:config>
   <aop:advisor advice-ref="txAdvice" pointcut="execution(* com.alice.ssh.service..*.*(..))"/>
</aop:config>
</beans>
修改dao,使用HibernateDaoSupport
// 底层需要SessionFactory,自动创建HibernateTemplate模板
public class UserDaoImpl extends HibernateDaoSupport implements UserDao {

    @Override
    public void save(User user) {
        this.getHibernateTemplate().save(user);
    }
测试用例:
package com.alice.ssh.test;

import org.junit.Test;
import org.junit.runner.RunWith;
import org.springframework.beans.factory.annotation.Autowired;
import org.springframework.test.context.ContextConfiguration;
import org.springframework.test.context.junit4.SpringJUnit4ClassRunner;

import com.alice.ssh.domain.User;
import com.alice.ssh.service.UserService;

@RunWith(SpringJUnit4ClassRunner.class)
@ContextConfiguration(locations="classpath:applicactionContext.xml")
public class UserTest {
    @Autowired
    private UserService userService;

    @Test
    public void test(){
        User user = new User();
        user.setUsername("llili");
        user.setPassword("124354");
        user.setAge(18);

        userService.register(user);
    }

}
4、 struts整合spring
4.1 spring创建action
1.编写action类,并将其配置给spring ,spring可以注入service
package com.alice.ssh.web.action;

import com.alice.ssh.domain.User;
import com.alice.ssh.service.UserService;
import com.opensymphony.xwork2.ActionSupport;
import com.opensymphony.xwork2.ModelDriven;

public class UserAction extends ActionSupport implements ModelDriven<User>{
    /**
     *
     */
    private static final long serialVersionUID = 1L;
    //1 封装数据
        private User user = new User();

        public User getModel() {
            return user;
        }

        //2 service
        private UserService userService;
        public void setUserService(UserService userService) {
            this.userService = userService;
        }

        /**
         * 注册
         * @return
         */
        public String register(){
            userService.register(user);
            return "success";
        }

}
applicationContex.xml中注入action

2.编写struts.xml
<?xml version="1.0" encoding="UTF-8" ?>
<!DOCTYPE struts PUBLIC
    "-//Apache Software Foundation//DTD Struts Configuration 2.3//EN"
    "http://struts.apache.org/dtds/struts-2.3.dtd">
<struts>
  <!-- 开发模式 -->
    <constant name="struts.devMode" value="true" />

    <package name="default" namespace="/" extends="struts-default">
        <!-- 底层自动从spring容器中通过名称获得内容, getBean("userAction") -->
        <action name="userAction_*" class="userAction" method="register">
            <result name="success">/success.jsp</result>
        </action>
    </package>
</struts>
3.表单jsp页面
<form action="${pageContext.request.contextPath}/userAction_register" method="post">
        用户名:<input type="text" name="username"/> <br/>
        密码:<input type="password" name="password"/> <br/>
        年龄:<input type="text" name="age"/> <br/>
        <input type="submit" />
    </form>
4.web.xml 配置
1.确定配置文件contextConfigLocation
2.配置监听器 ContextLoaderListener
3.配置前端控制器 StrutsPrepareAndExecuteFitler
<?xml version="1.0" encoding="UTF-8"?>
<web-app version="2.5"
    xmlns="http://java.sun.com/xml/ns/javaee"
    xmlns:xsi="http://www.w3.org/2001/XMLSchema-instance"
    xsi:schemaLocation="http://java.sun.com/xml/ns/javaee
    http://java.sun.com/xml/ns/javaee/web-app_2_5.xsd">
  <display-name></display-name>
   <!-- 1 确定spring xml位置 -->
  <context-param>
      <param-name>contextConfigLocation</param-name>
      <param-value>classpath:applicactionContext.xml</param-value>
  </context-param>
  <!-- 2 spring监听器 -->
  <listener>
      <listener-class>org.springframework.web.context.ContextLoaderListener</listener-class>
  </listener>
  <!-- 3 struts 前端控制器 -->
  <filter>
      <filter-name>struts2</filter-name>
      <filter-class>org.apache.struts2.dispatcher.ng.filter.StrutsPrepareAndExecuteFilter</filter-class>
  </filter>
  <filter-mapping>
      <filter-name>struts2</filter-name>
      <url-pattern>/*</url-pattern>
  </filter-mapping>
    <welcome-file-list>
    <welcome-file>index.jsp</welcome-file>
  </welcome-file-list>
</web-app>
4.2 struts创建action
1 删除spring action配置

2 struts <action class="全限定类名">
<struts>
  <!-- 开发模式 -->
    <constant name="struts.devMode" value="true" />

    <package name="default" namespace="/" extends="struts-default">
        <!-- 底层自动从spring容器中通过名称获得内容, getBean("userAction") -->
        <action name="userAction_*" class="com.alice.ssh.web.action.UserAction" method="register">
            <result name="success">/success.jsp</result>
        </action>
    </package>
</struts>