此案例为替换原有的消费者,注册中心和消息提供者延用之前的
注册中心的案例 https://www.cnblogs.com/songlove/p/14793575.html
消息提供者:https://www.cnblogs.com/songlove/p/14794021.html
先创建一个工程,引用maven控制 ,比着之前的消费者的项目增加了一个feign的依赖
1 <dependency>
2     <groupId>org.springframework.cloud</groupId>
3     <artifactId>spring-cloud-starter-openfeign</artifactId>
4 </dependency>
第一步补全pom文件,完整的pom文件内容为

 1 <?xml version="1.0" encoding="UTF-8"?>
 2 <project xmlns="http://maven.apache.org/POM/4.0.0" xmlns:xsi="http://www.w3.org/2001/XMLSchema-instance"
 3          xsi:schemaLocation="http://maven.apache.org/POM/4.0.0 https://maven.apache.org/xsd/maven-4.0.0.xsd">
 4     <modelVersion>4.0.0</modelVersion>
 5     <parent>
 6         <groupId>org.springframework.boot</groupId>
 7         <artifactId>spring-boot-starter-parent</artifactId>
 8         <version>2.5.0</version>
 9         <relativePath/> <!-- lookup parent from repository -->
10     </parent>
11     <groupId>com.ssc</groupId>
12     <artifactId>demo</artifactId>
13     <version>0.0.1-SNAPSHOT</version>
14     <name>demo</name>
15     <description>Demo project for Spring Boot</description>
16     <properties>
17         <java.version>1.8</java.version>
18         <spring-cloud.version>2020.0.3-SNAPSHOT</spring-cloud.version>
19     </properties>
20     <dependencies>
21         <dependency>
22             <groupId>org.springframework.boot</groupId>
23             <artifactId>spring-boot-starter-web</artifactId>
24         </dependency>
25         <dependency>
26             <groupId>org.springframework.cloud</groupId>
27             <artifactId>spring-cloud-starter-openfeign</artifactId>
28         </dependency>
29         <dependency>
30             <groupId>org.springframework.cloud</groupId>
31             <artifactId>spring-cloud-starter-netflix-eureka-client</artifactId>
32         </dependency>
33         <dependency>
34             <groupId>org.springframework.boot</groupId>
35             <artifactId>spring-boot-starter-test</artifactId>
36             <scope>test</scope>
37         </dependency>
38     </dependencies>
39     <dependencyManagement>
40         <dependencies>
41             <dependency>
42                 <groupId>org.springframework.cloud</groupId>
43                 <artifactId>spring-cloud-dependencies</artifactId>
44                 <version>${spring-cloud.version}</version>
45                 <type>pom</type>
46                 <scope>import</scope>
47             </dependency>
48         </dependencies>
49     </dependencyManagement>
50
51     <build>
52         <plugins>
53             <plugin>
54                 <groupId>org.springframework.boot</groupId>
55                 <artifactId>spring-boot-maven-plugin</artifactId>
56             </plugin>
57         </plugins>
58     </build>
59     <repositories>
60         <repository>
61             <id>spring-snapshots</id>
62             <name>Spring Snapshots</name>
63             <url>https://repo.spring.io/snapshot</url>
64             <releases>
65                 <enabled>false</enabled>
66             </releases>
67         </repository>
68         <repository>
69             <id>spring-milestones</id>
70             <name>Spring Milestones</name>
71             <url>https://repo.spring.io/milestone</url>
72             <snapshots>
73                 <enabled>false</enabled>
74             </snapshots>
75         </repository>
76     </repositories>
77
78 </project>
第二步、在启动类上增加@EnableFeignClients和@EnableEurekaClient 注解,@EnableFeignClients注解是启用了feign客户端,如果Feign接口与启动类不是在同一个包下,需要增加包的扫描,@EnableFeignClients(basePackages=“com.ssc.demo”)
 1 package com.ssc.demo;
 2
 3 import org.springframework.boot.SpringApplication;
 4 import org.springframework.boot.autoconfigure.SpringBootApplication;
 5 import org.springframework.cloud.netflix.eureka.EnableEurekaClient;
 6 import org.springframework.cloud.openfeign.EnableFeignClients;
 7 @EnableEurekaClient
 8 @SpringBootApplication
 9 @EnableFeignClients
10 public class DemoApplication {
11
12     public static void main(String[] args) {
13         SpringApplication.run(DemoApplication.class, args);
14     }
15
16 }
第三步,创建Feign接口
 1 package com.ssc.demo;
 2
 3 import org.springframework.cloud.openfeign.FeignClient;
 4 import org.springframework.web.bind.annotation.GetMapping;
 5 import org.springframework.web.bind.annotation.RequestMapping;
 6 import org.springframework.web.bind.annotation.RequestMethod;
 7 //@FeignClient注解,这个注解标识当前是一个 Feign 的客户端,value 属性是对应的服务名称,也就是你需要调用哪个服务中的接口。
 8 @FeignClient(value = "eureka-user-provide")
 9 public interface UserRemoteClient {
10 //这个位置的请求路径就是,在这个提供者实例下提供具体服务的路径
11     @RequestMapping(value = "/user/hello",method = RequestMethod.GET)
12     String hello();
13 }
第四步,写消费者调用类
package com.ssc.demo;

import org.springframework.beans.factory.annotation.Autowired;
import org.springframework.web.bind.annotation.GetMapping;
import org.springframework.web.bind.annotation.RestController;

@RestController
public class CallHello {

    @Autowired
    private UserRemoteClient userRemoteClient;
    @GetMapping(value = "/callHello")
    public String calloHello(){
//此时的调用相当于 http://eureka-user-provide/user/hello
        String result=userRemoteClient.hello();
        System.out.println("调用结果:"+result);
        return result;
    }
}
第五步,书写yml配置文件
 1 server:
 2   port: 8099
 3 eureka:
 4   client:
 5     service-url:
 6       defaultZone: http://localhost:8761/eureka
 7   instance:
 8     instance-id: ${spring.application.name}:${spring.cloud.client.ip-address}:${server.port}
 9 spring:
10   application:
11     name: feign-user-consumer
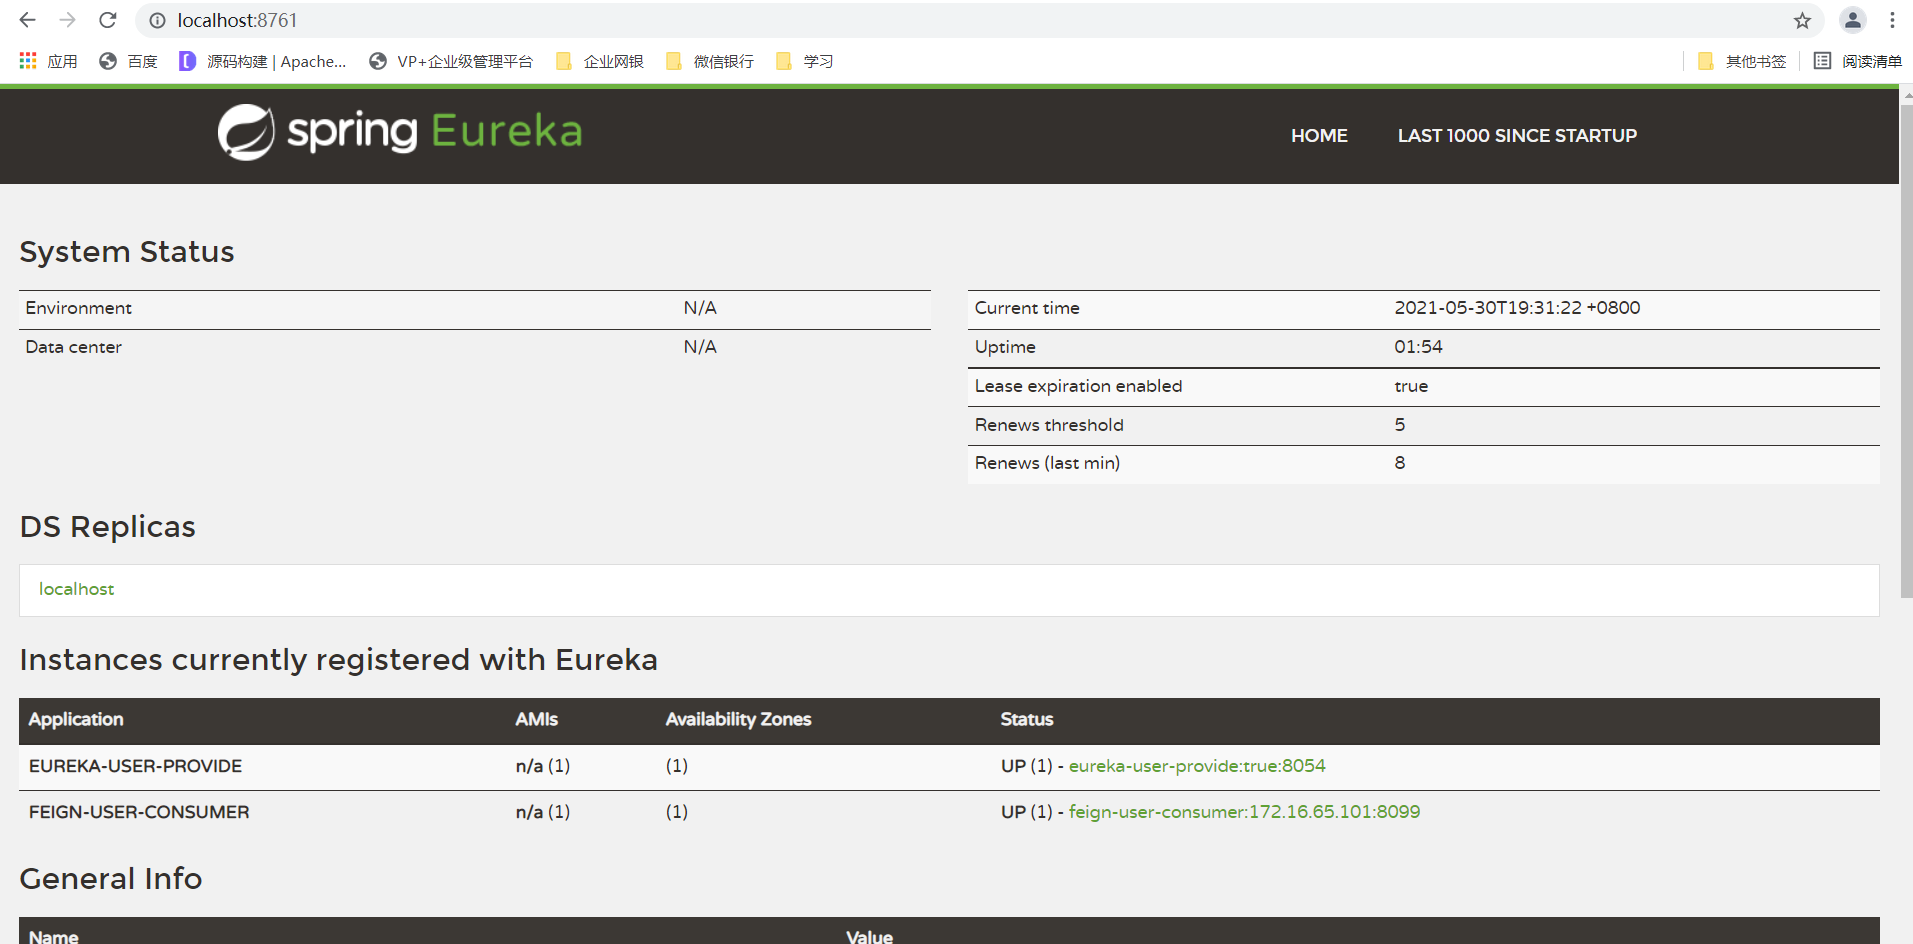
第六步启动应用,调用接口。先查看eureka注册中心

输入请求路径,查看http://127.0.0.1:8099/callHello,成功调用

项目的gitee地址:Feign_demo: 创建一个feign案例 (gitee.com)
