什么是MyBatis
MyBatis是支持定制化SQL、存储过程以及高级映射的优秀的持久层框架。MyBatis 避免了几乎所有的 JDBC 代码和手工设置参数以及抽取结果集。MyBatis 使用简单的 XML 或注解来配置和映射基本体,将接口和 Java 的 POJOs(Plain Old Java Objects,普通的 Java对象)映射成数据库中的记录。
MyBatis简单示例
虽然在使用MyBatis时一般都会使用XML文件,但是本文为了分析程序的简单性,简单的测试程序将不包含XML配置,该测试程序包含一个接口、一个启动类:
public interface UserMapper {
  @Select("SELECT * FROM user WHERE id = #{id}")
  User selectUser(int id);
}

public class Test2 {
	public static void main(String[] args) {
		SqlSessionFactory sqlSessionFactory = initSqlSessionFactory();
		SqlSession session = sqlSessionFactory.openSession();
		try {
			User user = (User) session.selectOne(
					"org.mybatis.example.UserMapper.selectUser", 1);
			System.out.println(user.getUserAddress());
			System.out.println(user.getUserName());
		} finally {
			session.close();
		}
	}

	private static SqlSessionFactory initSqlSessionFactory() {
		DataSource dataSource = new PooledDataSource("com.mysql.jdbc.Driver",
				"jdbc:mysql://127.0.0.1:3306/jdbc", "root", "");
		TransactionFactory transactionFactory = new JdbcTransactionFactory();
		Environment environment = new Environment("development",
				transactionFactory, dataSource);
		Configuration configuration = new Configuration(environment);
		configuration.addMapper(UserMapper.class);
		SqlSessionFactory sqlSessionFactory = new SqlSessionFactoryBuilder()
				.build(configuration);

		return sqlSessionFactory;
	}
}
UserMapper是一个接口,我们在构建sqlSessionFactory时通过configuration.addMapper(UserMapper.class)把该接口注册进了sqlSessionFactory中。从上面的代码中我们可以看出,要使用MyBatis,我们应该经过以下步骤:1、创建sqlSessionFactory(一次性操作);2、用sqlSessionFactory对象构造sqlSession对象;3、调用sqlSession的相应方法;4、关闭sqlSession对象。
在main方法中,我们没有配置sql,也没有根据查询结果拼接对象,只需在调用sqlSession方法时传入一个命名空间以及方法参数参数即可,所有的操作都是面向对象的。在UserMapper接口中,我们定制了自己的sql,MyBatis把书写sql的权利给予了我们,方便我们进行sql优化及sql排错。
JDBC基础回顾
直接使用JDBC是很痛苦的,JDBC连接数据库包含以下几个基本步骤:1、注册驱动 ;2、建立连接(Connection);3、创建SQL语句(Statement);4、执行语句;5、处理执行结果(ResultSet);6、释放资源,示例代码如下:
public static void test() throws SQLException{
    // 1.注册驱动
    Class.forName("com.mysql.jdbc.Driver");

    // 2.建立连接  url格式 - JDBC:子协议:子名称//主机名:端口/数据库名?属性名=属性值&…
    Connection conn = DriverManager.getConnection("jdbc:mysql://localhost:3306/jdbc", "root", "");

    // 3.创建语句
    Statement st = conn.createStatement();

    // 4.执行语句
    ResultSet rs = st.executeQuery("select * from user");

    // 5.处理结果
    while (rs.next()) {
      User user = new User(rs.getObject(1), rs.getObject(2));
    }

    // 6.释放资源
    rs.close();
    st.close();
    conn.close();
}
可以看到与直接使用JDBC相比,MyBatis为我们简化了很多工作:
1、把创建连接相关工作抽象成一个sqlSessionFactory对象,一次创建多次使用;
2、把sql语句从业务层剥离,代码逻辑更加清晰,增加可维护性;
3、自动完成结果集处理,不需要我们编写重复代码。
但是,我们应该知道的是,框架虽然能够帮助我们简化工作,但是框架底层的代码肯定还是最基础的JDBC代码,因为这是Java平台连接数据库的通用方法,今天我将分析一下MyBatis源码,看看MyBatis是如何把这些基础代码封装成一个框架的。
MyBatis调用流程
我们最终调用的是sqlSession对象上的方法,所以我们先跟踪sqlSession的创建方法:sqlSessionFactory.openSession(),最终这个方法会调用到DefaultSqlSessionFactory的以下方法:
private SqlSession openSessionFromDataSource(ExecutorType execType, TransactionIsolationLevel level, boolean autoCommit) {
    Transaction tx = null;
    try {
      final Environment environment = configuration.getEnvironment();
      final TransactionFactory transactionFactory = getTransactionFactoryFromEnvironment(environment);
      tx = transactionFactory.newTransaction(environment.getDataSource(), level, autoCommit);
      final Executor executor = configuration.newExecutor(tx, execType);
      return new DefaultSqlSession(configuration, executor, autoCommit);
    } catch (Exception e) {
      closeTransaction(tx); // may have fetched a connection so lets call close()
      throw ExceptionFactory.wrapException("Error opening session.  Cause: " + e, e);
    } finally {
      ErrorContext.instance().reset();
    }
  }
最终返回的对象是一个DefaultSqlSession对象,在调试模式下,我们看到autoCommit为false,executor为CachingExecutor类型,在CachingExecutor里面有属性delegate,其类型为simpleExecutor:

现在,我们跟进DefaultSqlSession的selectOne()方法,查看该方法的调用流程,selectOne()方法又会调用selectList()方法:
  public <E> List<E> selectList(String statement, Object parameter, RowBounds rowBounds) {
    try {
      MappedStatement ms = configuration.getMappedStatement(statement);
      List<E> result = executor.query(ms, wrapCollection(parameter), rowBounds, Executor.NO_RESULT_HANDLER);
      return result;
    } catch (Exception e) {
      throw ExceptionFactory.wrapException("Error querying database.  Cause: " + e, e);
    } finally {
      ErrorContext.instance().reset();
    }
  }
可以看到要得到查询结果,最终还是要调用executor上的query方法,这里的executor是CachingExecutor实例,跟进程序得到如下代码:
  public <E> List<E> query(MappedStatement ms, Object parameterObject, RowBounds rowBounds, ResultHandler resultHandler) throws SQLException {
    BoundSql boundSql = ms.getBoundSql(parameterObject);
    CacheKey key = createCacheKey(ms, parameterObject, rowBounds, boundSql);
    return query(ms, parameterObject, rowBounds, resultHandler, key, boundSql);
  }

  public <E> List<E> query(MappedStatement ms, Object parameterObject, RowBounds rowBounds, ResultHandler resultHandler, CacheKey key, BoundSql boundSql)
      throws SQLException {
    Cache cache = ms.getCache();
    if (cache != null) {
      flushCacheIfRequired(ms);
      if (ms.isUseCache() && resultHandler == null) {
        ensureNoOutParams(ms, parameterObject, boundSql);
        @SuppressWarnings("unchecked")
        List<E> list = (List<E>) tcm.getObject(cache, key);
        if (list == null) {
          list = delegate.<E> query(ms, parameterObject, rowBounds, resultHandler, key, boundSql);
          tcm.putObject(cache, key, list); // issue #578. Query must be not synchronized to prevent deadlocks
        }
        return list;
      }
    }
    return delegate.<E> query(ms, parameterObject, rowBounds, resultHandler, key, boundSql);
  }
MyBatis框架首先生成了一个boundSql和CacheKey,在boundSql中包含有我们传入的sql语句:

生成boundSql和CacheKey后会调用一个重载函数,在重载函数中,我们会检测是否有缓存,这个缓存是MyBatis的二级缓存,我们没有配置,那么直接调用最后一句delegate.<E> query(ms, parameterObject, rowBounds, resultHandler, key, boundSql),前面说过这个delagate其实就是simpleExecutor,跟进去查看一下:
public <E> List<E> query(MappedStatement ms, Object parameter, RowBounds rowBounds, ResultHandler resultHandler, CacheKey key, BoundSql boundSql) throws SQLException {
    ErrorContext.instance().resource(ms.getResource()).activity("executing a query").object(ms.getId());
    if (closed) throw new ExecutorException("Executor was closed.");
    if (queryStack == 0 && ms.isFlushCacheRequired()) {
      clearLocalCache();
    }
    List<E> list;
    try {
      queryStack++;
      list = resultHandler == null ? (List<E>) localCache.getObject(key) : null;
      if (list != null) {
        handleLocallyCachedOutputParameters(ms, key, parameter, boundSql);
      } else {
        list = queryFromDatabase(ms, parameter, rowBounds, resultHandler, key, boundSql);
      }
    } finally {
      queryStack--;
    }
    if (queryStack == 0) {
      for (DeferredLoad deferredLoad : deferredLoads) {
        deferredLoad.load();
      }
      deferredLoads.clear(); // issue #601
      if (configuration.getLocalCacheScope() == LocalCacheScope.STATEMENT) {
        clearLocalCache(); // issue #482
      }
    }
    return list;
  }
关键代码是以下三行:
      list = resultHandler == null ? (List<E>) localCache.getObject(key) : null;
      if (list != null) {
        handleLocallyCachedOutputParameters(ms, key, parameter, boundSql);
      } else {
        list = queryFromDatabase(ms, parameter, rowBounds, resultHandler, key, boundSql);
      }
首先尝试从localCache中根据key得到List,这里的localCache是MyBatis的一级缓存,如果得不到则调用queryFromDatabase()从数据库中查询:
  private <E> List<E> queryFromDatabase(MappedStatement ms, Object parameter, RowBounds rowBounds, ResultHandler resultHandler, CacheKey key, BoundSql boundSql) throws SQLException {
    List<E> list;
    localCache.putObject(key, EXECUTION_PLACEHOLDER);
    try {
      list = doQuery(ms, parameter, rowBounds, resultHandler, boundSql);
    } finally {
      localCache.removeObject(key);
    }
    localCache.putObject(key, list);
    if (ms.getStatementType() == StatementType.CALLABLE) {
      localOutputParameterCache.putObject(key, parameter);
    }
    return list;
  }
其中关键代码是调用doQuery()代码,SimpleExecutor的doQuery()方法如下:
  public <E> List<E> doQuery(MappedStatement ms, Object parameter, RowBounds rowBounds, ResultHandler resultHandler, BoundSql boundSql) throws SQLException {
    Statement stmt = null;
    try {
      Configuration configuration = ms.getConfiguration();
      StatementHandler handler = configuration.newStatementHandler(wrapper, ms, parameter, rowBounds, resultHandler, boundSql);
      stmt = prepareStatement(handler, ms.getStatementLog());
      return handler.<E>query(stmt, resultHandler);
    } finally {
      closeStatement(stmt);
    }
  }
调用了prepareStatement方法,该方法如下:
  private Statement prepareStatement(StatementHandler handler, Log statementLog) throws SQLException {
    Statement stmt;
    Connection connection = getConnection(statementLog);
    stmt = handler.prepare(connection);
    handler.parameterize(stmt);
    return stmt;
  }
终于,我们看到熟悉的代码了,首先得到Connection,然后从Connection中得到Statement,同时在调试模式下我们看到,我们的sql语句已经被设置到stmt中了:

现在Statement对象有了,sql也设置进去了,就只差执行以及对象映射了,继续跟进代码,我们会跟踪到org.apache.ibatis.executor.statement.
PreparedStatementHandler类的executor方法:
  public <E> List<E> query(Statement statement, ResultHandler resultHandler) throws SQLException {
    PreparedStatement ps = (PreparedStatement) statement;
    ps.execute();
    return resultSetHandler.<E> handleResultSets(ps);
  }
在这里,调用了ps.execute()方法执行sql,接下来调用的resultSetHandler.<E> handleResultSets(ps)方法明显是对结果集进行封装,我就不继续跟进了。
MyBatis的数据库连接池
上面一部分介绍了MyBatis执行的整体流程,这一部分打算讨论一个具体话题:MyBatis的数据库连接池。
我们知道,每次连接数据库时都创建Connection是十分耗费性能的,所以我们在写JDBC代码时,一般都会使用数据库连接池,把用过的Connection不是直接关闭,而是放入数据库连接池中,方便下次复用,开源的数据库连接池有DBCP、C3P0等,MyBatis也实现了自己的数据库连接池,在这一节我将探索一下MyBatis实现的数据库连接池源码。
跟进上一节的getConnection()方法,我们最终会进入JdbcTransaction的getConnection()方法,getConnection()方法又会调用openConnection()方法,而openConnection()又将调用dataSource的getConnection()方法:
public Connection getConnection() throws SQLException {
	if (connection == null) {
		openConnection();
	}
	return connection;
}

protected void openConnection() throws SQLException {
	if (log.isDebugEnabled()) {
		log.debug("Opening JDBC Connection");
	}
	connection = dataSource.getConnection();
	if (level != null) {
		connection.setTransactionIsolation(level.getLevel());
	}
	setDesiredAutoCommit(autoCommmit);
}
这里的dataSource是PooledDataSource类型,跟进查看源码如下:
  public Connection getConnection() throws SQLException {
    return popConnection(dataSource.getUsername(), dataSource.getPassword()).getProxyConnection();
  }

  private PooledConnection popConnection(String username, String password) throws SQLException {
    //暂不分析
  }
可以看到,在这里我们返回的对象其实已经不是原生的Connection对象了,而是一个动态代理对象,是PooledConnection的一个属性,所有对对Connection对象的操作都将被PooledConnection拦截,我们可以查看PooledConnection的定义如下:
class PooledConnection implements InvocationHandler {
	private static final String CLOSE = "close";
	private static final Class<?>[] IFACES = new Class<?>[] { Connection.class };
	private int hashCode = 0;
	private PooledDataSource dataSource;
	private Connection realConnection;
	private Connection proxyConnection;
	private long checkoutTimestamp;
	private long createdTimestamp;
	private long lastUsedTimestamp;
	private int connectionTypeCode;
	private boolean valid;

	public PooledConnection(Connection connection, PooledDataSource dataSource) {
		this.hashCode = connection.hashCode();
		this.realConnection = connection;
		this.dataSource = dataSource;
		this.createdTimestamp = System.currentTimeMillis();
		this.lastUsedTimestamp = System.currentTimeMillis();
		this.valid = true;
		this.proxyConnection = (Connection) Proxy.newProxyInstance(
				Connection.class.getClassLoader(), IFACES, this);
	}

	public void invalidate() {
		valid = false;
	}

	public boolean isValid() {
		return valid && realConnection != null
				&& dataSource.pingConnection(this);
	}

	public Connection getRealConnection() {
		return realConnection;
	}

	public Connection getProxyConnection() {
		return proxyConnection;
	}

	public int getRealHashCode() {
		if (realConnection == null) {
			return 0;
		} else {
			return realConnection.hashCode();
		}
	}

	public int getConnectionTypeCode() {
		return connectionTypeCode;
	}

	public void setConnectionTypeCode(int connectionTypeCode) {
		this.connectionTypeCode = connectionTypeCode;
	}

	public long getCreatedTimestamp() {
		return createdTimestamp;
	}

	public void setCreatedTimestamp(long createdTimestamp) {
		this.createdTimestamp = createdTimestamp;
	}

	public long getLastUsedTimestamp() {
		return lastUsedTimestamp;
	}

	public void setLastUsedTimestamp(long lastUsedTimestamp) {
		this.lastUsedTimestamp = lastUsedTimestamp;
	}

	public long getTimeElapsedSinceLastUse() {
		return System.currentTimeMillis() - lastUsedTimestamp;
	}

	public long getAge() {
		return System.currentTimeMillis() - createdTimestamp;
	}

	public long getCheckoutTimestamp() {
		return checkoutTimestamp;
	}

	public void setCheckoutTimestamp(long timestamp) {
		this.checkoutTimestamp = timestamp;
	}

	public long getCheckoutTime() {
		return System.currentTimeMillis() - checkoutTimestamp;
	}

	public int hashCode() {
		return hashCode;
	}

	public boolean equals(Object obj) {
		if (obj instanceof PooledConnection) {
			return realConnection.hashCode() == (((PooledConnection) obj).realConnection
					.hashCode());
		} else if (obj instanceof Connection) {
			return hashCode == obj.hashCode();
		} else {
			return false;
		}
	}

	public Object invoke(Object proxy, Method method, Object[] args)
			throws Throwable {
		String methodName = method.getName();
		if (CLOSE.hashCode() == methodName.hashCode()
				&& CLOSE.equals(methodName)) {
			dataSource.pushConnection(this);
			return null;
		} else {
			try {
				if (!Object.class.equals(method.getDeclaringClass())) {
					checkConnection();
				}
				return method.invoke(realConnection, args);
			} catch (Throwable t) {
				throw ExceptionUtil.unwrapThrowable(t);
			}
		}
	}

	private void checkConnection() throws SQLException {
		if (!valid) {
			throw new SQLException(
					"Error accessing PooledConnection. Connection is invalid.");
		}
	}
}
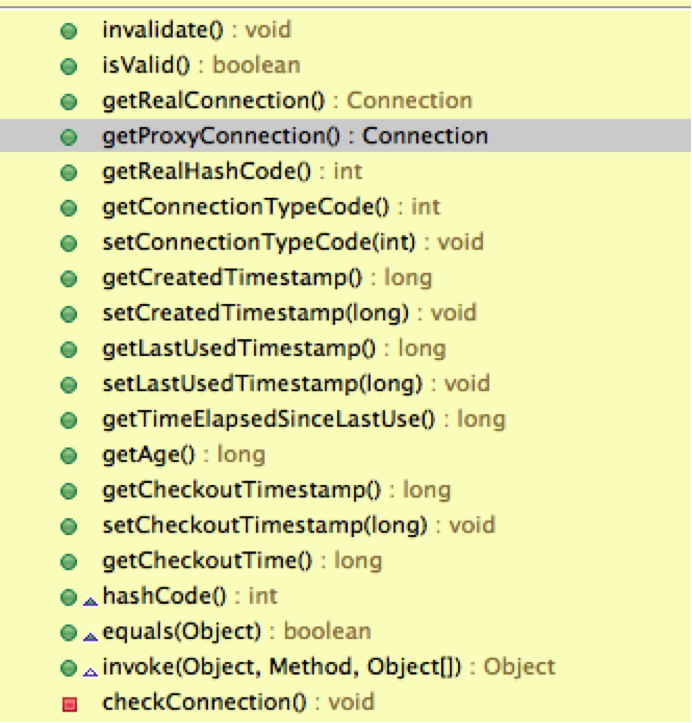
可以看到这个类暴露了很多接口检测Connection状态,例如连接是否有效,连接创建时间最近使用连接等:
这个类实现了InvocationHandler接口,最主要的一个方法如下:
  public Object invoke(Object proxy, Method method, Object[] args) throws Throwable {
    String methodName = method.getName();
    if (CLOSE.hashCode() == methodName.hashCode() && CLOSE.equals(methodName)) {
      dataSource.pushConnection(this);
      return null;
    } else {
      try {
        if (!Object.class.equals(method.getDeclaringClass())) {
          checkConnection();
        }
        return method.invoke(realConnection, args);
      } catch (Throwable t) {
        throw ExceptionUtil.unwrapThrowable(t);
      }
    }
  }
可以看到,PooledConnection会拦截close方法,当客户端调用close()方法时,程序不会关闭Connection,而是会调用dataSource.pushConnection(this)方法,该方法的实现如下:
  protected void pushConnection(PooledConnection conn) throws SQLException {
    synchronized (state) {
      state.activeConnections.remove(conn);
      if (conn.isValid()) {
        if (state.idleConnections.size() < poolMaximumIdleConnections && conn.getConnectionTypeCode() == expectedConnectionTypeCode) {
          state.accumulatedCheckoutTime += conn.getCheckoutTime();
          if (!conn.getRealConnection().getAutoCommit()) {
            conn.getRealConnection().rollback();
          }
          PooledConnection newConn = new PooledConnection(conn.getRealConnection(), this);
          state.idleConnections.add(newConn);
          newConn.setCreatedTimestamp(conn.getCreatedTimestamp());
          newConn.setLastUsedTimestamp(conn.getLastUsedTimestamp());
          conn.invalidate();
          if (log.isDebugEnabled()) {
            log.debug("Returned connection " + newConn.getRealHashCode() + " to pool.");
          }
          state.notifyAll();
        } else {
          state.accumulatedCheckoutTime += conn.getCheckoutTime();
          if (!conn.getRealConnection().getAutoCommit()) {
            conn.getRealConnection().rollback();
          }
          conn.getRealConnection().close();
          if (log.isDebugEnabled()) {
            log.debug("Closed connection " + conn.getRealHashCode() + ".");
          }
          conn.invalidate();
        }
      } else {
        if (log.isDebugEnabled()) {
          log.debug("A bad connection (" + conn.getRealHashCode() + ") attempted to return to the pool, discarding connection.");
        }
        state.badConnectionCount++;
      }
    }
  }
可以看到,首先会把Connection从活跃列表中删除,然后检测空闲列表的长度有没有达到最大长度(默认为5),若没有达到,把Connection放入空闲链表,否则关闭连接。这里的state是一个PoolState对象,该对象定义如下:
public class PoolState {
  protected PooledDataSource dataSource;
  protected final List<PooledConnection> idleConnections = new ArrayList<PooledConnection>();
  protected final List<PooledConnection> activeConnections = new ArrayList<PooledConnection>();
  protected long requestCount = 0;
  protected long accumulatedRequestTime = 0;
  protected long accumulatedCheckoutTime = 0;
  protected long claimedOverdueConnectionCount = 0;
  protected long accumulatedCheckoutTimeOfOverdueConnections = 0;
  protected long accumulatedWaitTime = 0;
  protected long hadToWaitCount = 0;
  protected long badConnectionCount = 0;

  public PoolState(PooledDataSource dataSource) {
    this.dataSource = dataSource;
  }

  public synchronized long getRequestCount() {
    return requestCount;
  }

  public synchronized long getAverageRequestTime() {
    return requestCount == 0 ? 0 : accumulatedRequestTime / requestCount;
  }

  public synchronized long getAverageWaitTime() {
    return hadToWaitCount == 0 ? 0 : accumulatedWaitTime / hadToWaitCount;
  }

  public synchronized long getHadToWaitCount() {
    return hadToWaitCount;
  }

  public synchronized long getBadConnectionCount() {
    return badConnectionCount;
  }

  public synchronized long getClaimedOverdueConnectionCount() {
    return claimedOverdueConnectionCount;
  }

  public synchronized long getAverageOverdueCheckoutTime() {
    return claimedOverdueConnectionCount == 0 ? 0 : accumulatedCheckoutTimeOfOverdueConnections / claimedOverdueConnectionCount;
  }

  public synchronized long getAverageCheckoutTime() {
    return requestCount == 0 ? 0 : accumulatedCheckoutTime / requestCount;
  }

  public synchronized int getIdleConnectionCount() {
    return idleConnections.size();
  }

  public synchronized int getActiveConnectionCount() {
    return activeConnections.size();
  }
}
可以看到最终我们的Connection对象是放在ArrayList中的,该类还提供一些接口返回连接池基本信息。
好了,现在我们可以回去看看PooledDataSource的popConnection方法了:
private PooledConnection popConnection(String username, String password) throws SQLException {
    boolean countedWait = false;
    PooledConnection conn = null;
    long t = System.currentTimeMillis();
    int localBadConnectionCount = 0;

    while (conn == null) {
      synchronized (state) {
        if (state.idleConnections.size() > 0) {
          // Pool has available connection
          conn = state.idleConnections.remove(0);
          if (log.isDebugEnabled()) {
            log.debug("Checked out connection " + conn.getRealHashCode() + " from pool.");
          }
        } else {
          // Pool does not have available connection
          if (state.activeConnections.size() < poolMaximumActiveConnections) {
            // Can create new connection
            conn = new PooledConnection(dataSource.getConnection(), this);
            @SuppressWarnings("unused")
            //used in logging, if enabled
            Connection realConn = conn.getRealConnection();
            if (log.isDebugEnabled()) {
              log.debug("Created connection " + conn.getRealHashCode() + ".");
            }
          } else {
            // Cannot create new connection
            PooledConnection oldestActiveConnection = state.activeConnections.get(0);
            long longestCheckoutTime = oldestActiveConnection.getCheckoutTime();
            if (longestCheckoutTime > poolMaximumCheckoutTime) {
              // Can claim overdue connection
              state.claimedOverdueConnectionCount++;
              state.accumulatedCheckoutTimeOfOverdueConnections += longestCheckoutTime;
              state.accumulatedCheckoutTime += longestCheckoutTime;
              state.activeConnections.remove(oldestActiveConnection);
              if (!oldestActiveConnection.getRealConnection().getAutoCommit()) {
                oldestActiveConnection.getRealConnection().rollback();
              }
              conn = new PooledConnection(oldestActiveConnection.getRealConnection(), this);
              oldestActiveConnection.invalidate();
              if (log.isDebugEnabled()) {
                log.debug("Claimed overdue connection " + conn.getRealHashCode() + ".");
              }
            } else {
              // Must wait
              try {
                if (!countedWait) {
                  state.hadToWaitCount++;
                  countedWait = true;
                }
                if (log.isDebugEnabled()) {
                  log.debug("Waiting as long as " + poolTimeToWait + " milliseconds for connection.");
                }
                long wt = System.currentTimeMillis();
                state.wait(poolTimeToWait);
                state.accumulatedWaitTime += System.currentTimeMillis() - wt;
              } catch (InterruptedException e) {
                break;
              }
            }
          }
        }
        if (conn != null) {
          if (conn.isValid()) {
            if (!conn.getRealConnection().getAutoCommit()) {
              conn.getRealConnection().rollback();
            }
            conn.setConnectionTypeCode(assembleConnectionTypeCode(dataSource.getUrl(), username, password));
            conn.setCheckoutTimestamp(System.currentTimeMillis());
            conn.setLastUsedTimestamp(System.currentTimeMillis());
            state.activeConnections.add(conn);
            state.requestCount++;
            state.accumulatedRequestTime += System.currentTimeMillis() - t;
          } else {
            if (log.isDebugEnabled()) {
              log.debug("A bad connection (" + conn.getRealHashCode() + ") was returned from the pool, getting another connection.");
            }
            state.badConnectionCount++;
            localBadConnectionCount++;
            conn = null;
            if (localBadConnectionCount > (poolMaximumIdleConnections + 3)) {
              if (log.isDebugEnabled()) {
                log.debug("PooledDataSource: Could not get a good connection to the database.");
              }
              throw new SQLException("PooledDataSource: Could not get a good connection to the database.");
            }
          }
        }
      }
    }

    if (conn == null) {
      if (log.isDebugEnabled()) {
        log.debug("PooledDataSource: Unknown severe error condition.  The connection pool returned a null connection.");
      }
      throw new SQLException("PooledDataSource: Unknown severe error condition.  The connection pool returned a null connection.");
    }

    return conn;
  }
可以看到获取Connection一共分以下几种情况:1、如果有空闲Connection,那么直接使用空闲Connection,否则2;2、如果活跃Connection没有达到活跃Connection的上限,那么创建一个新Connection并返回,否则3;3、如果达到活跃上限,且被检出的Connection检出时间过长,那么把该Connection置为失效,新创建一个Connection,否则4;4、等待空闲Connection。
至此,我们就把MyBatis的数据库连接池代码整理了一遍,其中有两个关键点:1、检出的Connection其实不是原生Connection,而是一个代理对象;2、存放Connection的容器是ArrayList,Connection的检出遵从先进先出原则。
MyBatis的缓存
这篇博客讲的很好,mark一下:http://www.cnblogs.com/fangjian0423/p/mybatis-cache.html
MyBatis的事务
首先回顾一下JDBC的事务知识。
JDBC可以操作Connection的setAutoCommit()方法,给它false参数,提示数据库启动事务,在下达一连串的SQL命令后,自行调用Connection的commit()方法,提示数据库确认(Commit)操作。如果中间发生错误,则调用rollback(),提示数据库撤销(ROLLBACK)所有执行。同时,如果仅想要撤回某个SQL执行点,则可以设置存储点(SAVEPOINT)。一个示范的事务流程如下:
Connection conn = ...;
Savepoint point = null;
try {
    conn.setAutoCommit(false);
    Statement stmt = conn.createStatement();
    stmt.executeUpdate("INSERT INTO ...");
    ...
    point = conn.setSavepoint();
    stmt.executeUpdate("INSERT INTO ...");
    ...
    conn.commit();
} catch (SQLException e) {
    e.printStackTrace();
    if (conn != null) {
        try {
            if (point == null) {
                conn.rollback();
            } else {
                conn.rollback(point);
                conn.releaseSavepoint(point);
            }
        } catch (SQLException ex) {
            ex.printStackTrace();
        }
    }
} finally {
    ...
    if (conn != null) {
        try {
            conn.setAutoCommit(true);
            conn.close();
        } catch (SQLException ex) {
            ex.printStackTrace();
        }
    }
}
在MyBatis调用流程一节就写过,在调试模式下,我们看到autoCommit为false,所以每个sqlSession其实都是一个事务,这也是为什么每次做删、改、查时都必须调用commit的原因。