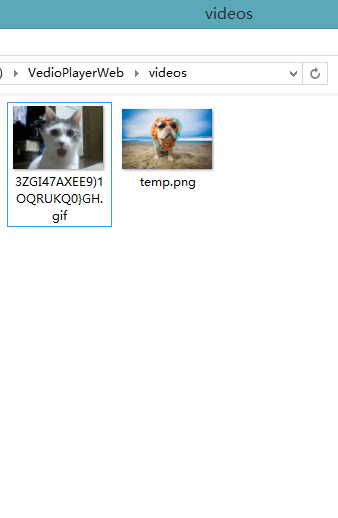

上面是上传结果的展示,下面具体讲一下实现过程。
一、Web Service (.NET)
namespace VedioPlayerWebService.service.vedios
{
    [WebService(Namespace = "http://tempuri.org/")]
    [WebServiceBinding(ConformsTo = WsiProfiles.BasicProfile1_1)]
    [System.ComponentModel.ToolboxItem(false)]
    [System.Web.Script.Services.ScriptService]
    [SoapDocumentService(RoutingStyle = SoapServiceRoutingStyle.RequestElement)]
    public class GetVedios : System.Web.Services.WebService
    {
        [WebMethod(EnableSession = true, Description = "上传文件")]
        public int FileUploadByBase64String(string base64string, string fileName1)
        {
            try
            {
                string fileName = "D:\VedioPlayerWeb\videos\" + fileName1;
                // 取得文件夹
                string dir = fileName.Substring(0, fileName.LastIndexOf("\"));
                //如果不存在文件夹,就创建文件夹
                if (!Directory.Exists(dir))
                    Directory.CreateDirectory(dir);
                byte[] bytes = Convert.FromBase64String(base64string);
                MemoryStream memoryStream = new MemoryStream(bytes, 0, bytes.Length);
                memoryStream.Write(bytes, 0, bytes.Length);
                // 写入文件
                File.WriteAllBytes(fileName, memoryStream.ToArray());
                if (File.Exists(fileName))
                {
                    FileStream fsSource = new FileStream(fileName, FileMode.Open, FileAccess.Read);
                    fsSource.Close();
                }
                //返回数据如果是1,上传成功!
                return 1;
            }
            catch (Exception ex)
            {
                //返回如果是-1,上传失败
                return -1;
            }
        }

    }
}
二、工具类(Android)
1、将要上传的文件转换成经过处理的Base64字符串
 1 /**
 2  *得到经过处理的Base64字符串
 3  * Created by WFZ on 2015/12/7.
 4  */
 5 public class Base64Util {
 6     public static String getBase64String(String path) {
 7         byte[] byteArray = null;
 8         byteArray = Fileutil.readFileToByteArray(new File(path));
 9         String strBase64 = new String(Base64.encode(byteArray,0));
10         return strBase64;
11     }
12 }
2、读取文件的工具类
 1 import java.io.ByteArrayOutputStream;
 2 import java.io.File;
 3 import java.io.FileInputStream;
 4 import java.io.FileNotFoundException;
 5 import java.io.IOException;
 6 /**
 7  * 读取文件的工具类
 8  * Created by WFZ on 2015/12/7.
 9  */
10 public class Fileutil {
11     public static byte[] readFileToByteArray(File file) {
12         FileInputStream fileInputStream = null;
13         ByteArrayOutputStream byteArrayOutputStream = null;
14         try {
15             fileInputStream = new FileInputStream(file);
16             byteArrayOutputStream = new ByteArrayOutputStream();
17             byte[] bt = new byte[1024];
18             int len = 0;
19             while ((len = fileInputStream.read(bt)) != -1) {
20                 byteArrayOutputStream.write(bt, 0, len);
21             }
22             return byteArrayOutputStream.toByteArray();
23         } catch (FileNotFoundException e) {
24             // TODO Auto-generated catch block
25             e.printStackTrace();
26         } catch (IOException e) {
27             // TODO Auto-generated catch block
28             e.printStackTrace();
29         } finally {
30             if (fileInputStream != null) {
31                 try {
32                     fileInputStream.close();
33                 } catch (IOException e) {
34                     // TODO Auto-generated catch block
35                     e.printStackTrace();
36                 }
37             }
38             if (byteArrayOutputStream != null) {
39                 try {
40                     byteArrayOutputStream.close();
41                 } catch (IOException e) {
42                     // TODO Auto-generated catch block
43                     e.printStackTrace();
44                 }
45             }
46         }
47         return null;
48     }
49 }
3、上传文件的工具类,这里需要soap的jar包
 1 import org.ksoap2.SoapEnvelope;
 2 import org.ksoap2.serialization.SoapObject;
 3 import org.ksoap2.serialization.SoapSerializationEnvelope;
 4 import org.ksoap2.transport.HttpTransportSE;
 5
 6 /**
 7  *
 8  * Created by WFZ on 2015/12/7.
 9  */
10 public class QueryUploadUtil {
11     private String filename, base64string;
12
13     public QueryUploadUtil(String base64str, String fileName) {
14         this.filename = fileName;
15         this.base64string = base64str;
16     }
17     // 需要实现Callable的Call方法
18     public String call(String wsdl,String url) throws Exception {
19         String str = "上传失败";
20         // TODO Auto-generated method stub
21         try {
22             //创建SoapObject对象,并指定WebService的命名空间和调用的方法名
23             SoapObject rpc = new SoapObject("http://tempuri.org/",
24                     "FileUploadByBase64String");
25             //设置WebService方法的参数
26             rpc.addProperty("base64string", base64string);
27             rpc.addProperty("fileName1", filename);
28             //第3步:创建SoapSerializationEnvelope对象,并指定WebService的版本
29             SoapSerializationEnvelope envelope = new SoapSerializationEnvelope(
30                     SoapEnvelope.VER11);
31             // 设置bodyOut属性
32             envelope.bodyOut = rpc;
33             envelope.dotNet = true;
34             envelope.setOutputSoapObject(rpc);
35             //创建HttpTransportSE对象,并指定WSDL文档的URL
36             /**
37              * 创建WSDL文档有三种方法:
38              * 在.NET中有三种方式生成WSDL:
39              * 1.在Web Service的URL后面加上WDSL需求,如下:
40              *  http://localhost/webExamples/simpleService.asmx?WSDL
41              * 2.使用disco.exe。在命令行中写下如下的命令:
42              *  disco http://localhost/webExamples/simpleService.asmx
43              *3.使用System.Web.Services.Description命名空间下提供的类
44              * */
45             HttpTransportSE ht = new HttpTransportSE(wsdl);
46             ht.debug = false;
47             //调用WebService
48             ht.call(url, envelope);
49             //使用getResponse方法获得WebService方法的返回结果
50             String result = String.valueOf(envelope.getResponse());
51             //这个地方是我自己设置的从webservice返回的结果,“1”表示上传成功。
52             if (result.toString().equals("1"))
53                 str = "上传成功";
54         } catch (Exception e) {
55             // TODO Auto-generated catch block
56             e.printStackTrace();
57             str = "上传错误";
58         }
59         return str;
60     }
61 }
三、布局文件
 1 <LinearLayout xmlns:android="http://schemas.android.com/apk/res/android"
 2     xmlns:tools="http://schemas.android.com/tools" android:layout_width="match_parent"
 3     android:layout_height="match_parent"
 4     android:orientation="vertical"
 5     tools:context=".MainActivity">
 6     <TextView
 7         android:id="@+id/tv1"
 8         android:layout_width="match_parent"
 9         android:layout_height="wrap_content" />
10     <TextView
11         android:id="@+id/tv2"
12         android:layout_width="match_parent"
13         android:layout_height="wrap_content" />
14     <Button
15         android:id="@+id/btn"
16         android:layout_width="match_parent"
17         android:text="上传"
18         android:layout_height="wrap_content" />
19     <ImageView
20         android:id="@+id/iv"
21         android:layout_width="wrap_content"
22         android:layout_height="wrap_content" />
23     <TextView
24         android:id="@+id/tv3"
25         android:layout_width="match_parent"
26         android:layout_height="wrap_content" />
27 </LinearLayout>
四、MainActivity文件
  1 import android.content.DialogInterface;
  2 import android.graphics.Bitmap;
  3 import android.graphics.BitmapFactory;
  4 import android.os.Handler;
  5 import android.os.Message;
  6 import android.support.v7.app.AppCompatActivity;
  7 import android.os.Bundle;
  8 import android.view.Menu;
  9 import android.view.MenuItem;
 10 import android.view.View;
 11 import android.widget.Button;
 12 import android.widget.ImageView;
 13 import android.widget.TextView;
 14 import android.widget.Toast;
 15
 16 import com.lhgj.wfz.uploadfiles.utils.Base64Util;
 17 import com.lhgj.wfz.uploadfiles.utils.Fileutil;
 18 import com.lhgj.wfz.uploadfiles.utils.QueryUploadUtil;
 19
 20 import java.io.File;
 21
 22 public class MainActivity extends AppCompatActivity {
 23     private TextView tv1 = null;//上传的文件地址
 24     private TextView tv2 = null;//上传的文件名称
 25     private TextView tv3 = null;//上传是否成功提示
 26     private Button btn = null;//上传按钮
 27     private ImageView img = null;//图片
 28     private  String filePath="/data/data/com.lhgj.wfz.uploadfiles/";//手机中文件存储的位置
 29     private String fileName ="temp.jpg";//上传的图片
 30     private String wsdl ="http://192.168.15.4:1122/service/vedios/GetVedios.asmx?WSDL";//WSDL
 31     private String url ="http://192.168.15.4:1122/service/vedios/GetVedios.asmx/FileUploadByBase64String";//与webservice交互的地址
 32
 33     /**
 34      * 由于上传文件是一个耗时操作,需要开一个异步,这里我们使用handle
 35      * */
 36     private Handler handler = new Handler() {
 37         public void handleMessage(android.os.Message msg) {
 38             String string = (String) msg.obj;
 39             Toast.makeText(MainActivity.this, string, Toast.LENGTH_LONG).show();;
 40             tv3.setText(string);
 41         };
 42     };
 43
 44     @Override
 45     protected void onCreate(Bundle savedInstanceState) {
 46         super.onCreate(savedInstanceState);
 47         setContentView(R.layout.activity_main);
 48         initView();
 49     }
 50
 51     /**
 52      * 初始化view
 53      * */
 54     private void initView(){
 55         tv1 = (TextView) findViewById(R.id.tv1);
 56         tv2 = (TextView) findViewById(R.id.tv2);
 57         tv3 = (TextView) findViewById(R.id.tv3);
 58         btn = (Button) findViewById(R.id.btn);
 59         img = (ImageView) findViewById(R.id.iv);
 60
 61         //设置显示的图片
 62         byte[] byteArray = null;
 63         byteArray = Fileutil.readFileToByteArray(new File(filePath+fileName));
 64         Bitmap bitmap = BitmapFactory.decodeByteArray(byteArray, 0,
 65                 byteArray.length);
 66         img.setImageBitmap(bitmap);
 67
 68         //设置显示的文本
 69         tv1.setText("文件位置:" + filePath);
 70         tv2.setText("文件名称" + fileName);
 71
 72         btn.setOnClickListener(new BtnOnclickListener());
 73     }
 74
 75     /**
 76      * ImageView的事件响应
 77      * */
 78     private class BtnOnclickListener implements View.OnClickListener{
 79
 80         @Override
 81         public void onClick(View v) {
 82             new Thread(new Runnable() {
 83
 84                 @Override
 85                 public void run() {
 86                     // TODO Auto-generated method stub
 87                     Message message = Message.obtain();
 88                     String result="";
 89                     try {
 90                         QueryUploadUtil quu = new QueryUploadUtil(Base64Util.getBase64String(filePath+fileName), "temp.png");
 91                         result= quu.call(wsdl,wsdl);
 92                     } catch (Exception e) {
 93                         // TODO Auto-generated catch block
 94                         e.printStackTrace();
 95                     }
 96                     message.obj=result;
 97                     handler.sendMessage(message);
 98                 }
 99             }).start();
100         }
101     }
102 }
可以去我的github上下载Demo,两个文件:一个Android客户端,一个服务端。下载地址:https://github.com/weifengzz/UploadFile_1