环境搭建,我用的是Ubuntu18.04.python3自行安装。
pip3 install pyqt5 -i https://pypi.douban.com/simple
安装pyqt5包。
sudo apt install pyqt5*
安装所有依赖。
sudo apt install qttools5-dev-tools
安装Qt设计师。
书中用的是eric6,但是我下载下来这个图标是一个蛇头,懒得换,挺吓人的,我还是用我的pycharm吧。我觉得功能也能补全。
接下来配置pycharm。
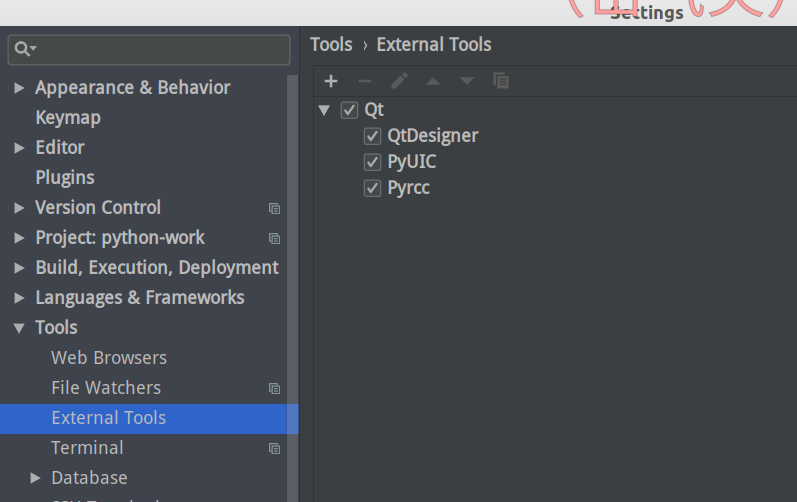
在设置中找到external tools, 然后点击加号。

name:QtDesigner(名字取自己喜欢的就好)
group:Qt(就是一个组,也是自己取。)
program:/usr/lib/x86_64-linux-gnu/qt5/bin/designer(QtDesigner的路径)
arguments:$FileName$
working directory:$ProjectFileDir$

然后再添加一个,这个可以使ui文件转为py文件。
name:PyUIC(名字取自己喜欢的就好)
group:Qt(就是一个组,也是自己取。)
program:/usr/bin/python3(python3的路径)
arguments:-m PyQt5.uic.pyuic $FileName$ -o $FileNameWithoutExtension$.py
working directory:$FileDir$

好吧,再来一个,我们今后会用到的,把qrc文件转为py文件。
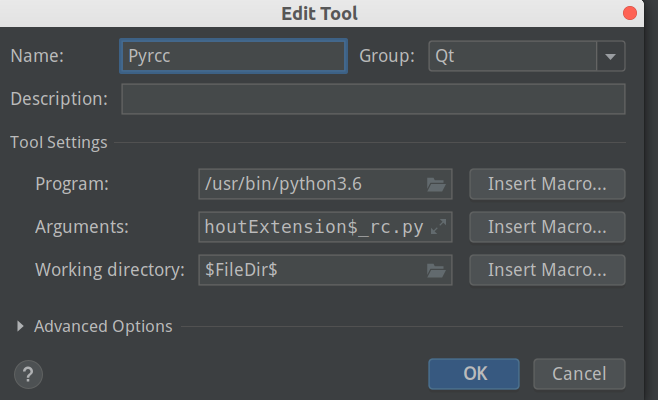
name:Pyrcc(名字取自己喜欢的就好)
group:Qt(就是一个组,也是自己取。)
program:/usr/bin/python3(python3的路径)
arguments:-m PyQt5.pyrcc_main $FileName$ -o $FileNameWithoutExtension$.py
working directory:$FileDir$

配置完毕。
然后建立2个模板,以后可能会用到。
打开Qt设计师,新建一个窗口。

然后保存,查看源代码。
<?xml version="1.0" encoding="UTF-8"?>
<ui version="4.0">
 <class>MainWindow</class>
 <widget class="QMainWindow" name="MainWindow">
  <property name="geometry">
   <rect>
    <x>0</x>
    <y>0</y>
    <width>800</width>
    <height>600</height>
   </rect>
  </property>
  <property name="windowTitle">
   <string>MainWindow</string>
  </property>
  <widget class="QWidget" name="centralwidget"/>
  <widget class="QMenuBar" name="menubar">
   <property name="geometry">
    <rect>
     <x>0</x>
     <y>0</y>
     <width>800</width>
     <height>32</height>
    </rect>
   </property>
  </widget>
  <widget class="QStatusBar" name="statusbar"/>
 </widget>
 <resources/>
 <connections/>
</ui>
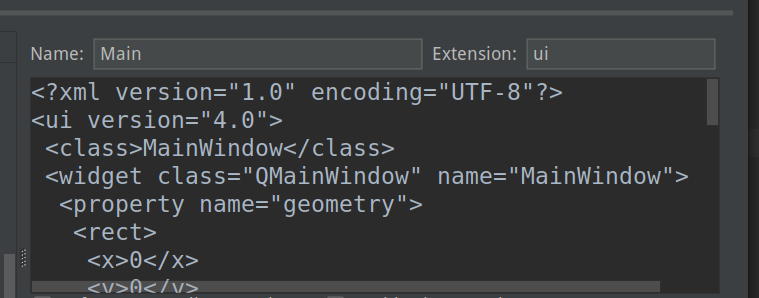
复制代码,在pycharm中依次点击file-》new-》-》edit file template-》点击+号
将复制的代码粘贴到此处。
编辑如下:

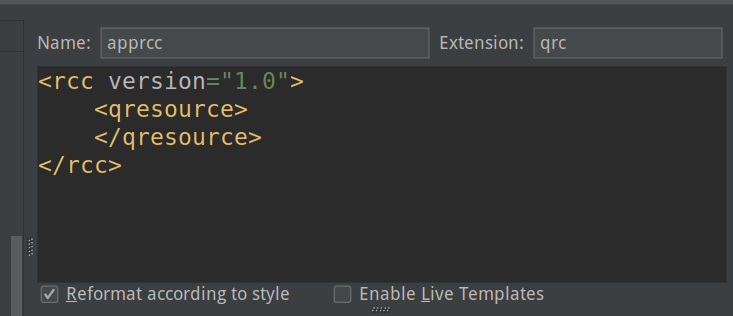
我们再添加一个资源模板,如果看书以后你就会知道资源模板了。
在Pycharm中操作跟上边一样,但是最后需要编辑如下:

OK,现在对于QT已经可以非常好的应用了。