碎片(Fragment)是一种可以嵌入活动当中的UI片段,它能让程序更加合理和充分地利用大屏幕的空间,因此碎片在平板上的应用非常广泛。
你可以将碎片理解成一个迷你型的活动,水平同样可能包含布局,同样都有自己的生命周期。。。

上面的例子中,移动设备使用两个活动装载布局,而平板电脑的布局分别放在两个碎片中,然后在同一个活动里引入这两个碎片。
----------------------------------------------------碎片的简单用法--------------------------------------------------
新建两个布局,left_fragment.xml 和 right_fragment.xml(随便写点,能够区分开就行)
这是我创建的两个fragment:


接着创建一个LeftFragment类,继承自Fragment。重写onCreateView方法,代码如下:
public class LeftFragment extends Fragment {
    @Nullable
    @Override
    public View onCreateView(LayoutInflater inflater, ViewGroup container, Bundle savedInstanceState) {

        //return super.onCreateView(inflater, container, savedInstanceState);
        return inflater.inflate(R.layout.left_fragment, container, false);
    }
}
这里仅仅是重写了Fragment的onCreateView()方法。然后在这个方法中通过LayoutInflater的inflater()方法将刚才定义的left_fragment布局动态加载进来。
方法简单明了,试着用同样的原理新建一个RightFragment。
至此,碎片已经创建完毕,现在可以使用<fragment>标签在activity_main布局中添加碎片:
<?xml version="1.0" encoding="utf-8"?>
<LinearLayout xmlns:android="http://schemas.android.com/apk/res/android"
    android:layout_width="match_parent"
    android:layout_height="match_parent"
    android:orientation="horizontal">

    <fragment
        android:id="@+id/left_fragment"
        android:name="com.example.dudon.fragmenttest.LeftFragment"
        android:layout_width="wrap_content"
        android:layout_height="match_parent"
        android:layout_weight="1" />

    <fragment
        android:id="@+id/right_fragment"
        android:name="com.example.dudon.fragmenttest.RightFragment"
        android:layout_width="wrap_content"
        android:layout_height="match_parent"
        android:layout_weight="1" />
</LinearLayout>
使用<fragment>向布局中添加碎片需要通过:android:name 属性来显示指明要添加的碎片类名,注意一定要将类的包名也加上。
最终效果:
-------------------------------------------------动态添加碎片--------------------------------------------------
动态添加碎片主要分为五步:

  1.  创建待添加的碎片实例。

  2.  获取到 FragmentManager,在活动中可以直接调用getFragmentManager()方法得到。

  3.  开启一个事务,通过调用beginTransaction()方法开启。

  4.  向容器内加入碎片,一般使用replace()方法实现,需要传入容器的id和待添加的碎片实例。

  5.  提交事务,调用 commit()方法来完成。
新建一个布局 another_right_fragment.xml 效果如下:

然后新建一个AnotherRightFragment作为另一个右侧碎片,代码如下所示:
public class AnotherRightFragment extends Fragment {
    public View onCreateView(LayoutInflater inflater, ViewGroup container, Bundle savedInstanceState) {
        return inflater.inflate(R.layout.another_right_fragment, container, false);
    }
}
这样我们就准备好了另一个碎片,接下来将它动态的添加到活动中。
修改 activity_main.xml,代码如下所示:
<?xml version="1.0" encoding="utf-8"?>
<LinearLayout xmlns:android="http://schemas.android.com/apk/res/android"
    android:layout_width="match_parent"
    android:layout_height="match_parent"
    android:orientation="horizontal">

    <fragment
        android:id="@+id/left_fragment"
        android:name="com.example.dudon.fragmenttest.LeftFragment"
        android:layout_width="wrap_content"
        android:layout_height="match_parent"
        android:layout_weight="1" />

    <FrameLayout
        android:id="@+id/right_layout"
        android:layout_width="wrap_content"
        android:layout_height="match_parent"
        android:layout_weight="1">

        <fragment
            android:id="@+id/right_fragment"
            android:name="com.example.dudon.fragmenttest.RightFragment"
            android:layout_width="match_parent"
            android:layout_height="match_parent" />
    </FrameLayout>

</LinearLayout>
现在将右侧碎片放在了一个FrameLayout中(FrameLayout中的所有控件都会摆放在布局的左上角)由于这里仅需要在布局里放入一个碎片,因此非常适合使用FrameLayout。
但是,我在这里使用FrameLayout并不表示 fragment 必须使用 FrameLayout。
修改MainActivity中的代码,从而实现动态添加碎片的功能。核心代码如下:
                //实例化动态碎片
                AnotherRightFragment fragment = new AnotherRightFragment();
                //获取FragmentManger
                FragmentManager fragmentManager = getFragmentManager();
                //开启一个事务,通过调用beginTransaction开启
                FragmentTransaction transaction = fragmentManager.beginTransaction();
                //更改FrameLayout中的碎片,并提交
                transaction.replace(R.id.right_layout, fragment);
                transaction.commit();
完整代码:
public class MainActivity extends Activity implements View.OnClickListener {
    @Override
    protected void onCreate(Bundle savedInstanceState) {
        super.onCreate(savedInstanceState);
        setContentView(R.layout.activity_main);
        ImageView imageView = (ImageView)findViewById(R.id.rocket);
        imageView.setOnClickListener(this);
    }

    @Override
    public void onClick(View v) {
        switch (v.getId()){
            case R.id.rocket:
                AnotherRightFragment fragment = new AnotherRightFragment();
                FragmentManager fragmentManager = getFragmentManager();
                FragmentTransaction transaction = fragmentManager.beginTransaction();
                transaction.replace(R.id.right_layout, fragment);
                transaction.commit();
                break;
            default:
                break;
        }
    }
}
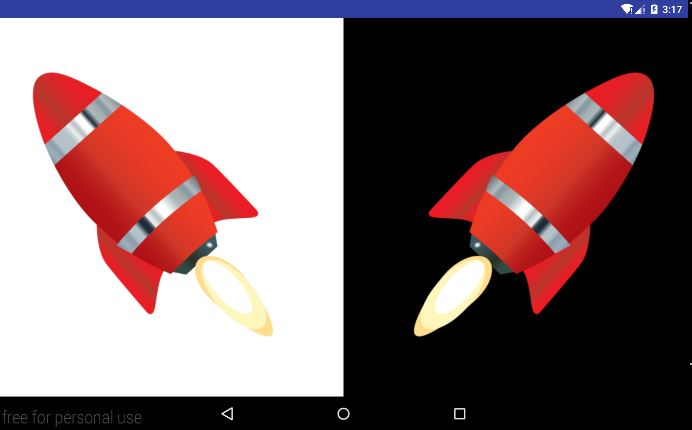
最终效果(点击左侧小火箭之后):

====================Fragment扩展========================
-----------------------------------------模拟返回栈------------------------------------------
虽然现在成功实现了向活动中动态添加碎片的功能,但是添加完碎片之后,按下Back键程序就会直接退出。而我希望按下Back程序能够返回上一个碎片。
其实很简单,FragmentTransaction中提供了一个addToBackStack()方法,可以用于将一个事务添加到返回栈中,代码如下:
private void analogStack() {
        AnotherRightFragment fragment = new AnotherRightFragment();
        FragmentManager fragmentManager = getFragmentManager();
        //开启一个事务,通过调用beginTransaction开启
        FragmentTransaction transaction = fragmentManager.beginTransaction();
        transaction.replace(R.id.right_layout, fragment);
        //addToBackStack()方法用于将一个事务添加到返回栈中
        transaction.addToBackStack(null);
        transaction.commit();
    }
重新运行程序,并点击按钮将 AnotherRightFragment 添加到活动中,然后按下Back键,你会发现程序并没有退出,而是回到了RightFragment界面,再次按下Back键程序才会退出。
----------------------------------------碎片与活动通信------------------------------------------
虽然碎片都是嵌入在活动中显示的,可实际上它们的关系并没有那么亲密。碎片和活动都是各自存在于一个独立的类当中的,它们之间并没有那么明显的方式来直接进行通信。
如果想要在活动中调用碎片的方法,或者在碎片中调用活动里的方法,应该如何实现呢?
为了方便碎片和活动之间进行通信,FragmentManager 提供了一个类似于 findViewById()的方法,专门用于从布局文件中获取碎片的实例:
RightFragment rightFragment = (RightFragment) getFragmentManager().findFragmentById( R.id.right_fragment );
调用FragmentManager的findFragmentById()方法,可以在活动中得到相应碎片的实例,然后就能轻松地调用碎片里的方法了。
在每个碎片中都可以通过调用getActivity()方法来得到和当前碎片相关联的活动实例:
MainActivity activity = (MainActivity) getActivity();
有了活动实例之后,就能够在碎片中调用活动里的方法了。当碎片中需要Context对象时,也可使用getActivity()方法,因为获取到的活动本身就是一个Context对象。
---------------------------------------碎片的生命周期----------------------------------------------
碎片的生命周期类似活动,每个碎片在其生命周期都会经历 运行状态、暂停状态、停止状态、销毁状态。
运行状态:
当一个碎片是可见的,并且它所关联的活动正处于运行状态时,该碎片也处于运行状态。
暂停状态:
当一个活动进入暂停状态时(由于另一个未占屏幕的活动被添加到了栈顶),与它关联的可见碎片就会进入到暂停状态。
停止状态:
当一个活动进入停止状态时,与它关联的碎片就会进入到停止状态。(或者通过FragmentTransaction 的 remove()、replace()方法将碎片从活动中移除),停止状态的碎片对用户来说完全不可见,有可能会被系统回收。
销毁状态:
碎片总是依附于活动而存在的,因此当活动被销毁时,与它相关联的碎片就会进入到销毁状态。
同样,Fragment类中也提供了一系列的回调方法,以覆盖碎片什么周期的每个环节。
onAttach(): 当碎片和活动建立关联的时候调用。
onCreateView(): 为碎片创建视图(加载布局)时调用。
onActivityCreated(): 确保与碎片相关的活动已经创建完毕的时候调用。
onDestroyView(): 当与碎片关联的视图被移除的时候调用。
onDetach(): 当碎片和活动解除关联的时候调用。