更新ubuntu源
/etc/apt/sources.list
Cp /etc/apt/sources.list /etc/apt/sources.list.bak备份
修改vim /etc/apt/sources.list
将其中的数据修改为最新的源镜像地址
deb http://mirrors.aliyun.com/ubuntu/ bionic main restricted universe multiverse
deb-src http://mirrors.aliyun.com/ubuntu/ bionic main restricted universe multiverse
deb http://mirrors.aliyun.com/ubuntu/ bionic-security main restricted universe multiverse
deb-src http://mirrors.aliyun.com/ubuntu/ bionic-security main restricted universe multiverse
deb http://mirrors.aliyun.com/ubuntu/ bionic-updates main restricted universe multiverse
deb-src http://mirrors.aliyun.com/ubuntu/ bionic-updates main restricted universe multiverse
deb http://mirrors.aliyun.com/ubuntu/ bionic-proposed main restricted universe multiverse
deb-src http://mirrors.aliyun.com/ubuntu/ bionic-proposed main restricted universe multiverse
deb http://mirrors.aliyun.com/ubuntu/ bionic-backports main restricted universe multiverse
deb-src http://mirrors.aliyun.com/ubuntu/ bionic-backports main restricted universe multiverse
之后执行 apt-get update
Unbuntu安装LAMP服务
Step1:安装apache
Apt install apache2 -y

默认的配置文件: /etc/apache2/site-enabled/000-defult.conf
默认安装源码的位置:/var/www.html
安装完成,从宿主机浏览器进入虚拟机的地址能看到

Step2:安装mysql
apt install mysql-server -y

Mysql -uroot -proot 登录mtsql数据库
Showdatebases 查看所有的数据库
使用navicat连接数据库
修改配置文件 gedit /etc/mysql/mysql.conf.d/mysqld.cnf
Bind-address = 127.0.0.1 注释掉
mysql>grant all on *.* to root@'%' identified by '你的密码' with grant option;
mysql>flush privileges;
重启数据库
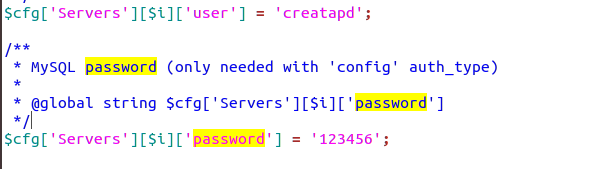
CREATE USER '用户名'@'localhost' IDENTIFIED BY '123456';
GRANT ALL PRIVILEGES ON *.* TO '用户名'@'localhost' WITH GRANT OPTION;
FLUSH PRIVILEGES;
gedit /var/www/html/phpmyadmin/libraries/config.default.php
之后就能登陆
Step3:
安装PHP
apt install php -y
我这里遇到了问题,提示

这里我选择的解决方法是强制解锁,
执行 rm /var/cache/apt/archives/lock
Rm /var/lib/dpkg/lock

之后再次运行apt install php -y
(或者apt install php7.0 php-pear libapache2-mod-php7.0 php7.0-mysql安装php及其扩展
Apt install php7.0-curl php7.0-json php7.0-cgi安装php组件
)

更改php代码
打开开/etc/apache2/mods-enabled/dir.conf
在其中将主目录设置为index.php

重启apache服务器
Systemctl restart apache2

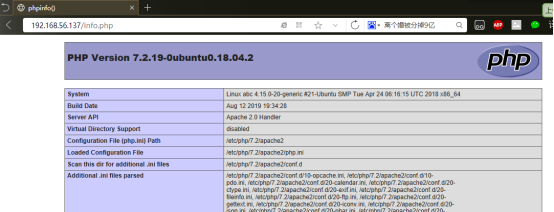
创建info文件
进入/var/www/html,创建info.php,里面输入调用
<?php
phpinfo();
?>
删除index.html

打开网页,输入虚拟机ip,进入php
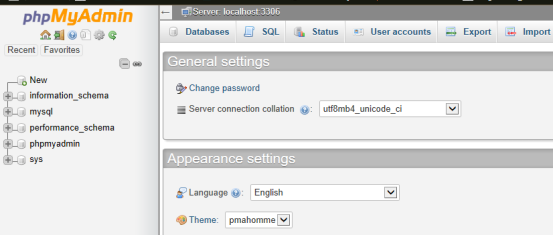
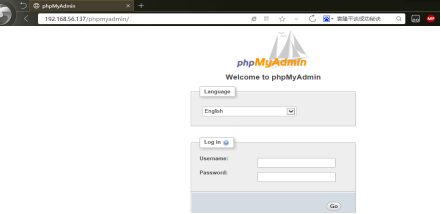
安装phpmyadmin,基于web形式的管理mysql数据库的平台
Apt install phpmyadmin
安装过程中根据提示进行设置
之后将/usr/share/phpmyadmin放在 /var/www/html下,使用软连接将其放入
ln -s /usr/share/phpmyadmin /var/www/html/phpmyadmin
之后打开浏览器输入地址localhost/phpmyadmin/,可以看到 (localhos为虚拟机地址)
Windows Server2008R2的安装
服务一:IIS Internet information service,互联网信息服务
Windows server 2003、xp使用的iis6
Windows server2008、win7使用的iis7.0
Step1:

FTP服务器,file transfer protocol 文件传输协议,基于C/S模式,应用层,端口为20,21
20负责传输数据,21负责传输命令
1、ip地址可以静态配置也可以动态获取
2、FTP服务器运行在IIS智商
非隔离帐号的搭建
Step1:安装IIS,注意FTP觉得的安装
step2:打开IIS管理器,右击网站,创建FTP站点,选择不隔离用户。
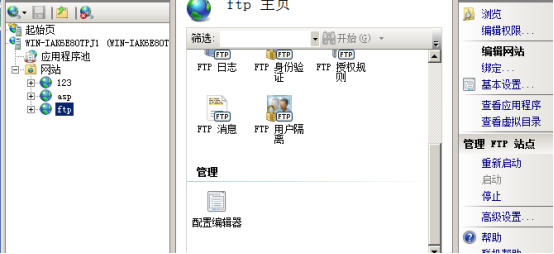
Step3:确定主目录路径,配置读取写入权限
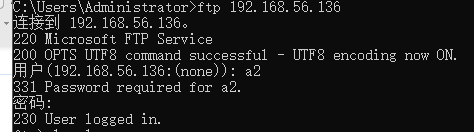
Step4:从客户端访问 ftp://localhost:port (localhost为服务端ip)
打开客户端终端,ftp ip即可进入
隔离帐号搭建
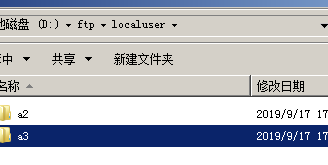
Step1:先添加好两个用户,在主目录创建localuser,再在其中创建两个与用户同名的文件夹,分别放入测试文档
Step2:新建FTP服务器,选择隔离用户,路径选择主目录

Step3:使用同上方式进行登录测试