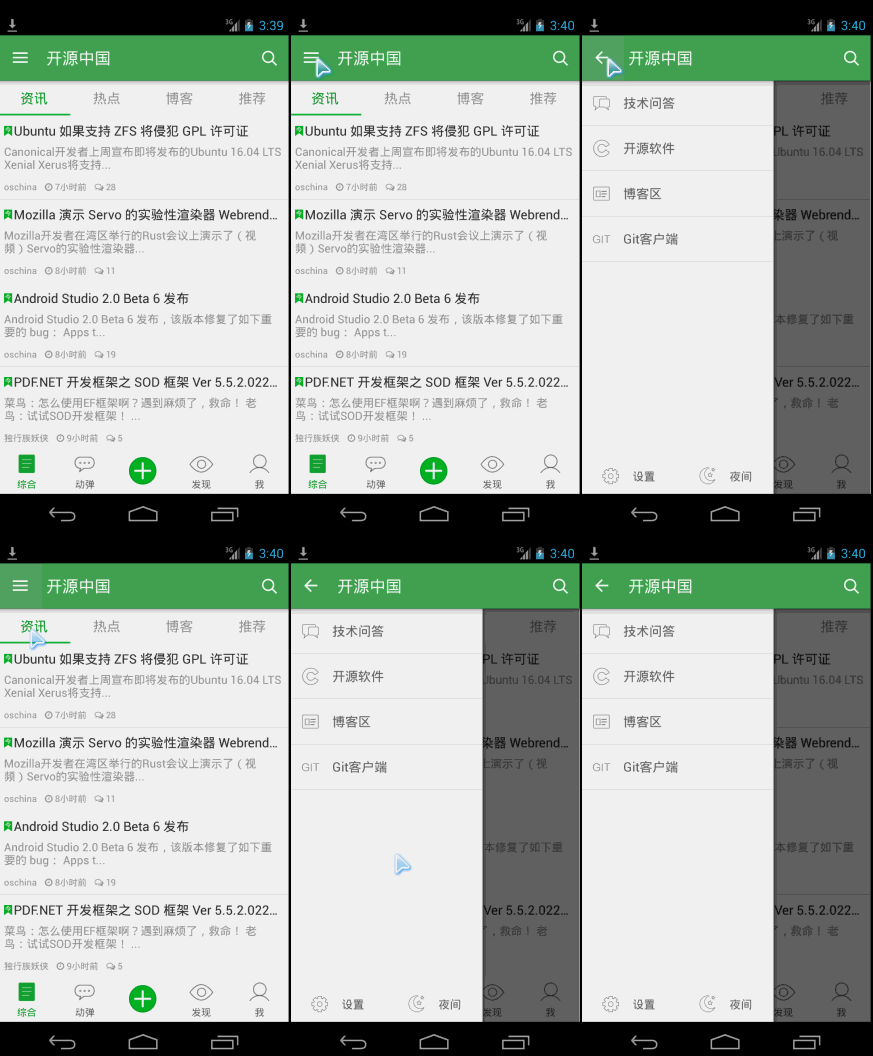
从启动界面到主界面之后的效果如图所示,采用的是v4包下的DrawerLayout, activity_main.xml文件如下:
<!-- A DrawerLayout is intended to be used as the top-level content view using match_parent for both width and height to consume the full space available. --><android.support.v4.widget.DrawerLayoutandroid:id="@+id/drawer_layout"xmlns:android="http://schemas.android.com/apk/res/android"xmlns:tools="http://schemas.android.com/tools"android:layout_width="match_parent"android:layout_height="match_parent"tools:context="net.oschina.app.ui.MainActivity"><LinearLayoutandroid:layout_width="match_parent"android:layout_height="match_parent"android:orientation="vertical"><FrameLayoutandroid:id="@+id/realtabcontent"android:layout_width="match_parent"android:layout_height="0dip"android:layout_weight="1"/><FrameLayoutandroid:layout_width="match_parent"android:layout_height="wrap_content"android:background="?attr/windows_bg"><RelativeLayoutandroid:layout_width="match_parent"android:layout_height="wrap_content"android:layout_marginBottom="4dip"><net.oschina.app.widget.MyFragmentTabHostandroid:id="@android:id/tabhost"android:layout_width="match_parent"android:layout_height="wrap_content"android:layout_marginTop="4dip"/><Viewandroid:layout_width="match_parent"android:layout_height="1px"android:background="?attr/lineColor"/></RelativeLayout><!-- 快速操作按钮 --><ImageViewandroid:id="@+id/quick_option_iv"android:layout_width="wrap_content"android:layout_height="wrap_content"android:layout_gravity="center"android:contentDescription="@null"android:src="@drawable/btn_quickoption_selector"/></FrameLayout></LinearLayout><!-- 左侧侧滑菜单 --><fragmentandroid:id="@+id/navigation_drawer"android:name="net.oschina.app.ui.NavigationDrawerFragment"android:layout_width="@dimen/navigation_drawer_width"android:layout_height="match_parent"android:layout_gravity="start"tools:layout="@layout/fragment_navigation_drawer"/></android.support.v4.widget.DrawerLayout>
侧边栏布局fragment_navigation_drawer.xml的定义:
<LinearLayout xmlns:android="http://schemas.android.com/apk/res/android"android:layout_width="match_parent"android:layout_height="match_parent"android:orientation="vertical"android:background="?attr/layout_bg_normal" ><net.oschina.app.widget.CustomerScrollViewandroid:layout_width="match_parent"android:layout_height="0dip"android:layout_weight="1"><include layout="@layout/fragment_navigation_drawer_items"/></net.oschina.app.widget.CustomerScrollView ><include layout="@layout/fragment_navigation_drawer_foot"/></LinearLayout>
fragment_navigation_drawer_items.xml和fragment_navigation_drawer_foot.xml的布局比较简单,不再赘述。
主要介绍自定义控件CustomerScollView,继承了ScrollView:
package net.oschina.app.widget;import android.annotation.SuppressLint;import android.content.Context;import android.graphics.Rect;import android.util.AttributeSet;import android.view.MotionEvent;import android.view.View;import android.view.animation.TranslateAnimation;import android.widget.ScrollView;/*** 可以拖动的ScrollView**/public class CustomerScrollView extends ScrollView {private static final int size = 4;private View inner;private float y;private Rect normal = new Rect();public CustomerScrollView(Context context) {super(context);}public CustomerScrollView(Context context, AttributeSet attrs) {super(context, attrs);}@Overrideprotected void onFinishInflate() {if (getChildCount() > 0) {inner = getChildAt(0);}}@SuppressLint("ClickableViewAccessibility")@Overridepublic boolean onTouchEvent(MotionEvent ev) {if (inner == null) {return super.onTouchEvent(ev);} else {commOnTouchEvent(ev);}return super.onTouchEvent(ev);}public void commOnTouchEvent(MotionEvent ev) {int action = ev.getAction();switch (action) {case MotionEvent.ACTION_DOWN:y = ev.getY();break;case MotionEvent.ACTION_UP:if (isNeedAnimation()) {// Log.v("mlguitar", "will up and animation");animation();}break;case MotionEvent.ACTION_MOVE:final float preY = y;float nowY = ev.getY();/*** size=4 表示 拖动的距离为屏幕的高度的1/4*/int deltaY = (int) (preY - nowY) / size;// 滚动// scrollBy(0, deltaY);y = nowY;if (isNeedMove()) {if (normal.isEmpty()) {normal.set(inner.getLeft(), inner.getTop(),inner.getRight(), inner.getBottom());return;}int yy = inner.getTop() - deltaY;// 移动布局inner.layout(inner.getLeft(), yy, inner.getRight(),inner.getBottom() - deltaY);}break;default:break;}}public void animation() {TranslateAnimation ta = new TranslateAnimation(0, 0, inner.getTop(),normal.top);ta.setDuration(200);inner.startAnimation(ta);inner.layout(normal.left, normal.top, normal.right, normal.bottom);normal.setEmpty();}public boolean isNeedAnimation() {return !normal.isEmpty();}public boolean isNeedMove() {int offset = inner.getMeasuredHeight() - getHeight();int scrollY = getScrollY();if (scrollY == 0 || scrollY == offset) {return true;}return false;}}
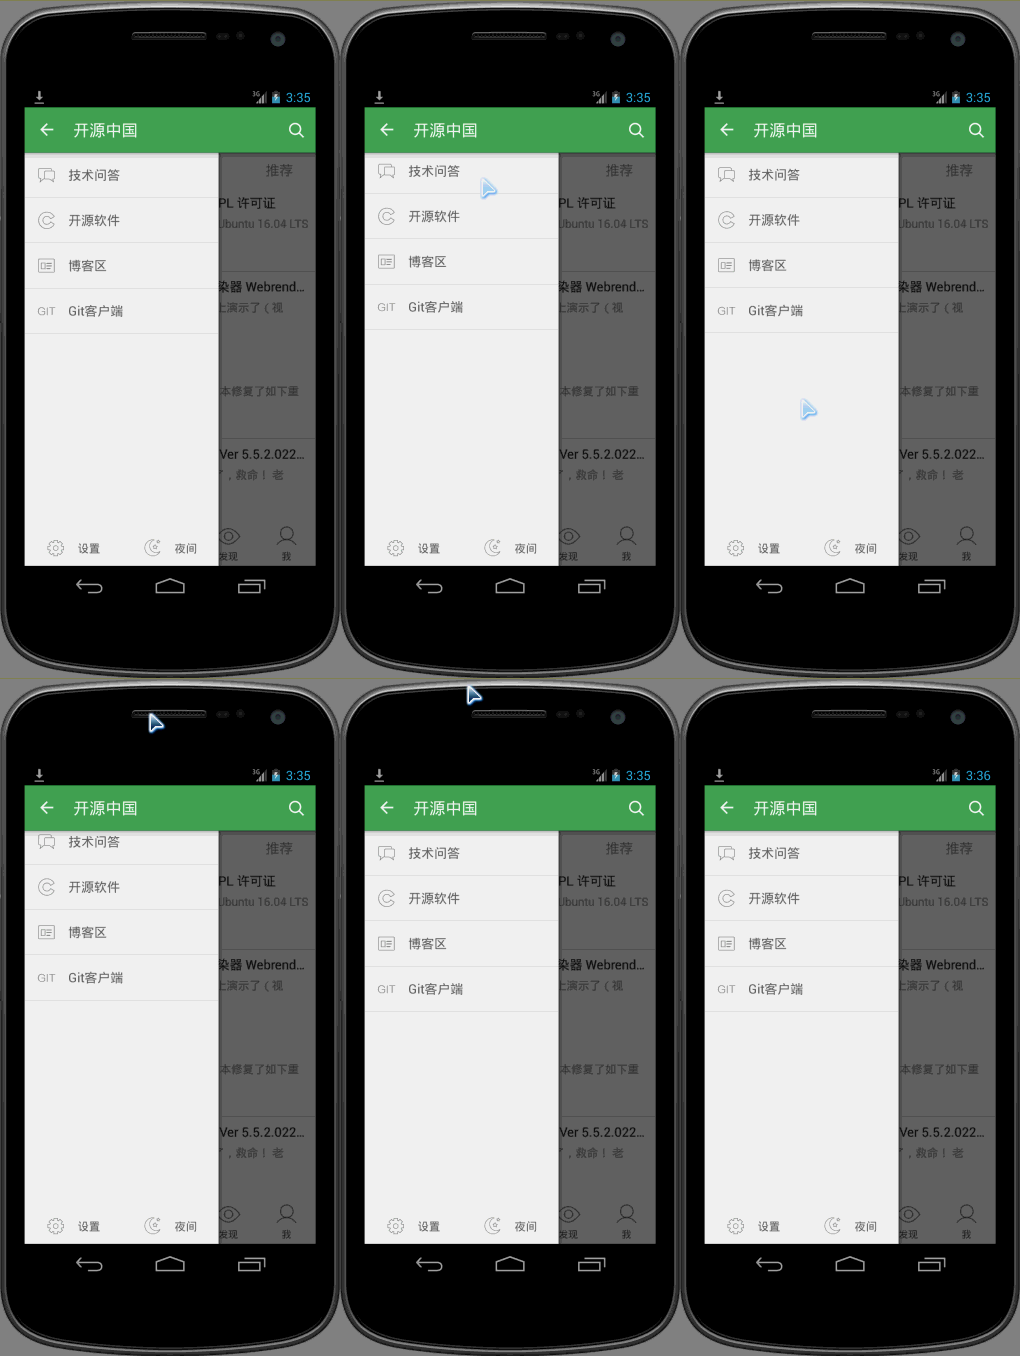
再来看看效果:
可以看到向上滑动的时候,会有明显回弹的效果。
oschina客户端滑动菜单的View的布局使用了可以拖拽的ScrollView,类文件为CustomerScrollView。
- 拖拽的目标是ScrollView内的菜单的布局View,所以在CustomerScrollView内的onFinishInflate()函数中首先通过getChildAt(0)来获取菜单布局的View,这就是第一步的目标是获取要拖拽的对象。onFinishInflate()加载完view,这里的View指的就是源码中<include layout="@layout/fragment_navigation_drawer_items"/>加载的布局文件。
- 拖拽的过程实际上是一个“按下-移动-抬起”的过程,因此要重写onTouchEvent(MotionEvent ev),其中移动过程实际上是将菜单view按照移动的方向和距离,怎么实现这个功能呢?源码中最关键的就是这行代码inner.layout(inner.getLeft(), yy, inner.getRight(),inner.getBottom() - deltaY);这个方法四个参数都是inner相对其父控件ScrollView的坐标原点而言的。不是很了解的,可以专门查查坐标的相关知识。
- 当手指抬起也就是MotionEvent.ACTION_UP事件发生时,将拖拽后的view恢复移动到原来位置,移动过程附加了一个动画,由于移动实际上是位置发生了变化,因此用到了TranslateAnimation,因为是上下拖拽,所以X的起始和终止坐标都是0,Y的起始和终止坐标至于为什么那么写,相信看完博客应该就会明白了。那么问题来了,要自动移动回去,那么触发的时机在MotionEvent.ACTION_UP中,原来的位置怎么保存,因为移动时需要左上右下四个参数,因此在CustomerScrollView中我们看到了这样一个变量private Rect normal = new Rect();通过normal.set(inner.getLeft(), inner.getTop(),inner.getRight(), inner.getBottom());方法记录菜单view的初始化位置。
- 经过仔细揣摩发现scrollY == 0这个条件实际上是滚动到了最顶部的时候,而scrollY == offset是滚动到最底部的时候,两个条件满足其中一个都可以实现拖拽的效果。int offset = inner.getMeasuredHeight() - getHeight();相当于本身的身高减去实际能看到的身高就等于没有看到的身高部分。
//是否需要移动public boolean isNeedMove() {int offset = inner.getMeasuredHeight() - getHeight();int scrollY = getScrollY();if (scrollY == 0 || scrollY == offset) {return true;}return false;}
- 为什么源码中需要isNeedAnimation()这个函数呢?因为恢复到原来位置也用到了inner.layout(normal.left, normal.top, normal.right, normal.bottom);,因此normal首先必须要有四个参数值。而这个normal只有满足上面的条件后才有值的。
- 为什么在拖拽发生又恢复到原来位置后,要把这个normal.setEmpty();置空呢?它的意图是什么?仔细想来,发现这个normal的set左上右下四个值时,是在满足2.4两种条件之一就会有具体值的。因此这个normal就会有两种不同的Rect.顶部的时候左上右下四个值分别为(0,0,实际菜单的宽度240dp,菜单的实际测量高度)而滚动到最底部的时候左上右下四个值分别为(0,负的【菜单的实际高度减去屏幕的高度】,实际菜单的宽度240dp,屏幕的高度),因此需要清空。

