1、先在vscode中安装PHP Debug,在设置添加“php.validate.executablePath”项,选中对应版本的php.exe。
"php.validate.executablePath": "d:\wamp\bin\php\php7.2.14\php.exe",
2、按F5调试,选择PHP,就可以了,可能会配置失败。
3、按 Ctrl+Shift+D 打开调试面板,点击上面的小齿轮打开launch.json,如果出现“Listen for XDebug”和“Launch currently open script”,就证明成功了,
可以调试了。
4、如果发现没有,就需要手动添加了:
{
  // 使用 IntelliSense 了解相关属性。
  // 悬停以查看现有属性的描述。
  // 欲了解更多信息,请访问: https://go.microsoft.com/fwlink/?linkid=830387
  "version": "0.2.0",
  "configurations": [
    {
      "name": "Listen for XDebug",
      "type": "php",
      "request": "launch",
      "port": 9000
    },
    {
      "name": "Launch currently open script",
      "type": "php",
      "request": "launch",
      "program": "${file}",
      "cwd": "${fileDirname}",
      "port": 9000
    }
  ]
}
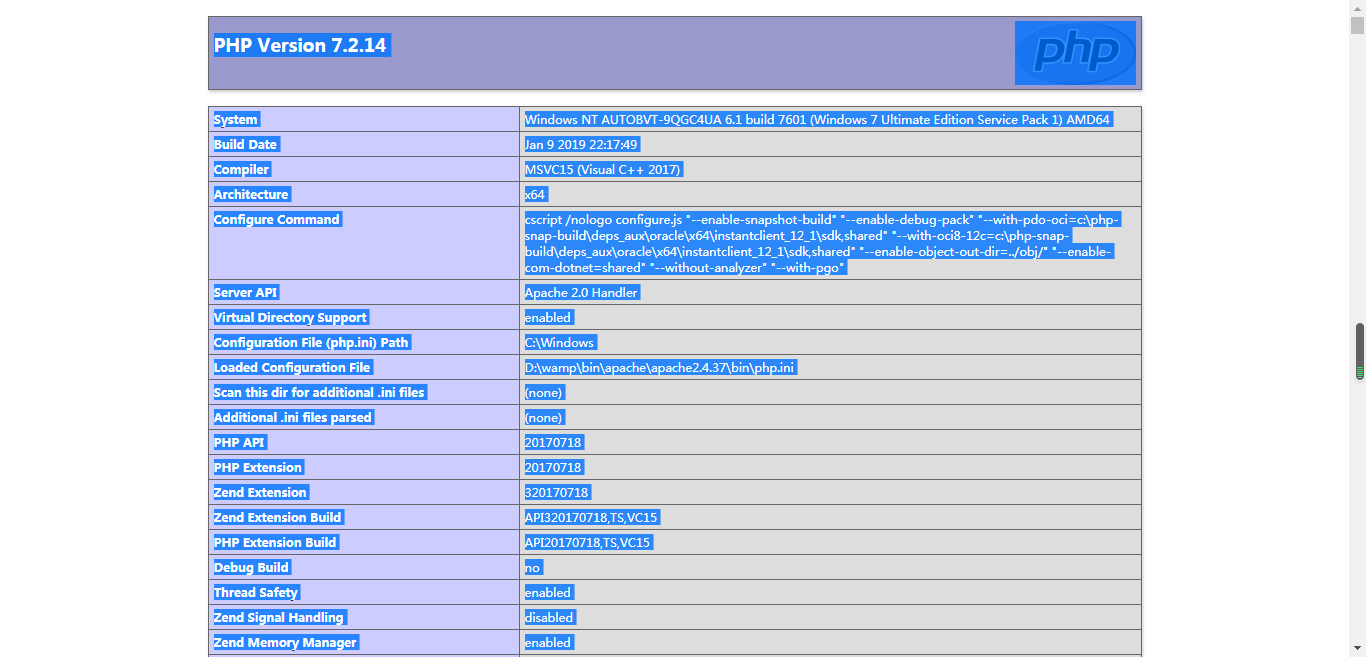
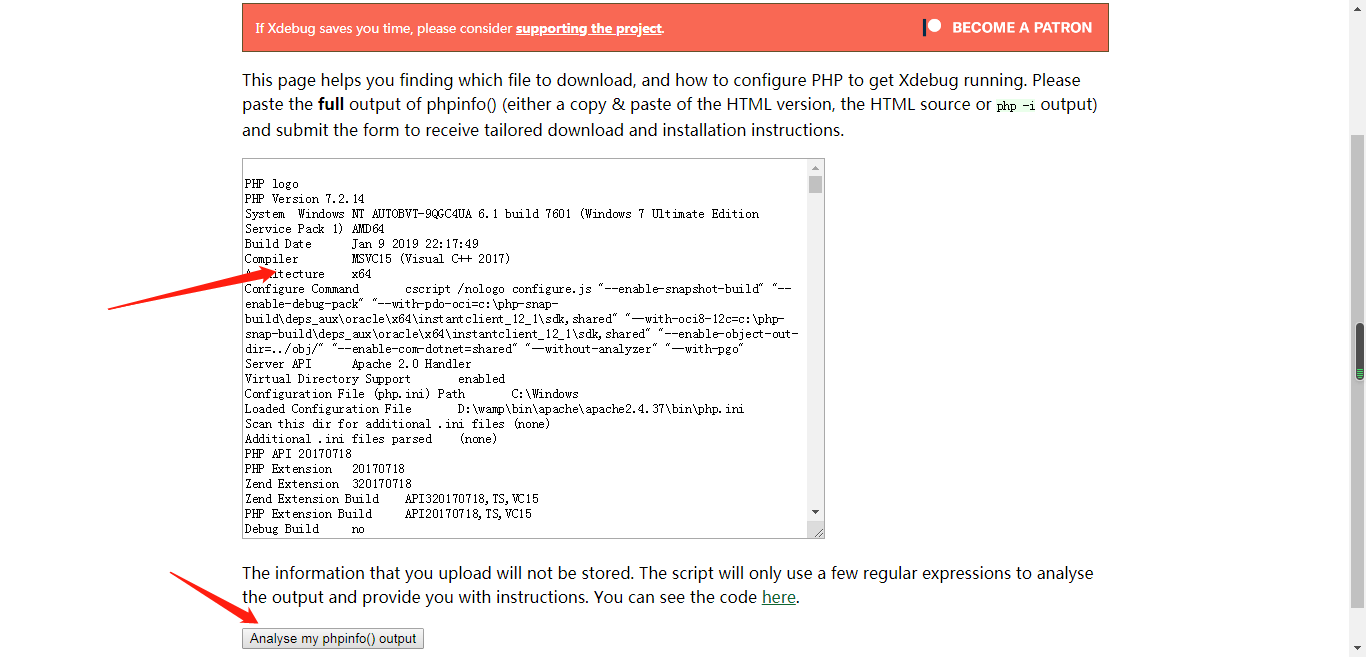
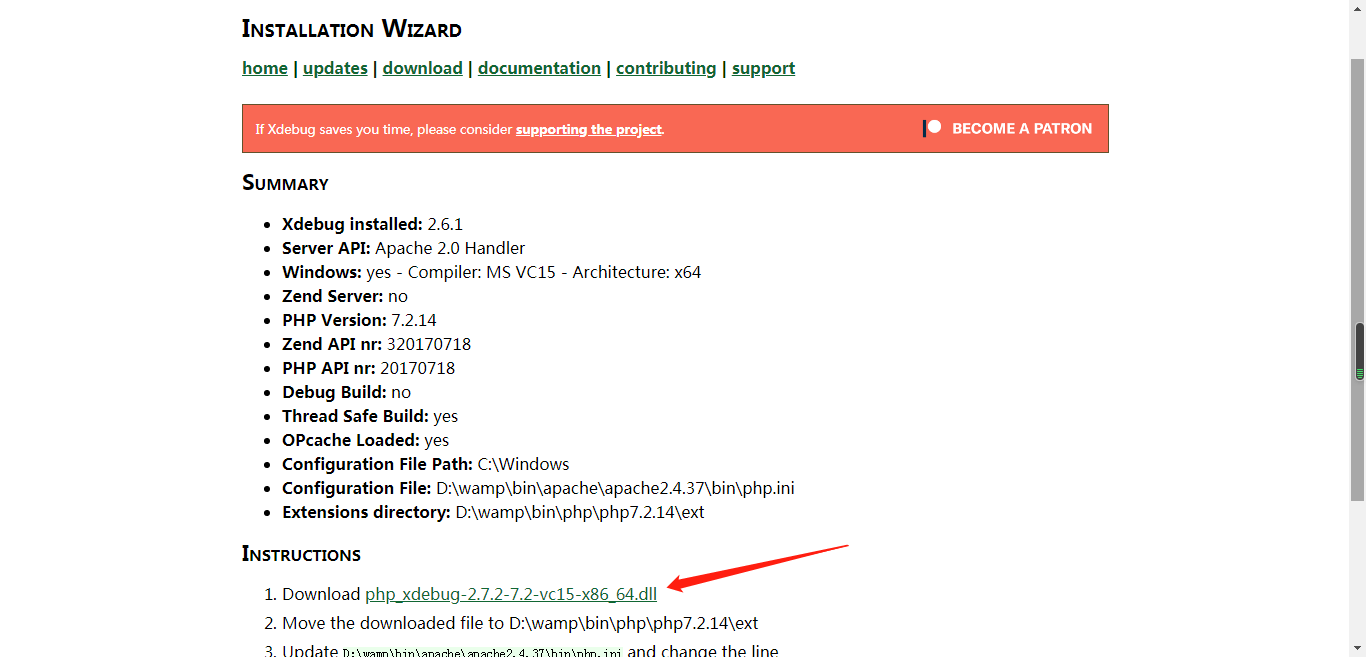
5、然后在随便一个页面输出一下phpinfo(); Ctrl+A 复制页面的内容到 https://xdebug.org/wizard.php 的文本框内,点击下面的 Analyse my phpinfo() output 按钮获取对应的xdebug.dll文件,下载下来放到当前版本php目录下的zend_ext文件夹内。


6、配置apache下的php.ini文件
D:wampinapacheapache2.4.37inphp.ini
[XDebug]
zend_extension = "D:/wamp/bin/php/php7.2.14/zend_ext/php_xdebug-2.6.1-7.2-vc15-x86_64.dll" :对应下载的xdebug的目录
xdebug.remote_enable = 1
xdebug.remote_autostart = 1
xdebug.remote_handler=dbgp
xdebug.remote_mode=req
xdebug.romote_host=localhost
xdebug.remote_port=9000 //关键在于这个端口号要和launch.json配置的端口号对应起来。
然后重启服务器就ok啦。