yellowpencil官网
https://yellowpencil.waspthemes.com/
tips: 在官网中的Docs中,已经简短的不能再简短了(不详细)。
原生的限制[弱]
yellowpencil原版有几点限制:
1、平台依赖。yellowpencil是在wordpress平台下部署的,而wordpress是基于php的。我们也可以在后台看到yellowpencil的源码(php版的)。免费版yellowpencil部署步骤见: https://yellowpencil.waspthemes.com/docs/how-to-install-yellowpencil-lite/ 。
2、对同源网站存在稍许的bug,在customize another page中,有时候同源网站被判断为无效url。
蛋哥的贡献[强]
1、解放了yellowpencil对平台的依赖,使其能自由部署。
2、修复了customize another page中的一些bug,消除对同源站点的限制。
install(部署)
文件资源见:https://download.csdn.net/download/qqhanhan/12082916
把文件解压后,直接部署在网站后端即可,因为整套文件只包含js、css等静态文件。
快速上手
比如,我把yellowpenci直接部署在wamp服务器的yellowpencil目录下。并在模板之间下载了一个模板例子,部署在loot-4-Nava文件夹下。
访问链接:http://localhost/yellowpencil/index.html?href=localhost/loot-4-Nava 即可对loot-4-Nava进行编辑。
其中http://localhost/yellowpencil/index.html是整个编辑器的入口网址(需要根据自己的需要进行相应的修改)。localhost/loot-4-Nava是需要编辑css的目标文件。
由于同源安全问题,蛋哥在这个版本暂未对异源网址开放权限。
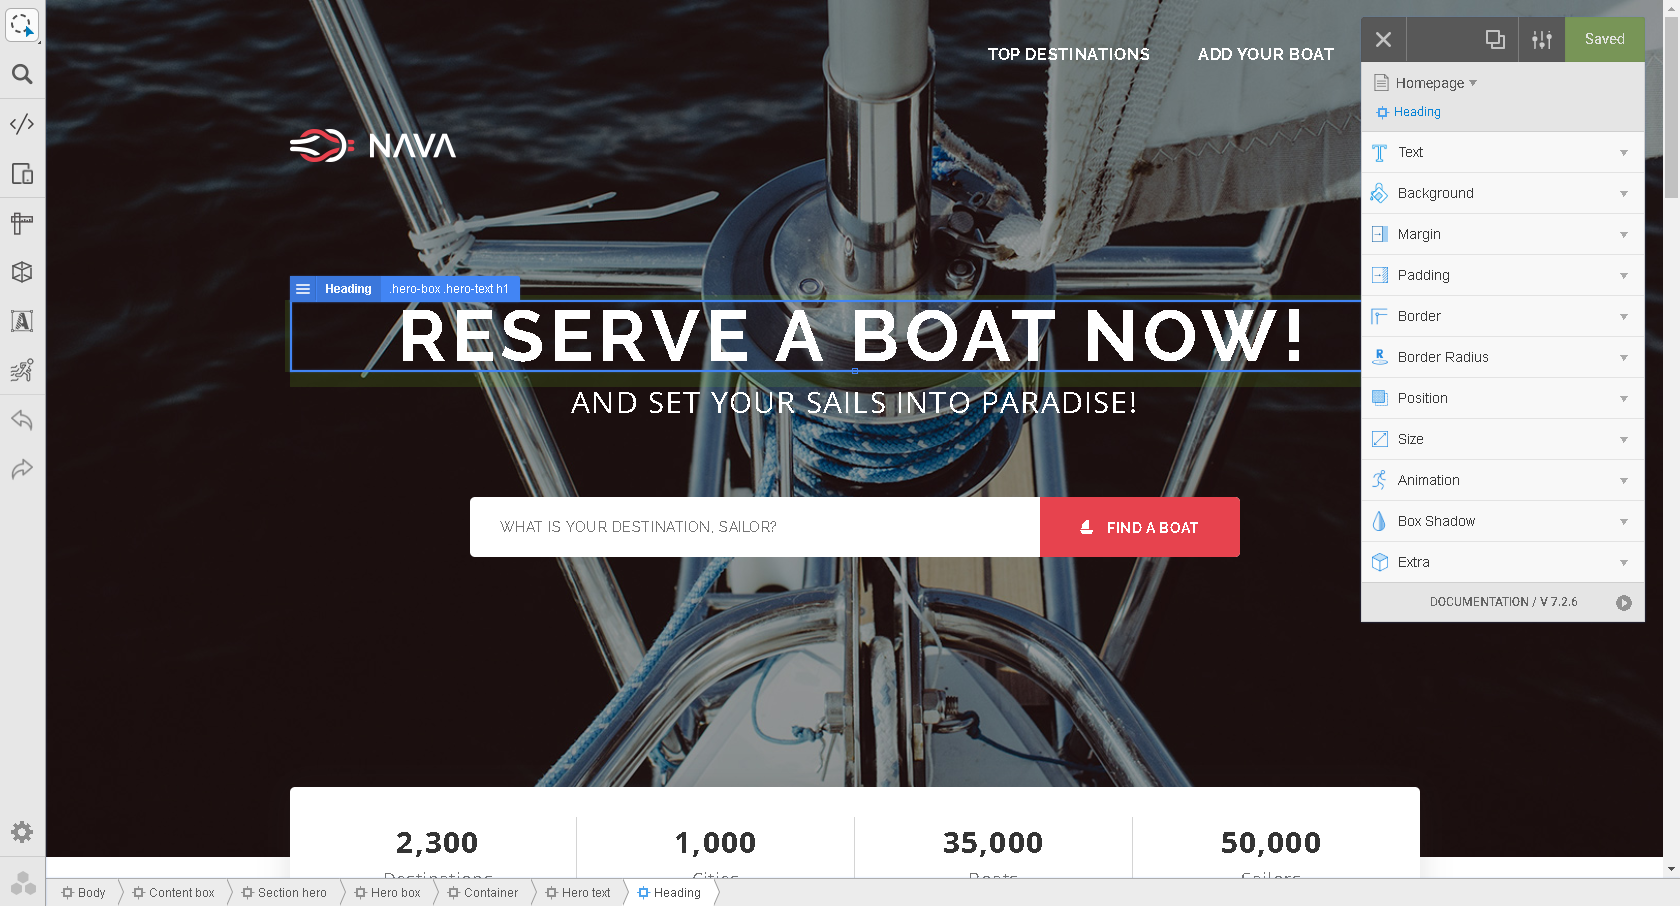
页面效果
如何使用生成的css文件
编辑得到到满意效果后,如何使用生成的css。
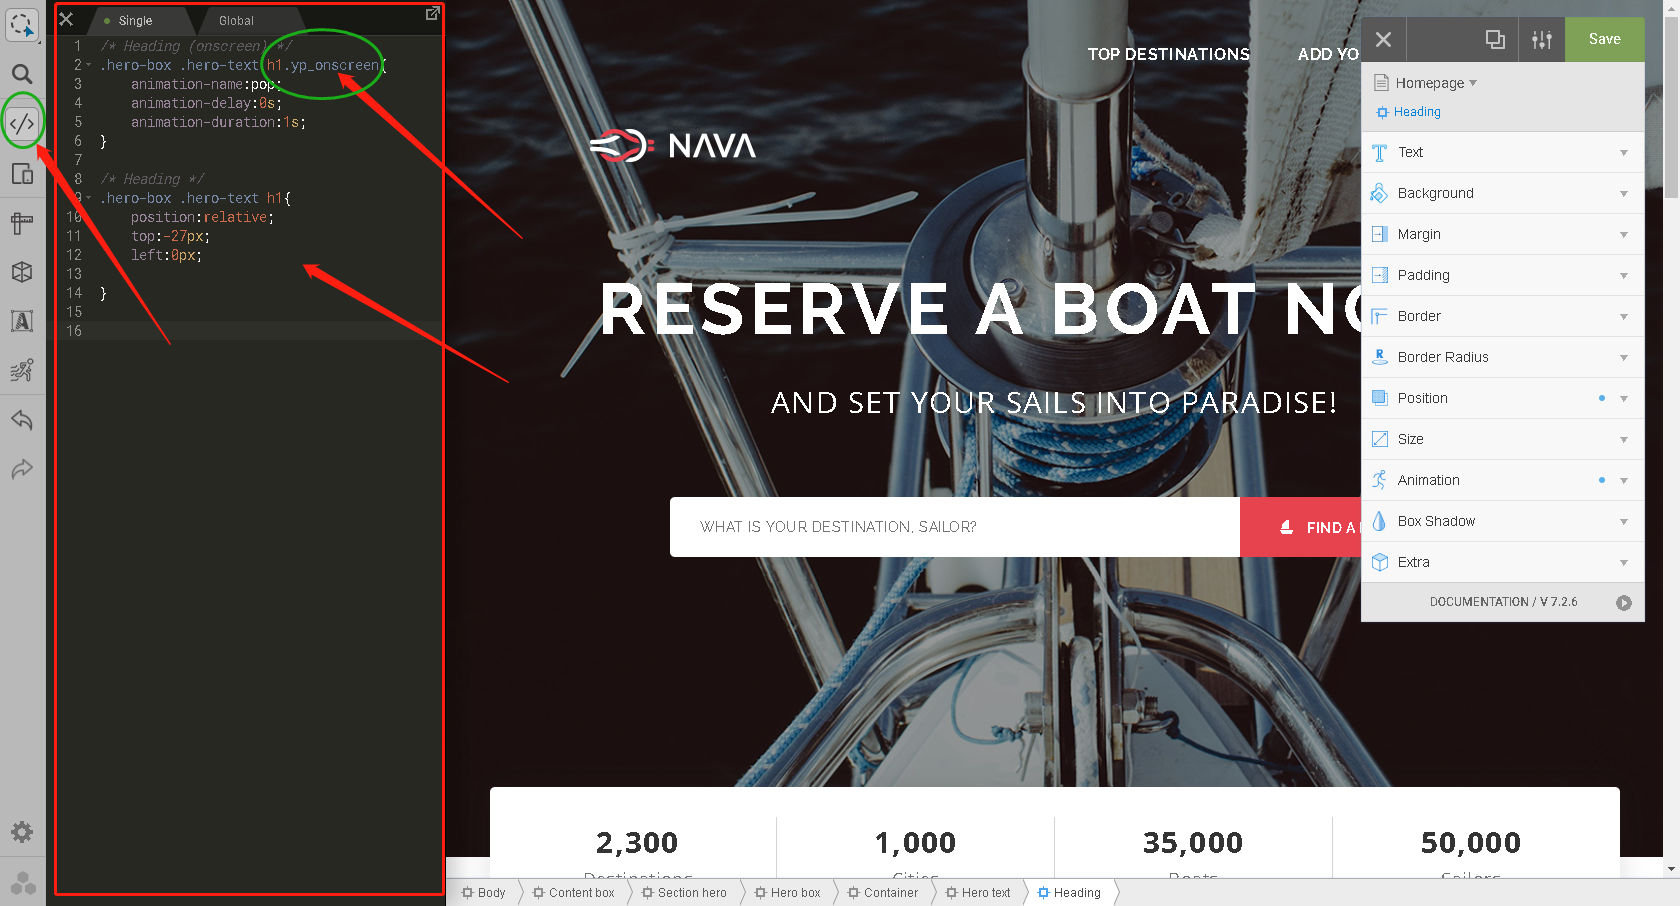
- css中 .yp_onscreen删掉;
- 如果对页面的animation进行了一些编辑操作,除了需要在目标页面中写入上面生成的css,还需要引入上面压缩包中library/css/animate.css 。如上图在css中的L2~L6行是对动画效果的描述。由于它使用了animation-name的自定义的‘“pop”名字,而此animation的描述效果在library/css/animate.css中。
注意
实际操作中需要对选择的element进行点击操作,才会出现右侧的panel内容。此时可以对element进行拖拽调整位置和边距。
详细的操作(举一个例子)
持续更新中。。。[奋斗]