监控linux服务器网卡流量
作者:尹正杰
版权声明:原创作品,谢绝转载!否则将追究法律责任。
欢迎加入:高级运维工程师之路 598432640
前言:众所周知,我们安装zabbix服务器的时候会默认监控自己,也就是说这个安装包是包含了server端和agent端,我门就没有必要去找单独的agent包了,以下是链接教程:链接:http://pan.baidu.com/s/1slcXw41 密码:k8jm
一.客户端配置
1.首先要在客户端安装zabbix_agent
1 [root@yinzhengjie yinzhengjie]# tar -zxvf zabbix-3.0.4.tar.gz
2 [root@yinzhengjie yinzhengjie]# cd zabbix-3.0.4
3 [root@yinzhengjie zabbix-3.0.4]# ./configure --prefix=/usr/local/zabbix --enable-agent
4 [root@yinzhengjie zabbix-3.0.4]# make -j 4 && make install
2.添加启动脚本
1 [root@yinzhengjie zabbix-3.0.4]# cd
2 [root@yinzhengjie ~]# cp /yinzhengjie/zabbix-3.0.4/misc/init.d/fedora/core/zabbix_agentd /etc/init.d/
3 [root@yinzhengjie ~]#sed  -i 's#BASEDIR=/usr/local#BASEDIR=/usr/local/zabbix#g'  /etc/init.d/zabbix_agentd   #修改脚本里的安装路径,当然你可以自定义安装,
4 [root@yinzhengjie ~]#cat /etc/init.d/zabbix_agentd  | grep BASEDIR=
5        BASEDIR=/usr/local/zabbix6 [root@yinzhengjie ~]#
3.修改zabbix_agent配置文件
备注:主动模式是被监控机主动发送数据到zabbix服务器,被动模式是zabbix 主动向被监控机请求数据。主动模式配置稍有调整,一般采用两种兼备模式。
1 [root@yinzhengjie ~]# cd /usr/local/zabbix/etc/
2 [root@yinzhengjie etc]# cp zabbix_agentd.conf zabbix_agentd.conf.`date +%F`
3 [root@yinzhengjie etc]#
4 [root@yinzhengjie etc]# sed -i 's#Server=127.0.0.1#Server=172.16.96.66#' zabbix_agentd.conf
5 [root@yinzhengjie etc]# sed -i 's#ServerActive=127.0.0.1#ServerActive=172.16.96.66#' zabbix_agentd.conf
6 [root@yinzhengjie etc]# more zabbix_agentd.conf | grep 172.16 | grep -v ^#
7 Server=172.16.96.66             # 被动模式指定的zabbix服务器
8 ServerActive=172.16.96.66    #主动模式指定的zabbix服务器
9 [root@yinzhengjie etc]#
4.将zabbix_agentd设置成开机启动
1 [root@yinzhengjie etc]# chkconfig --add zabbix_agentd
2 [root@yinzhengjie etc]# chkconfig zabbix_agentd on
3 [root@yinzhengjie etc]# chkconfig zabbix_agentd --list
4 zabbix_agentd   0:关闭  1:关闭  2:启用  3:启用  4:启用  5:启用  6:关闭
5 [root@yinzhengjie etc]#
5.启动zabbix_agentd程序
 1 [root@yinzhengjie etc]# groupadd zabbix
 2 [root@yinzhengjie etc]# useradd zabbix -s /sbin/nologin -M -g zabbix   #注意,这里一定要创建zabbix用户哟~不然直接启动会报错!
 3 [root@yinzhengjie etc]# service zabbix_agentd start
 4 Starting zabbix_agentd:  [确定]
 5 [root@yinzhengjie etc]#
 6 [root@yinzhengjie etc]# lsof -i :10050  #检查服务是否已经成功启动
 7 COMMAND     PID   USER   FD   TYPE DEVICE SIZE/OFF NODE NAME
 8 zabbix_ag 17864 zabbix    4u  IPv4 775343      0t0  TCP *:zabbix-agent (LISTEN)
 9 zabbix_ag 17865 zabbix    4u  IPv4 775343      0t0  TCP *:zabbix-agent (LISTEN)
10 zabbix_ag 17866 zabbix    4u  IPv4 775343      0t0  TCP *:zabbix-agent (LISTEN)
11 zabbix_ag 17867 zabbix    4u  IPv4 775343      0t0  TCP *:zabbix-agent (LISTEN)
12 zabbix_ag 17868 zabbix    4u  IPv4 775343      0t0  TCP *:zabbix-agent (LISTEN)
13 zabbix_ag 17869 zabbix    4u  IPv4 775343      0t0  TCP *:zabbix-agent (LISTEN)
14 [root@yinzhengjie etc]#

二.ZABBIX服务端配置:
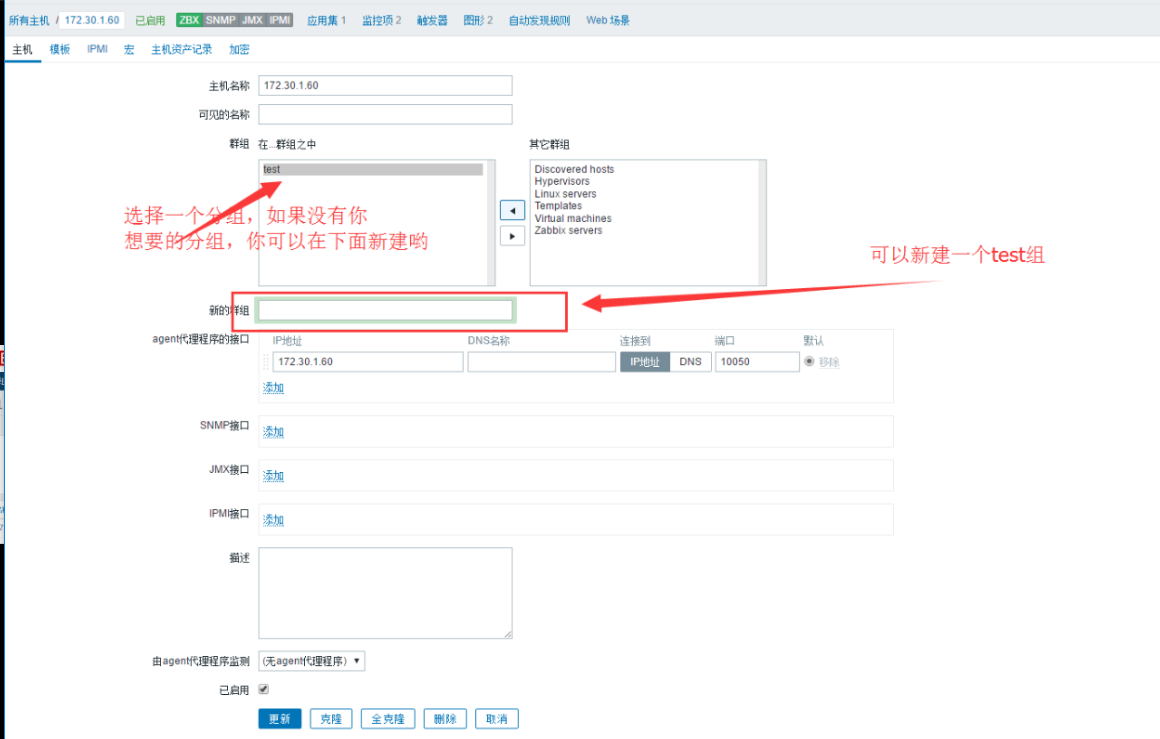
1.创建主机


2.配置主机信息

3.点击监控项


4.创建一个监控项


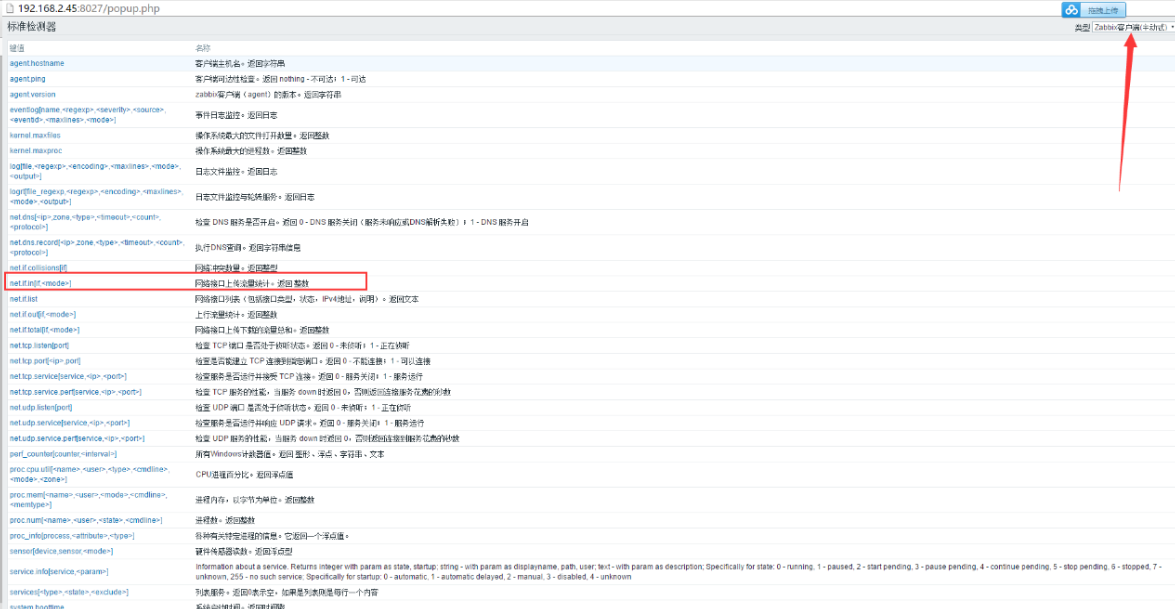
5.监控项配置
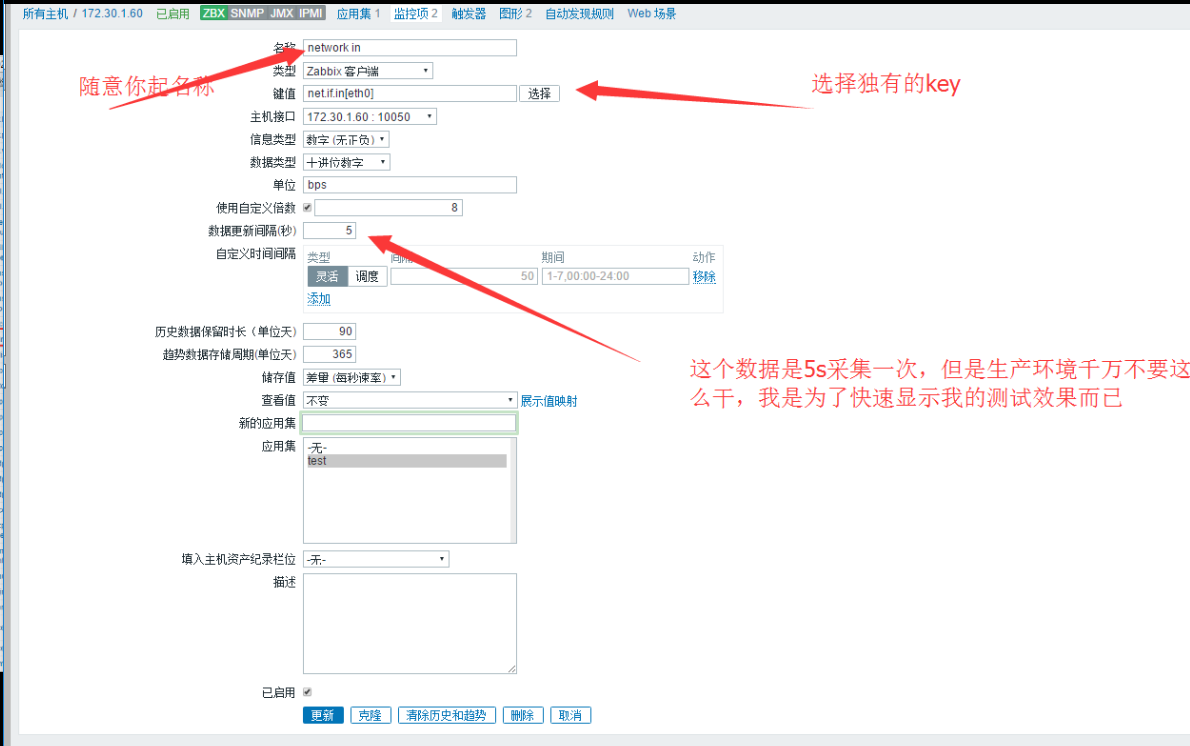

6.选择独有的Key,这些key都是zabbix服务器自带的~当然改软件支持二次开发,后期我们会说

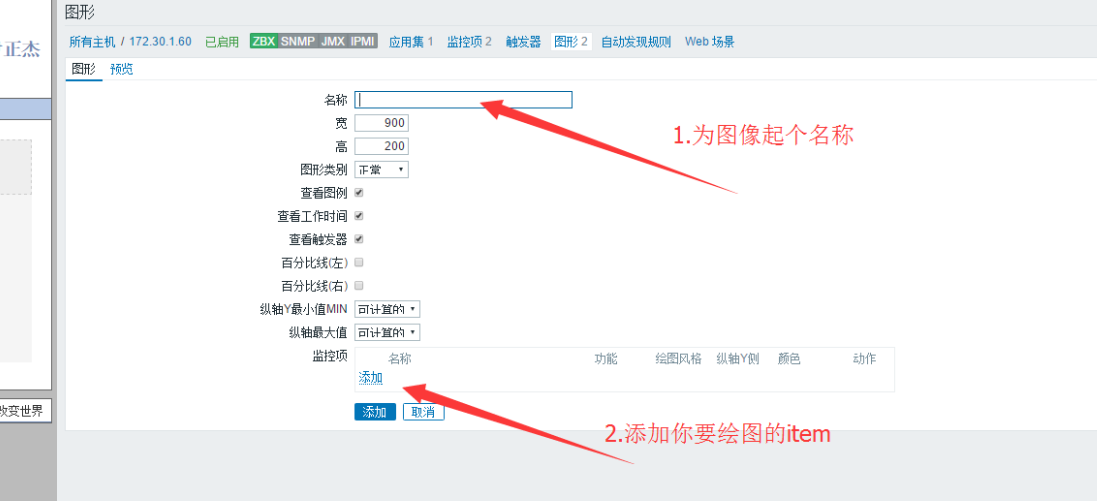
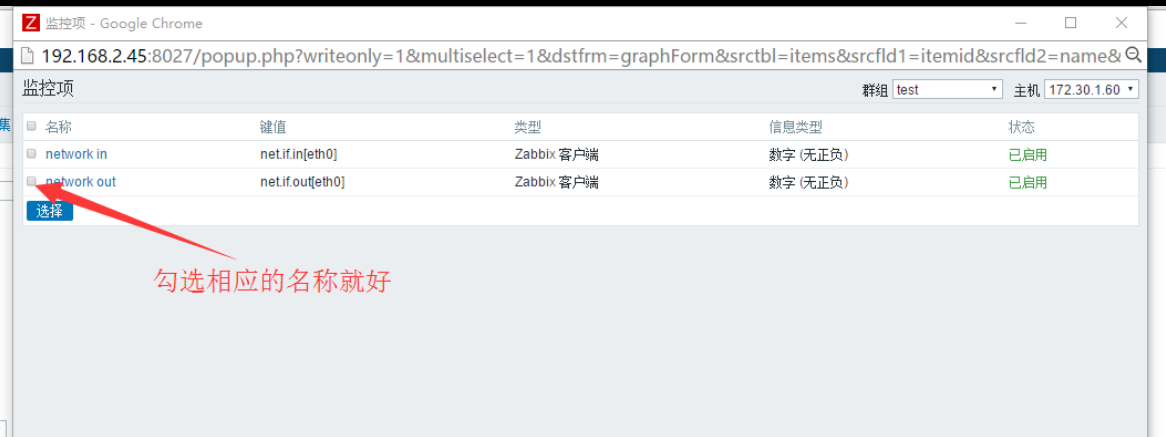
7.为我的监控项添加绘图


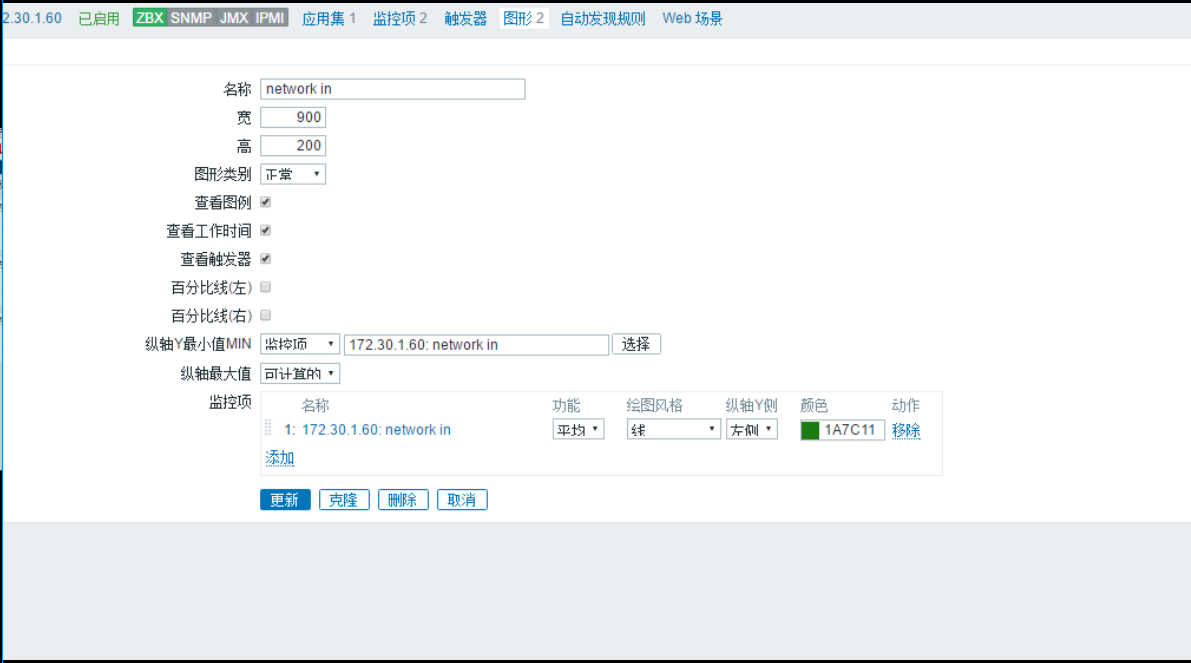
8.创建图形


点击更新就好

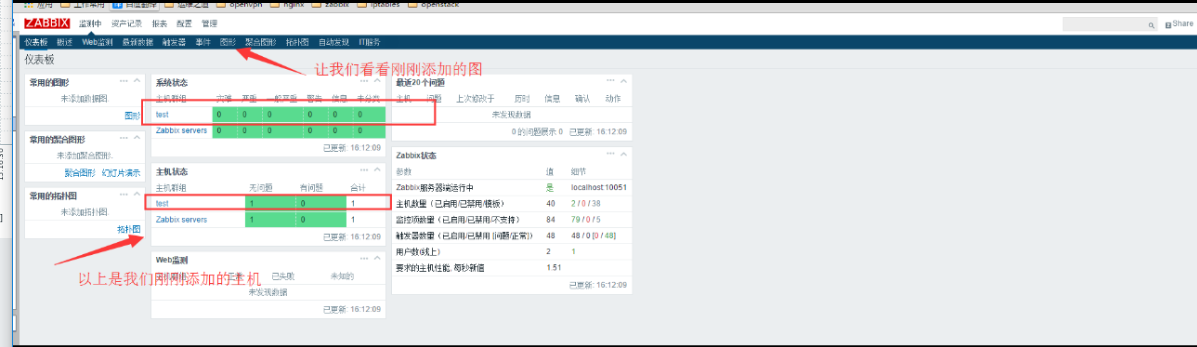
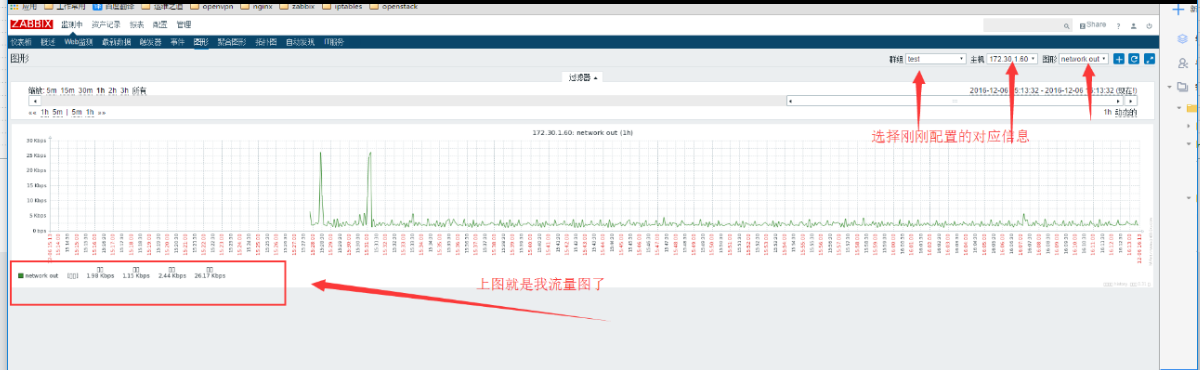
9.查看图形