https://yunpan.cn/cZVeSJ33XSHKZ 访问密码 0fc2
今天整合lightbox插件Fancybox1.3.4,发现1.3.4版本太老了。而目前easyui 1.4.x的jquery的版本已经到达1.11.x以上。
本以为不能再使用这个插件,但是发现还是有人重写了插件的方法让其支持jquery 1.11.x以上,最上面是下载地址。
不过有收费插件fancybox2.0,本身支持高版本的jquery,大家可以使用
使用fancybox非常简单。解压包下的index基本有所有例子
直接运行结果:
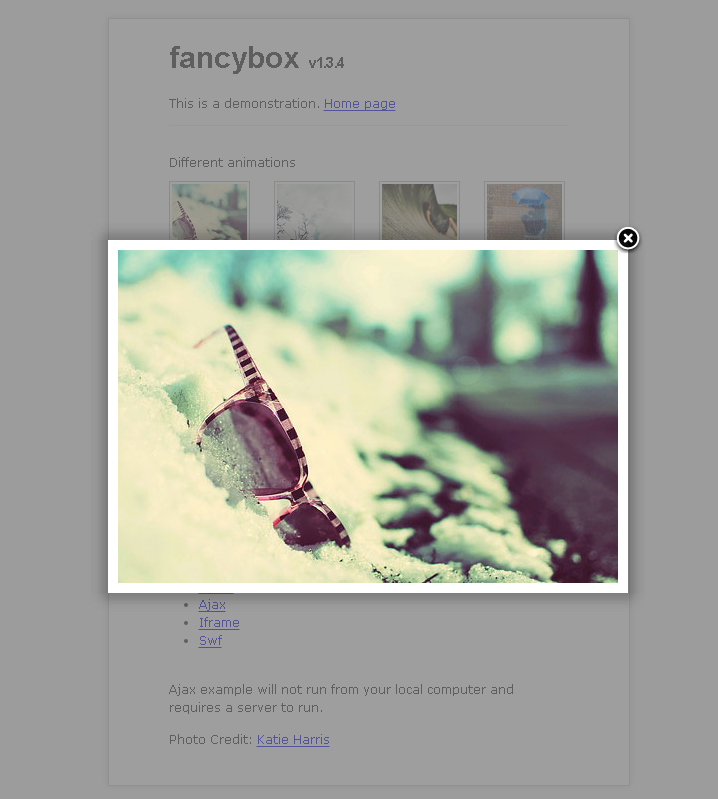
显示非常动感。
以SysSample例子为例子 构建ASP.NET MVC4+EF5+EasyUI+Unity2.x注入的后台管理系统(8)-MVC与EasyUI DataGrid 分页
必须让SysSample支持上传文件上传 构建ASP.NET MVC4+EF5+EasyUI+Unity2.x注入的后台管理系统(32)-swfupload多文件上传[附源码]
我之前只发布过多文件上传的源码,实际多文件上传里面也包含了单文件上传。
(整合你自己项目时候忽略easyui。可能是的表格插件是datatable,jqgrid,extjs等,但是基本同理)
修改Create.cshtml代码
 <tr>
                <td style="100px; text-align:right;">
                    @Html.LabelFor(model => model.Photo):
                </td>
                  <td>
                      @Html.TextBoxFor(model => model.Photo)
                    </td>
                <td>
                    @Html.ValidationMessageFor(model => model.Photo)
                </td>
            </tr>
为
 <tr>
                <th>
                    @Html.LabelFor(model => model.Photo):
                </th>
                <td>
                    @Html.HiddenFor(model => model.Photo)
                    <img class="expic" src="/Content/Images/NotPic.jpg" /><br />
                    <a href="javascript:$('#FileUpload').trigger('click');" class="files">
                        <input type="file"  id="FileUpload" name="FileUpload" onchange="Upload('SingleFile', 'Photo', 'FileUpload','1','1');" />
                    </a><span class="uploading">请稍候...</span>
                    @Html.ValidationMessageFor(model => model.Photo)
                </td>

            </tr>
NotPic.jpg图片为 ,这个是我自己PS的丑图片(没有上传时显示的照片)


//文件上传
function Upload(action, repath, uppath, iswater, isthumbnail, filepath) {

    var sendUrl = "/Core/upload_ajax.ashx?action=" + action + "&ReFilePath=" + repath + "&UpFilePath=" + uppath;
    //判断是否打水印
    if (arguments.length == 4) {
        sendUrl = "/Core/upload_ajax.ashx?action=" + action + "&ReFilePath=" + repath + "&UpFilePath=" + uppath + "&IsWater=" + iswater;
    }
    //判断是否生成宿略图
    if (arguments.length == 5) {
        sendUrl = "/Core/upload_ajax.ashx?action=" + action + "&ReFilePath=" + repath + "&UpFilePath=" + uppath + "&IsWater=" + iswater + "&IsThumbnail=" + isthumbnail;
    }
    //自定义上传路径
    if (arguments.length == 6) {
        sendUrl = filepath + "tools/upload_ajax.ashx?action=" + action + "&ReFilePath=" + repath + "&UpFilePath=" + uppath + "&IsWater=" + iswater + "&IsThumbnail=" + isthumbnail;
    }
    //开始提交
    $("form").ajaxSubmit({
        beforeSubmit: function (formData, jqForm, options) {
            //隐藏上传按钮
            $("#" + repath).nextAll(".files").eq(0).hide();
            //显示LOADING图片
            $("#" + repath).nextAll(".uploading").eq(0).show();
        },
        success: function (data, textStatus) {
            if (data.msg == 1) {

                $("#" + repath).val(data.msgbox.split(",")[0]);

                $("#" + repath).next("img").attr("src", data.msgbox.split(",")[0]);
            } else {
                alert(data.msgbox);
            }
            $("#" + repath).nextAll(".files").eq(0).show();
            $("#" + repath).nextAll(".uploading").eq(0).hide();
        },
        error: function (data, status, e) {
            alert("上传失败,错误信息:" + e);
            $("#" + repath).nextAll(".files").eq(0).show();
            $("#" + repath).nextAll(".uploading").eq(0).hide();
        },
        url: sendUrl,
        type: "post",
        dataType: "json",
        timeout: 600000
    });
};
后台方法提取32节的upload_ajax.ashx文件即可
这样就完成支持单文件上传了
别忘记加入CSS
a.files, a.files input{ outline:none;/*ff*/hide-focus:expression(this.hideFocus=true);/*ie*/ }
.uploading{ float:left; background:url(loading2.gif) no-repeat left center; padding-left:18px;display:none; line-height:24px; height:24px; color:#333; }
.expic{cursor: pointer;  140px; height: 140px; border: 1px #ccc solid;}
.uploading{ float:left; background:url(Images/loading2.gif) no-repeat left center; padding-left:18px;display:none; line-height:24px; height:24px; color:#333; }
#FileUpload{ 140px;}
运行结果:
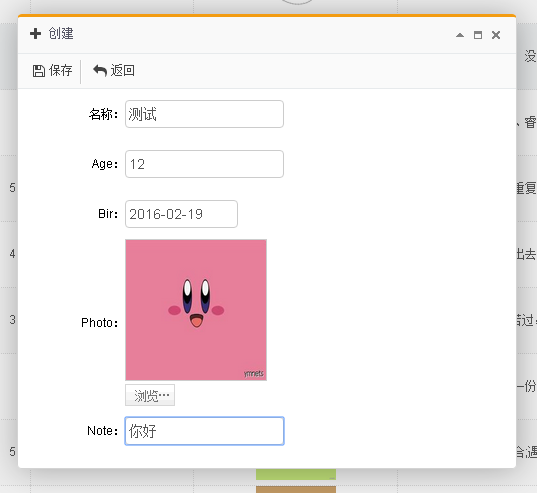
记得添加多点数据,这样才比较好看
运行结果
datagrid代码
$('#List').datagrid({
            url: '/SysSample/GetList',
             SetGridWidthSub(10),
            methord: 'post',
            height: SetGridHeightSub(39),
            fitColumns: true,
            sortName: 'Id',
            sortOrder: 'desc',
            idField: 'Id',
            pageSize: 10,
            pageList: [10, 20, 30, 40, 50],
            pagination: true,
            striped: true, //奇偶行是否区分
            singleSelect: true,//单选模式
            //rownumbers: true,//行号
            onLoadSuccess: function (data) {
                $("a.example").fancybox();
            },
            columns: [[
                { field: 'Id', title: '@Resource.TitleID',  80,sortable: true },
                { field: 'Name', title: '@Resource.TitleName',  60 },
                { field: 'Age', title: '年龄',  50, align: 'right' },
                { field: 'Bir', title: '生日',  80, align: 'right', formatter: function (value) { return SubStrYMD(value) } },
                {
                    field: 'Photo', title: '照片',  100, align: 'center', formatter: function (value, row, index) {
                        return '<a class="example" title="'+row.Note+'" href="' + value + '"><img width="80px" alt="example" src="' + value + '" /></a>';
                    }
                },
                { field: 'Note', title: '@Resource.TitleRemark',  260 },
                { field: 'CreateTime', title: '@Resource.TitleCreateTime',  160, align: 'center' }
            ]]
        });
 {
                    field: 'Photo', title: '照片',  100, align: 'center', formatter: function (value, row, index) {
                        return '<a class="example" title="'+row.Note+'" href="' + value + '"><img width="80px" alt="example" src="' + value + '" /></a>';
                    }
                },
核心代码解析。这段代码来源于fancybox插件的第一个样例代码。
但是插件代码只演示了ID方式的显示,我们需要变通一下用class而已(下面是easyui逐行生成后的代码)
<a class="example" title="这世界上除了你自己,没有谁可以真正帮到你。" href="/upload/201602/17/201602171809062531.jpg"><img width="80px" alt="example" src="/upload/201602/17/201602171809062531.jpg"></a>
所以我们在初始化时候必须使用class方式:即
$("a.example").fancybox();
代码必须写在datagrid加载之后。不能写在$(function(){});里面。因为$(function(){});比datagrid初始化可能更快
onLoadSuccess: function (data) {
$("a.example").fancybox();
},
运行结果:

如果你的记录支持多张图片。那么必须再新建一张图片子表来关联。
然后用到样例中的:多张显示

代码用组的方式:
$("a[rel=example_group]").fancybox({ 'transitionIn' : 'none', 'transitionOut' : 'none', 'titlePosition' : 'over', 'titleFormat' : function(title, currentArray, currentIndex, currentOpts) { return '<span id="fancybox-title-over">Image ' + (currentIndex + 1) + ' / ' + currentArray.length + (title.length ? ' ' + title : '') + '</span>'; } });
本文到此为止!有兴趣下载32节代码。来改装一下