最近学习spring boot,总结一下入门的的基础知识
1新建maven项目,修改pom.xml
<project xmlns="http://maven.apache.org/POM/4.0.0" xmlns:xsi="http://www.w3.org/2001/XMLSchema-instance"
  xsi:schemaLocation="http://maven.apache.org/POM/4.0.0 http://maven.apache.org/maven-v4_0_0.xsd">
  <modelVersion>4.0.0</modelVersion>
  <groupId>cn.sam</groupId>
  <artifactId>springboot3</artifactId>
  <packaging>war</packaging>
  <version>0.0.1-SNAPSHOT</version>
  <name>springboot3 Maven Webapp</name>
  <url>http://maven.apache.org</url>
      <properties>
        <project.build.sourceEncoding>UTF-8</project.build.sourceEncoding>
        <!-- 这里一定要配置上java的版本,如果是1.7版本的可不用配置 -->
        <java.version>1.8</java.version>

    </properties>
<parent>
    <groupId>org.springframework.boot</groupId>
    <artifactId>spring-boot-starter-parent</artifactId>
    <version>1.4.1.RELEASE</version>
    <relativePath/>
  </parent>


  <dependencies>
    <dependency>
      <groupId>org.springframework.boot</groupId>
      <artifactId>spring-boot-starter-web</artifactId>
    </dependency>
  </dependencies>

  <build>
    <plugins>
      <plugin>
        <groupId>org.springframework.boot</groupId>
        <artifactId>spring-boot-maven-plugin</artifactId>
      </plugin>
    </plugins>
  </build>
</project>
2新建main类如下,运行main方法,然后在浏览器输入http://127.0.0.1:8080/hello
import org.springframework.boot.SpringApplication;
import org.springframework.boot.autoconfigure.EnableAutoConfiguration;
import org.springframework.web.bind.annotation.RequestMapping;
import org.springframework.web.bind.annotation.RestController;

@RestController
@EnableAutoConfiguration
public class Application {
	public static void main(String[] args) {
		SpringApplication.run(Application.class, args);
	}
	@RequestMapping("/hello")
	public String hello(){
		return "Hello World!";
	}
}
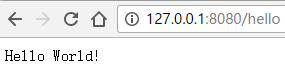
这样一个简单的入门例子就完成了,是不是非常的简单呢。
下面记录一下spring boot的一些简单配置
1在我们开发过程中,我们需要经常修改,为了避免重复启动项目,我们可以启用热部署。
Spring-Loaded项目提供了强大的热部署功能,添加/删除/修改 方法/字段/接口/枚举 等代码的时候都可以热部署,速度很快,很方便。想在Spring Boot中使用该功能非常简单,就是在spring-boot-maven-plugin插件下面添加依赖:
<dependencies>
    <dependency>
        <groupId>org.springframework</groupId>
        <artifactId>springloaded</artifactId>
        <version>1.2.5.RELEASE</version>
    </dependency>
</dependencies>
添加以后,用cmd进入项目目录,通过mvn spring-boot:run启动就支持热部署了(这里是用mvn命令去启动项目,并不是运行main方法)。
2修改服务器端口
一main方法类实现EmbeddedServletContainerCustomizer接口
import org.springframework.boot.SpringApplication;
import org.springframework.boot.autoconfigure.EnableAutoConfiguration;
import org.springframework.boot.context.embedded.ConfigurableEmbeddedServletContainer;
import org.springframework.boot.context.embedded.EmbeddedServletContainerCustomizer;
import org.springframework.web.bind.annotation.RequestMapping;
import org.springframework.web.bind.annotation.RestController;
@RestController
@EnableAutoConfiguration
public class Application1 implements EmbeddedServletContainerCustomizer {

	@Override
	public void customize(ConfigurableEmbeddedServletContainer container) {
		container.setPort(8899);
	}

	public static void main(String[] args) {
		SpringApplication.run(Application1.class, args);
	}

	@RequestMapping("/hello")
	public String port(){
		return "port 8899";
	}
}

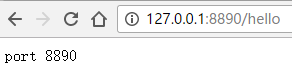
二主类添加一个factory方法
import java.util.concurrent.TimeUnit;

import org.springframework.boot.SpringApplication;
import org.springframework.boot.autoconfigure.EnableAutoConfiguration;
import org.springframework.boot.context.embedded.EmbeddedServletContainerFactory;
import org.springframework.boot.context.embedded.tomcat.TomcatEmbeddedServletContainerFactory;
import org.springframework.context.annotation.Bean;
import org.springframework.web.bind.annotation.RequestMapping;
import org.springframework.web.bind.annotation.RestController;
@RestController
@EnableAutoConfiguration
public class Application2 {
	public static void main(String[] args) {
		SpringApplication.run(Application2.class, args);
	}
	@RequestMapping("/hello")
	public String hello(){
		return "port 8890";
	}

	@Bean
    public EmbeddedServletContainerFactory servletFactory(){
        TomcatEmbeddedServletContainerFactory tomcatFactory = new TomcatEmbeddedServletContainerFactory();
        tomcatFactory.setPort(8890);
        tomcatFactory.setSessionTimeout(10,TimeUnit.SECONDS);
        return tomcatFactory;
    }
}
Hello World例子只是一个controller,可以在主类增加扫描,实现多个controller
1新建User实体类
public class User {
	private Integer id;
	private String name;
	public Integer getId() {
		return id;
	}
	public void setId(Integer id) {
		this.id = id;
	}
	public String getName() {
		return name;
	}
	public void setName(String name) {
		this.name = name;
	}
}
2新建UserController
import org.springframework.web.bind.annotation.PathVariable;
import org.springframework.web.bind.annotation.RequestMapping;
import org.springframework.web.bind.annotation.RestController;

import springboot3.domain.User;

@RequestMapping("/user")
@RestController
public class UserController {
	@RequestMapping("/{id}")
	public User getUserById(@PathVariable String id){
		User u = new User();
		u.setId(new Integer(id));
		u.setName("name="+id);
		return u;
	}
}
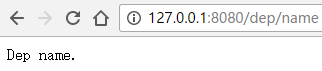
3新建DepartmentController
import org.springframework.web.bind.annotation.RequestMapping;
import org.springframework.web.bind.annotation.RestController;

@RequestMapping("/dep")
@RestController
public class DepartmentController {
	@RequestMapping("name")
	public String getDepName(){
		return "Dep name.";
	}
}
4新建主类
import org.springframework.boot.SpringApplication;
import org.springframework.boot.autoconfigure.EnableAutoConfiguration;
import org.springframework.context.annotation.ComponentScan;
@EnableAutoConfiguration
@ComponentScan(value = {"springboot3.controller"})
public class Application4 {
	public static void main(String[] args) {
		SpringApplication.run(Application4.class, args);
	}
}
运行主方法,在浏览器输入http://127.0.0.1:8080/user/1
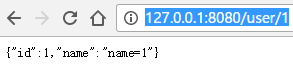
在浏览器输入http://127.0.0.1:8080/user/1
上面例子中,user用到url中的变量,可以直接获取
@RequestMapping("/users/{username}")
public String userProfile(@PathVariable("username") String username) {
    return String.format("user %s", username);
}

@RequestMapping("/posts/{id}")
public String post(@PathVariable("id") int id) {
    return String.format("post %d", id);
}
支持http方法
@RequestMapping(value = "/login", method = RequestMethod.GET)
public String loginGet() {
    return "Login Page";
}

@RequestMapping(value = "/login", method = RequestMethod.POST)
public String loginPost() {
    return "Login Post Request";
}
上面的例子,为了方便演示,都是采用restcontroller,spring boot也可以用模板
我们使用Thymeleaf模板引擎进行模板渲染,需要引入依赖:
<dependency>
  <groupId>org.springframework.boot</groupId>
  <artifactId>spring-boot-starter-thymeleaf</artifactId>
</dependency>
controller类
@Controller
public class HtmlController {
	@RequestMapping("/html/{name}")
	public String html(@PathVariable("name") String name, Model model){
		model.addAttribute("name","Hello Html "+name);
		return "html";
	}
}
接下来需要在默认的模板文件夹src/main/resources/templates/目录下添加一个模板文件hello.html
<html xmlns:th="http://www.thymeleaf.org">
<head>
    <title>Getting Started: Serving Web Content</title>
    <meta http-equiv="Content-Type" content="text/html; charset=UTF-8" />
</head>
<body>
    <p th:text="'Hello, ' + ${name} + '!'" />
</body>
</html>
访问http://127.0.0.1:8080/html/sam
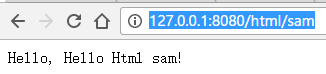
浏览器页面使用HTML作为描述语言,那么必然也脱离不了CSS以及JavaScript。为了能够浏览器能够正确加载类似/css/style.css, /js/main.js等资源,默认情况下我们只需要在src/main/resources/static目录下添加css/style.css和js/main.js文件后,Spring MVC能够自动将他们发布,通过访问/css/style.css, /js/main.js也就可以正确加载这些资源。