The information in this guide is not validated by Oracle, is not supported by Oracle, and should only be used at your own risk; it is for educational purposes only.
21. Install Oracle Grid Infrastructure for a Cluster
Perform the following installation procedures from only one of the Oracle RAC nodes in the cluster (racnode1). The Oracle grid infrastructure software (Oracle Clusterware and Automatic Storage Management) will be installed to both of the Oracle RAC nodes in the cluster by the Oracle Universal Installer.
You are now ready to install the "grid" part of the environment Oracle Clusterware and Automatic Storage Management. Complete the following steps to install Oracle grid infrastructure on your cluster.
At any time during installation, if you have a question about what you are being asked to do, click the Help button on the OUI page.
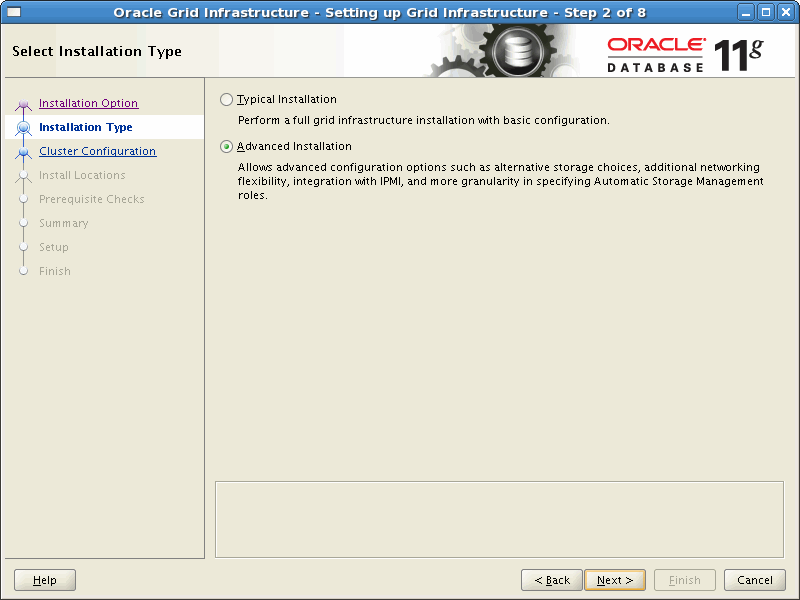
Typical and Advanced Installation
Starting with 11g release 2, Oracle now provides two options for installing the Oracle grid infrastructure software:
- Typical Installation
The typical installation option is a simplified installation with a minimal number of manual configuration choices. This new option provides streamlined cluster installations, especially for those customers who are new to clustering. Typical installation defaults as many options as possible to those recommended as best practices.
- Advanced Installation
The advanced installation option is an advanced procedure that requires a higher degree of system knowledge. It enables you to select particular configuration choices, including additional storage and network choices, use of operating system group authentication for role-based administrative privileges, integration with IPMI, or more granularity in specifying Automatic Storage Management roles.
Given the fact that this article makes use of role-based administrative privileges and high granularity in specifying Automatic Storage Management roles, we will be using the "Advanced Installation" option.
Configuring SCAN without DNS
For the purpose of this article, although I indicated I will be manually assigning IP addresses using the DNS method for name resolution (as opposed to GNS), I will not actually be defining the SCAN in any DNS server (or GNS for that matter). Instead, I will only be defining the SCAN host name and IP address in the hosts file ( /etc/hosts) on each Oracle RAC node and any clients attempting to connect to the database cluster. Although Oracle strongly discourages this practice and highly recommends the use of GNS or DNS resolution, I felt it beyond the scope of this article to configure DNS. This section includes a workaround (Ok, a total hack) to thenslookup binary that allows the Cluster Verification Utility to finish successfully during the Oracle grid infrastructure install. Please note that the workaround documented in this section is only for the sake of brevity and should not be considered for a production implementation.
Defining the SCAN in only the hosts file and not in either Grid Naming Service (GNS) or DNS is an invalid configuration and will cause the Cluster Verification Utility to fail during the Oracle grid infrastructure installation:
Figure 17: Oracle Grid Infrastructure / CVU Error - (Configuring SCAN without DNS)
|
INFO: Checking Single Client Access Name (SCAN)... INFO: Checking name resolution setup for "racnode-cluster-scan"... INFO: ERROR: INFO: PRVF-4657 : Name resolution setup check for "racnode-cluster-scan" (IP address: 216.24.138.153) failed INFO: ERROR: INFO: PRVF-4657 : Name resolution setup check for "racnode-cluster-scan" (IP address: 192.168.1.187) failed INFO: ERROR: INFO: PRVF-4664 : Found inconsistent name resolution entries for SCAN name "racnode-cluster-scan" INFO: Verification of SCAN VIP and Listener setup failed |
Provided this is the only error reported by the CVU, it would be safe to ignore this check and continue by clicking the [Next] button in OUI and move forward with the Oracle grid infrastructure installation. This is documented in Doc ID: 887471.1 on the My Oracle Support web site.
If on the other hand you want the CVU to complete successfully while still only defining the SCAN in the hosts file, simply modify thenslookup utility as root on both Oracle RAC nodes as follows.
First, rename the original nslookup binary to nslookup.original on both Oracle RAC nodes:
[root@racnode1 ~]#
mv /usr/bin/nslookup /usr/bin/nslookup.original
Next, create a new shell script named /usr/bin/nslookup as shown below while replacing 24.154.1.34 with your primary DNS,racnode-cluster-scan with your SCAN host name, and 192.168.1.187 with your SCAN IP address:
|
#!/bin/bash
HOSTNAME=${1}
if [[ $HOSTNAME = "
racnode-cluster-scan" ]]; then echo "Server:
24.154.1.34" echo "Address:
24.154.1.34#53" echo "Non-authoritative answer:" echo "Name:
racnode-cluster-scan" echo "Address:
192.168.1.187" else /usr/bin/nslookup.original $HOSTNAME fi |
Finally, change the new nslookup shell script to executable:
[root@racnode1 ~]#
chmod 755 /usr/bin/nslookup
Remember to perform these actions on both Oracle RAC nodes.
The new nslookup shell script simply echo's back your SCAN IP address whenever the CVU calls nslookup with your SCAN host name; otherwise, it calls the original nslookup binary.
The CVU will now pass during the Oracle grid infrastructure installation when it attempts to verify your SCAN:
|
[grid@racnode1 ~]$
cluvfy comp scan -verbose
Verifying scan
Checking Single Client Access Name (SCAN)... SCAN VIP name Node Running? ListenerName Port Running? ---------------- ------------ ------------ ------------ ------------ ------------ racnode-cluster-scan racnode1 true LISTENER 1521 true
Checking name resolution setup for "racnode-cluster-scan"... SCAN Name IP Address Status Comment ------------ ------------------------ ------------------------ ---------- racnode-cluster-scan 192.168.1.187
passed
Verification of SCAN VIP and Listener setup passed
Verification of scan was successful.
===============================================================================
[grid@racnode2 ~]$
cluvfy comp scan -verbose
Verifying scan
Checking Single Client Access Name (SCAN)... SCAN VIP name Node Running? ListenerName Port Running? ---------------- ------------ ------------ ------------ ------------ ------------ racnode-cluster-scan racnode1 true LISTENER 1521 true
Checking name resolution setup for "racnode-cluster-scan"... SCAN Name IP Address Status Comment ------------ ------------------------ ------------------------ ---------- racnode-cluster-scan 192.168.1.187
passed
Verification of SCAN VIP and Listener setup passed
Verification of scan was successful. |
Verify Terminal Shell Environment
Before starting the Oracle Universal Installer, log in to racnode1 as the owner of the Oracle grid infrastructure software which for this article is grid. Next, if you are using a remote client to connect to the Oracle RAC node performing the installation (SSH or Telnet toracnode1 from a workstation configured with an X Server), verify your X11 display server settings which were described in the section, Logging In to a Remote System Using X Terminal.
Install Oracle Grid Infrastructure
Perform the following tasks as the grid user to install Oracle grid infrastructure:
[grid@racnode1 ~]$
id
uid=1100(grid) gid=1000(oinstall) groups=1000(oinstall),1200(asmadmin),1201(asmdba),1202(asmoper)
[grid@racnode1 ~]$
DISPLAY=<your local workstation>:0.0
[grid@racnode1 ~]$
export DISPLAY
[grid@racnode1 ~]$
cd /home/grid/software/oracle/grid
[grid@racnode1 grid]$
./runInstaller
|
Screen Name |
Response |
Screen Shot |
|||||||||
|
Select Installation Option |
Select " Install and Configure Grid Infrastructure for a Cluster" |
||||||||||
|
Select Installation Type |
Select " Advanced Installation" |
||||||||||
|
Select Product Languages |
Make the appropriate selection(s) for your environment. |
||||||||||
|
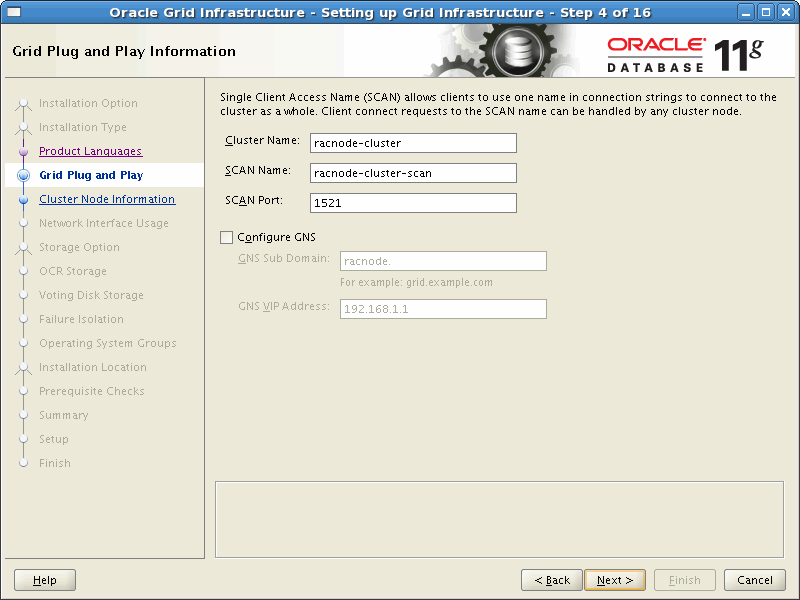
Grid Plug and Play Information |
Instructions on how to configure Grid Naming Service (GNS) is beyond the scope of this article. Un-check the option to "Configure GNS".
After clicking [Next], the OUI will attempt to validate the SCAN information:
|
||||||||||
|
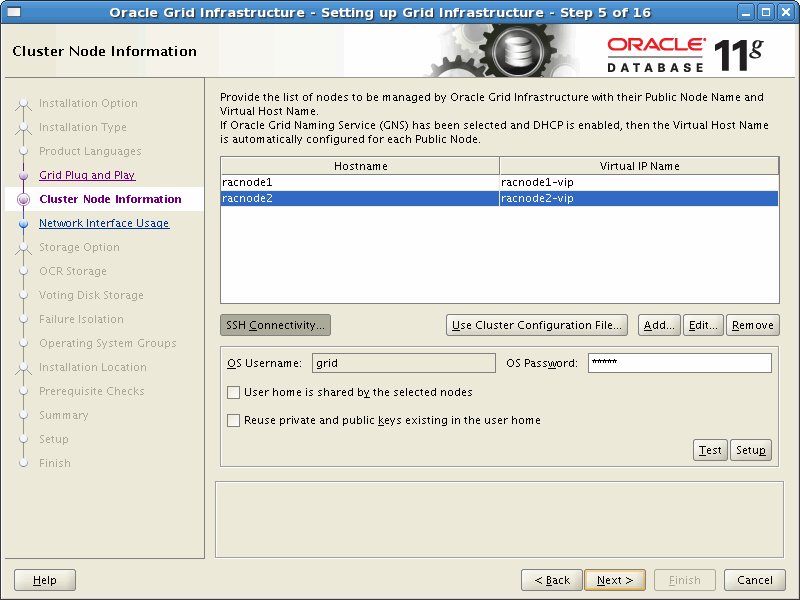
Cluster Node Information |
Use this screen to add the node racnode2 to the cluster and to configure SSH connectivity. Click the "Add" button to add " racnode2" and its virtual IP address "racnode2-vip" according to the table below:
Next, click the [SSH Connectivity] button. Enter the "OS Password" for thegrid user and click the [Setup] button. This will start the "SSH Connectivity" configuration process:
After the SSH configuration process successfully completes, acknowledge the dialog box. Finish off this screen by clicking the [Test] button to verify passwordless SSH connectivity. |
||||||||||
|
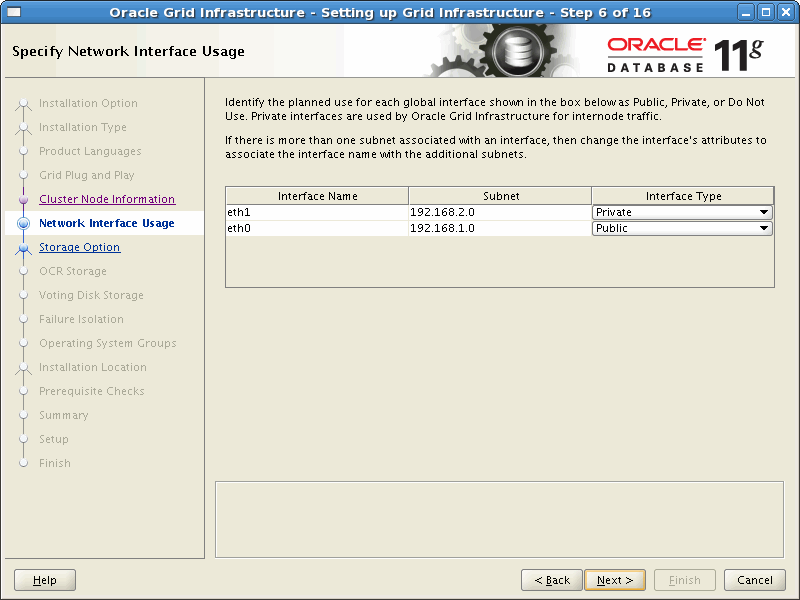
Specify Network Interface Usage |
Identify the network interface to be used for the "Public" and "Private" network. Make any changes necessary to match the values in the table below:
|
||||||||||
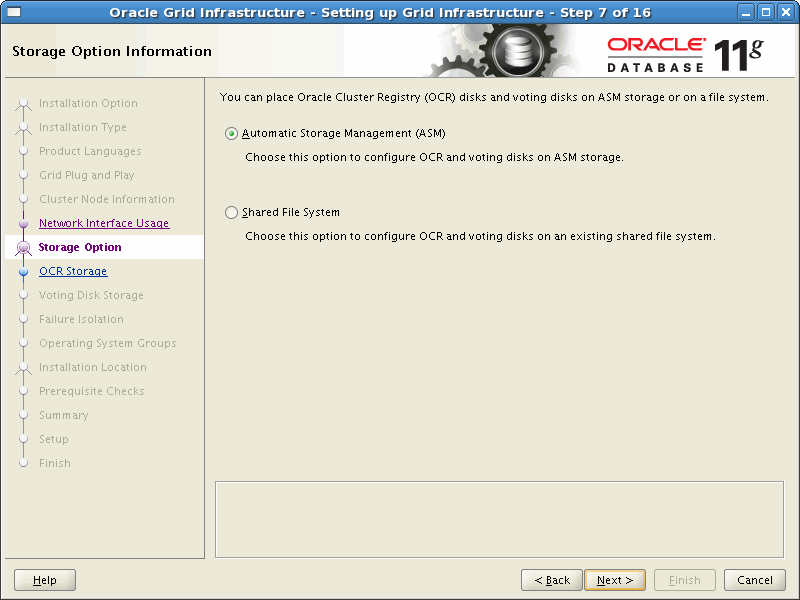
|
Storage Option Information |
Select " Automatic Storage Management (ASM)". |
||||||||||
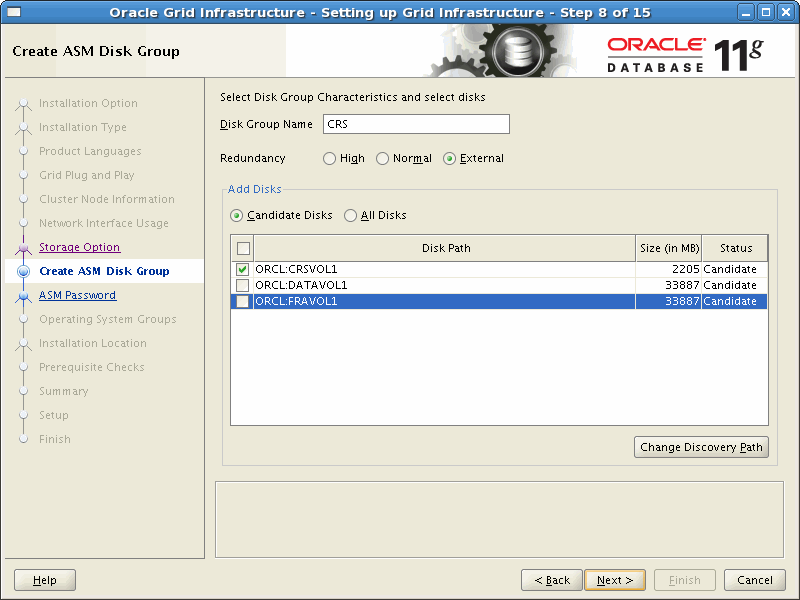
|
Create ASM Disk Group |
Create an ASM Disk Group that will be used to store the Oracle Clusterware files according to the values in the table below:
|
||||||||||
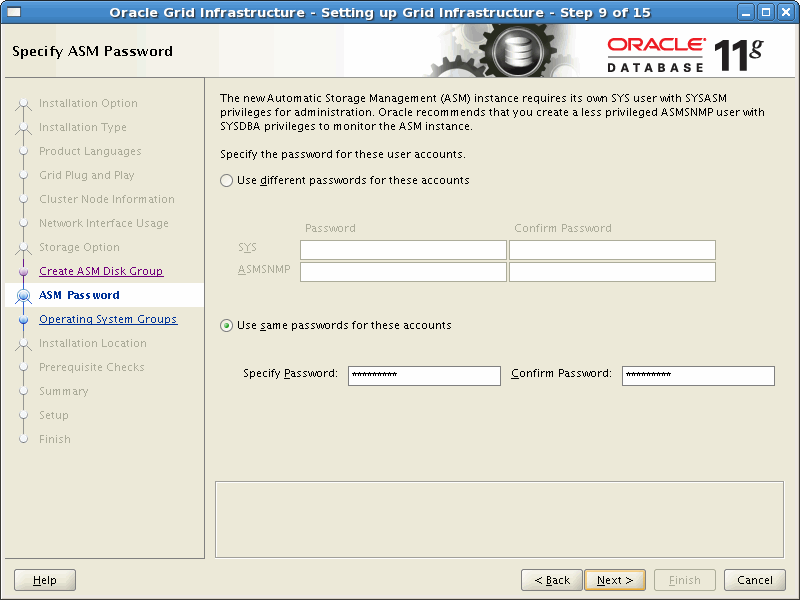
|
Specify ASM Password |
For the purpose of this article, I choose to " Use same passwords for these accounts". |
||||||||||
|
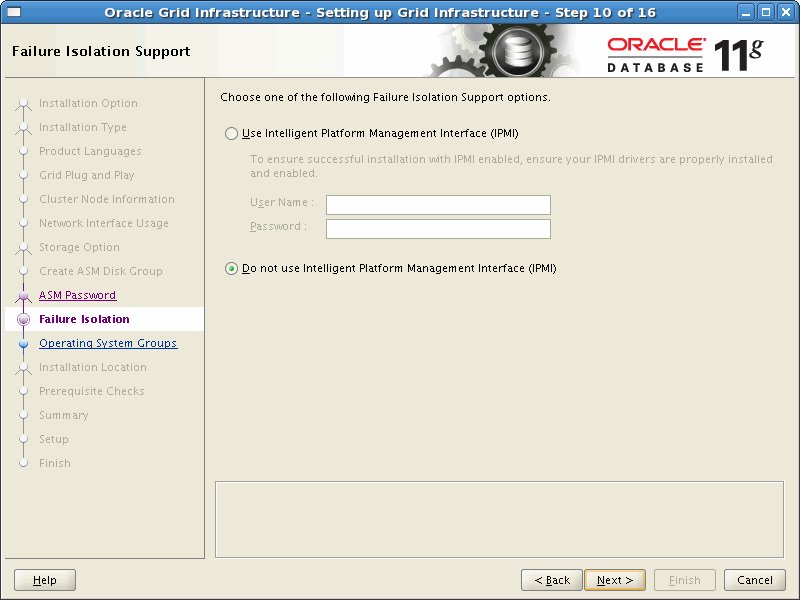
Failure Isolation Support |
Configuring Intelligent Platform Management Interface (IPMI) is beyond the scope of this article. Select " Do not use Intelligent Platform Management Interface (IPMI)". |
||||||||||
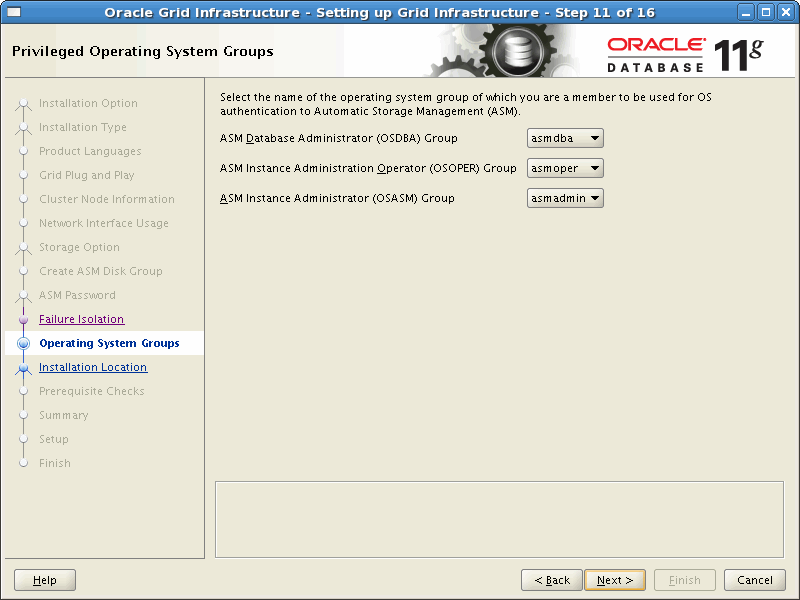
|
Privileged Operating System Groups |
This article makes use of role-based administrative privileges and high granularity in specifying Automatic Storage Management roles using a Job Role Separation. configuration. Make any changes necessary to match the values in the table below:
|
||||||||||
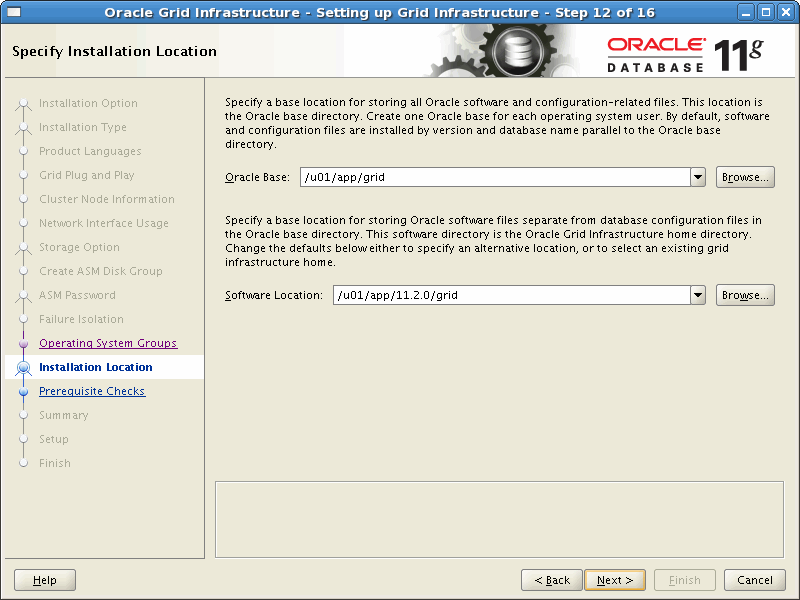
|
Specify Installation Location |
Set the "Oracle Base" ( $ORACLE_BASE) and "Software Location" ($ORACLE_HOME) for the Oracle grid infrastructure installation: |
||||||||||
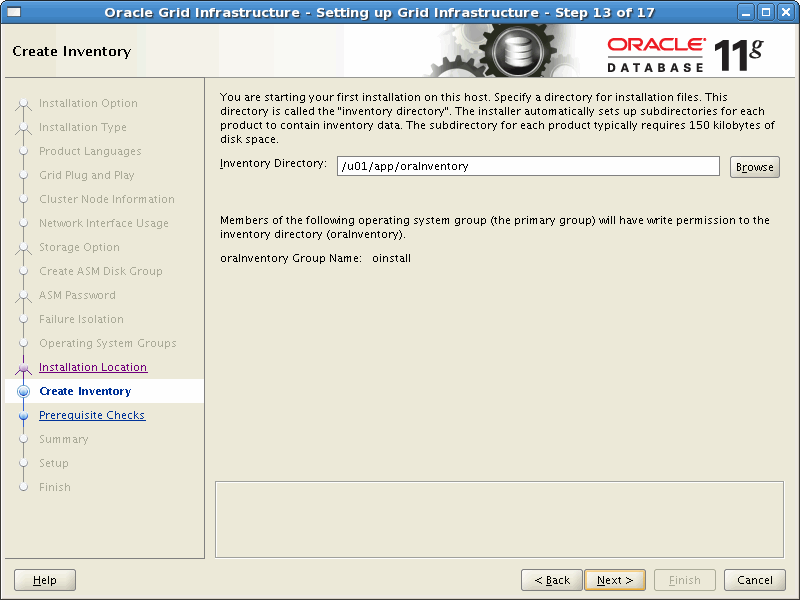
|
Create Inventory |
Since this is the first install on the host, you will need to create the Oracle Inventory. Use the default values provided by the OUI: |
||||||||||
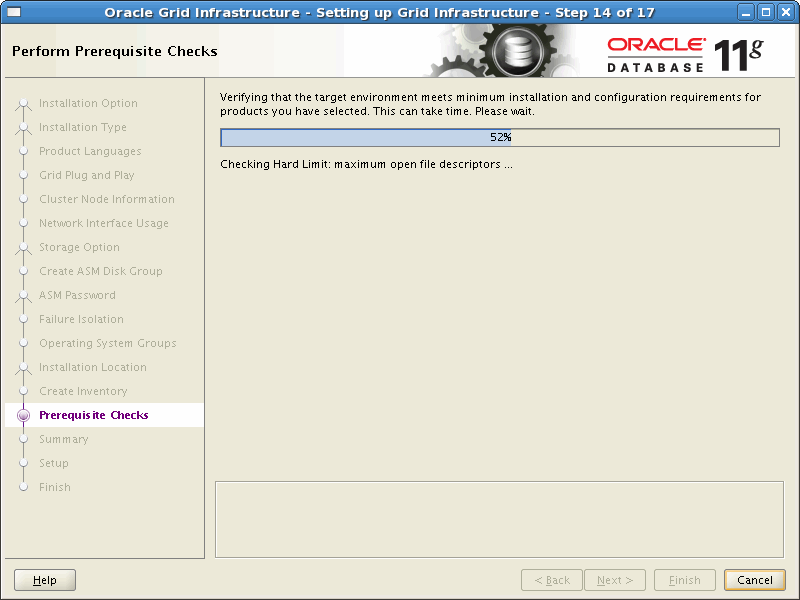
|
Prerequisite Checks |
The installer will run through a series of checks to determine if both Oracle RAC nodes meet the minimum requirements for installing and configuring the Oracle Clusterware and Automatic Storage Management software. Starting with Oracle Clusterware 11g release 2 (11.2), if any checks fail, the installer (OUI) will create shell script programs, called fixup scripts, to resolve many incomplete system configuration requirements. If OUI detects an incomplete task that is marked "fixable", then you can easily fix the issue by generating the fixup script by clicking the [Fix & Check Again] button. The fixup script is generated during installation. You will be prompted to run the script as root in a separate terminal session. When you run the script, it raises kernel values to required minimums, if necessary, and completes other operating system configuration tasks. If all prerequisite checks pass (as was the case for my install), the OUI continues to the Summary screen. |
||||||||||
|
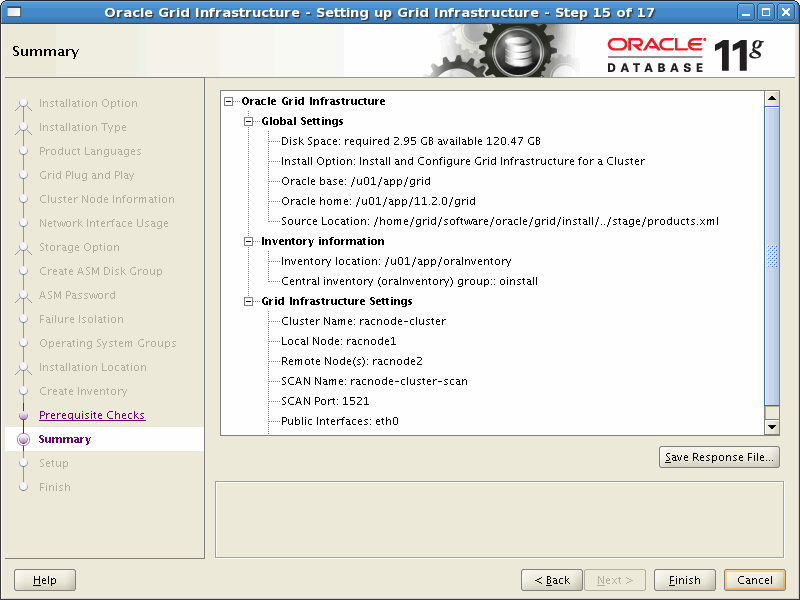
Summary |
Click [Finish] to start the installation. |
||||||||||
|
Setup |
The installer performs the Oracle grid infrastructure setup process on both Oracle RAC nodes. |
||||||||||
|
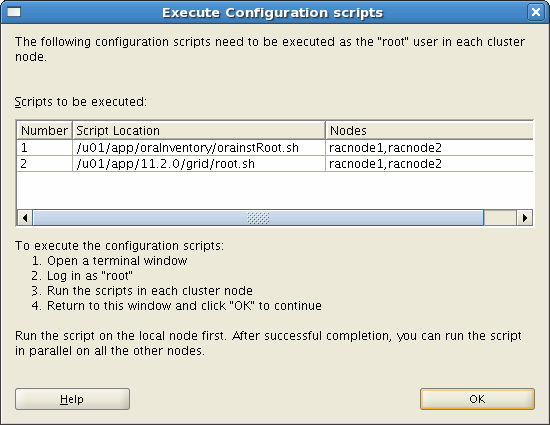
Execute Configuration scripts |
After the installation completes, you will be prompted to run the/u01/app/oraInventory/orainstRoot.sh and/u01/app/11.2.0/grid/root.sh scripts. Open a new console window on both Oracle RAC nodes in the cluster, (starting with the node you are performing the install from), as the root user account. Run the orainstRoot.sh script on both nodes in the RAC cluster: [root@racnode1 ~]#
/u01/app/oraInventory/orainstRoot.sh
[root@racnode2 ~]#
/u01/app/oraInventory/orainstRoot.sh
Within the same new console window on both Oracle RAC nodes in the cluster, (starting with the node you are performing the install from), stay logged in as the root user account. Run the root.sh script on both nodes in the RAC cluster one at a time starting with the node you are performing the install from: [root@racnode1 ~]#
/u01/app/11.2.0/grid/root.sh
[root@racnode2 ~]#
/u01/app/11.2.0/grid/root.sh
The root.sh script can take several minutes to run. When running root.shon the last node, you will receive output similar to the following which signifies a successful install: ... The inventory pointer is located at /etc/oraInst.loc The inventory is located at /u01/app/oraInventory 'UpdateNodeList' was successful. Go back to OUI and acknowledge the "Execute Configuration scripts" dialog window. |
||||||||||
|
Configure Oracle Grid Infrastructure for a Cluster |
The installer will run configuration assistants for Oracle Net Services (NETCA), Automatic Storage Management (ASMCA), and Oracle Private Interconnect (VIPCA). The final step performed by OUI is to run the Cluster Verification Utility (CVU). If the configuration assistants and CVU run successfully, you can exit OUI by clicking [Next] and then [Close]. As described earlier in this section, if you configured SCAN "only" in your hosts file ( /etc/hosts) and not in either Grid Naming Service (GNS) or manually using DNS, this is considered an invalid configuration and will cause the Cluster Verification Utility to fail. Provided this is the only error reported by the CVU, it would be safe to ignore this check and continue by clicking [Next] and then the [Close] button to exit the OUI. This is documented in Doc ID: 887471.1 on the My Oracle Supportweb site. If on the other hand you want the CVU to complete successfully while still only defining the SCAN in the hosts file, do not click the [Next] button in OUI to bypass the error. Instead, follow the instructions in section Configuring SCAN without DNS to modify the nslookup utility. After completing the steps document in that section, return to the OUI and click the [Retry] button. The CVU should now finish with no errors. Click [Next] and then [Close] to exit the OUI. |
||||||||||
|
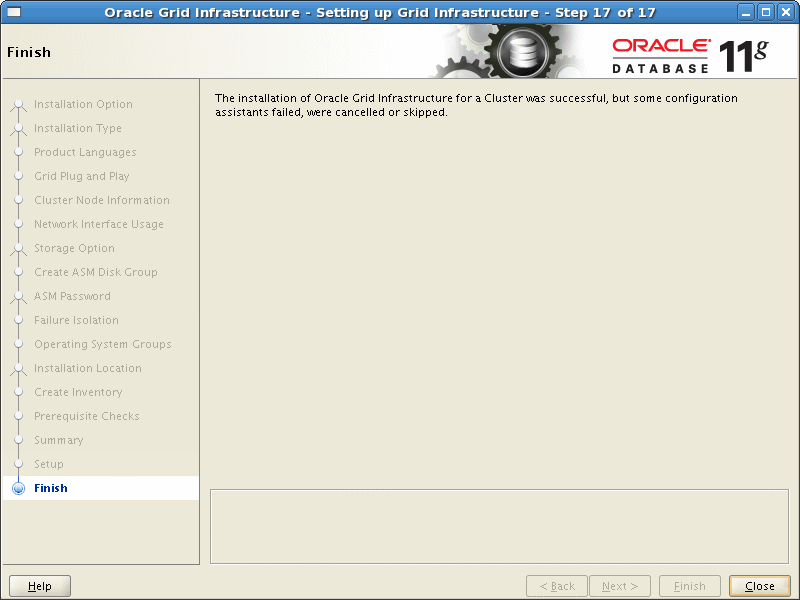
Finish |
At the end of the installation, click the [Close] button to exit the OUI. |
Caution: After installation is complete, do not remove manually or run cron jobs that remove /tmp/.oracle or /var/tmp/.oracle or its files while Oracle Clusterware is up. If you remove these files, then Oracle Clusterware could encounter intermittent hangs, and you will encounter error CRS-0184: Cannot communicate with the CRS daemon.
22. Postinstallation Tasks for Oracle Grid Infrastructure for a Cluster
Perform the following postinstallation procedures on both Oracle RAC nodes in the cluster.
Verify Oracle Clusterware Installation
After the installation of Oracle grid infrastructure, you should run through several tests to verify the install was successful. Run the following commands on both nodes in the RAC cluster as the grid user.
Check CRS Status
[grid@racnode1 ~]$
crsctl check crs
CRS-4638: Oracle High Availability Services is online
CRS-4537: Cluster Ready Services is online
CRS-4529: Cluster Synchronization Services is online
CRS-4533: Event Manager is online
Check Clusterware Resources
Note: The crs_stat command is deprecated in Oracle Clusterware 11g release 2 (11.2).
[grid@racnode1 ~]$
crs_stat -t -v
Name Type R/RA F/FT Target State Host
----------------------------------------------------------------------
ora.CRS.dg ora....up.type 0/5 0/ ONLINE ONLINE racnode1
ora....ER.lsnr ora....er.type 0/5 0/ ONLINE ONLINE racnode1
ora....N1.lsnr ora....er.type 0/5 0/0 ONLINE ONLINE racnode1
ora.asm ora.asm.type 0/5 0/ ONLINE ONLINE racnode1
ora.eons ora.eons.type 0/3 0/ ONLINE ONLINE racnode1
ora.gsd ora.gsd.type 0/5 0/ OFFLINE OFFLINE
ora....network ora....rk.type 0/5 0/ ONLINE ONLINE racnode1
ora.oc4j ora.oc4j.type 0/5 0/0 OFFLINE OFFLINE
ora.ons ora.ons.type 0/3 0/ ONLINE ONLINE racnode1
ora....SM1.asm application 0/5 0/0 ONLINE ONLINE racnode1
ora....E1.lsnr application 0/5 0/0 ONLINE ONLINE racnode1
ora....de1.gsd application 0/5 0/0 OFFLINE OFFLINE
ora....de1.ons application 0/3 0/0 ONLINE ONLINE racnode1
ora....de1.vip ora....t1.type 0/0 0/0 ONLINE ONLINE racnode1
ora....SM2.asm application 0/5 0/0 ONLINE ONLINE racnode2
ora....E2.lsnr application 0/5 0/0 ONLINE ONLINE racnode2
ora....de2.gsd application 0/5 0/0 OFFLINE OFFLINE
ora....de2.ons application 0/3 0/0 ONLINE ONLINE racnode2
ora....de2.vip ora....t1.type 0/0 0/0 ONLINE ONLINE racnode2
ora....ry.acfs ora....fs.type 0/5 0/ ONLINE ONLINE racnode1
ora.scan1.vip ora....ip.type 0/0 0/0 ONLINE ONLINE racnode1
Check Cluster Nodes
[grid@racnode1 ~]$
olsnodes -n
racnode1 1
racnode2 2
Check Oracle TNS Listener Process on Both Nodes
[grid@racnode1 ~]$
ps -ef | grep lsnr | grep -v 'grep' | grep -v 'ocfs' | awk '{print $9}'
LISTENER_SCAN1
LISTENER
[grid@racnode2 ~]$
ps -ef | grep lsnr | grep -v 'grep' | grep -v 'ocfs' | awk '{print $9}'
LISTENER
Confirming Oracle ASM Function for Oracle Clusterware Files
If you installed the OCR and voting disk files on Oracle ASM, then use the following command syntax as the Grid Infrastructure installation owner to confirm that your Oracle ASM installation is running:
[grid@racnode1 ~]$
srvctl status asm -a
ASM is running on racnode1,racnode2
ASM is enabled.
Check Oracle Cluster Registry (OCR)
[grid@racnode1 ~]$
ocrcheck
Status of Oracle Cluster Registry is as follows :
Version : 3
Total space (kbytes) : 262120
Used space (kbytes) : 2404
Available space (kbytes) : 259716
ID : 1259866904
Device/File Name : +CRS
Device/File integrity check succeeded
Device/File not configured
Device/File not configured
Device/File not configured
Device/File not configured
Cluster registry integrity check succeeded
Logical corruption check bypassed due to non-privileged user
Check Voting Disk
[grid@racnode1 ~]$
crsctl query css votedisk
## STATE File Universal Id File Name Disk group
-- ----- ----------------- --------- ---------
1. ONLINE 4cbbd0de4c694f50bfd3857ebd8ad8c4 (ORCL:CRSVOL1) [CRS]
Located 1 voting disk(s).
Note: To manage Oracle ASM or Oracle Net 11g release 2 (11.2) or later installations, use the srvctl binary in the Oracle grid infrastructure home for a cluster (Grid home). When we install Oracle Real Application Clusters (the Oracle database software), you cannot use the srvctl binary in the database home to manage Oracle ASM or Oracle Net which reside in the Oracle grid infrastructure home.
Voting Disk Management
In prior releases, it was highly recommended to back up the voting disk using the dd command after installing the Oracle Clusterware software. With Oracle Clusterware release 11.2 and later, backing up and restoring a voting disk using the dd is not supported and may result in the loss of the voting disk.
Backing up the voting disks in Oracle Clusterware 11g release 2 is no longer required. The voting disk data is automatically backed up in OCR as part of any configuration change and is automatically restored to any voting disk added.
To learn more about managing the voting disks, Oracle Cluster Registry (OCR), and Oracle Local Registry (OLR), please refer to theOracle Clusterware Administration and Deployment Guide 11g Release 2 (11.2) .
Back Up the root.sh Script
Oracle recommends that you back up the root.sh script after you complete an installation. If you install other products in the same Oracle home directory, then the installer updates the contents of the existing root.sh script during the installation. If you require information contained in the original root.sh script, then you can recover it from the root.sh file copy.
Back up the root.sh file on both Oracle RAC nodes as root:
[root@racnode1 ~]#
cd /u01/app/11.2.0/grid
[root@racnode1 grid]#
cp root.sh root.sh.racnode1.AFTER_INSTALL_NOV-20-2009
[root@racnode2 ~]#
cd /u01/app/11.2.0/grid
[root@racnode2 grid]#
cp root.sh root.sh.racnode2.AFTER_INSTALL_NOV-20-2009
Install Cluster Health Management Software - (Optional)
To address troubleshooting issues, Oracle recommends that you install Instantaneous Problem Detection OS Tool (IPD/OS) if you are using Linux kernel 2.6.9 or higher. This article was written using Oracle Enterprise Linux 5 update 4 which uses the 2.6.18 kernel:
[root@racnode1 ~]#
uname -a
Linux racnode1 2.6.18-164.el5 #1 SMP Thu Sep 3 04:15:13 EDT 2009 x86_64 x86_64 x86_64 GNU/Linux
If you are using a Linux kernel earlier than 2.6.9, then you would use OS Watcher and RACDDT which is available through the My Oracle Support website (formerly Metalink).
The IPD/OS tool is designed to detect and analyze operating system and cluster resource-related degradation and failures. The tool can provide better explanations for many issues that occur in clusters where Oracle Clusterware, Oracle ASM and Oracle RAC are running, such as node evictions. It tracks the operating system resource consumption at each node, process, and device level continuously. It collects and analyzes cluster-wide data. In real time mode, when thresholds are reached, an alert is shown to the operator. For root cause analysis, historical data can be replayed to understand what was happening at the time of failure.
Instructions for installing and configuring the IPD/OS tool is beyond the scope of this article and will not be discussed. You can download the IPD/OS tool along with a detailed installation and configuration guide at the following URL:
http://www.oracle.com/technology/products/database/clustering/ipd_download_homepage.html
23. Create ASM Disk Groups for Data and Fast Recovery Area
Run the ASM Configuration Assistant (asmca) as the grid user from only one node in the cluster (racnode1) to create the additional ASM disk groups which will be used to create the clustered database.
During the installation of Oracle grid infrastructure, we configured one ASM disk group named +CRS which was used to store the Oracle clusterware files (OCR and voting disk).
In this section, we will create two additional ASM disk groups using the ASM Configuration Assistant ( asmca). These new ASM disk groups will be used later in this guide when creating the clustered database.
The first ASM disk group will be named +RACDB_DATA and will be used to store all Oracle physical database files (data, online redo logs, control files, archived redo logs). A second ASM disk group will be created for the Fast Recovery Area named +FRA.
Verify Terminal Shell Environment
Before starting the ASM Configuration Assistant, log in to racnode1 as the owner of the Oracle grid infrastructure software which for this article is grid. Next, if you are using a remote client to connect to the Oracle RAC node performing the installation (SSH or Telnet to racnode1 from a workstation configured with an X Server), verify your X11 display server settings which were described in the section, Logging In to a Remote System Using X Terminal.
Create Additional ASM Disk Groups using ASMCA
Perform the following tasks as the grid user to create two additional ASM disk groups:
[grid@racnode1 ~]$
asmca &
|
Screen Name |
Response |
Screen Shot |
|
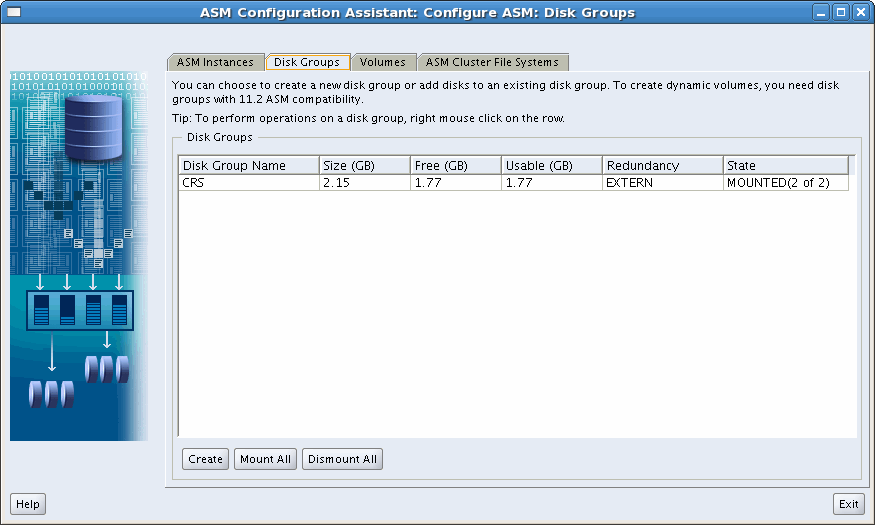
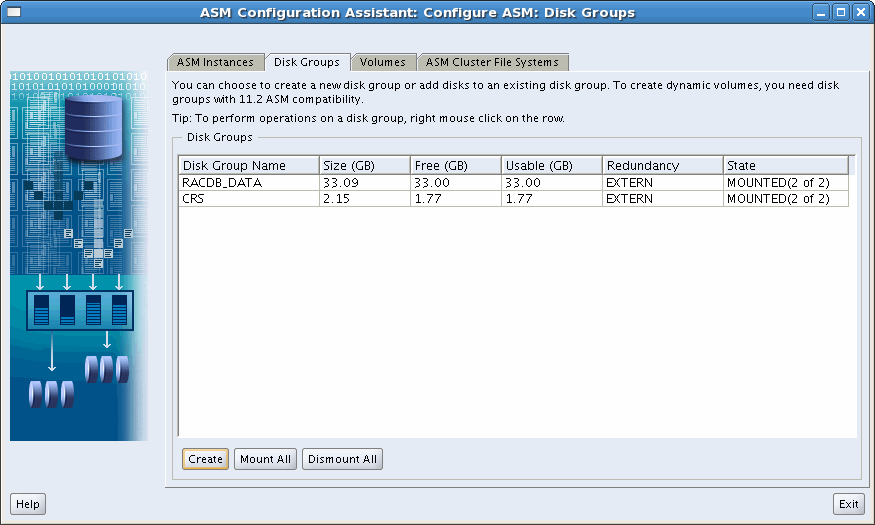
Disk Groups |
From the "Disk Groups" tab, click the " Create" button. |
|
|
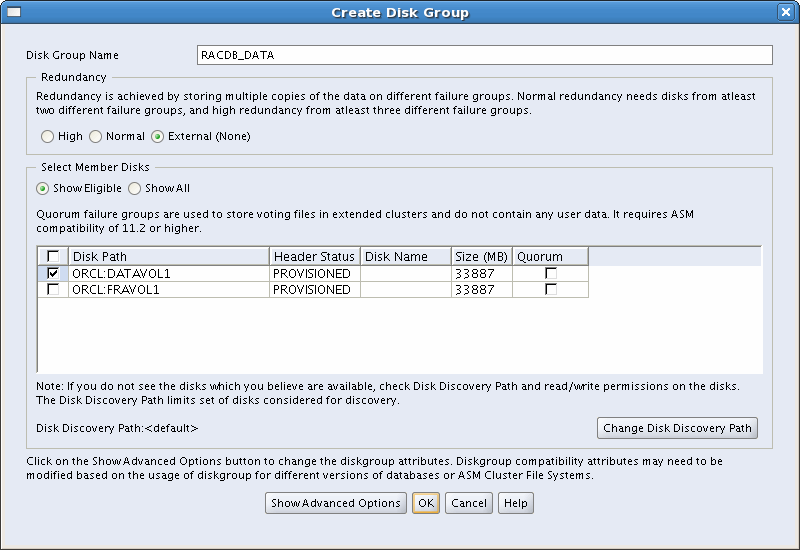
Create Disk Group |
The "Create Disk Group" dialog should show two of the ASMLib volumes we created earlier in this guide. If the ASMLib volumes we created earlier in this article do not show up in the "Select Member Disks" window as eligible ( ORCL:DATAVOL1 and ORCL:FRAVOL1) then click on the "Change Disk Discovery Path" button and input " ORCL:*". When creating the "Data" ASM disk group, use " RACDB_DATA" for the "Disk Group Name". In the "Redundancy" section, choose " External (none)". Finally, check the ASMLib volume "ORCL:DATAVOL1" in the "Select Member Disks" section. After verifying all values in this dialog are correct, click the " [OK]" button. |
|
|
Disk Groups |
After creating the first ASM disk group, you will be returned to the initial dialog. Click the "Create" button again to create the second ASM disk group. |
|
|
Create Disk Group |
The "Create Disk Group" dialog should now show the final remaining ASMLib volume. When creating the "Fast Recovery Area" disk group, use " FRA" for the "Disk Group Name". In the "Redundancy" section, choose " External (none)". Finally, check the ASMLib volume "ORCL:FRAVOL1" in the "Select Member Disks" section. After verifying all values in this dialog are correct, click the " [OK]" button. |
|
|
Disk Groups |
Exit the ASM Configuration Assistant by clicking the [Exit] button. |
24. Install Oracle Database 11g with Oracle Real Application Clusters
Perform the Oracle Database software installation from only one of the Oracle RAC nodes in the cluster (racnode1)! The Oracle Database software will be installed to both of Oracle RAC nodes in the cluster by the Oracle Universal Installer using SSH.
Now that the grid infrastructure software is functional, you can install the Oracle Database software on the one node in your cluster (racnode1) as the oracle user. OUI copies the binary files from this node to all the other node in the cluster during the installation process.
For the purpose of this guide, we will forgo the "Create Database" option when installing the Oracle Database software. The clustered database will be created later in this guide using the Database Configuration Assistant (DBCA) after all installs have been completed.
Verify Terminal Shell Environment
Before starting the Oracle Universal Installer (OUI), log in to racnode1 as the owner of the Oracle Database software which for this article is oracle. Next, if you are using a remote client to connect to the Oracle RAC node performing the installation (SSH or Telnet toracnode1 from a workstation configured with an X Server), verify your X11 display server settings which were described in the section, Logging In to a Remote System Using X Terminal.
Install Oracle Database 11g Release 2 Software
Perform the following tasks as the oracle user to install the Oracle Database software:
[oracle@racnode1 ~]$
id
uid=1101(oracle) gid=1000(oinstall) groups=1000(oinstall),1201(asmdba),1300(dba),1301(oper)
[oracle@racnode1 ~]$
DISPLAY=<your local workstation>:0.0
[oracle@racnode1 ~]$
export DISPLAY
[oracle@racnode1 ~]$
cd /home/oracle/software/oracle/database
[oracle@racnode1 database]$
./runInstaller
|
Screen Name |
Response |
Screen Shot |
|
Configure Security Updates |
For the purpose of this article, un-check the security updates checkbox and click the [Next] button to continue. Acknowledge the warning dialog indicating you have not provided an email address by clicking the [Yes]button. |
|
|
Installation Option |
Select " Install database software only". |
|
|
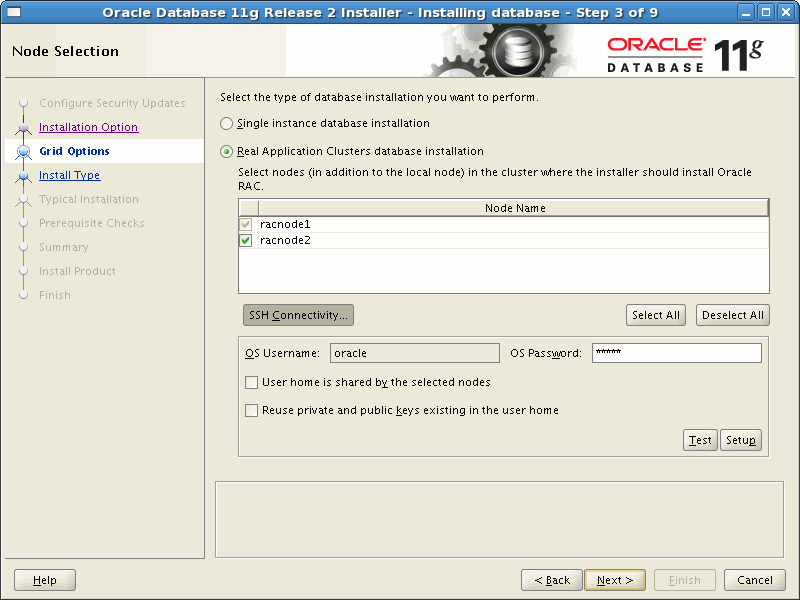
Grid Options |
Select the " Real Application Clusters database installation" radio button (default) and verify that both Oracle RAC nodes are checked in the "Node Name" window. Next, click the [SSH Connectivity] button. Enter the "OS Password" for theoracle user and click the [Setup] button. This will start the "SSH Connectivity" configuration process:
After the SSH configuration process successfully completes, acknowledge the dialog box. Finish off this screen by clicking the [Test] button to verify passwordless SSH connectivity. |
|
|
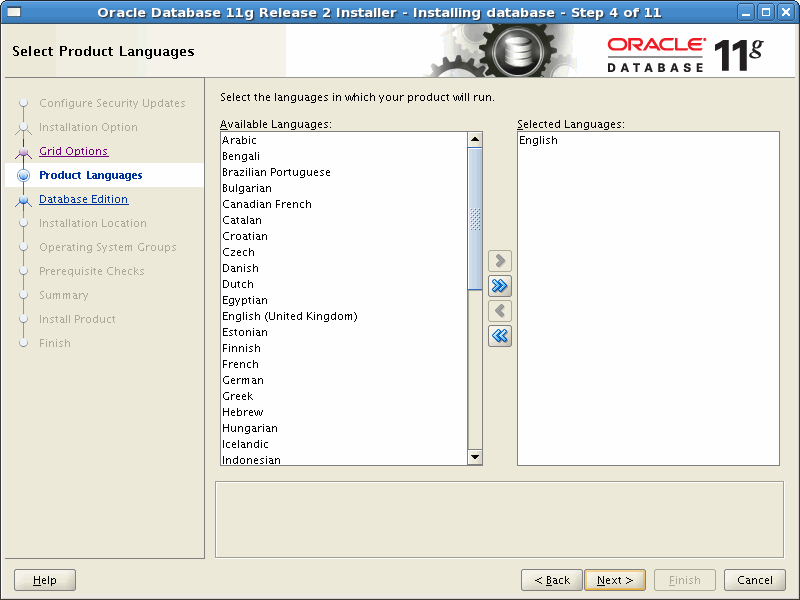
Product Languages |
Make the appropriate selection(s) for your environment. |
|
|
Database Edition |
Select " Enterprise Edition". |
|
|
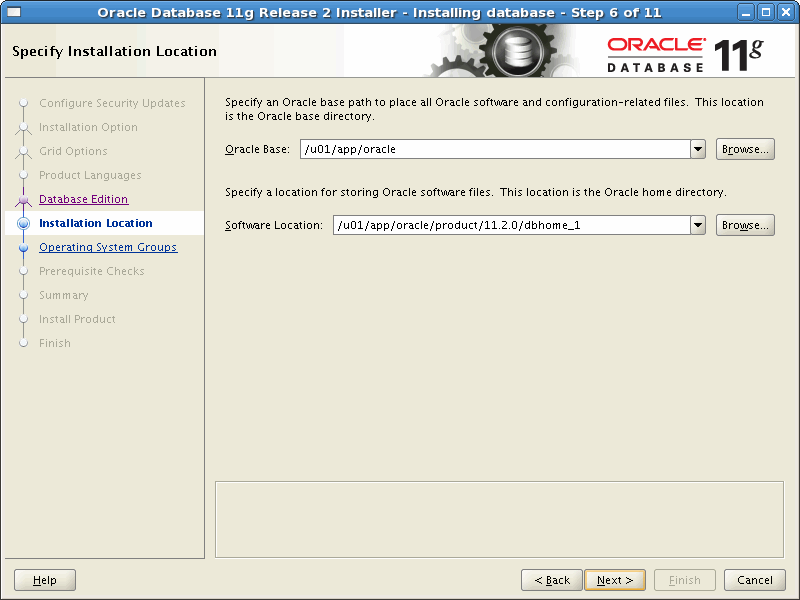
Installation Location |
Specify the Oracle base and Software location (Oracle_home) as follows: |
|
|
Operating System Groups |
Select the OS groups to be used for the SYSDBA and SYSOPER privileges: |
|
|
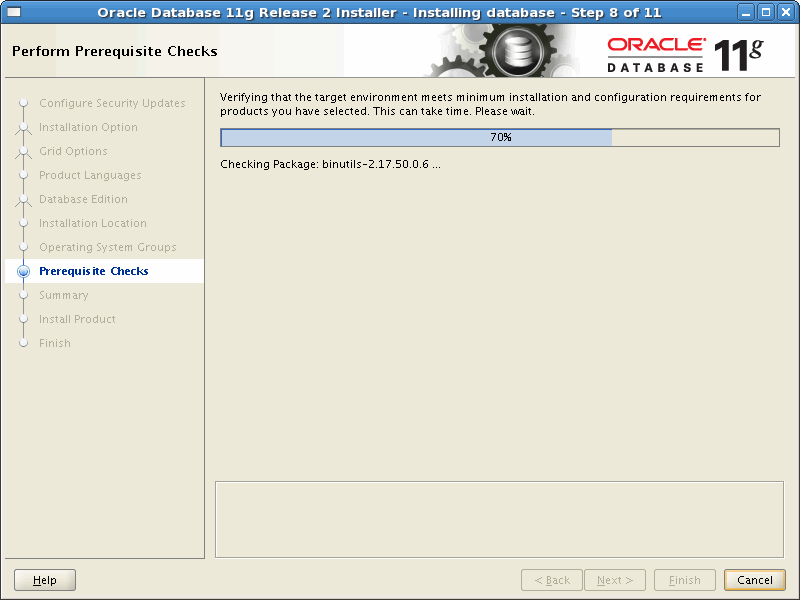
Prerequisite Checks |
The installer will run through a series of checks to determine if both Oracle RAC nodes meet the minimum requirements for installing and configuring the Oracle Database software. Starting with 11g release 2 (11.2), if any checks fail, the installer (OUI) will create shell script programs, called fixup scripts, to resolve many incomplete system configuration requirements. If OUI detects an incomplete task that is marked "fixable", then you can easily fix the issue by generating the fixup script by clicking the [Fix & Check Again] button. The fixup script is generated during installation. You will be prompted to run the script as root in a separate terminal session. When you run the script, it raises kernel values to required minimums, if necessary, and completes other operating system configuration tasks. If all prerequisite checks pass (as was the case for my install), the OUI continues to the Summary screen. |
|
|
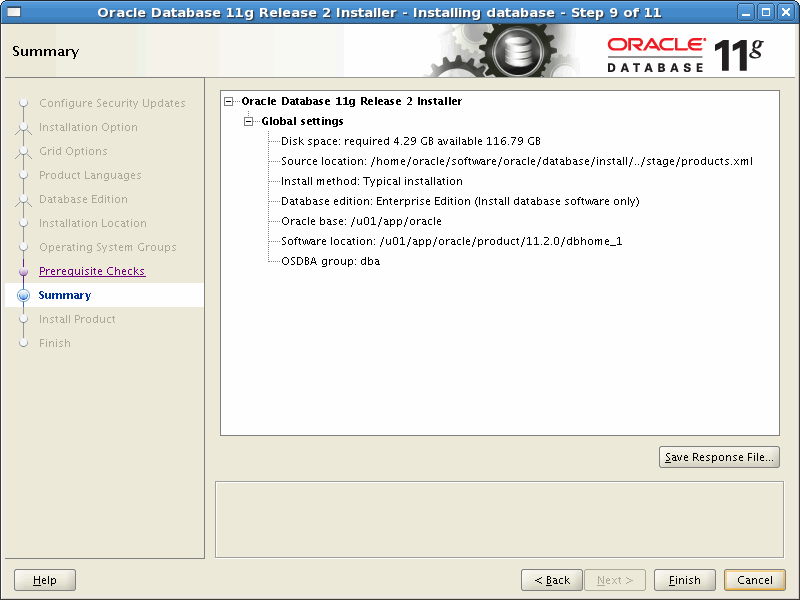
Summary |
Click [Finish] to start the installation. |
|
|
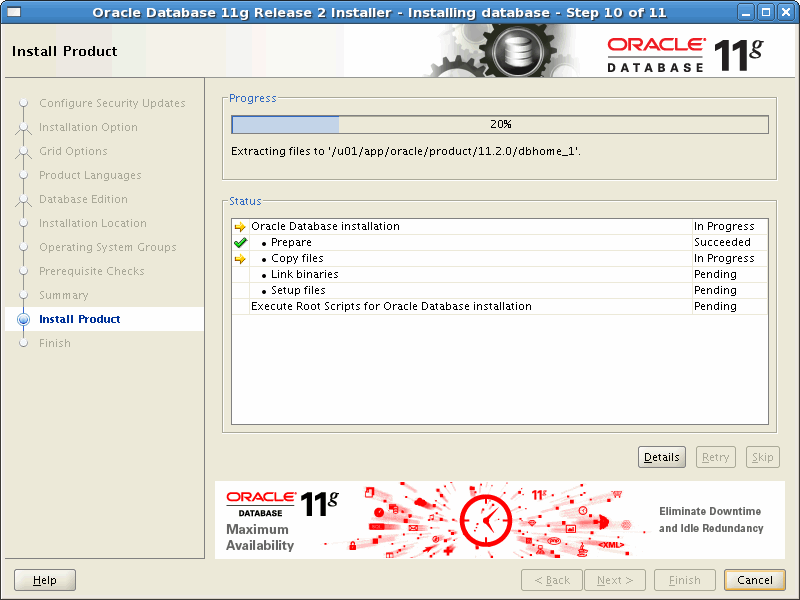
Install Product |
The installer performs the Oracle Database software installation process on both Oracle RAC nodes. |
|
|
Execute Configuration scripts |
After the installation completes, you will be prompted to run the/u01/app/oracle/product/11.2.0/dbhome_1/root.sh script on both Oracle RAC nodes. Open a new console window on both Oracle RAC nodes in the cluster, (starting with the node you are performing the install from), as theroot user account. Run the root.sh script on all nodes in the RAC cluster: [root@racnode1 ~]#
/u01/app/oracle/product/11.2.0/dbhome_1/root.sh
[root@racnode2 ~]#
/u01/app/oracle/product/11.2.0/dbhome_1/root.sh
Go back to OUI and acknowledge the "Execute Configuration scripts" dialog window. |
|
|
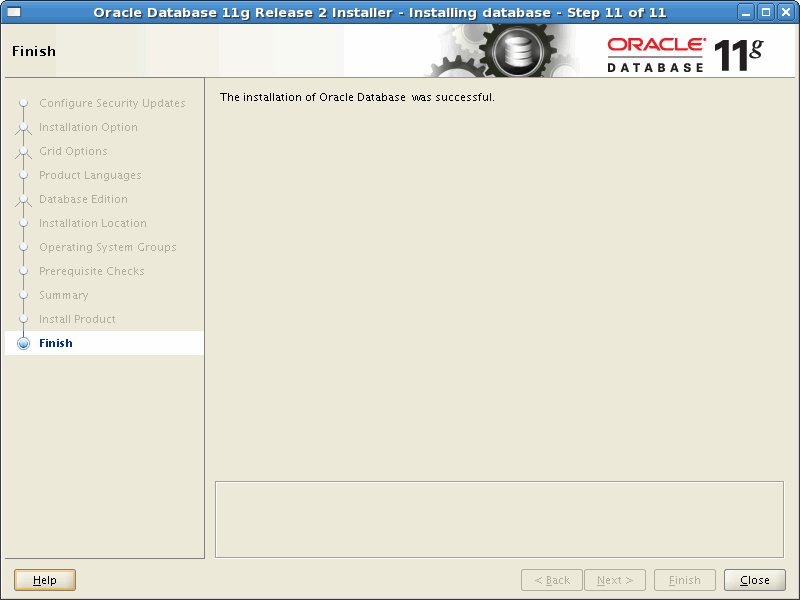
Finish |
At the end of the installation, click the [Close] button to exit the OUI. |
25. Install Oracle Database 11g Examples (formerly Companion)
Perform the Oracle Database 11g Examples software installation from only one of the Oracle RAC nodes in the cluster (racnode1)! The Oracle Database Examples software will be installed to both of Oracle RAC nodes in the cluster by the Oracle Universal Installer using SSH.
Now that the Oracle Database 11g software is installed, you have the option to install the Oracle Database 11g Examples. Like the Oracle Database software install, the Examples software is only installed from one node in your cluster ( racnode1) as the oracleuser. OUI copies the binary files from this node to all the other node in the cluster during the installation process.
Verify Terminal Shell Environment
Before starting the Oracle Universal Installer (OUI), log in to racnode1 as the owner of the Oracle Database software which for this article is oracle. Next, if you are using a remote client to connect to the Oracle RAC node performing the installation (SSH or Telnet toracnode1 from a workstation configured with an X Server), verify your X11 display server settings which were described in the section, Logging In to a Remote System Using X Terminal.
Install Oracle Database 11g Release 2 Examples
Perform the following tasks as the oracle user to install the Oracle Database Examples:
[oracle@racnode1 ~]$
cd /home/oracle/software/oracle/examples
[oracle@racnode1 examples]$
./runInstaller
|
Screen Name |
Response |
Screen Shot |
|
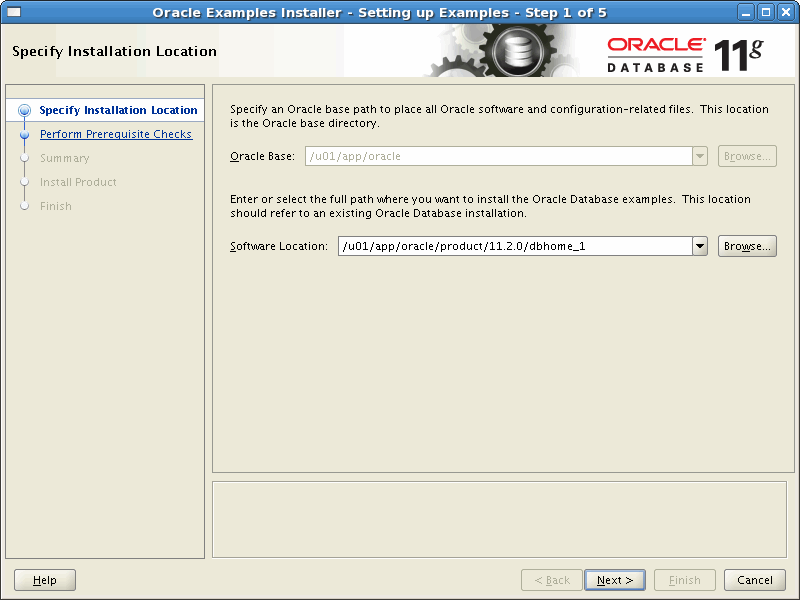
Installation Location |
Specify the Oracle base and Software location (Oracle_home) as follows: |
|
|
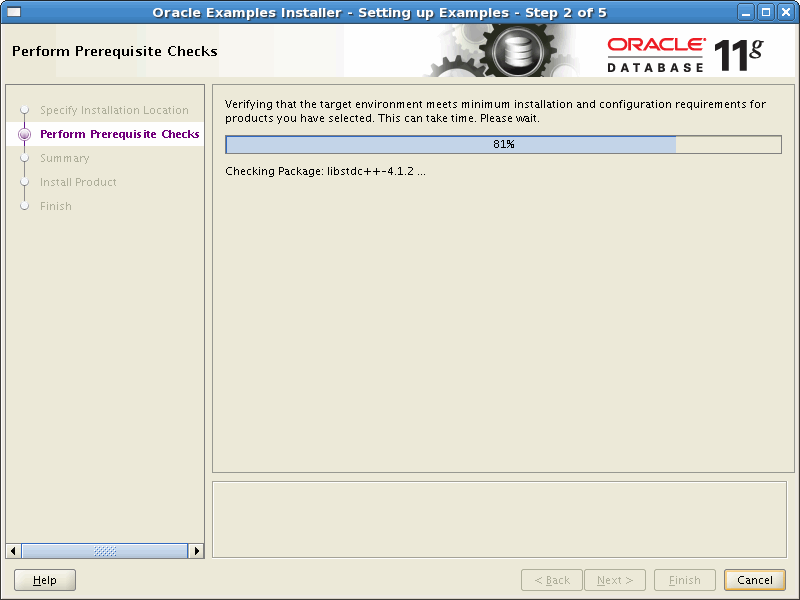
Prerequisite Checks |
The installer will run through a series of checks to determine if both Oracle RAC nodes meet the minimum requirements for installing and configuring the Oracle Database Examples software. Starting with 11g release 2 (11.2), if any checks fail, the installer (OUI) will create shell script programs, called fixup scripts, to resolve many incomplete system configuration requirements. If OUI detects an incomplete task that is marked "fixable", then you can easily fix the issue by generating the fixup script by clicking the [Fix & Check Again] button. The fixup script is generated during installation. You will be prompted to run the script as root in a separate terminal session. When you run the script, it raises kernel values to required minimums, if necessary, and completes other operating system configuration tasks. If all prerequisite checks pass (as was the case for my install), the OUI continues to the Summary screen. |
|
|
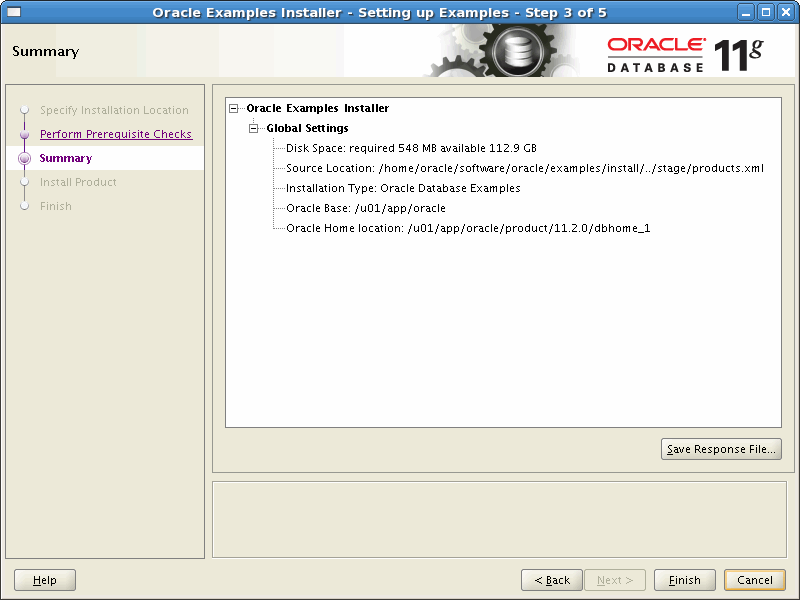
Summary |
Click [Finish] to start the installation. |
|
|
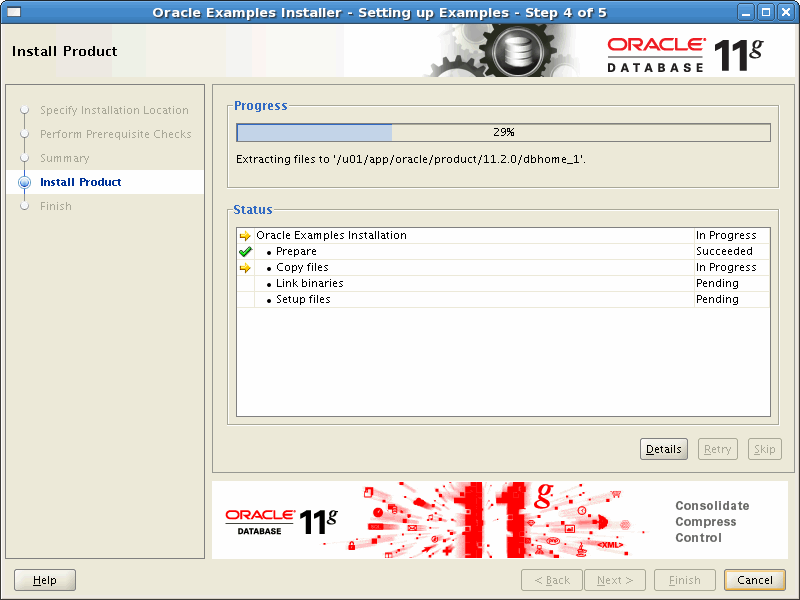
Install Product |
The installer performs the Oracle Database Examples software installation process on both Oracle RAC nodes. |
|
|
Finish |
At the end of the installation, click the [Close] button to exit the OUI. |
26. Create the Oracle Cluster Database
The database creation process should only be performed from one of the Oracle RAC nodes in the cluster (racnode1).
Use the Oracle Database Configuration Assistant (DBCA) to create the clustered database.
Before executing the DBCA, make certain that the $ORACLE_HOME and $PATH are set appropriately for the$ORACLE_BASE/product/11.2.0/dbhome_1 environment. Setting environment variables in the login script for the oracle user account was covered in Section 13.
You should also verify that all services we have installed up to this point (Oracle TNS listener, Oracle Clusterware processes, etc.) are running before attempting to start the clustered database creation process:
[oracle@racnode1 ~]$
su - grid -c "crs_stat -t -v"
Password:
*********
Name Type R/RA F/FT Target State Host
----------------------------------------------------------------------
ora.CRS.dg ora....up.type 0/5 0/ ONLINE ONLINE racnode1
ora.FRA.dg ora....up.type 0/5 0/ ONLINE ONLINE racnode1
ora....ER.lsnr ora....er.type 0/5 0/ ONLINE ONLINE racnode1
ora....N1.lsnr ora....er.type 0/5 0/0 ONLINE ONLINE racnode1
ora....DATA.dg ora....up.type 0/5 0/ ONLINE ONLINE racnode1
ora.asm ora.asm.type 0/5 0/ ONLINE ONLINE racnode1
ora.eons ora.eons.type 0/3 0/ ONLINE ONLINE racnode1
ora.gsd ora.gsd.type 0/5 0/ OFFLINE OFFLINE
ora....network ora....rk.type 0/5 0/ ONLINE ONLINE racnode1
ora.oc4j ora.oc4j.type 0/5 0/0 OFFLINE OFFLINE
ora.ons ora.ons.type 0/3 0/ ONLINE ONLINE racnode1
ora....SM1.asm application 0/5 0/0 ONLINE ONLINE racnode1
ora....E1.lsnr application 0/5 0/0 ONLINE ONLINE racnode1
ora....de1.gsd application 0/5 0/0 OFFLINE OFFLINE
ora....de1.ons application 0/3 0/0 ONLINE ONLINE racnode1
ora....de1.vip ora....t1.type 0/0 0/0 ONLINE ONLINE racnode1
ora....SM2.asm application 0/5 0/0 ONLINE ONLINE racnode2
ora....E2.lsnr application 0/5 0/0 ONLINE ONLINE racnode2
ora....de2.gsd application 0/5 0/0 OFFLINE OFFLINE
ora....de2.ons application 0/3 0/0 ONLINE ONLINE racnode2
ora....de2.vip ora....t1.type 0/0 0/0 ONLINE ONLINE racnode2
ora....ry.acfs ora....fs.type 0/5 0/ ONLINE ONLINE racnode1
ora.scan1.vip ora....ip.type 0/0 0/0 ONLINE ONLINE racnode1
Verify Terminal Shell Environment
Before starting the Database Configuration Assistant (DBCA), log in to racnode1 as the owner of the Oracle Database software which for this article is oracle. Next, if you are using a remote client to connect to the Oracle RAC node performing the installation (SSH or Telnet to racnode1 from a workstation configured with an X Server), verify your X11 display server settings which were described in the section, Logging In to a Remote System Using X Terminal.
Create the Clustered Database
To start the database creation process, run the following as the oracle user:
[oracle@racnode1 ~]$
dbca &
|
Screen Name |
Response |
Screen Shot |
|
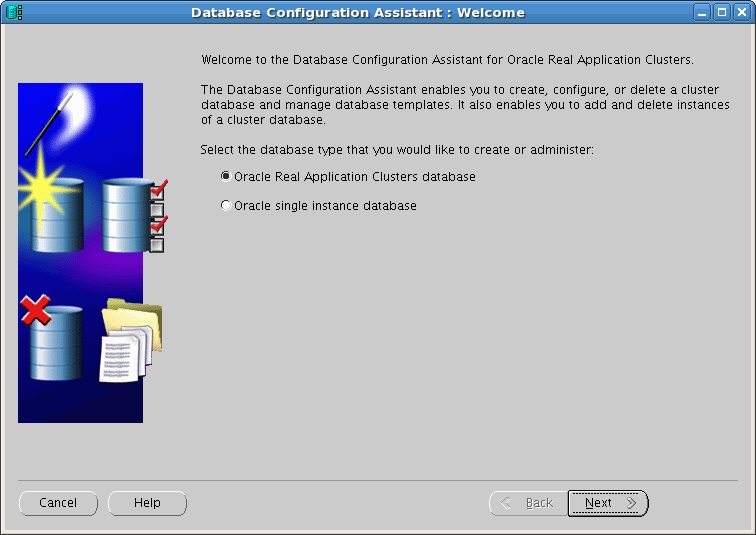
Welcome Screen |
Select Oracle Real Application Clusters database. |
|
|
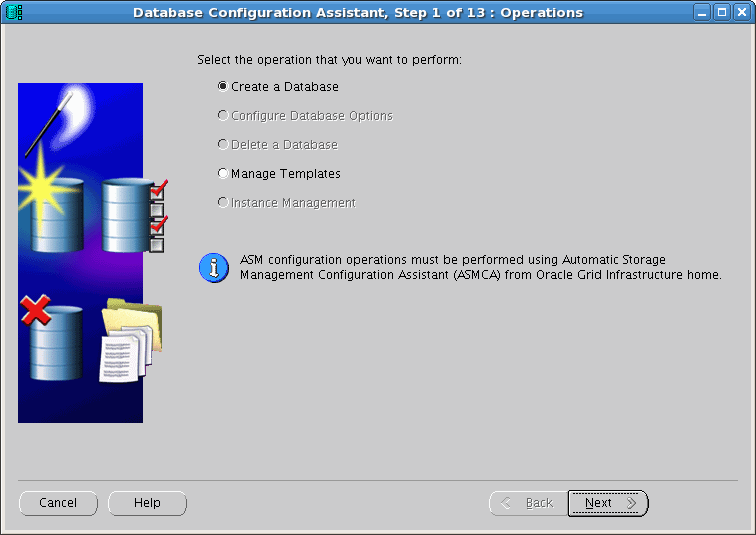
Operations |
Select Create a Database. |
|
|
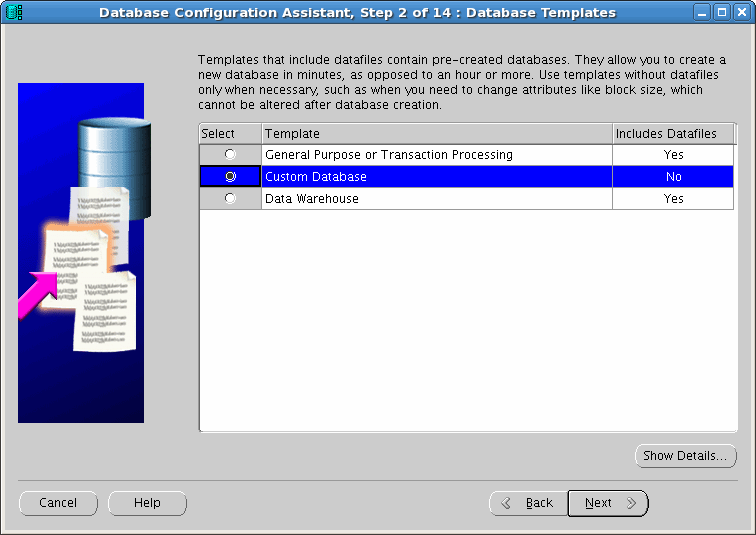
Database Templates |
Select Custom Database. |
|
|
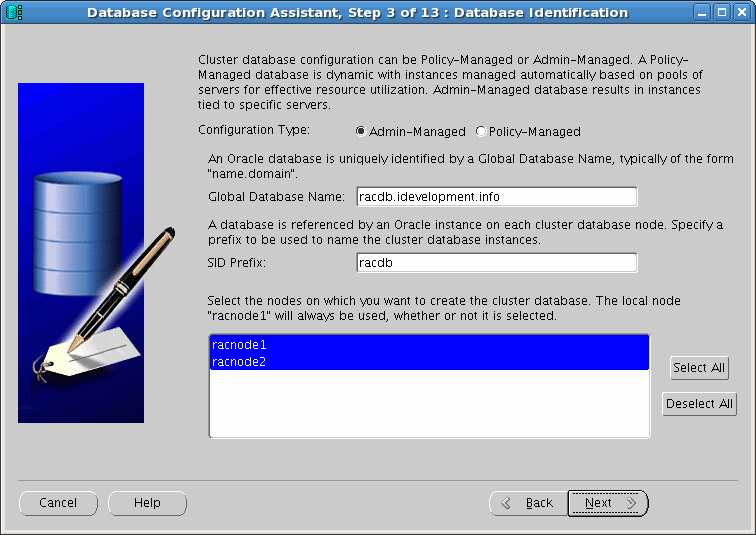
Database Identification |
Cluster database configuration. Database naming. Note: I used idevelopment.info for the database domain. You may use any database domain. Keep in mind that this domain does not have to be a valid DNS domain. Node Selection. |
|
|
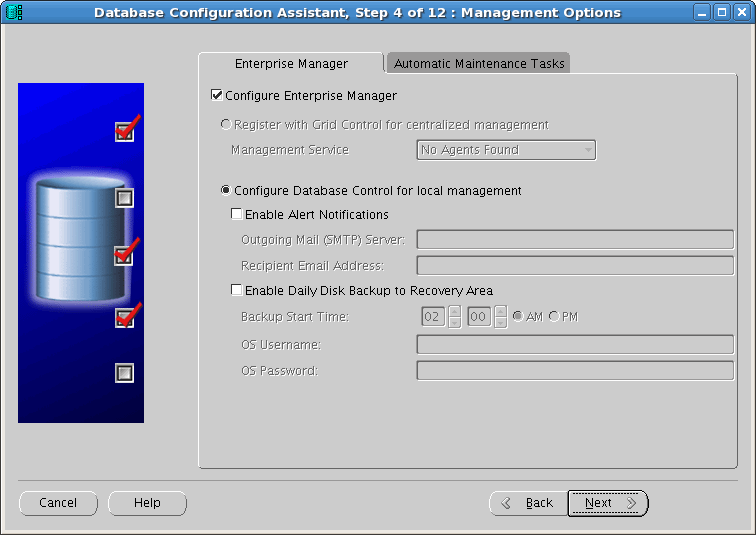
Management Options |
Leave the default options here, which is to Configure Enterprise Manager /Configure Database Control for local management. |
|
|
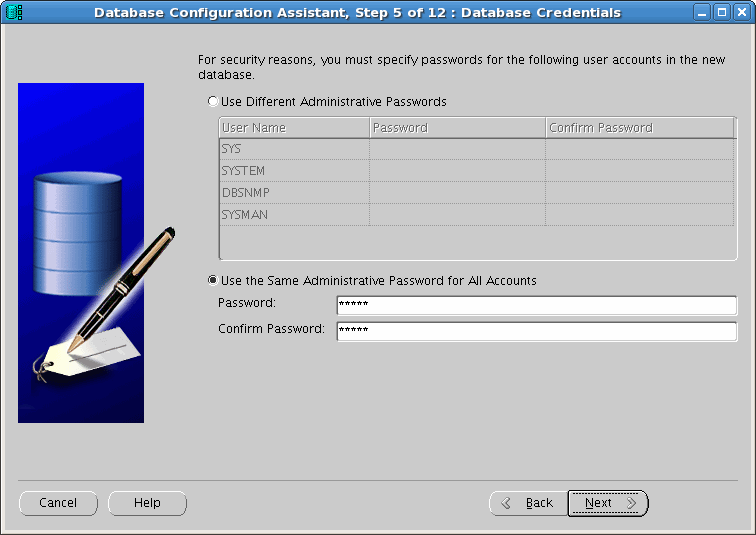
Database Credentials |
I selected to Use the Same Administrative Password for All Accounts. Enter the password (twice) and make sure the password does not start with a digit number. |
|
|
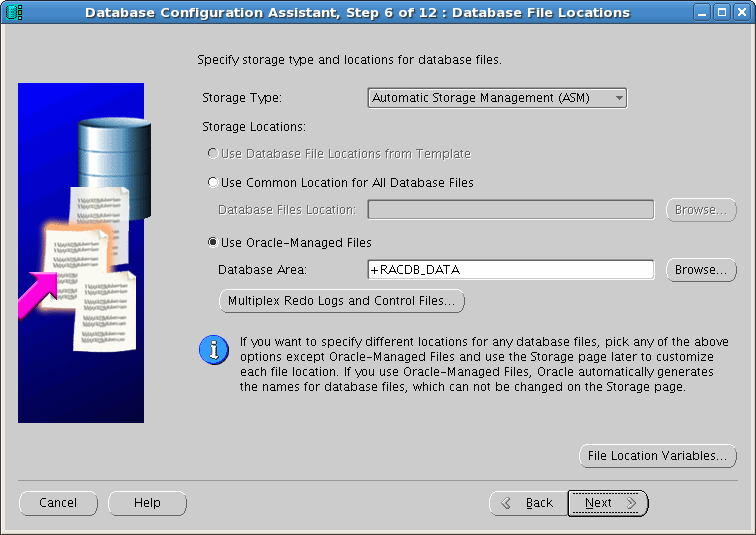
Database File Locations |
Specify storage type and locations for database files. |
|
|
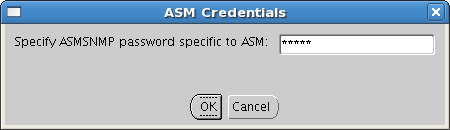
Specify ASMSNMP Password |
Specify the ASMSNMP password for the ASM instance. |
|
|
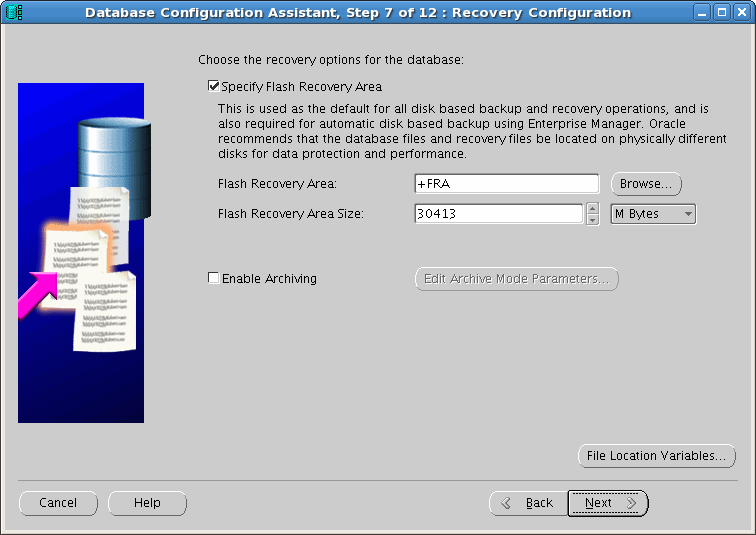
Recovery Configuration |
Check the option for Specify Fast Recovery Area. For the Fast Recovery Area, click the [Browse] button and select the disk group name +FRA. My disk group has a size of about 33GB. When defining the Fast Recovery Area size, use the entire volume minus 10% for overhead (33-10%=30 GB). I used a Fast Recovery Area Size of 30 GB ( 30413 MB). |
|
|
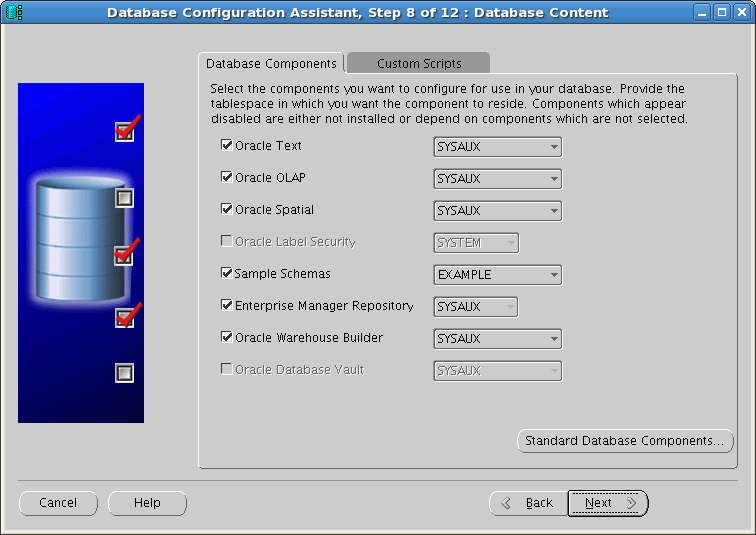
Database Content |
I left all of the Database Components (and destination tablespaces) set to their default value although it is perfectly OK to select the Sample Schemas. This option is available since we installed the Oracle Database 11gExamples. |
|
|
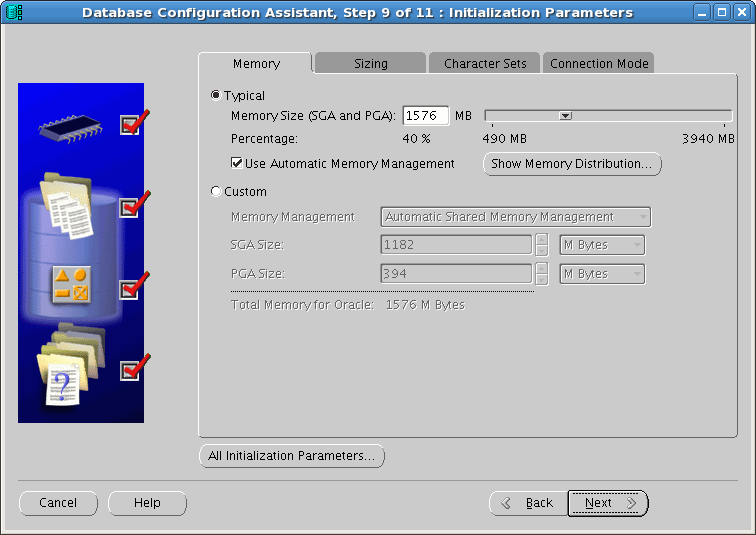
Initialization Parameters |
Change any parameters for your environment. I left them all at their default settings. |
|
|
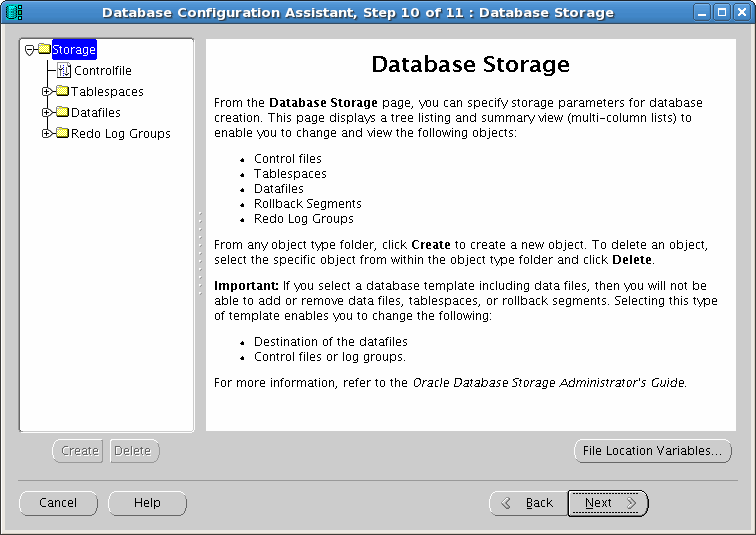
Database Storage |
Change any parameters for your environment. I left them all at their default settings. |
|
|
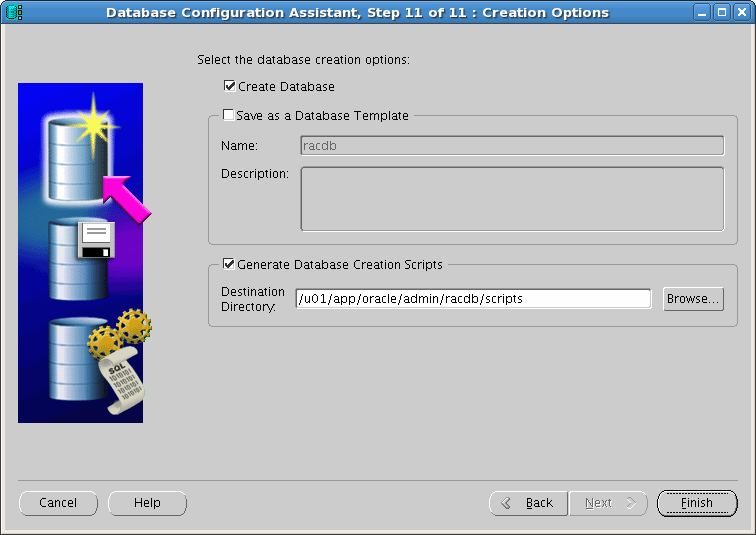
Creation Options |
Keep the default option Create Database selected. I also always select toGenerate Database Creation Scripts. Click Finish to start the database creation process. After acknowledging the database creation report and script generation dialog, the database creation will start. Click OK on the "Summary" screen. |
|
|
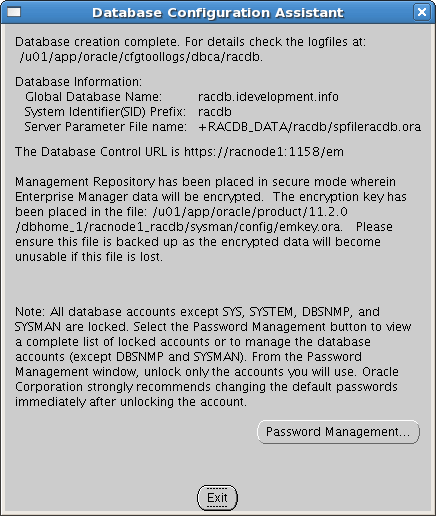
End of Database Creation |
At the end of the database creation, exit from the DBCA. |
When the DBCA has completed, you will have a fully functional Oracle RAC cluster running!
Verify Clustered Database is Open
[oracle@racnode1 ~]$
su - grid -c "crsctl status resource -w \"TYPE co 'ora'\" -t"
Password:
*********
--------------------------------------------------------------------------------
NAME TARGET STATE SERVER STATE_DETAILS
--------------------------------------------------------------------------------
Local Resources
--------------------------------------------------------------------------------
ora.CRS.dg
ONLINE ONLINE racnode1
ONLINE ONLINE racnode2
ora.FRA.dg
ONLINE ONLINE racnode1
ONLINE ONLINE racnode2
ora.LISTENER.lsnr
ONLINE ONLINE racnode1
ONLINE ONLINE racnode2
ora.RACDB_DATA.dg
ONLINE ONLINE racnode1
ONLINE ONLINE racnode2
ora.asm
ONLINE ONLINE racnode1 Started
ONLINE ONLINE racnode2 Started
ora.eons
ONLINE ONLINE racnode1
ONLINE ONLINE racnode2
ora.gsd
OFFLINE OFFLINE racnode1
OFFLINE OFFLINE racnode2
ora.net1.network
ONLINE ONLINE racnode1
ONLINE ONLINE racnode2
ora.ons
ONLINE ONLINE racnode1
ONLINE ONLINE racnode2
ora.registry.acfs
ONLINE ONLINE racnode1
ONLINE ONLINE racnode2
--------------------------------------------------------------------------------
Cluster Resources
--------------------------------------------------------------------------------
ora.LISTENER_SCAN1.lsnr
1 ONLINE ONLINE racnode1
ora.oc4j
1 OFFLINE OFFLINE
ora.racdb.db
1 ONLINE ONLINE racnode1 Open
2 ONLINE ONLINE racnode2 Open
ora.racnode1.vip
1 ONLINE ONLINE racnode1
ora.racnode2.vip
1 ONLINE ONLINE racnode2
ora.scan1.vip
1 ONLINE ONLINE racnode1
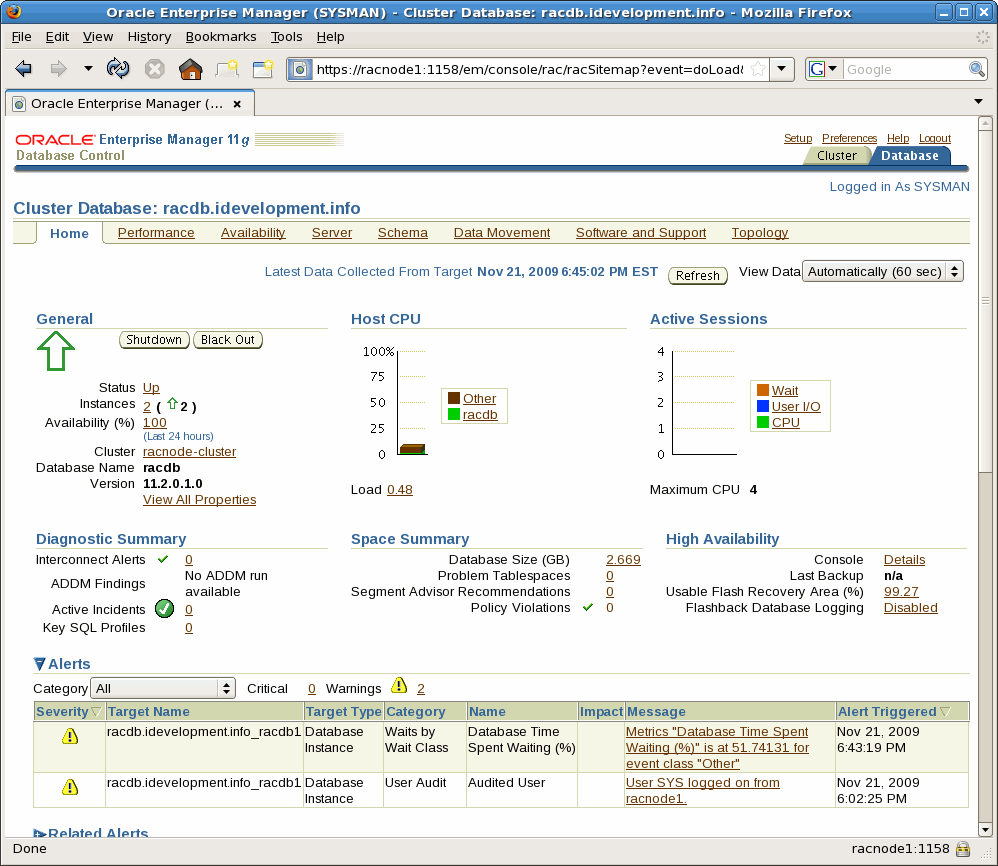
Oracle Enterprise Manager
If you configured Oracle Enterprise Manager (Database Control), it can be used to view the database configuration and current status of the database.
The URL for this example is: https://racnode1:1158/em
[oracle@racnode1 ~]$
emctl status dbconsole
Oracle Enterprise Manager 11g Database Control Release 11.2.0.1.0
Copyright (c) 1996, 2009 Oracle Corporation. All rights reserved.
https://racnode1:1158/em/console/aboutApplication
Oracle Enterprise Manager 11g is running.
------------------------------------------------------------------
Logs are generated in directory /u01/app/oracle/product/11.2.0/dbhome_1/racnode1_racdb/sysman/log
Figure 18: Oracle Enterprise Manager - (Database Console)
27. Post Database Creation Tasks - (Optional)
This section offers several optional tasks that can be performed on your new Oracle 11g in order to enhance availability as well as database management.
Re-compile Invalid Objects
Run the utlrp.sql script to recompile all invalid PL/SQL packages now instead of when the packages are accessed for the first time. This step is optional but recommended.
[oracle@racnode1 ~]$
sqlplus / as sysdba
SQL>
@?/rdbms/admin/utlrp.sql
Enabling Archive Logs in a RAC Environment
Whether a single instance or clustered database, Oracle tracks and logs all changes to database blocks in online redolog files. In an Oracle RAC environment, each instance will have its own set of online redolog files known as a thread. Each Oracle instance will use its group of online redologs in a circular manner. Once an online redolog fills, Oracle moves to the next one. If the database is in "Archive Log Mode", Oracle will make a copy of the online redo log before it gets reused. A thread must contain at least two online redologs (or online redolog groups). The same holds true for a single instance configuration. The single instance must contain at least two online redologs (or online redolog groups).
The size of an online redolog file is completely independent of another instance's' redolog size. Although in most configurations the size is the same, it may be different depending on the workload and backup / recovery considerations for each node. It is also worth mentioning that each instance has exclusive write access to its own online redolog files. In a correctly configured RAC environment, however, each instance can read another instance's current online redolog file to perform instance recovery if that instance was terminated abnormally. It is therefore a requirement that online redo logs be located on a shared storage device (just like the database files).
As already mentioned, Oracle writes to its online redolog files in a circular manner. When the current online redolog fills, Oracle will switch to the next one. To facilitate media recovery, Oracle allows the DBA to put the database into "Archive Log Mode" which makes a copy of the online redolog after it fills (and before it gets reused). This is a process known as archiving.
The Database Configuration Assistant (DBCA) allows users to configure a new database to be in archive log mode, however most DBA's opt to bypass this option during initial database creation. In cases like this where the database is in no archive log mode, it is a simple task to put the database into archive log mode. Note however that this will require a short database outage. From one of the nodes in the Oracle RAC configuration, use the following tasks to put a RAC enabled database into archive log mode. For the purpose of this article, I will use the node racnode1 which runs the racdb1 instance:
- 1. Log in to one of the nodes (i.e. racnode1) as oracle and disable the cluster instance parameter by setting cluster_database toFALSE from the current instance:
2. [oracle@racnode1 ~]$
- 3.
4. sqlplus / as sysdba
- 5.
6. SQL>
- 7.
8. alter system set cluster_database=false scope=spfile sid='racdb1';
- 9.
- 10. System altered.
- 11.
- 12. Shutdown all instances accessing the clustered database as the oracle user:
- 13. [oracle@racnode1 ~]$
- 14.
- 15. srvctl stop database -d racdb
- 16.
- 17. Using the local instance, MOUNT the database:
- 18. [oracle@racnode1 ~]$
- 19.
- 20. sqlplus / as sysdba
- 21.
- 22. SQL*Plus: Release 11.2.0.1.0 Production on Sat Nov 21 19:26:47 2009
- 23.
- 24. Copyright (c) 1982, 2009, Oracle. All rights reserved.
- 25.
- 26. Connected to an idle instance.
- 27.
- 28. SQL>
- 29.
- 30. startup mount
- 31. ORACLE instance started.
- 32.
- 33. Total System Global Area 1653518336 bytes
- 34. Fixed Size 2213896 bytes
- 35. Variable Size 1073743864 bytes
- 36. Database Buffers 570425344 bytes
- 37. Redo Buffers 7135232 bytes
- 38.
- 39. Enable archiving:
- 40. SQL>
- 41.
- 42. alter database archivelog;
- 43.
- 44. Database altered.
- 45.
- 46. Re-enable support for clustering by modifying the instance parameter cluster_database to TRUE from the current instance:
- 47. SQL>
- 48.
- 49. alter system set cluster_database=true scope=spfile sid='racdb1';
- 50.
- 51. System altered.
- 52.
- 53. Shutdown the local instance:
- 54. SQL>
- 55.
- 56. shutdown immediate
- 57.
- 58. ORA-01109: database not open
- 59.
- 60.
- 61. Database dismounted.
- 62. ORACLE instance shut down.
- 63.
- 64. Bring all instance back up as the oracle account using srvctl:
- 65. [oracle@racnode1 ~]$
- 66.
- 67. srvctl start database -d racdb
- 68.
- 69. Login to the local instance and verify Archive Log Mode is enabled:
- 70. [oracle@racnode1 ~]$
- 71.
- 72. sqlplus / as sysdba
- 73.
- 74. SQL*Plus: Release 11.2.0.1.0 Production on Sat Nov 21 19:33:38 2009
- 75.
- 76. Copyright (c) 1982, 2009, Oracle. All rights reserved.
- 77.
- 78.
- 79. Connected to:
- 80. Oracle Database 11g Enterprise Edition Release 11.2.0.1.0 - 64bit Production
- 81. With the Partitioning, Real Application Clusters, Automatic Storage Management, OLAP,
- 82. Data Mining and Real Application Testing options
- 83.
- 84. SQL>
- 85.
- 86. archive log list
- 87. Database log mode
- 88.
- 89.
- 90. Archive Mode
- 91.
- 92. Automatic archival
- 93.
- 94.
- 95. Enabled
- 96.
- 97. Archive destination USE_DB_RECOVERY_FILE_DEST
- 98. Oldest online log sequence 69
- 99. Next log sequence to archive 70
- 100. Current log sequence 70
After enabling Archive Log Mode, each instance in the RAC configuration can automatically archive redologs!
Download and Install Custom Oracle Database Scripts
DBA's rely on Oracle's data dictionary views and dynamic performance views in order to support and better manage their databases. Although these views provide a simple and easy mechanism to query critical information regarding the database, it helps to have a collection of accurate and readily available SQL scripts to query these views.
In this section you will download and install a collection of Oracle DBA scripts that can be used to manage many aspects of your database including space management, performance, backups, security, and session management. The Oracle DBA scripts archive can be downloaded using the following link http://www.idevelopment.info/data/Oracle/DBA_scripts/common.zip. As the oracle user account, download the common.zip archive to the $ORACLE_BASE directory of each node in the cluster. For the purpose of this example, the common.zip archive will be copied to /u01/app/oracle. Next, unzip the archive file to the $ORACLE_BASE directory.
For example, perform the following on both nodes in the Oracle RAC cluster as the oracle user account:
[oracle@racnode1 ~]$
mv common.zip /u01/app/oracle
[oracle@racnode1 ~]$
cd /u01/app/oracle
[oracle@racnode1 ~]$
unzip common.zip
The final step is to verify (or set) the appropriate environment variable for the current UNIX shell to ensure the Oracle SQL scripts can be run from within SQL*Plus while in any directory. For UNIX, verify the following environment variable is set and included in your login shell script:
ORACLE_PATH=
$ORACLE_BASE/common/oracle/sql:.:$ORACLE_HOME/rdbms/admin
export ORACLE_PATH
Note: The ORACLE_PATH environment variable should already be set in the .bash_profile login script that was created in the sectionCreate Login Script for the oracle User Account.
Now that the Oracle DBA scripts have been unzipped and the UNIX environment variable ( $ORACLE_PATH) has been set to the appropriate directory, you should now be able to run any of the SQL scripts in your $ORACLE_BASE/common/oracle/sql while logged into SQL*Plus. For example, to query tablespace information while logged into the Oracle database as a DBA user:
SQL>
@dba_tablespaces
Status Tablespace Name TS Type Ext. Mgt. Seg. Mgt. Tablespace Size Used (in bytes) Pct. Used
------- ----------------- ------------ ---------- --------- ---------------- ---------------- ---------
ONLINE SYSAUX PERMANENT LOCAL AUTO 629,145,600 511,967,232 81
ONLINE UNDOTBS1 UNDO LOCAL MANUAL 1,059,061,760 948,043,776 90
ONLINE USERS PERMANENT LOCAL AUTO 5,242,880 1,048,576 20
ONLINE SYSTEM PERMANENT LOCAL MANUAL 734,003,200 703,135,744 96
ONLINE EXAMPLE PERMANENT LOCAL AUTO 157,286,400 85,131,264 54
ONLINE UNDOTBS2 UNDO LOCAL MANUAL 209,715,200 20,840,448 10
ONLINE TEMP TEMPORARY LOCAL MANUAL 75,497,472 66,060,288 88
---------------- ---------------- ---------
avg 63
sum 2,869,952,512 2,336,227,328
7 rows selected.
To obtain a list of all available Oracle DBA scripts while logged into SQL*Plus, run the help.sql script:
SQL>
@help.sql
========================================
Automatic Shared Memory Management
========================================
asmm_components.sql
========================================
Automatic Storage Management
========================================
asm_alias.sql
asm_clients.sql
asm_diskgroups.sql
asm_disks.sql
asm_disks_perf.sql
asm_drop_files.sql
asm_files.sql
asm_files2.sql
asm_templates.sql
< --- SNIP --- >
perf_top_sql_by_buffer_gets.sql
perf_top_sql_by_disk_reads.sql
========================================
Workspace Manager
========================================
wm_create_workspace.sql
wm_disable_versioning.sql
wm_enable_versioning.sql
wm_freeze_workspace.sql
wm_get_workspace.sql
wm_goto_workspace.sql
wm_merge_workspace.sql
wm_refresh_workspace.sql
wm_remove_workspace.sql
wm_unfreeze_workspace.sql
wm_workspaces.sql
28. Create / Alter Tablespaces
When creating the clustered database, we left all tablespaces set to their default size. If you are using a large drive for the shared storage, you may want to make a sizable testing database.
Below are several optional SQL commands for modifying and creating all tablespaces for the test database. Please keep in mind that the database file names (OMF files) used in this example may differ from what the Oracle Database Configuration Assistant (DBCA) creates for your environment. When working through this section, substitute the data file names that were created in your environment where appropriate. The following query can be used to determine the file names for your environment:
SQL>
select tablespace_name, file_name
2
from dba_data_files
3
union
4
select tablespace_name, file_name
5
from dba_temp_files;
TABLESPACE_NAME FILE_NAME
--------------- --------------------------------------------------
EXAMPLE +RACDB_DATA/racdb/datafile/example.263.703530435
SYSAUX +RACDB_DATA/racdb/datafile/sysaux.260.703530411
SYSTEM +RACDB_DATA/racdb/datafile/system.259.703530397
TEMP +RACDB_DATA/racdb/tempfile/temp.262.703530429
UNDOTBS1 +RACDB_DATA/racdb/datafile/undotbs1.261.703530423
UNDOTBS2 +RACDB_DATA/racdb/datafile/undotbs2.264.703530441
USERS +RACDB_DATA/racdb/datafile/users.265.703530447
7 rows selected.
[oracle@racnode1 ~]$
sqlplus "/ as sysdba"
SQL>
create user scott identified by tiger default tablespace users;
User created.
SQL>
grant dba, resource, connect to scott;
Grant succeeded.
SQL>
alter database datafile '+RACDB_DATA/racdb/datafile/users.265.703530447' resize 1024m;
Database altered.
SQL>
alter tablespace users add datafile '+RACDB_DATA' size 1024m autoextend off;
Tablespace altered.
SQL>
create tablespace indx datafile '+RACDB_DATA' size 1024m
2
autoextend on next 100m maxsize unlimited
3
extent management local autoallocate
4
segment space management auto;
Tablespace created.
SQL>
alter database datafile '+RACDB_DATA/racdb/datafile/system.259.703530397' resize 1024m;
Database altered.
SQL>
alter database datafile '+RACDB_DATA/racdb/datafile/sysaux.260.703530411' resize 1024m;
Database altered.
SQL>
alter database datafile '+RACDB_DATA/racdb/datafile/undotbs1.261.703530423' resize 1024m;
Database altered.
SQL>
alter database datafile '+RACDB_DATA/racdb/datafile/undotbs2.264.703530441' resize 1024m;
Database altered.
SQL>
alter database tempfile '+RACDB_DATA/racdb/tempfile/temp.262.703530429' resize 1024m;
Database altered.
Here is a snapshot of the tablespaces I have defined for my test database environment:
Status Tablespace Name TS Type Ext. Mgt. Seg. Mgt. Tablespace Size Used (in bytes) Pct. Used
------- ----------------- ------------ ---------- --------- ---------------- ---------------- ---------
ONLINE SYSAUX PERMANENT LOCAL AUTO 1,073,741,824 512,098,304 48
ONLINE UNDOTBS1 UNDO LOCAL MANUAL 1,073,741,824 948,043,776 88
ONLINE USERS PERMANENT LOCAL AUTO 2,147,483,648 2,097,152 0
ONLINE SYSTEM PERMANENT LOCAL MANUAL 1,073,741,824 703,201,280 65
ONLINE EXAMPLE PERMANENT LOCAL AUTO 157,286,400 85,131,264 54
ONLINE INDX PERMANENT LOCAL AUTO 1,073,741,824 1,048,576 0
ONLINE UNDOTBS2 UNDO LOCAL MANUAL 1,073,741,824 20,840,448 2
ONLINE TEMP TEMPORARY LOCAL MANUAL 1,073,741,824 66,060,288 6
---------------- ---------------- ---------
avg 33
sum 8,747,220,992 2,338,521,088
8 rows selected.
29. Verify Oracle Grid Infrastructure and Database Configuration
The following Oracle Clusterware and Oracle RAC verification checks can be performed on any of the Oracle RAC nodes in the cluster. For the purpose of this article, I will only be performing checks from racnode1 as the oracle OS user.
Most of the checks described in this section use the Server Control Utility (SRVCTL) and can be run as either the oracle or grid OS user. There are five node-level tasks defined for SRVCTL:
- Adding and deleting node-level applications
- Setting and un-setting the environment for node-level applications
- Administering node applications
- Administering ASM instances
- Starting and stopping a group of programs that includes virtual IP addresses, listeners, Oracle Notification Services, and Oracle Enterprise Manager agents (for maintenance purposes).
Oracle also provides the Oracle Clusterware Control (CRSCTL) utility. CRSCTL is an interface between you and Oracle Clusterware, parsing and calling Oracle Clusterware APIs for Oracle Clusterware objects.
Oracle Clusterware 11g release 2 (11.2) introduces cluster-aware commands with which you can perform check, start, and stop operations on the cluster. You can run these commands from any node in the cluster on another node in the cluster, or on all nodes in the cluster, depending on the operation.
You can use CRSCTL commands to perform several operations on Oracle Clusterware, such as:
- Starting and stopping Oracle Clusterware resources
- Enabling and disabling Oracle Clusterware daemons
- Checking the health of the cluster
- Managing resources that represent third-party applications
- Integrating Intelligent Platform Management Interface (IPMI) with Oracle Clusterware to provide failure isolation support and to ensure cluster integrity
- Debugging Oracle Clusterware components
For the purpose of this article (and this section), we will only make use of the "Checking the health of the cluster" operation which uses the Clusterized (Cluster Aware) Command:
crsctl check cluster
Many subprograms and commands were deprecated in Oracle Clusterware 11g release 2 (11.2):
- crs_stat
- crs_register
- crs_unregister
- crs_start
- crs_stop
- crs_getperm
- crs_profile
- crs_relocate
- crs_setperm
- crsctl check crsd
- crsctl check cssd
- crsctl check evmd
- crsctl debug log
- crsctl set css votedisk
- crsctl start resources
- crsctl stop resources
Check the Health of the Cluster - (Clusterized Command)
Run as the grid user.
[grid@racnode1 ~]$
crsctl check cluster
CRS-4537: Cluster Ready Services is online
CRS-4529: Cluster Synchronization Services is online
CRS-4533: Event Manager is online
All Oracle Instances - (Database Status)
[oracle@racnode1 ~]$
srvctl status database -d racdb
Instance racdb1 is running on node racnode1
Instance racdb2 is running on node racnode2
Single Oracle Instance - (Status of Specific Instance)
[oracle@racnode1 ~]$
srvctl status instance -d racdb -i racdb1
Instance racdb1 is running on node racnode1
Node Applications - (Status)
[oracle@racnode1 ~]$
srvctl status nodeapps
VIP racnode1-vip is enabled
VIP racnode1-vip is running on node: racnode1
VIP racnode2-vip is enabled
VIP racnode2-vip is running on node: racnode2
Network is enabled
Network is running on node: racnode1
Network is running on node: racnode2
GSD is disabled
GSD is not running on node: racnode1
GSD is not running on node: racnode2
ONS is enabled
ONS daemon is running on node: racnode1
ONS daemon is running on node: racnode2
eONS is enabled
eONS daemon is running on node: racnode1
eONS daemon is running on node: racnode2
Node Applications - (Configuration)
[oracle@racnode1 ~]$
srvctl config nodeapps
VIP exists.:racnode1
VIP exists.: /racnode1-vip/192.168.1.251/255.255.255.0/eth0
VIP exists.:racnode2
VIP exists.: /racnode2-vip/192.168.1.252/255.255.255.0/eth0
GSD exists.
ONS daemon exists. Local port 6100, remote port 6200
eONS daemon exists. Multicast port 24057, multicast IP address 234.194.43.168, listening port 2016
List all Configured Databases
[oracle@racnode1 ~]$
srvctl config database
racdb
Database - (Configuration)
[oracle@racnode1 ~]$
srvctl config database -d racdb -a
Database unique name: racdb
Database name: racdb
Oracle home: /u01/app/oracle/product/11.2.0/dbhome_1
Oracle user: oracle
Spfile: +RACDB_DATA/racdb/spfileracdb.ora
Domain: idevelopment.info
Start options: open
Stop options: immediate
Database role: PRIMARY
Management policy: AUTOMATIC
Server pools: racdb
Database instances: racdb1,racdb2
Disk Groups: RACDB_DATA,FRA
Services:
Database is enabled
Database is administrator managed
ASM - (Status)
[oracle@racnode1 ~]$
srvctl status asm
ASM is running on racnode1,racnode2
ASM - (Configuration)
$
srvctl config asm -a
ASM home: /u01/app/11.2.0/grid
ASM listener: LISTENER
ASM is enabled.
TNS listener - (Status)
[oracle@racnode1 ~]$
srvctl status listener
Listener LISTENER is enabled
Listener LISTENER is running on node(s): racnode1,racnode2
TNS listener - (Configuration)
[oracle@racnode1 ~]$
srvctl config listener -a
Name: LISTENER
Network: 1, Owner: grid
Home: <crs>
/u01/app/11.2.0/grid on node(s) racnode2,racnode1
End points: TCP:1521
SCAN - (Status)
[oracle@racnode1 ~]$
srvctl status scan
SCAN VIP scan1 is enabled
SCAN VIP scan1 is running on node racnode1
SCAN - (Configuration)
[oracle@racnode1 ~]$
srvctl config scan
SCAN name: racnode-cluster-scan, Network: 1/192.168.1.0/255.255.255.0/eth0
SCAN VIP name: scan1, IP: /racnode-cluster-scan/192.168.1.187
VIP - (Status of Specific Node)
[oracle@racnode1 ~]$
srvctl status vip -n racnode1
VIP racnode1-vip is enabled
VIP racnode1-vip is running on node: racnode1
[oracle@racnode1 ~]$
srvctl status vip -n racnode2
VIP racnode2-vip is enabled
VIP racnode2-vip is running on node: racnode2
VIP - (Configuration of Specific Node)
[oracle@racnode1 ~]$
srvctl config vip -n racnode1
VIP exists.:racnode1
VIP exists.: /racnode1-vip/192.168.1.251/255.255.255.0/eth0
[oracle@racnode1 ~]$
srvctl config vip -n racnode2
VIP exists.:racnode2
VIP exists.: /racnode2-vip/192.168.1.252/255.255.255.0/eth0
Configuration for Node Applications - (VIP, GSD, ONS, Listener)
[oracle@racnode1 ~]$
srvctl config nodeapps -a -g -s -l
-l option has been deprecated and will be ignored.
VIP exists.:racnode1
VIP exists.: /racnode1-vip/192.168.1.251/255.255.255.0/eth0
VIP exists.:racnode2
VIP exists.: /racnode2-vip/192.168.1.252/255.255.255.0/eth0
GSD exists.
ONS daemon exists. Local port 6100, remote port 6200
Name: LISTENER
Network: 1, Owner: grid
Home: <crs>
/u01/app/11.2.0/grid on node(s) racnode2,racnode1
End points: TCP:1521
Verifying Clock Synchronization across the Cluster Nodes
[oracle@racnode1 ~]$
cluvfy comp clocksync -verbose
Verifying Clock Synchronization across the cluster nodes
Checking if Clusterware is installed on all nodes...
Check of Clusterware install passed
Checking if CTSS Resource is running on all nodes...
Check: CTSS Resource running on all nodes
Node Name Status
------------------------------------ ------------------------
racnode1
passed
Result: CTSS resource check passed
Querying CTSS for time offset on all nodes...
Result: Query of CTSS for time offset passed
Check CTSS state started...
Check: CTSS state
Node Name State
------------------------------------ ------------------------
racnode1 Active
CTSS is in Active state. Proceeding with check of clock time offsets on all nodes...
Reference Time Offset Limit: 1000.0 msecs
Check: Reference Time Offset
Node Name Time Offset Status
------------ ------------------------ ------------------------
racnode1 0.0
passed
Time offset is within the specified limits on the following set of nodes:
"[racnode1]"
Result: Check of clock time offsets passed
Oracle Cluster Time Synchronization Services check passed
Verification of Clock Synchronization across the cluster nodes was successful.
All running instances in the cluster - (SQL)
SELECT
inst_id
, instance_number inst_no
, instance_name inst_name
, parallel
, status
, database_status db_status
, active_state state
, host_name host
FROM gv$instance
ORDER BY inst_id;
INST_ID INST_NO INST_NAME PAR STATUS DB_STATUS STATE HOST
-------- -------- ---------- --- ------- ------------ --------- -------
1 1 racdb1 YES OPEN ACTIVE NORMAL racnode1
2 2 racdb2 YES OPEN ACTIVE NORMAL racnode2
All database files and the ASM disk group they reside in - (SQL)
select name from v$datafile
union
select member from v$logfile
union
select name from v$controlfile
union
select name from v$tempfile;
NAME
-------------------------------------------
+FRA/racdb/controlfile/current.256.703530389
+FRA/racdb/onlinelog/group_1.257.703530391
+FRA/racdb/onlinelog/group_2.258.703530393
+FRA/racdb/onlinelog/group_3.259.703533497
+FRA/racdb/onlinelog/group_4.260.703533499
+RACDB_DATA/racdb/controlfile/current.256.703530389
+RACDB_DATA/racdb/datafile/example.263.703530435
+RACDB_DATA/racdb/datafile/indx.270.703542993
+RACDB_DATA/racdb/datafile/sysaux.260.703530411
+RACDB_DATA/racdb/datafile/system.259.703530397
+RACDB_DATA/racdb/datafile/undotbs1.261.703530423
+RACDB_DATA/racdb/datafile/undotbs2.264.703530441
+RACDB_DATA/racdb/datafile/users.265.703530447
+RACDB_DATA/racdb/datafile/users.269.703542943
+RACDB_DATA/racdb/onlinelog/group_1.257.703530391
+RACDB_DATA/racdb/onlinelog/group_2.258.703530393
+RACDB_DATA/racdb/onlinelog/group_3.266.703533497
+RACDB_DATA/racdb/onlinelog/group_4.267.703533499
+RACDB_DATA/racdb/tempfile/temp.262.703530429
19 rows selected.
ASM Disk Volumes - (SQL)
SELECT path
FROM v$asm_disk;
PATH
----------------------------------
ORCL:CRSVOL1
ORCL:DATAVOL1
ORCL:FRAVOL1
30. Starting / Stopping the Cluster
At this point, everything has been installed and configured for Oracle RAC 11g release 2. Oracle grid infrastructure was installed by the grid user while the Oracle RAC software was installed by oracle. We also have a fully functional clustered database running named racdb.
After all of that hard work, you may ask, "OK, so how do I start and stop services?". If you have followed the instructions in this guide, all services — including Oracle Clusterware, ASM , network, SCAN, VIP, the Oracle Database, and so on — should start automatically on each reboot of the Linux nodes.
There are times, however, when you might want to take down the Oracle services on a node for maintenance purposes and restart the Oracle Clusterware stack at a later time. Or you may find that Enterprise Manager is not running and need to start it. This section provides the commands necessary to stop and start the Oracle Clusterware stack on a local server ( racnode1).
The following stop/start actions need to be performed as root.
Stopping the Oracle Clusterware Stack on the Local Server
Use the " crsctl stop cluster" command on racnode1 to stop the Oracle Clusterware stack:
[root@racnode1 ~]#
/u01/app/11.2.0/grid/bin/crsctl stop cluster
CRS-2673: Attempting to stop 'ora.crsd' on 'racnode1'
CRS-2790: Starting shutdown of Cluster Ready Services-managed resources on 'racnode1'
CRS-2673: Attempting to stop 'ora.LISTENER.lsnr' on 'racnode1'
CRS-2673: Attempting to stop 'ora.CRS.dg' on 'racnode1'
CRS-2673: Attempting to stop 'ora.racdb.db' on 'racnode1'
CRS-2673: Attempting to stop 'ora.registry.acfs' on 'racnode1'
CRS-2673: Attempting to stop 'ora.LISTENER_SCAN1.lsnr' on 'racnode1'
CRS-2677: Stop of 'ora.LISTENER.lsnr' on 'racnode1' succeeded
CRS-2673: Attempting to stop 'ora.racnode1.vip' on 'racnode1'
CRS-2677: Stop of 'ora.LISTENER_SCAN1.lsnr' on 'racnode1' succeeded
CRS-2673: Attempting to stop 'ora.scan1.vip' on 'racnode1'
CRS-2677: Stop of 'ora.scan1.vip' on 'racnode1' succeeded
CRS-2672: Attempting to start 'ora.scan1.vip' on 'racnode2'
CRS-2677: Stop of 'ora.racnode1.vip' on 'racnode1' succeeded
CRS-2672: Attempting to start 'ora.racnode1.vip' on 'racnode2'
CRS-2677: Stop of 'ora.registry.acfs' on 'racnode1' succeeded
CRS-2676: Start of 'ora.racnode1.vip' on 'racnode2' succeeded
<-- Notice racnode1 VIP moved to racnode2
CRS-2676: Start of 'ora.scan1.vip' on 'racnode2' succeeded
<-- Notice SCAN moved to racnode2
CRS-2672: Attempting to start 'ora.LISTENER_SCAN1.lsnr' on 'racnode2'
CRS-2676: Start of 'ora.LISTENER_SCAN1.lsnr' on 'racnode2' succeeded
<-- Notice LISTENER_SCAN1 moved to racnode2
CRS-2677: Stop of 'ora.CRS.dg' on 'racnode1' succeeded
CRS-2677: Stop of 'ora.racdb.db' on 'racnode1' succeeded
CRS-2673: Attempting to stop 'ora.FRA.dg' on 'racnode1'
CRS-2673: Attempting to stop 'ora.RACDB_DATA.dg' on 'racnode1'
CRS-2677: Stop of 'ora.RACDB_DATA.dg' on 'racnode1' succeeded
CRS-2677: Stop of 'ora.FRA.dg' on 'racnode1' succeeded
CRS-2673: Attempting to stop 'ora.asm' on 'racnode1'
CRS-2677: Stop of 'ora.asm' on 'racnode1' succeeded
CRS-2673: Attempting to stop 'ora.ons' on 'racnode1'
CRS-2673: Attempting to stop 'ora.eons' on 'racnode1'
CRS-2677: Stop of 'ora.ons' on 'racnode1' succeeded
CRS-2673: Attempting to stop 'ora.net1.network' on 'racnode1'
CRS-2677: Stop of 'ora.net1.network' on 'racnode1' succeeded
CRS-2677: Stop of 'ora.eons' on 'racnode1' succeeded
CRS-2792: Shutdown of Cluster Ready Services-managed resources on 'racnode1' has completed
CRS-2677: Stop of 'ora.crsd' on 'racnode1' succeeded
CRS-2673: Attempting to stop 'ora.cssdmonitor' on 'racnode1'
CRS-2673: Attempting to stop 'ora.ctssd' on 'racnode1'
CRS-2673: Attempting to stop 'ora.evmd' on 'racnode1'
CRS-2673: Attempting to stop 'ora.asm' on 'racnode1'
CRS-2677: Stop of 'ora.cssdmonitor' on 'racnode1' succeeded
CRS-2677: Stop of 'ora.evmd' on 'racnode1' succeeded
CRS-2677: Stop of 'ora.ctssd' on 'racnode1' succeeded
CRS-2677: Stop of 'ora.asm' on 'racnode1' succeeded
CRS-2673: Attempting to stop 'ora.cssd' on 'racnode1'
CRS-2677: Stop of 'ora.cssd' on 'racnode1' succeeded
CRS-2673: Attempting to stop 'ora.diskmon' on 'racnode1'
CRS-2677: Stop of 'ora.diskmon' on 'racnode1' succeeded
Note: If any resources that Oracle Clusterware manages are still running after you run the " crsctl stop cluster" command, then the entire command fails. Use the -f option to unconditionally stop all resources and stop the Oracle Clusterware stack.
Also note that you can stop the Oracle Clusterware stack on all servers in the cluster by specifying -all. The following will bring down the Oracle Clusterware stack on both racnode1 and racnode2:
[root@racnode1 ~]#
/u01/app/11.2.0/grid/bin/crsctl stop cluster -all
Starting the Oracle Clusterware Stack on the Local Server
Use the " crsctl start cluster" command on racnode1 to start the Oracle Clusterware stack:
[root@racnode1 ~]#
/u01/app/11.2.0/grid/bin/crsctl start cluster
CRS-2672: Attempting to start 'ora.cssdmonitor' on 'racnode1'
CRS-2676: Start of 'ora.cssdmonitor' on 'racnode1' succeeded
CRS-2672: Attempting to start 'ora.cssd' on 'racnode1'
CRS-2672: Attempting to start 'ora.diskmon' on 'racnode1'
CRS-2676: Start of 'ora.diskmon' on 'racnode1' succeeded
CRS-2676: Start of 'ora.cssd' on 'racnode1' succeeded
CRS-2672: Attempting to start 'ora.ctssd' on 'racnode1'
CRS-2676: Start of 'ora.ctssd' on 'racnode1' succeeded
CRS-2672: Attempting to start 'ora.evmd' on 'racnode1'
CRS-2672: Attempting to start 'ora.asm' on 'racnode1'
CRS-2676: Start of 'ora.evmd' on 'racnode1' succeeded
CRS-2676: Start of 'ora.asm' on 'racnode1' succeeded
CRS-2672: Attempting to start 'ora.crsd' on 'racnode1'
CRS-2676: Start of 'ora.crsd' on 'racnode1' succeeded
Note: You can choose to start the Oracle Clusterware stack on all servers in the cluster by specifying -all:
[root@racnode1 ~]#
/u01/app/11.2.0/grid/bin/crsctl start cluster -all
You can also start the Oracle Clusterware stack on one or more named servers in the cluster by listing the servers separated by a space:
[root@racnode1 ~]#
/u01/app/11.2.0/grid/bin/crsctl start cluster -n racnode1 racnode2
Start/Stop All Instances with SRVCTL
Finally, you can start/stop all instances and associated services using the following:
[oracle@racnode1 ~]$
srvctl stop database -d racdb
[oracle@racnode1 ~]$
srvctl start database -d racdb
31. Troubleshooting
Confirm the RAC Node Name is Not Listed in Loopback Address
Ensure that the node names ( racnode1 or racnode2) are not included for the loopback address in the /etc/hosts file. If the machine name is listed in the in the loopback address entry as below:
127.0.0.1
racnode1
localhost.localdomain localhost
it will need to be removed as shown below:
127.0.0.1 localhost.localdomain localhost
If the RAC node name is listed for the loopback address, you will receive the following error during the RAC installation:
ORA-00603: ORACLE server session terminated by fatal error
or
ORA-29702: error occurred in Cluster Group Service operation
Openfiler - Logical Volumes Not Active on Boot
One issue that I have run into several times occurs when using a USB drive connected to the Openfiler server. When the Openfiler server is rebooted, the system is able to recognize the USB drive however, it is not able to load the logical volumes and writes the following message to /var/log/messages - (also available through dmesg):
iSCSI Enterprise Target Software - version 0.4.14
iotype_init(91) register fileio
iotype_init(91) register blockio
iotype_init(91) register nullio
open_path(120) Can't open /dev/rac1/crs -2
fileio_attach(268) -2
open_path(120) Can't open /dev/rac1/asm1 -2
fileio_attach(268) -2
open_path(120) Can't open /dev/rac1/asm2 -2
fileio_attach(268) -2
open_path(120) Can't open /dev/rac1/asm3 -2
fileio_attach(268) -2
open_path(120) Can't open /dev/rac1/asm4 -2
fileio_attach(268) -2
Please note that I am not suggesting that this only occurs with USB drives connected to the Openfiler server. It may occur with other types of drives, however I have only seen it with USB drives!
If you do receive this error, you should first check the status of all logical volumes using the lvscan command from the Openfiler server:
#
lvscan
inactive
'/dev/rac1/crs' [2.00 GB] inherit
inactive
'/dev/rac1/asm1' [115.94 GB] inherit
inactive
'/dev/rac1/asm2' [115.94 GB] inherit
inactive
'/dev/rac1/asm3' [115.94 GB] inherit
inactive
'/dev/rac1/asm4' [115.94 GB] inherit
Notice that the status for each of the logical volumes is set to inactive - (the status for each logical volume on a working system would be set to ACTIVE).
I currently know of two methods to get Openfiler to automatically load the logical volumes on reboot, both of which are described below.
Method 1
One of the first steps is to shutdown both of the Oracle RAC nodes in the cluster - ( racnode1 and racnode2). Then, from the Openfiler server, manually set each of the logical volumes to ACTIVE for each consecutive reboot:
#
lvchange -a y /dev/rac1/crs
#
lvchange -a y /dev/rac1/asm1
#
lvchange -a y /dev/rac1/asm2
#
lvchange -a y /dev/rac1/asm3
#
lvchange -a y /dev/rac1/asm4
Another method to set the status to active for all logical volumes is to use the Volume Group change command as follows:
#
vgscan
Reading all physical volumes. This may take a while...
Found volume group "rac1" using metadata type lvm2
#
vgchange -ay
5 logical volume(s) in volume group "rac1" now active
After setting each of the logical volumes to active, use the lvscan command again to verify the status:
#
lvscan
ACTIVE
'/dev/rac1/crs' [2.00 GB] inherit
ACTIVE
'/dev/rac1/asm1' [115.94 GB] inherit
ACTIVE
'/dev/rac1/asm2' [115.94 GB] inherit
ACTIVE
'/dev/rac1/asm3' [115.94 GB] inherit
ACTIVE
'/dev/rac1/asm4' [115.94 GB] inherit
As a final test, reboot the Openfiler server to ensure each of the logical volumes will be set to ACTIVE after the boot process. After you have verified that each of the logical volumes will be active on boot, check that the iSCSI target service is running:
#
service iscsi-target status
ietd (pid 2668) is running...
Finally, restart each of the Oracle RAC nodes in the cluster - ( racnode1 and racnode2).
Method 2
This method was kindly provided by Martin Jones. His workaround includes amending the /etc/rc.sysinit script to basically wait for the USB disk ( /dev/sda in my example) to be detected. After making the changes to the /etc/rc.sysinit script (described below), verify the external drives are powered on and then reboot the Openfiler server.
The following is a small portion of the /etc/rc.sysinit script on the Openfiler server with the changes (highlighted in blue) proposed by Martin:
..............................................................
# LVM2 initialization, take 2
if [ -c /dev/mapper/control ]; then
if [ -x /sbin/multipath.static ]; then
modprobe dm-multipath >/dev/null 2>&1
/sbin/multipath.static -v 0
if [ -x /sbin/kpartx ]; then
/sbin/dmsetup ls --target multipath --exec "/sbin/kpartx -a"
fi
fi
if [ -x /sbin/dmraid ]; then
modprobe dm-mirror > /dev/null 2>&1
/sbin/dmraid -i -a y
fi
#-----
#----- MJONES - Customisation Start
#-----
# Check if /dev/sda is ready
while [ ! -e /dev/sda ]
do
echo "Device /dev/sda for first USB Drive is not yet ready."
echo "Waiting..."
sleep 5
done
echo "INFO - Device /dev/sda for first USB Drive is ready."
#-----
#----- MJONES - Customisation END
#-----
if [ -x /sbin/lvm.static ]; then
if /sbin/lvm.static vgscan > /dev/null 2>&1 ; then
action $"Setting up Logical Volume
Management:" /sbin/lvm.static vgscan --mknodes --ignorelockingfailure &&
/sbin/lvm.static vgchange -a y --ignorelockingfailure
fi
fi
fi
# Clean up SELinux labels
if [ -n "$SELINUX" ]; then
for file in /etc/mtab /etc/ld.so.cache ; do
[ -r $file ] && restorecon $file >/dev/null 2>&1
done
fi
..............................................................
Finally, restart each of the Oracle RAC nodes in the cluster - ( racnode1 and racnode2).
32. Conclusion
Oracle11g RAC allows the DBA to configure a database solution with superior fault tolerance and load balancing. For those DBA's, however, that want to become more familiar with the features and benefits of Oracle11g RAC will find the costs of configuring even a small RAC cluster costing in the range of US$15,000 to US$20,000.
This article has hopefully given you an economical solution to setting up and configuring an inexpensive Oracle 11g release 2 RAC Cluster using Oracle Enterprise Linux and iSCSI technology. The RAC solution presented in this article can be put together for around US$2,700 and will provide the DBA with a fully functional Oracle 11g release 2 RAC cluster. While the hardware used for this article should be stable enough for educational purposes, it should never be considered for a production environment.
33. Acknowledgements
An article of this magnitude and complexity is generally not the work of one person alone. Although I was able to author and successfully demonstrate the validity of the components that make up this configuration, there are several other individuals that deserve credit in making this article a success.
First, I would like to thank Bane Radulovic from the Server BDE Team at Oracle. Bane not only introduced me to Openfiler, but shared with me his experience and knowledge of the product and how to best utilize it for Oracle RAC. His research and hard work made the task of configuring Openfiler seamless. Bane was also involved with hardware recommendations and testing.
A special thanks to K Gopalakrishnan for his assistance in delivering the Oracle RAC 11g Overview section of this article. In this section, much of the content regarding the history of Oracle RAC can be found in his very popular book Oracle Database 10g Real Application Clusters Handbook . This book comes highly recommended for both DBA's and Developers wanting to successfully implement Oracle RAC and fully understand how many of the advanced services like Cache Fusion and Global Resource Directoryoperate.
Lastly, I would like to express my appreciation to the following vendors for generously supplying the hardware for this article; Seagate,Avocent Corporation, and Intel.
Jeffrey M. Hunter [ www.idevelopment.info] is an Oracle Certified Professional, Java Development Certified Professional, Author, and an Oracle ACE. Jeff currently works as a Senior Database Administrator for The DBA Zone, Inc. located in Pittsburgh, Pennsylvania.
His work includes advanced performance tuning, Java and PL/SQL programming, capacity planning, database security, and physical / logical database design in a UNIX, Linux, and Windows server environment. Jeff's other interests include mathematical encryption theory, programming language processors (compilers and interpreters) in Java and C, LDAP, writing web-based database administration tools, and of course Linux.
Jeff has been a Sr. Database Administrator and Software Engineer for over 16 years and maintains his own website site at:http://www.iDevelopment.info. Jeff graduated from Stanislaus State University in Turlock, California, with a Bachelor's degree in Computer Science.