参考:http://blog.itpub.net/31015730/viewspace-2152272 安装mysql数据库及问题解决方法 (基于mysql community版)
1. 下载 https://www.percona.com/downloads/Percona-Server-5.7/
我的环境是Red Hat Linux 7.5,目标是安装5.7,所以选择5.7最新版本,选择相应的Software

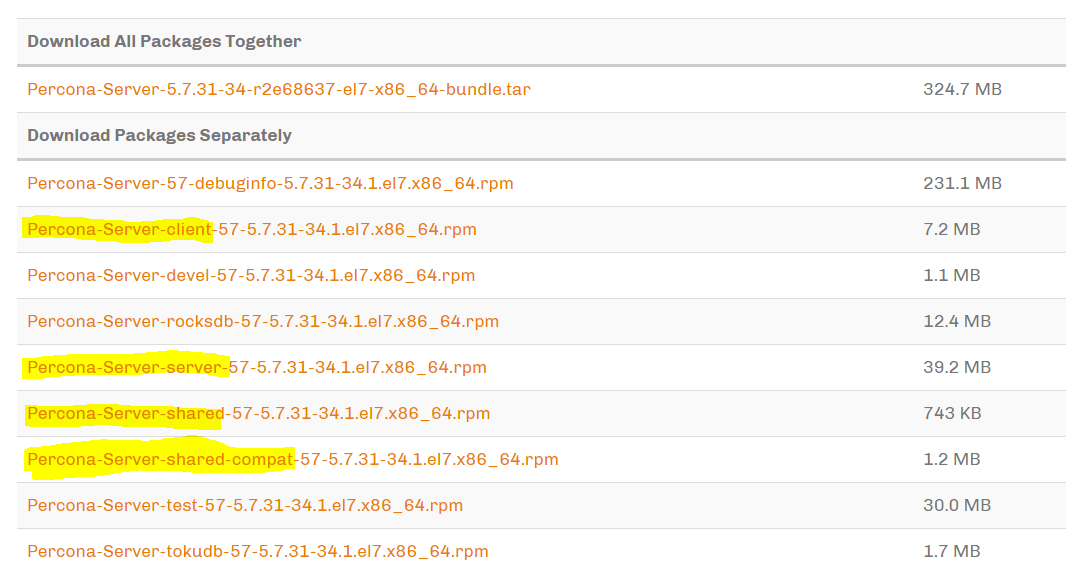
因为不需要都安装,只下载了四个rpm包:
Percona-Server-client-57-5.7.31-34.1.el7.x86_64.rpm
Percona-Server-server-57-5.7.31-34.1.el7.x86_64.rpm
Percona-Server-shared-57-5.7.31-34.1.el7.x86_64.rpm
Percona-Server-shared-compat-57-5.7.31-34.1.el7.x86_64.rpm
安装顺序为:
- Percona-Server-shared-compat-57-5.7.31-34.1.el7.x86_64.rpm
- Percona-Server-shared-57-5.7.31-34.1.el7.x86_64.rpm
- Percona-Server-client-57-5.7.31-34.1.el7.x86_64.rpm
- Percona-Server-server-57-5.7.31-34.1.el7.x86_64.rpm
不知道顺序也没有关系,因为安装的时候会提示
2. 安装
上传到Linux后按照安装顺序:
1)rpm -ivh Percona-Server-shared-compat-57-5.7.31-34.1.el7.x86_64.rpm
报错
|
root@DBSERVER mysql]# rpm -ivh Percona-Server-shared-compat-57-5.7.31-34.1.el7.x86_64.rpm warning: Percona-Server-shared-compat-57-5.7.31-34.1.el7.x86_64.rpm: Header V4 RSA/SHA256 Signature, key ID 8507efa5: NOKEY error: Failed dependencies: mariadb-libs is obsoleted by Percona-Server-shared-compat-57-5.7.31-34.1.el7.x86_64 |
解决:
a. 查看:[root@DBSERVER mysql]# rpm -qa | grep mariadb
mariadb-libs-5.5.56-2.el7.x86_64
b. 卸载:[root@DBSERVER mysql]# rpm -e mariadb-libs-5.5.56-2.el7.x86_64
error: Failed dependencies:
libmysqlclient.so.18()(64bit) is needed by (installed) postfix-2:2.10.1-6.el7.x86_64
libmysqlclient.so.18(libmysqlclient_18)(64bit) is needed by (installed) postfix-2:2.10.1-6.el7.x86_64
c. 由于存在依赖关系,强制卸载
[root@DBSERVER software]# rpm -e --nodeps mariadb-libs-5.5.56-2.el7.x86_64
2) 再次安装rpm -ivh Percona-Server-shared-compat-57-5.7.31-34.1.el7.x86_64.rpm
3) 安装rpm -ivh Percona-Server-shared-57-5.7.31-34.1.el7.x86_64.rpm
4) 安装rpm -ivh Percona-Server-client-57-5.7.31-34.1.el7.x86_64.rpm
5) 安装[root@DBSERVER mysql]# rpm -ivh Percona-Server-server-57-5.7.31-34.1.el7.x86_64.rpm
warning: Percona-Server-server-57-5.7.31-34.1.el7.x86_64.rpm: Header V4 RSA/SHA256 Signature, key ID 8507efa5: NOKEY
Preparing... ################################# [100%]
Updating / installing...
1:Percona-Server-server-57-5.7.31-3################################# [100%]
Percona Server is distributed with several useful UDF (User Defined Function) from Percona Toolkit.
Run the following commands to create these functions:
mysql -e "CREATE FUNCTION fnv1a_64 RETURNS INTEGER SONAME 'libfnv1a_udf.so'"
mysql -e "CREATE FUNCTION fnv_64 RETURNS INTEGER SONAME 'libfnv_udf.so'"
mysql -e "CREATE FUNCTION murmur_hash RETURNS INTEGER SONAME 'libmurmur_udf.so'"
See http://www.percona.com/doc/percona-server/5.7/management/udf_percona_toolkit.html for more details
3. 查看mysql的服务
上述四个rpm包安装成功后
[root@DBSERVER mysql]# systemctl status mysqld.service
- ● mysqld.service - MySQL Server
Loaded: loaded (/usr/lib/systemd/system/mysqld.service; enabled; vendor preset: disabled)
Active: inactive (dead)
Docs: man:mysqld(8)
http://dev.mysql.com/doc/refman/en/using-systemd.html
4. 启动mysql服务
[root@DBSERVER mysql]# systemctl start mysqld.service
[root@DBSERVER mysql]# systemctl status mysqld.service
- ● mysqld.service - MySQL Server
Loaded: loaded (/usr/lib/systemd/system/mysqld.service; enabled; vendor preset: disabled)
Active: active (running) since Tue 2020-10-13 11:24:25 CST; 2s ago
Docs: man:mysqld(8)
http://dev.mysql.com/doc/refman/en/using-systemd.html
Process: 37711 ExecStart=/usr/sbin/mysqld --daemonize --pid-file=/var/run/mysqld/mysqld.pid $MYSQLD_OPTS (code=exited, status=0/SUCCESS)
Process: 37626 ExecStartPre=/usr/bin/mysqld_pre_systemd (code=exited, status=0/SUCCESS)
Main PID: 37714 (mysqld)
Tasks: 28
Memory: 327.8M
CGroup: /system.slice/mysqld.service
└─37714 /usr/sbin/mysqld --daemonize --pid-file=/var/run/mysqld/mysqld.pid
Oct 13 11:24:18 DBSERVER systemd[1]: Starting MySQL Server...
Oct 13 11:24:25 DBSERVER systemd[1]: Started MySQL Server.
5. mysql服务启动成功,首先使用临时的密码进行登录,查看临时密码
[root@DBSERVER mysql]# grep "password" /var/log/mysqld.log
2020-10-13T03:24:22.707115Z 1 [Note] A temporary password is generated for root@localhost: =o)cjj=iY0um
2020-10-13T03:25:23.956186Z 0 [Note] Shutting down plugin 'validate_password'
2020-10-13T03:25:25.764120Z 0 [Note] Shutting down plugin 'sha256_password'
2020-10-13T03:25:25.764125Z 0 [Note] Shutting down plugin 'mysql_native_password'
6. 使用临时密码登录,然后修改root的密码
[root@DBSERVER mysql]# mysql -uroot -p
Enter password:
Welcome to the MySQL monitor. Commands end with ; or g.
Your MySQL connection id is 2
Server version: 5.7.31-34
Copyright (c) 2009-2020 Percona LLC and/or its affiliates
Copyright (c) 2000, 2020, Oracle and/or its affiliates. All rights reserved.
Oracle is a registered trademark of Oracle Corporation and/or its
affiliates. Other names may be trademarks of their respective
- owners.
Type 'help;' or 'h' for help. Type 'c' to clear the current input statement.
mysql> alter user 'root'@'localhost' identified by '123456';
ERROR 1819 (HY000): Your password does not satisfy the current policy requirements
下面是官方文档,对于该问题的解释:
https://dev.mysql.com/doc/refman/5.7/en/validate-password.html
上述报错的原因:其实与validate_password_policy的值有关。
validate_password_policy有以下取值:

默认是1,即MEDIUM,所以刚开始设置的密码必须符合长度,且必须含有数字,小写或大写字母,特殊字符。
解决方法:
修改validate_password_policy参数的值
mysql> set global validate_password_policy=0;
Query OK, 0 rows affected (0.00 sec)
mysql> select @@validate_password_length;
+----------------------------+
| @@validate_password_length |
+----------------------------+
| 8 |
+----------------------------+
1 row in set (0.05 sec)
默认的密码长度是8,少于8位依旧会出现报错
mysql> alter user 'root'@'localhost' identified by '123456';
ERROR 1819 (HY000): Your password does not satisfy the current policy requirements
mysql> alter user 'root'@'localhost' identified by '12345678';
Query OK, 0 rows affected (0.01 sec)
7. 使用新密码再次登录,登录成功
[root@DBSERVER mysql]# mysql -uroot -piotsuite
mysql: [Warning] Using a password on the command line interface can be insecure.
Welcome to the MySQL monitor. Commands end with ; or g.
Your MySQL connection id is 3
Server version: 5.7.31-34 Percona Server (GPL), Release 34, Revision 2e68637
Copyright (c) 2009-2020 Percona LLC and/or its affiliates
Copyright (c) 2000, 2020, Oracle and/or its affiliates. All rights reserved.
Oracle is a registered trademark of Oracle Corporation and/or its
affiliates. Other names may be trademarks of their respective
- owners.
Type 'help;' or 'h' for help. Type 'c' to clear the current input statement.
mysql>
8. 设置Linux的提示
1) 临时设置
mysql> prompt u@ h d >
PROMPT set to 'u@ h d >'
root@ localhost (none) >use mysql;
Reading table information for completion of table and column names
You can turn off this feature to get a quicker startup with -A
Database changed
root@ localhost mysql >prompt u@h d >
PROMPT set to 'u@h d >'
root@localhost mysql >
2) 永久设置
[root@DBSERVER mysql]# vi /etc/my.cnf
添加下面两句:
[mysql]
prompt=u@h [d]