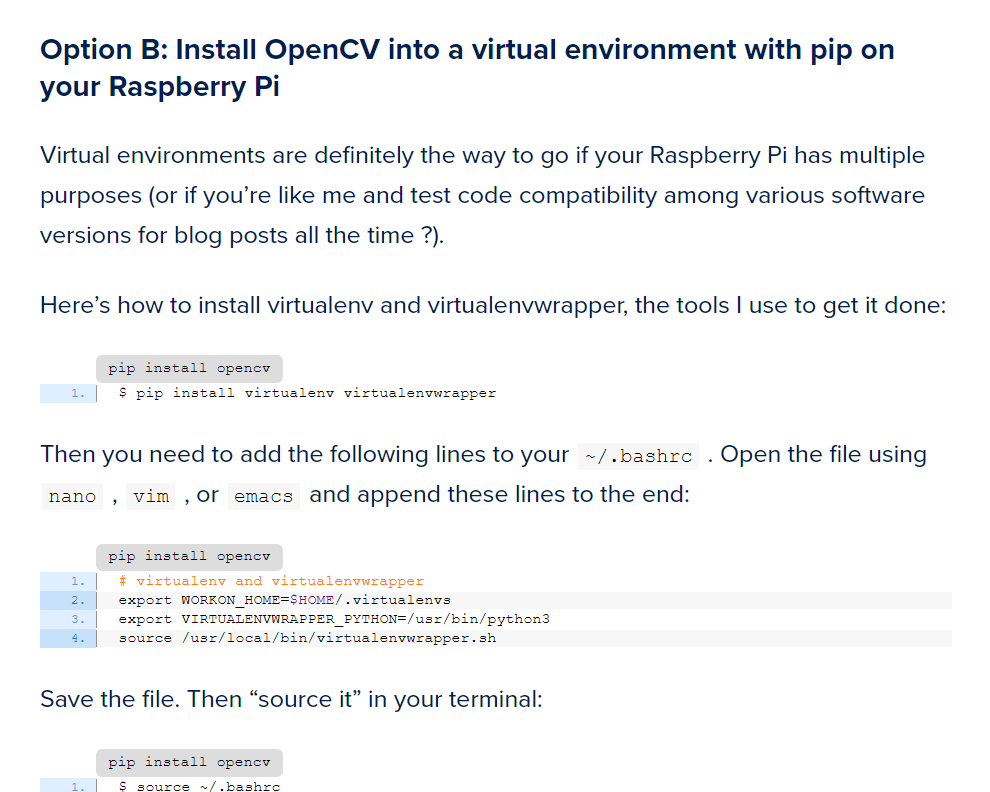
在虚拟环境中通过pip安装opencv库
注:以下我们是将opencv安装在真实环境里,在虚拟环境中装opencv我们也装了,具体可以参考这个:pip install opencv
翻到下面来:

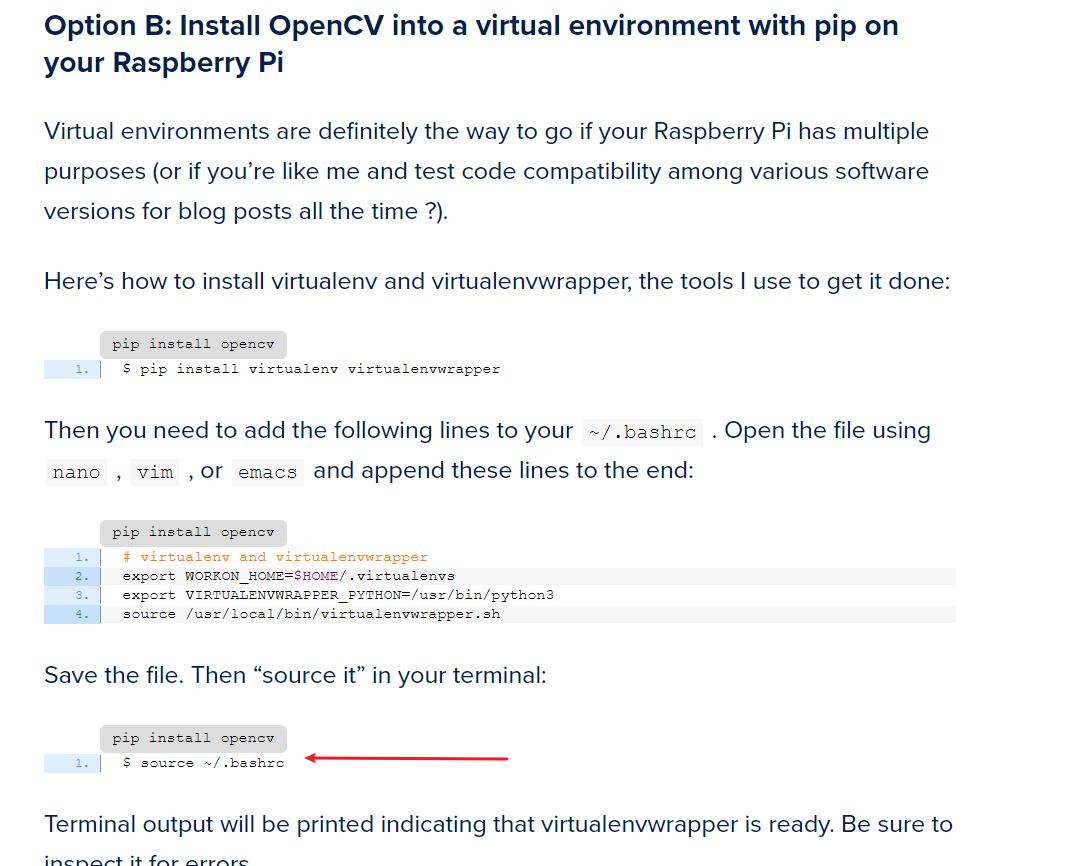
然后看这里,注意看标题,这里就是教你如何把opencv装到虚拟环境里:
安装依赖
pip3 install --upgrade setuptools
pip3 install numpy Matplotlib

sudo apt-get install libjpeg-dev libtiff5-dev libjasper-dev libpng12-dev
sudo apt-get install libavcodec-dev libavformat-dev libswscale-dev libv4l-dev
sudo apt-get install libxvidcore-dev libx264-dev
sudo apt-get install libgtk2.0-dev libgtk-3-dev
sudo apt-get install libatlas-base-dev
sudo apt install libqt4-test
安装opencv
pip3 install opencv-python
使用opencv和python控制树莓派的摄像头
示例代码
# import the necessary packages
from picamera.array import PiRGBArray
from picamera import PiCamera
import time
import cv2

# initialize the camera and grab a reference to the raw camera capture
camera = PiCamera()
rawCapture = PiRGBArray(camera)

# allow the camera to warmup
time.sleep(2)

# grab an image from the camera
camera.capture(rawCapture, format="bgr")
image = rawCapture.array

# display the image on screen and wait for a keypress
cv2.imshow("Image", image)
cv2.waitKey(0)

利用树莓派的摄像头实现人脸识别
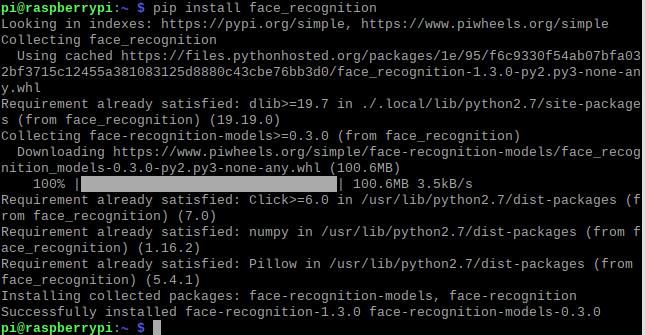
安装依赖库dlib,face_recognition
pip install dlib
pip install face_recognition

- facerec_on_raspberry_pi.py
# This is a demo of running face recognition on a Raspberry Pi.
# This program will print out the names of anyone it recognizes to the console.
# To run this, you need a Raspberry Pi 2 (or greater) with face_recognition and
# the picamera[array] module installed.
# You can follow this installation instructions to get your RPi set up:
# https://gist.github.com/ageitgey/1ac8dbe8572f3f533df6269dab35df65
import face_recognition
import picamera
import numpy as np
# Get a reference to the Raspberry Pi camera.
# If this fails, make sure you have a camera connected to the RPi and that you
# enabled your camera in raspi-config and rebooted first.
camera = picamera.PiCamera()
camera.resolution = (320, 240)
output = np.empty((240, 320, 3), dtype=np.uint8)
# Load a sample picture and learn how to recognize it.
print("Loading known face image(s)")
obama_image = face_recognition.load_image_file("obama_small.jpg")
obama_face_encoding = face_recognition.face_encodings(obama_image)[0]
# Initialize some variables
face_locations = []
face_encodings = []
while True:
print("Capturing image.")
# Grab a single frame of video from the RPi camera as a numpy array
camera.capture(output, format="rgb")
# Find all the faces and face encodings in the current frame of video
face_locations = face_recognition.face_locations(output)
print("Found {} faces in image.".format(len(face_locations)))
face_encodings = face_recognition.face_encodings(output, face_locations)
# Loop over each face found in the frame to see if it's someone we know.
for face_encoding in face_encodings:
# See if the face is a match for the known face(s)
match = face_recognition.compare_faces([obama_face_encoding], face_encoding)
name = "<Unknown Person>"
if match[0]:
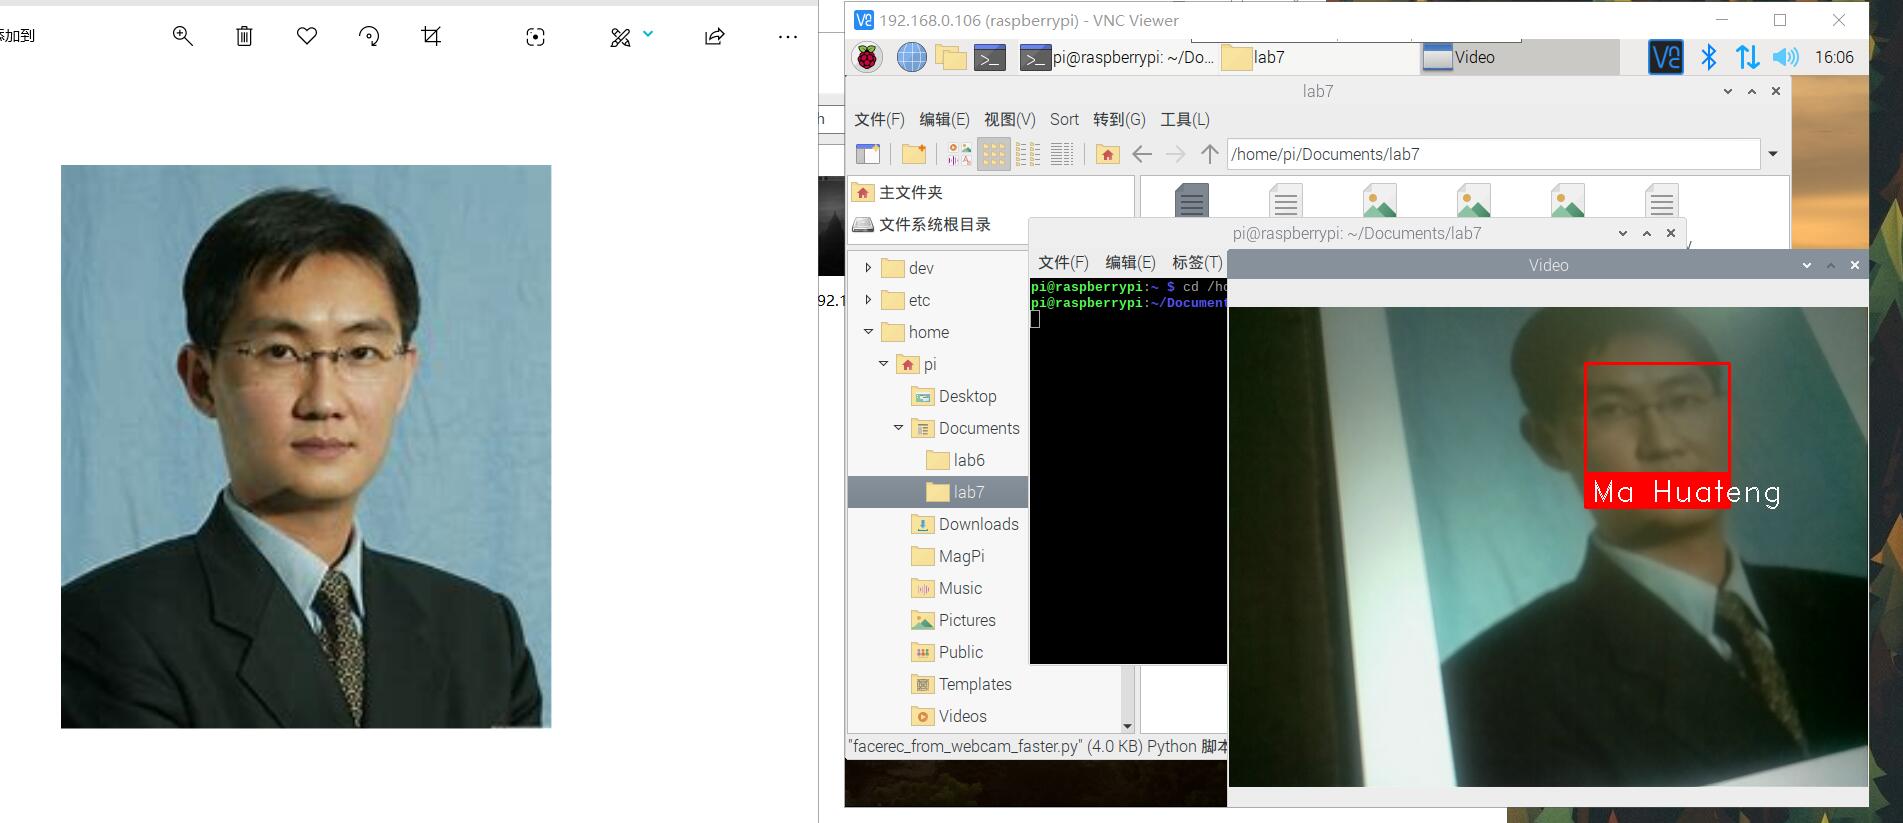
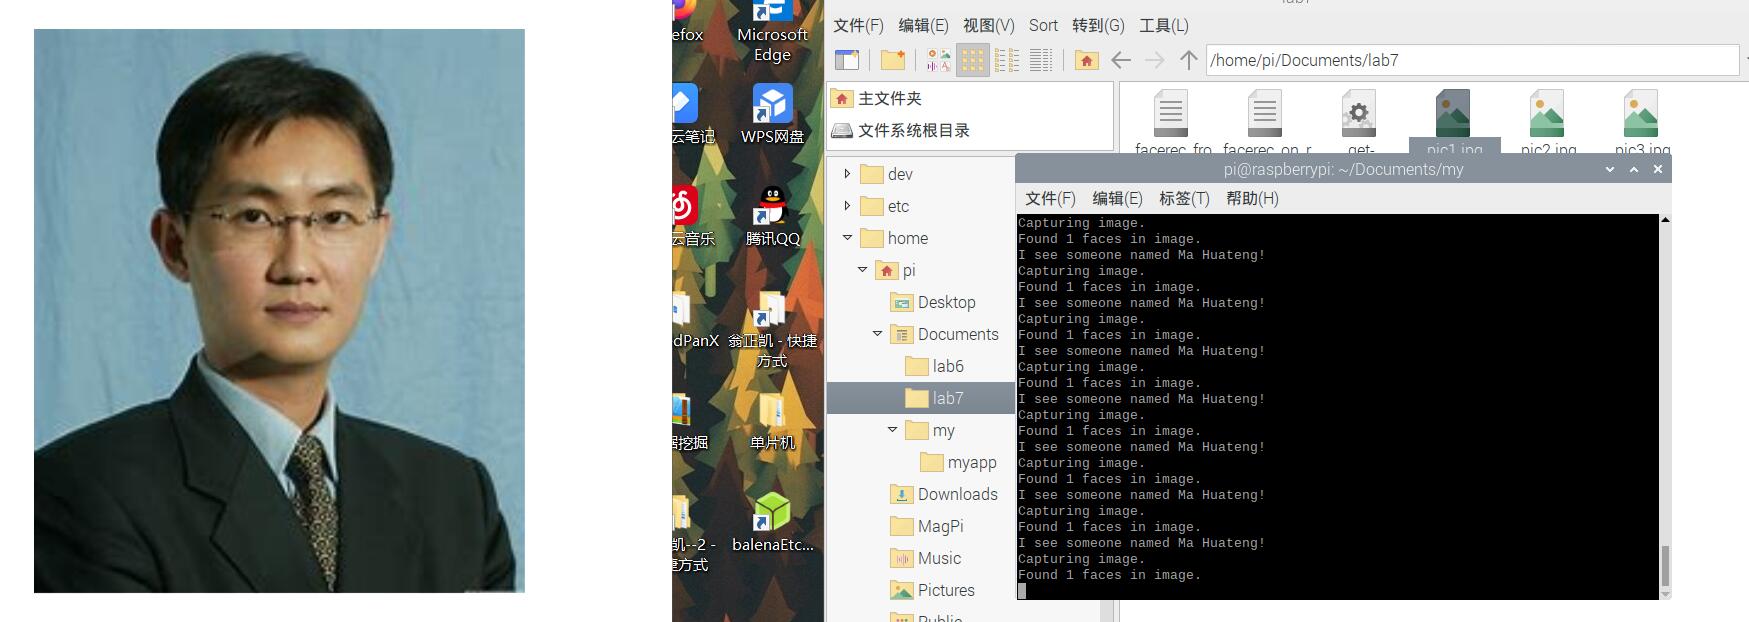
name = "Ma Huateng"
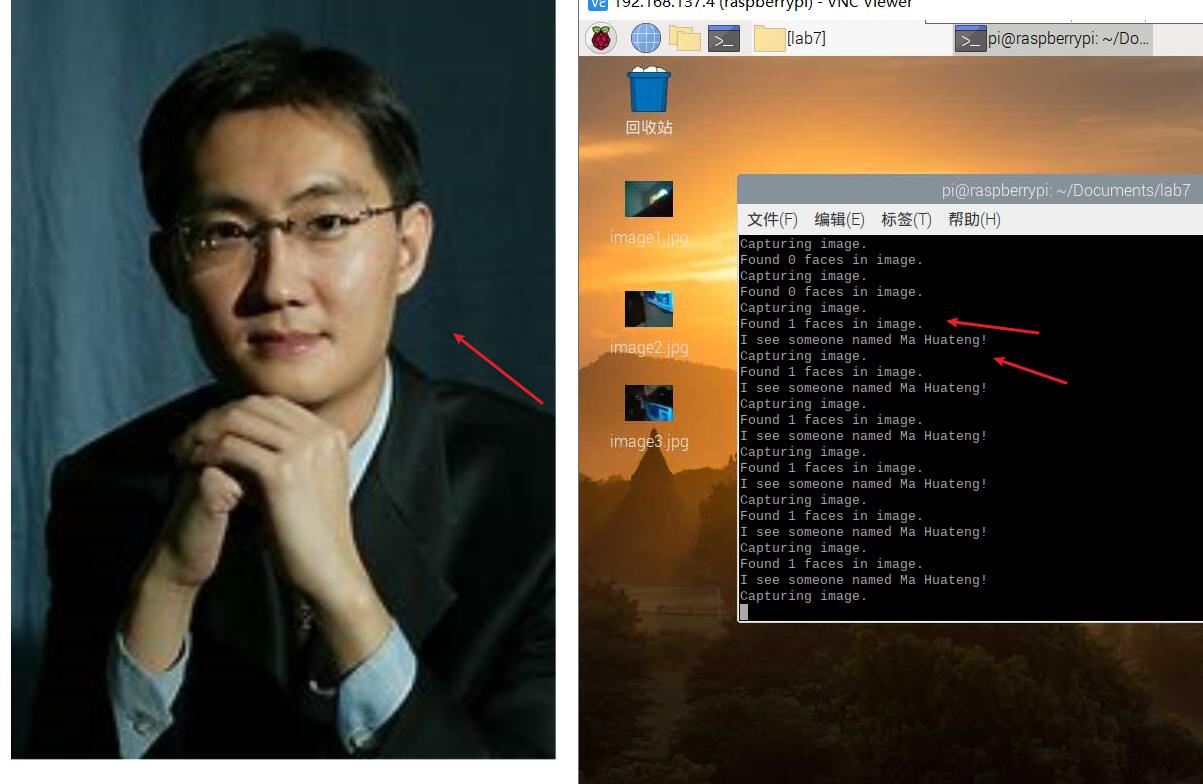
print("I see someone named {}!".format(name))
注意:在这之上的内容,我们是把opencv直接装到真实机上做的,下面的是我们参照开头给的网站把opencv装到虚拟环境里做的,所以可以看到命令提示符开头有个“(cv)”

测试一张马哥的照片,成功识别。

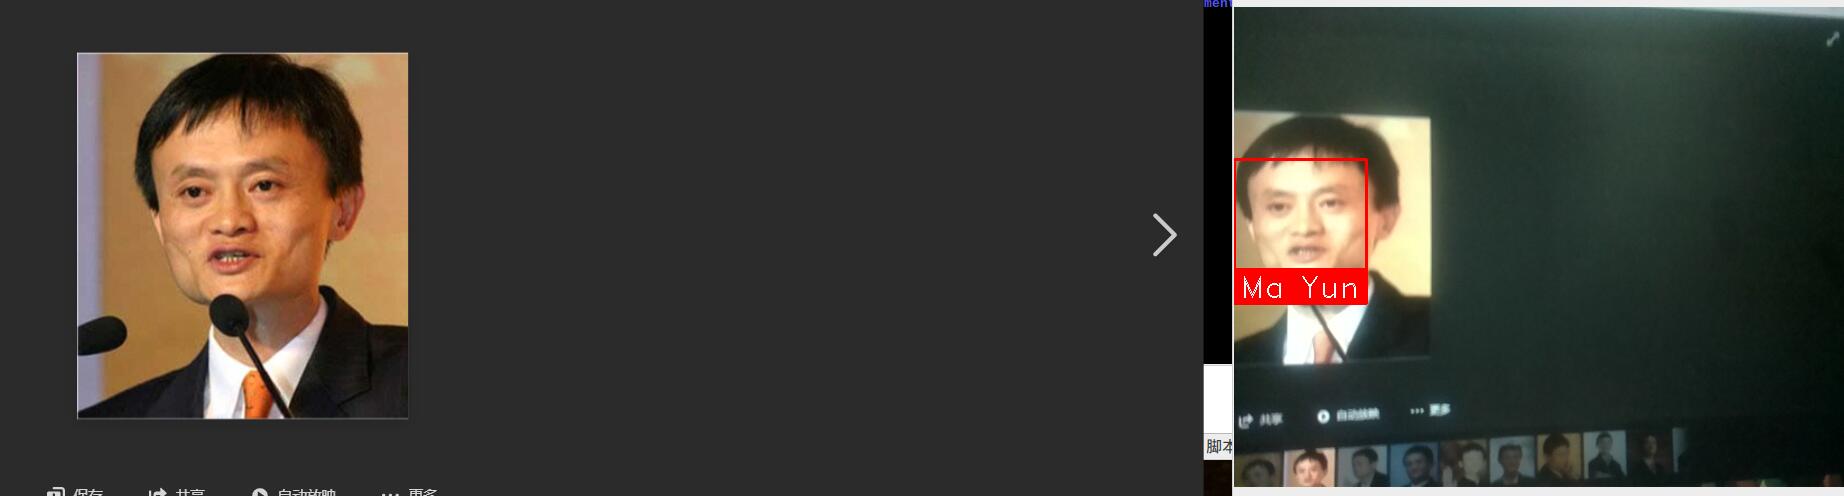
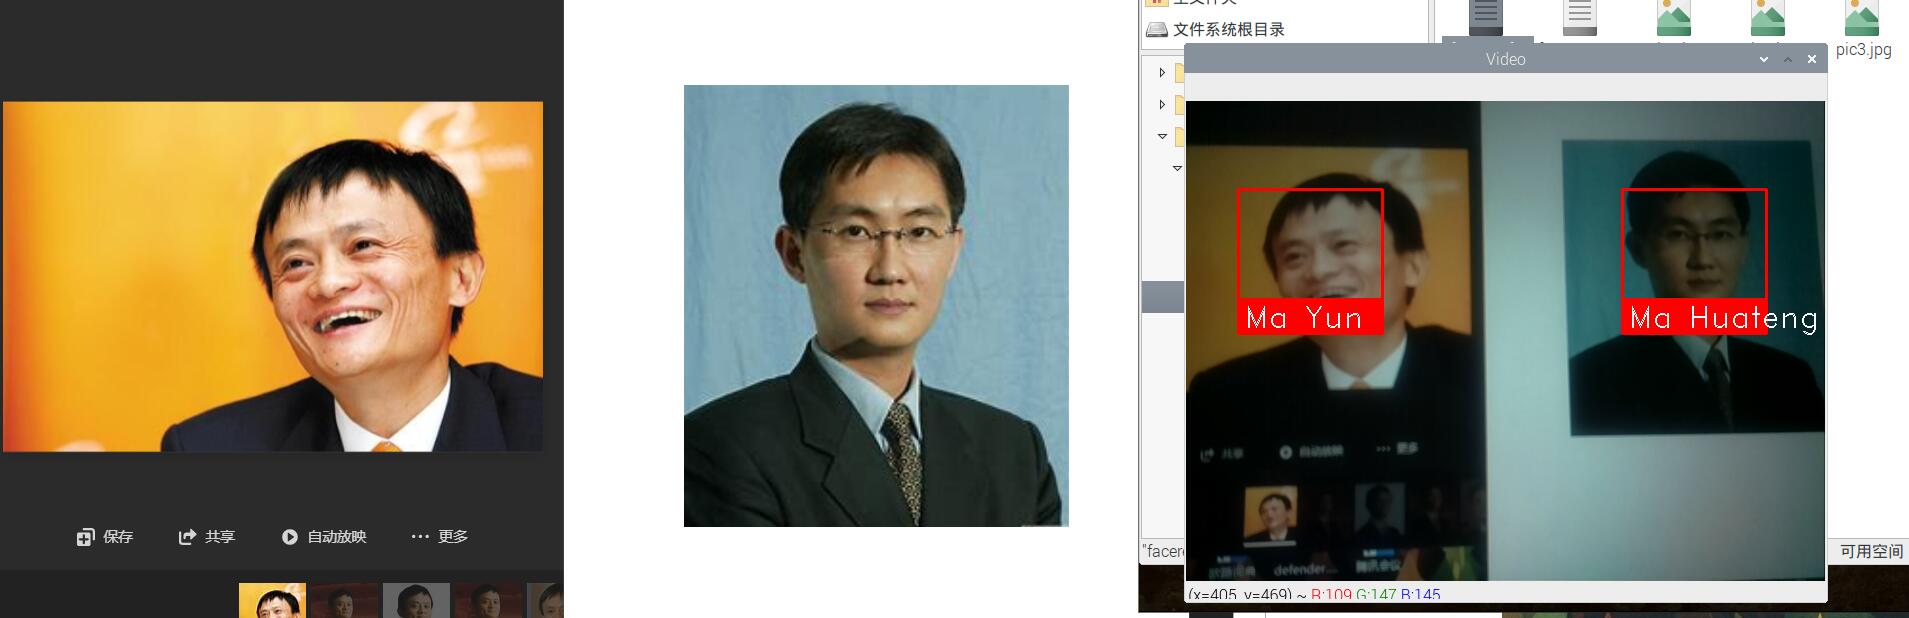
再测试一张
- facerec_from_webcam_faster.py
import face_recognition
import cv2
import numpy as np

# This is a demo of running face recognition on live video from your webcam. It's a little more complicated than the
# other example, but it includes some basic performance tweaks to make things run a lot faster:
#   1. Process each video frame at 1/4 resolution (though still display it at full resolution)
#   2. Only detect faces in every other frame of video.

# PLEASE NOTE: This example requires OpenCV (the `cv2` library) to be installed only to read from your webcam.
# OpenCV is *not* required to use the face_recognition library. It's only required if you want to run this
# specific demo. If you have trouble installing it, try any of the other demos that don't require it instead.

# Get a reference to webcam #0 (the default one)
video_capture = cv2.VideoCapture(0)

# Load a sample picture and learn how to recognize it.
Trump_image = face_recognition.load_image_file("Trump.jpg")
Trump_face_encoding = face_recognition.face_encodings(Trump_image)[0]

# Load a second sample picture and learn how to recognize it.
Kim_Jong_Eunimage = face_recognition.load_image_file("Kim_Jong_Eun.jpg")
Kim_Jong_Eunface_encoding = face_recognition.face_encodings(Kim_Jong_Eunimage)[0]

# Create arrays of known face encodings and their names
known_face_encodings = [
    Mahuateng_face_encoding,
    Mayun_face_encoding
]

known_face_names = [
    "Ma Huateng",
    "Ma Yun"
]


# Initialize some variables
face_locations = []
face_encodings = []
face_names = []

process_this_frame = True

while True:

    # Grab a single frame of video
    ret, frame = video_capture.read()

    # Resize frame of video to 1/4 size for faster face recognition processing
    small_frame = cv2.resize(frame, (0, 0), fx=0.25, fy=0.25)

    # Convert the image from BGR color (which OpenCV uses) to RGB color (which face_recognition uses)
    rgb_small_frame = small_frame[:, :, ::-1]

    # Only process every other frame of video to save time
    if process_this_frame:

        # Find all the faces and face encodings in the current frame of video
        face_locations = face_recognition.face_locations(rgb_small_frame)
        face_encodings = face_recognition.face_encodings(rgb_small_frame, face_locations)

        face_names = []
        for face_encoding in face_encodings:
            # See if the face is a match for the known face(s)
            matches = face_recognition.compare_faces(known_face_encodings, face_encoding)
            name = "Unknown"

            # # If a match was found in known_face_encodings, just use the first one.
            # if True in matches:
            #     first_match_index = matches.index(True)
            #     name = known_face_names[first_match_index]
            # Or instead, use the known face with the smallest distance to the new face
            face_distances = face_recognition.face_distance(known_face_encodings, face_encoding)
            best_match_index = np.argmin(face_distances)
            if matches[best_match_index]:
                name = known_face_names[best_match_index]

            face_names.append(name)

    process_this_frame = not process_this_frame

    # Display the results
    for (top, right, bottom, left), name in zip(face_locations, face_names):
        # Scale back up face locations since the frame we detected in was scaled to 1/4 size
        top *= 4
        right *= 4
        bottom *= 4
        left *= 4

        # Draw a box around the face
        cv2.rectangle(frame, (left, top), (right, bottom), (0, 0, 255), 2)

        # Draw a label with a name below the face
        cv2.rectangle(frame, (left, bottom - 35), (right, bottom), (0, 0, 255), cv2.FILLED)
        font = cv2.FONT_HERSHEY_DUPLEX
        cv2.putText(frame, name, (left + 6, bottom - 6), font, 1.0, (255, 255, 255), 1)

    # Display the resulting image
    cv2.imshow('Video', frame)

    # Hit 'q' on the keyboard to quit!
    if cv2.waitKey(1) & 0xFF == ord('q'):
        break

# Release handle to the webcam
video_capture.release()
cv2.destroyAllWindows()
结合微服务的进阶任务
安装Docker
下载安装脚本
curl -fsSL https://get.docker.com -o get-docker.sh

运行安装脚本(阿里云镜像)
sh get-docker.sh --mirror Aliyun

查看docker版本,验证是否安装成功

添加用户到docker组
sudo usermod -aG docker pi
重新登陆让用户组生效
exit
ssh pi@raspiberry
重启之后,docker指令之前就不需要加sudo了
定制opencv镜像
拉取镜像
docker pull sixsq/opencv-python

创建并运行容器
docker run -it sixsq/opencv-python /bin/bash
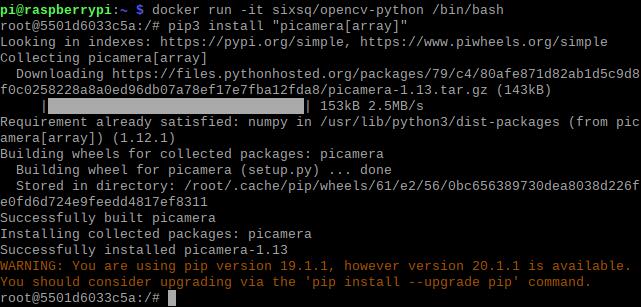
在容器中,用pip3安装 "picamera[array]",dlib和face_recognition
pip3 install "picamera[array]"
pip3 install dlib
pip3 install face_recognition
exit

commit镜像
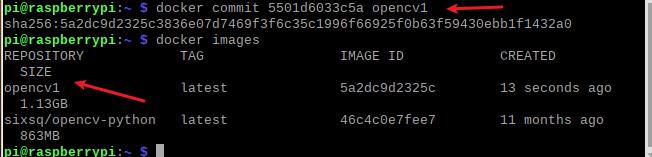
自定义镜像
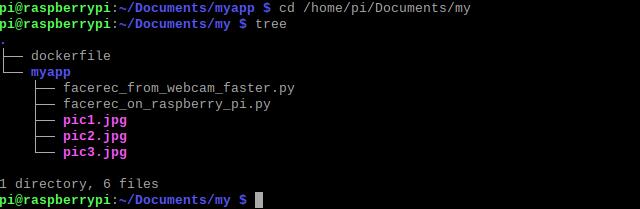
- Dockerfile
FROM opencv1
RUN mkdir /myapp
WORKDIR /myapp
COPY myapp .
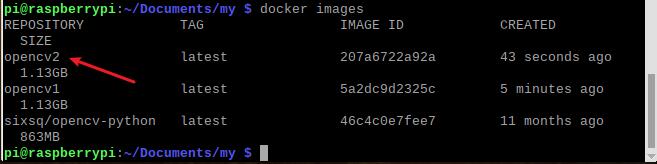
构建镜像
docker build -t opencv2 .

运行容器执行facerec_on_raspberry_pi.py
docker run -it --device=/dev/vchiq --device=/dev/video0 --name myopencv opencv2
python3 facerec_on_raspberry_pi.py
选做在opencv的docker容器中跑通步骤(3)的示例代码facerec_from_webcam_faster.py
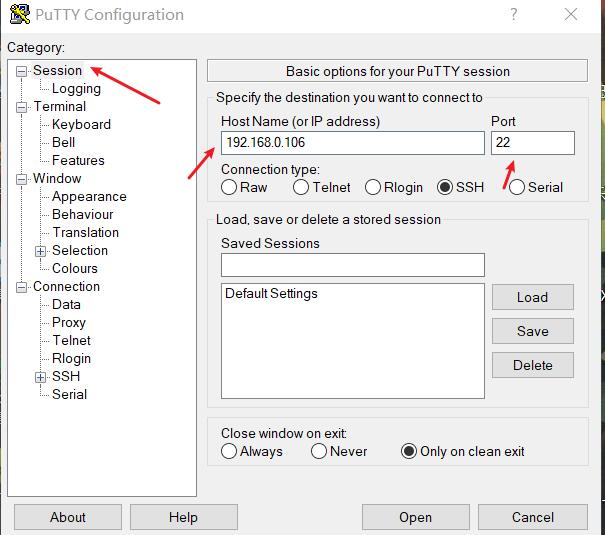
安装好后,先打开Xming,然后打开Putty,开启树莓派的ssh配置中的X11
打开Putty后,把树莓派的IP地址填在下面这一栏里,端口用默认的就行了

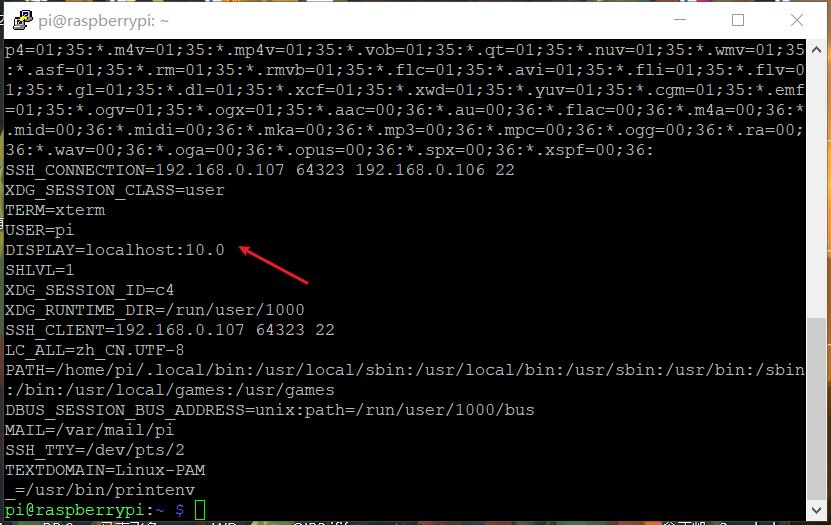
查看DISPLAY环境变量值
注意:这个查看是在用Putty打开的窗口上查看到的,若直接在树莓派里的终端看,看到就是"DISPLAY=localhost:0.0"
printenv
编写run.sh
#sudo apt-get install x11-xserver-utils
xhost +
docker run -it
        --net=host
        -v $HOME/.Xauthority:/root/.Xauthority
        -e DISPLAY=:10.0
        -e QT_X11_NO_MITSHM=1
        --device=/dev/vchiq
        --device=/dev/video0
        --name facerecgui
        opencv2
	python3 facerec_from_webcam_faster.py
打开终端,运行run.sh
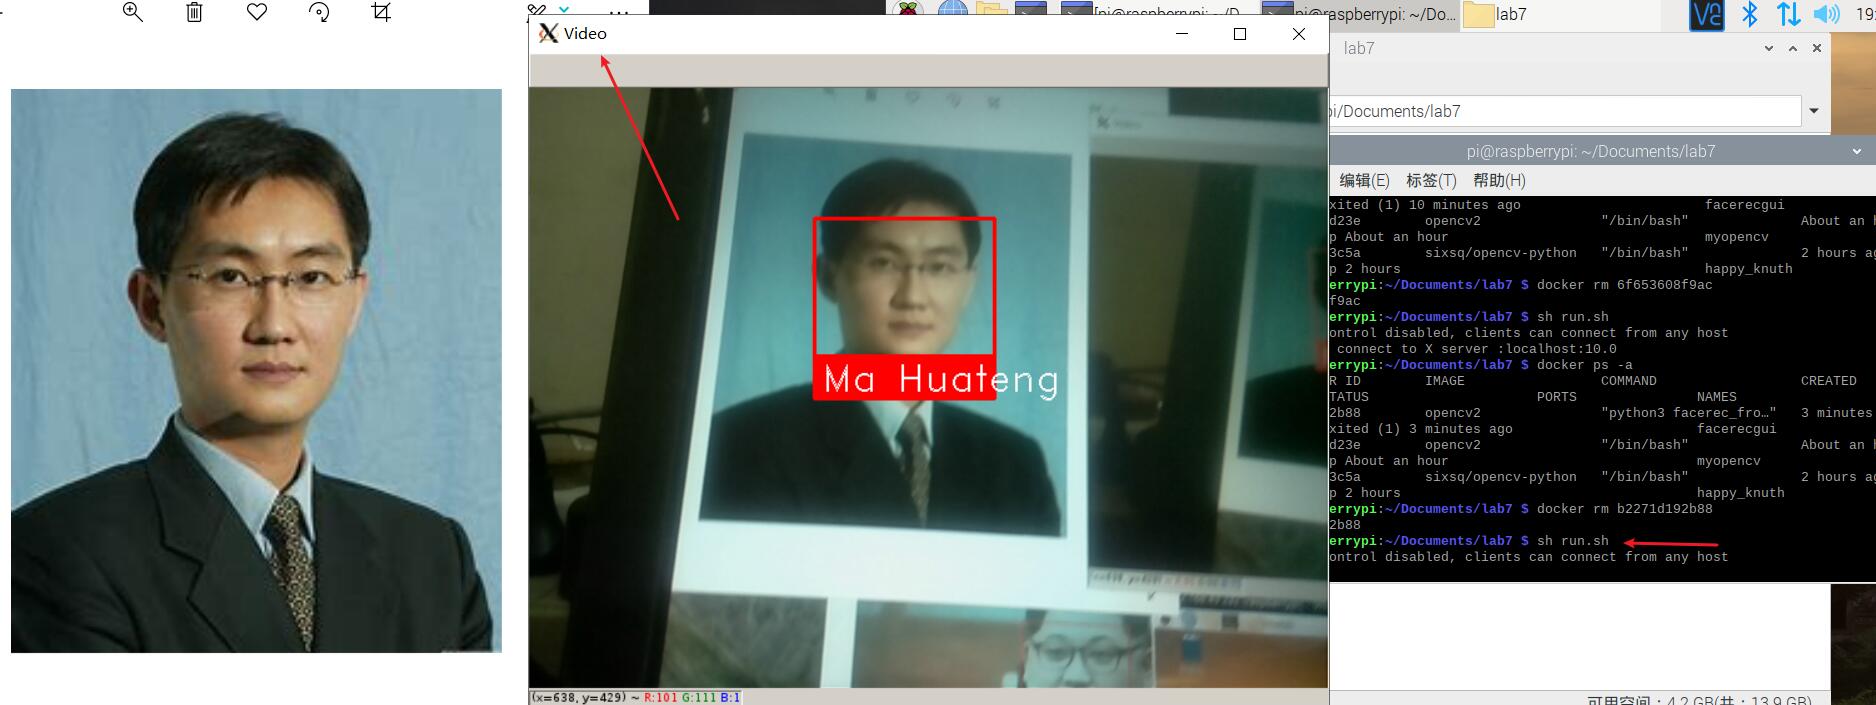
sh run.sh
可以看到在windows的Xvideo可以正确识别人脸。
遇到的问题
问题1:openCV的安装
import cv2时出现问题:
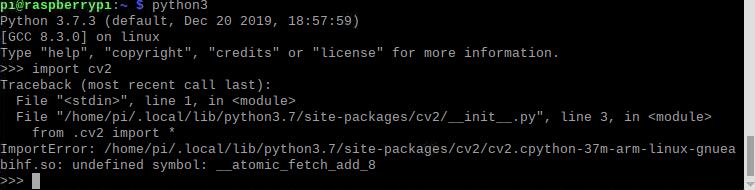
解决方法:
查资料发现是没有指定版本的缘故,把export LD_PRELOAD=/usr/lib/arm-linux-gnueabihf/libatomic.so.1 加到.bashrc文件,然后再cd ~ source ~/.bashrc使之生效。

问题2:把opencv装到虚拟环境时
做到这一步时(红色箭头):
报如下错误:

查找上述文件位置,并修改bashrc文件里对应的路径:

重新source,又出现如下错误:

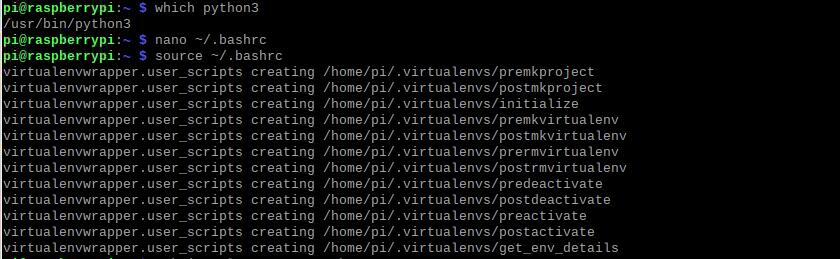
查找python3位置,修改bashrc文件里python3对应的路径,并再source:
创建虚拟环境,又报错:

上网查找到如下解决办法:

详细可看这个
最终修改~./bashrc文件如下,注意:下面的python3和virtualenvwrapper.sh的位置要换成上面重新找到的:
# virtualenv and virtualenvwrapper
export WORKON_HOME=$HOME/.virtualenvs
export VIRTUALENVWRAPPER_PYTHON=/usr/bin/python3
export VIRTUALENVWRAPPER_VIRTUALENV=/usr/local/bin/virtualenv
source /home/pi/.local/bin/virtualenvwrapper.sh
export VIRTUALENVWRAPPER_ENV_BIN_DIR=bin
最后再source ~./bashrc就行了
问题3:各种下载速度过慢,下着下载就挂了
通过换源and玄学reboot解决了。
分工协作及总结
分工协作
| 学号 | 姓名 | 分工 |
|---|---|---|
| 021700134 | 翁正凯 | 实机操作,查阅资料 |
| 021700827 | 张启荣 | 查阅资料,寻找解决方法 |
| 031702126 | 李家涌 | 博客编写,查阅资料 |
主要通过qq视频,群聊进行沟通和资料分享

小结
整个实验下来,主要是在安装openCV的时候花费的时间比较多。由于编译安装需要的时间较久且复杂,就决定用pip安装,后面又在真机和虚拟环境中安装openCV反复横跳,最后还是在真机上完成的,在线协作和学习理论知识以及实践操作合计大概有18h,总之还是学到了许多以及docker真香。