一:环境
1、服务端:Red Hat Enterprise Linux Server release 6.4 (Santiago)
2、客户端:windows7旗舰版64位
3、同步对象:测试数据
4、Rsync介绍:rsync是linux系统下的数据镜像备份工具。使用快速增量备份工具Remote Sync可以远程同步,支持本地复制,或者与其他SSH、rsync主机同步。是一款非常理想的数据同步工具
Rsync的好处:支持增量备份,对于很多大的数据文件来说用rsync是一个很理想的工具,既能节省磁盘空间还能提高备份相率
5、注意事项:此种同步方式仅限rsync的daemon模式
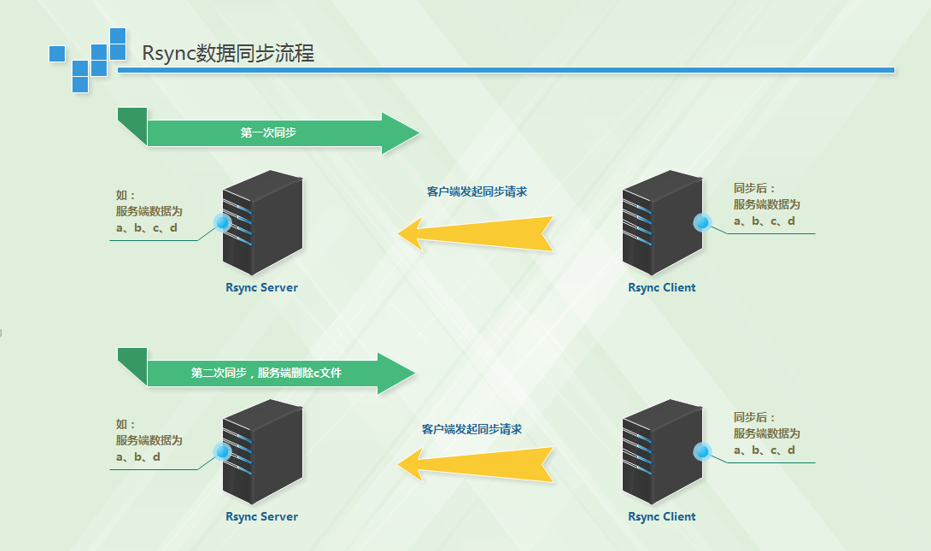
二:无差异同步示意图
三:服务端配置文件
1、 rsync配置文件:/etc/rsyncd.conf
uid = rsync # rsync用户,要是0的话代表所有用户
gid = rsync # rsync用户组
use chroot = no # 安全考虑,出现BUG可以把危险的数据定位到一个chroot目录下去,避免恶意攻击
max connections = 200 # 最大连接数
timeout = 300 # 超时时常
pid file = /var/run/rsyncd.pid # 服务端进程号
lock file = /var/run/rsync.lock # 服务端锁文件
log file = /var/log/rsyncd.log # 服务端后台日志
[test] # 模块名
path = /tmp/filesystem/ # 需要同步的目录内容
ignore errors # 忽略错误
read only = false # 取消只读
list = false # 客户端列出服务端的内容
hosts allow = 192.168.3.0/24  # 同步的主机地址
hosts deny = 0.0.0.0/32 # 需要阻止哪些地址登陆
auth users = test_rsync # rsync用户名
secrets file = /etc/rsync.password
2、rsync密码文件:/etc/rsync.password
[root@test ~]# cat /etc/rsync.password
test_rsync:test1234  #前面是rsync的虚拟用户,后者是rsync的密码
[root@test ~]# ll /etc/rsync.password
-rw------- 1 root root 17 Nov 26 14:46 /etc/rsync.password  # 修改密码文件权限为600
3、修改服务端两个配置文件权限(/etc/rsyncd.conf、rsync.password)
[root@test ~]# chmod 600 /etc/rsyncd.conf
[root@test ~]# chmod 600 /etc/rsync.password
4、创建rsync用户
[root@test ~]# useradd rsync -s /sbin/nologin
5、启动服务器端rsync进程
[root@test ~]# rsync --daemon
6、检查进程状态以及进程端口(默认873)如下:说明服务端一切正常
[root@test ~]# netstat -lnutp | grep rsync
tcp 0 0 0.0.0.0:873 0.0.0.0:* LISTEN 20509/rsync
tcp 0 0 :::873 :::* LISTEN 20509/rsync
[root@test ~]# ps -ef | grep rsync
root 20509 1 0 16:20 ? 00:00:00 rsync --daemon
root 22508 10881 0 17:12 pts/1 00:00:00 grep rsync
三:客户端准备
链接:https://pan.baidu.com/s/1kHQSVEODxbtXpxxMnT1S2A
提取码:9q4m
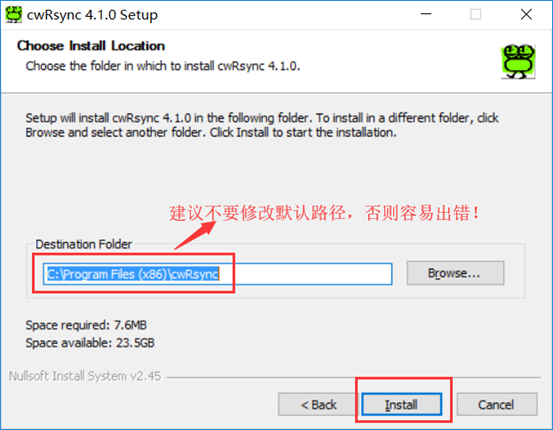
四:安装rsync客户端


五:客户端配置
1、rsync家目录内容

2、配置客户端rsync
在bin目录下加入密码文件:rsync.password,注意此密码要和服务端的/etc/rsync.password里面的密码一致,服务端密码为:test1234,所以客户端密码文件也写成这个
3、修改客户端密码文件的属主:(不修改属主默认会提示错误)

4、同步服务端的数据到客户端指定位置
在客户端rsync目录的bin目录下执行:
rsync.exe -avz --password-file=rsync.password test_rsync@192.168.3.14::test /cygdrive/f/testdir >> syslog.log
5、参数解读
-avz参数说明:
-a:等于下图所有内容:

-v:可视化
-z:传输时进行压缩提高传输速率
--password-file:指定密码文件
test_rsync:服务端/etc/rsyncd.conf里面的rsync的虚拟用户
::test:这个是服务端/etc/rsyncd.conf里面的模块名,客户端会根据服务端的模块名去找服务端需要共同步数据的目录
/cygdrive/f/testdir:告诉rsync我的数据是同步到客户端f盘的testdir目录下
6、linux和linux系统之间同步客户端配置更简单★★★★
只需要在客户端上加入如下内容即可:
[root@rsync_client ~]# cat /etc/rsync.password
test1234
六:无差异备份实验
1、服务端数据
[root@rsync_server zwy]# ls
1 10 2 3 4 5 6 7 8 9
2、客户端数据
[root@rsync_client data]# pwd
/root/data
[root@rsync_client data]# ls # 客户端无数据
3、第一次同步
[root@rsync_client data]# rsync -avz --password-file=/etc/rsync.password test_rsync@192.168.3.14::test ~/data/
receiving incremental file list
./
1
10
2
3
4
5
6
7
8
9
sent 248 bytes received 539 bytes 1574.00 bytes/sec
total size is 0 speedup is 0.00
4、检查服务端数据是否同步正常
[root@rsync_client data]# ls
1 10 2 3 4 5 6 7 8 9
5、无差异同步,删除服务器端的1-5的数据,然后客户端拉取数据看看效果
[root@rsync_server zwy]# ls
1 10 2 3 4 5 6 7 8 9
[root@rsync_server zwy]# rm -f {1..5}
[root@rsync_server zwy]# ls
10 6 7 8 9
6、客户端用无差异备份的方式拉数据看看效果
[root@rsync_client data]# rsync -avz --delete --password-file=/etc/rsync.password test_rsync@192.168.3.14::test ~/data/
receiving incremental file list
deleting 5
deleting 4
deleting 3
deleting 2
deleting 1
./
10
6
7
8
9
sent 153 bytes received 333 bytes 972.00 bytes/sec
total size is 0 speedup is 0.00
[root@rsync_client data]# ls # 再看客户端数据发现1-5的数据已经被删除了
10 6 7 8 9
7、无差异备份要了解拉数据和推数据的流程,否则风险很大!!!!!
七:附rsync自启动脚本
 1 [root@test ~]# cat /etc/init.d/tfrsync
 2 #!/bin/sh
 3 #
 4 #
 5 # rsync start/stop/status/restart
 6 #
 7 # chkconfig: 35 57 10
 8 # description: rsync backup oa data
 9
10 . /etc/init.d/functions
11
12 PID="/var/run/rsyncd.pid"
13 LOCK="/var/run/rsync.lock"
14 COUNT=`ps -ef | grep rsync | grep -vE "grep|vim|cat|more|sh" | wc -l`
15 STATUS_TRUE="action "$0" /bin/true"
16 STATUS_FALSE="action "$0" /bin/false"
17
18 case "$1" in
19
20   start)
21
22         if [ $COUNT -eq 1 ]
23           then
24             echo -ne "rsync is started " && $STATUS_FALSE
25             exit 1
26         else
27             /usr/bin/rsync --daemon && $STATUS_TRUE || $STATUS_FALSE
28
29         fi
30
31         ;;
32
33   stop)
34
35         cat $PID | xargs kill -9 2>/dev/null && $STATUS_TRUE && rm -f $PID $LOCK || $STATUS_FALSE
36
37         ;;
38
39   status)
40
41         [ $COUNT -eq 1 ] && echo "rsync is running." || echo "rsync is stoped."
42
43         ;;
44
45   restart)
46
47         if [ -f $PID ]
48           then
49             cat $PID | xargs kill -9 && $STATUS_TRUE && rm -rf $PID $LOCK && \
50             /usr/bin/rsync --daemon && $STATUS_TRUE || $STATUS_FALSE
51         else
52             /usr/bin/rsync --daemon && $STATUS_TRUE || $STATUS_FALSE
53         fi
54
55         ;;
56
57   *)
58         echo "Usage:$0 {start|stop|status|restart}"
59         ;;
60 esac
脚本写的不好,还请大家多多包涵,谢谢!