Webservice:
1、Xml:
2、WSDL:
Web service描述语言(WSDL)就是这样一个基于XML(标准通用标记语言下的一个子集)的语言,用于描述Web service及其函数、参数和返回值。WSDL既是机器可阅读的,又是人可阅读的,这将是一个很大的好处。
3、soap simple object access protoacl (简单对象访问协议) :
限定了xml的格式
soap 在http(因为有请求体,所以必须是post请求)的基础上传输xml数据
请求和响应的xml 的格式如: <Envelop><body>//....</body></Envelop>
operation name:服务提供的方法
静态方法不能发布为外部服务
运用jkd自带的代码生成访问服务器的客户端代码 E:/wsimort -s . http://test.cm/?wsdl
我们可以把webservice看做是web服务器上的一个应用,web服务器是webservice的一个容器
函数的参数在 http://test.cm/?xsd=1
JAX-WS是指 java api for xml -WebService
//测试 WebService服务的 explorer
Web Service Explorer 可以显示返回的xml格式
targetNamespace 默认为倒置的包名
一、借助axis2发布wenService服务的一种简单实现
第一步:首先要下载开发所需要的jar包
下载:axis2-1.6.2-war.zip: http://www.apache.org/dist//axis/axis2/java/core/1.6.2/
下载完后将axis2.war放至tomcat安装目录下的webapps文件夹下,然后启动tomcat后,在webapps目录下会生成axis2文件夹。
访问http://localhost:8080/axis2/能看到Apache的webservice页面表示axis2运行成功。
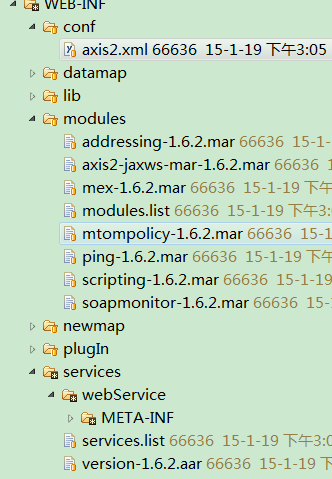
第二步:拷贝axis2必要文件到webproject中
将tomcate发布axis2 -> WEB_INF 下的conf、modules和services 拷贝到当前项目(webProject)的WEB-INF下,并且把axis2 -> WEB-INF -> lib 下的jar拷贝到当前项目lib下;
第三步:配置service.xml
在当前项目services/webservice/META-INF(没有该路径需要新建)下新建services.xml,配置对应的类格式如下:


 1 <?xml version="1.0" encoding="UTF-8"?>
 2
 3       <serviceGroup>
 4
 5         <service name="income" targetNamespace="http://tempuri.org/">
 6
 7           <schema schemaNamespace="http://tempuri.org/"/>
 8
 9           <description>axis2 webservice接口</description>
10           <parameter name="ServiceClass">tempuri.org.IncomeJC</parameter>
11           <operation name="incomeAdd">
12             <messageReceiver mep="http://www.w3.org/2004/08/wsdl/in-out"
13
14               class="org.apache.axis2.rpc.receivers.RPCMessageReceiver"  />
15           </operation>
16         </service>
17
18        <service name="incomeData" targetNamespace="http://tempuri.org/">
19         <schema schemaNamespace="http://tempuri.org/"/>
20         <description> WebServices提供到账数据查询接口</description>
21         <parameter name="ServiceClass"> tempuri.org.IncomeDataJC</parameter>
22         <operation name="incomeList">
23           <messageReceiver mep="http://www.w3.org/2004/08/wsdl/in-out"
24             class="org.apache.axis2.rpc.receivers.RPCMessageReceiver" />
25         </operation>
26        </service>
27
28     </serviceGroup>
1、发布多个接口:services.xml修改为
    <serviceGroup>
        <service name= "xxx" targetNamespace="http://tempuri.org/" >
            <schema schemaNamespace ="http://tempuri.org/"/>
            <description > WebServices接口1</description >
            <parameter name ="ServiceClass">tempuri.org.xxx</parameter >
            <operation name ="function">
                <messageReceiver mep= "http://www.w3.org/2004/08/wsdl/in-out"
                     class= "org.apache.axis2.rpc.receivers.RPCMessageReceiver" />
            </operation >
        </service>
        <service name= "yyy" targetNamespace="http://tempuri.org/" >
         ...
        </service>
    </serviceGroup>
2、接口方法消息接收形式(具体限定某方法)
1):有接收值没有返回值
    <operation name = "function1">
        <messageReceiver mep= "http://www.w3.org/2004/08/wsdl/in-only"
             class= "org.apache.axis2.rpc.receivers.RPCInOnlyMessageReceiver" />
    </operation >
2):既有接收值也有返回值
    <operation name = "function2">
        <messageReceiver mep= "http://www.w3.org/2004/08/wsdl/in-out"
             class= "org.apache.axis2.rpc.receivers.RPCMessageReceiver" />
    </operation >
第三步:创建类
新建包tempuri.org,在tempuri.org下新建类IncomeJC。
代码如下:
package tempuri.org;
      public class IncomeJC {
        public String incomeAdd(String xml) {
        String success = "0";
        try {
          ProjectIncomePub incomePub = readProjectIncome(xml);//读取xml数据
          if (null != incomePub) {
            success = new ProjectIncomeAction().incomeByJC(incomePub);//进一步处理
          }
        } catch (Exception e) {
          //e.printStackTrace();
          System.out.println("到账接口异常");
          return success;
        }
        return success;
      }
第四步:修改web.xml配置
在WEB-INF目录下修改web.xml文件,内容如下:
<?xml version="1.0" encoding="UTF-8"?>
<web-app version="2.5"
xmlns="http://java.sun.com/xml/ns/javaee"
xmlns:xsi="http://www.w3.org/2001/XMLSchema-instance"
xsi:schemaLocation="http://java.sun.com/xml/ns/javaee
http://java.sun.com/xml/ns/javaee/web-app_2_5.xsd">
<!--Axis2 config start-->
<servlet>
<servlet-name>AxisServlet</servlet-name>
<servlet-class>org.apache.axis2.transport.http.AxisServlet</servlet-class >
<load-on-startup>1</load-on-startup>
</servlet>
<servlet-mapping>
<servlet-name>AxisServlet</servlet-name>
<url-pattern>/services/*</url-pattern>
</servlet-mapping>
<!--Axis2 end-->
</web-app>
新建一个客户端的程序中使用:
 1 /***调用网络服务axis调用webservice**/
 2     this.incomeService();
 3     /***********************************/
 4     import javax.xml.namespace.QName;
 5     import org.apache.axis2.addressing.EndpointReference;
 6     import org.apache.axis2.client.Options;
 7     import org.apache.axis2.rpc.client.RPCServiceClient;
 8     private void incomeService() {
 9       String xmlStr = "xmlData";//xml格式的参数数据拼成的字符串
10       String url = "http://127.0.0.1:8080/webProject/services/systemDDLService";
11       String method="incomeJC";
12       String webObject = null;
13       try {
14         RPCServiceClient serviceClient = new RPCServiceClient();
15         Options options = serviceClient.getOptions();
16         EndpointReference targetEPR = new EndpointReference(url);
17         options.setTo(targetEPR);
18         /** 在创建QName对象时,QName类的构造方法的第一个参数表示WSDL文件的命名空间名,也就是<wsdl:definitions>元素的targetNamespace属性值,method指定方法名 */
19         QName opAddEntry = new QName("http://org.tempuri",method);
20         /** 参数,如果有多个,继续往后面增加即可,不用指定参数的名称*/
21         Object[] opAddEntryArgs = new Object[] {xmlStr};
22         // 返回参数类型,这个和axis1有点区别
23         /**invokeBlocking方法有三个参数, 其中第一个参数的类型是QName对象,表示要调用的方法名;第二个参数表示要调用的WebService方法的参数值,参数类型为Object[]; 第三个参数表示WebService方法的返回值类型的Class对象,参数类型为Class[]。 */
24         /**注意: 当方法没有参数时,invokeBlocking方法的第二个参数值不能是null,而要使用new Object[]{}
25           如果被调用的WebService方法没有返回值,应使用RPCServiceClient类的invokeRobust方法,
26           该方法只有两个参数,它们的含义与invokeBlocking方法的前两个参数的含义相同
27         */
28         Class[] classes = new Class[] { String.class };
29         webObject = (String)serviceClient.invokeBlocking(opAddEntry,opAddEntryArgs, classes)[0];
30         System.out.println(webObject);
31       }catch (Exception e) {
32         e.printStackTrace();
33         long end = System.currentTimeMillis();
34       }
35     }