一、Ceph对象存储(RGW)的简介和安装
1.1、对象存储的简介:
- 通过对象存储,将数据存储为对象,每个对象除了包含数据,还包含数据自身的元数据
- 对象通过Object ID来检索,无法通过普通文件系统操作来直接访问对象,只能通过API来访问,或者第三方客户端(实际上也是对API的封装)
- 对象存储中的对象不整理到目录树中,而是存储在扁平的命名空间中,Amazon S3将这个扁平命名空间称为bucket。而swift则将其称为容器
- 无论是bucket还是容器,都不能嵌套
- bucket需要被授权才能访问到,一个帐户可以对多个bucket授权,而权限可以不同
- 对象存储的优点:易扩展、快速检索
1.2、Rados网关介绍:
- RADOS网关也称为Ceph对象网关、RADOSGW、RGW,是一种服务,使客户端能够利用标准对象存储API来访问Ceph集群。它支持S3和Swift API
- rgw运行于librados之上,事实上就是一个称之为Civetweb的web服务器来响应api请求
- 客户端使用标准api与rgw通信,而rgw则使用librados与ceph集群通信
- rgw客户端通过s3或者swift api使用rgw用户进行身份验证。然后rgw网关代表用户利用cephx与ceph存储进行身份验证
更多详细介绍请查看官网:https://docs.ceph.com/en/latest/radosgw/
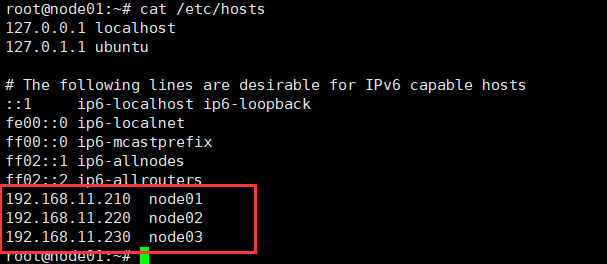
本次实验的主键情况如下:
1.3、安装Ceph的对象网关主键并验证(本次打算再node02和node03上安装RGW),具体详细过程如下:


  1 一、安装RGW:
  2
  3 node02:上的操作
  4 root@node02:~# apt install radosgw
  5 Reading package lists... Done
  6 Building dependency tree
  7 Reading state information... Done
  8 radosgw is already the newest version (16.2.5-1focal).
  9 0 upgraded, 0 newly installed, 0 to remove and 73 not upgraded.
 10 root@node02:~#
 11
 12
 13
 14 node03:上的操作
 15 root@node03:~# apt install radosgw
 16 Reading package lists... Done
 17 Building dependency tree
 18 Reading state information... Done
 19 radosgw is already the newest version (16.2.5-1focal).
 20 0 upgraded, 0 newly installed, 0 to remove and 73 not upgraded.
 21 root@node03:~#
 22
 23
 24
 25 ceph-deploy(node01):上的操作
 26 root@node01:~# ceph -s
 27   cluster:
 28     id:     9138c3cf-f529-4be6-ba84-97fcab59844b
 29     health: HEALTH_OK
 30
 31   services:
 32     mon: 3 daemons, quorum node01,node02,node03 (age 42s)
 33     mgr: node01(active, since 35s), standbys: node02, node03
 34     osd: 6 osds: 6 up (since 37s), 6 in (since 2w)
 35
 36   data:
 37     pools:   1 pools, 1 pgs
 38     objects: 0 objects, 0 B
 39     usage:   33 MiB used, 240 GiB / 240 GiB avail
 40     pgs:     1 active+clean
 41
 42 root@node01:~#
 43 root@node01:~/ceph-deploy#
 44 root@node01:~/ceph-deploy# ceph-deploy rgw create node02
 45 [ceph_deploy.conf][DEBUG ] found configuration file at: /root/.cephdeploy.conf
 46 [ceph_deploy.cli][INFO  ] Invoked (2.0.1): /usr/bin/ceph-deploy rgw create node02
 47 [ceph_deploy.cli][INFO  ] ceph-deploy options:
 48 [ceph_deploy.cli][INFO  ]  username                      : None
 49 [ceph_deploy.cli][INFO  ]  verbose                       : False
 50 [ceph_deploy.cli][INFO  ]  rgw                           : [('node02', 'rgw.node02')]
 51 [ceph_deploy.cli][INFO  ]  overwrite_conf                : False
 52 [ceph_deploy.cli][INFO  ]  subcommand                    : create
 53 [ceph_deploy.cli][INFO  ]  quiet                         : False
 54 [ceph_deploy.cli][INFO  ]  cd_conf                       : <ceph_deploy.conf.cephdeploy.Conf instance at 0x7fa24fea4d20>
 55 [ceph_deploy.cli][INFO  ]  cluster                       : ceph
 56 [ceph_deploy.cli][INFO  ]  func                          : <function rgw at 0x7fa24ff101d0>
 57 [ceph_deploy.cli][INFO  ]  ceph_conf                     : None
 58 [ceph_deploy.cli][INFO  ]  default_release               : False
 59 [ceph_deploy.rgw][DEBUG ] Deploying rgw, cluster ceph hosts node02:rgw.node02
 60 [node02][DEBUG ] connected to host: node02
 61 [node02][DEBUG ] detect platform information from remote host
 62 [node02][DEBUG ] detect machine type
 63 [ceph_deploy.rgw][INFO  ] Distro info: Ubuntu 20.04 focal
 64 [ceph_deploy.rgw][DEBUG ] remote host will use systemd
 65 [ceph_deploy.rgw][DEBUG ] deploying rgw bootstrap to node02
 66 [node02][DEBUG ] write cluster configuration to /etc/ceph/{cluster}.conf
 67 [node02][DEBUG ] create path recursively if it doesn't exist
 68 [node02][INFO  ] Running command: ceph --cluster ceph --name client.bootstrap-rgw --keyring /var/lib/ceph/bootstrap-rgw/ceph.keyring auth get-or-create client.rgw.node02 osd allow rwx mon allow rw -o /var/lib/ceph/radosgw/ceph-rgw.node02/keyring
 69 [node02][INFO  ] Running command: systemctl enable ceph-radosgw@rgw.node02
 70 [node02][INFO  ] Running command: systemctl start ceph-radosgw@rgw.node02
 71 [node02][INFO  ] Running command: systemctl enable ceph.target
 72 [ceph_deploy.rgw][INFO  ] The Ceph Object Gateway (RGW) is now running on host node02 and default port 7480
 73 root@node01:~/ceph-deploy# ceph-deploy rgw create node03
 74 [ceph_deploy.conf][DEBUG ] found configuration file at: /root/.cephdeploy.conf
 75 [ceph_deploy.cli][INFO  ] Invoked (2.0.1): /usr/bin/ceph-deploy rgw create node03
 76 [ceph_deploy.cli][INFO  ] ceph-deploy options:
 77 [ceph_deploy.cli][INFO  ]  username                      : None
 78 [ceph_deploy.cli][INFO  ]  verbose                       : False
 79 [ceph_deploy.cli][INFO  ]  rgw                           : [('node03', 'rgw.node03')]
 80 [ceph_deploy.cli][INFO  ]  overwrite_conf                : False
 81 [ceph_deploy.cli][INFO  ]  subcommand                    : create
 82 [ceph_deploy.cli][INFO  ]  quiet                         : False
 83 [ceph_deploy.cli][INFO  ]  cd_conf                       : <ceph_deploy.conf.cephdeploy.Conf instance at 0x7f6dee079d20>
 84 [ceph_deploy.cli][INFO  ]  cluster                       : ceph
 85 [ceph_deploy.cli][INFO  ]  func                          : <function rgw at 0x7f6dee0e51d0>
 86 [ceph_deploy.cli][INFO  ]  ceph_conf                     : None
 87 [ceph_deploy.cli][INFO  ]  default_release               : False
 88 [ceph_deploy.rgw][DEBUG ] Deploying rgw, cluster ceph hosts node03:rgw.node03
 89 [node03][DEBUG ] connected to host: node03
 90 [node03][DEBUG ] detect platform information from remote host
 91 [node03][DEBUG ] detect machine type
 92 [ceph_deploy.rgw][INFO  ] Distro info: Ubuntu 20.04 focal
 93 [ceph_deploy.rgw][DEBUG ] remote host will use systemd
 94 [ceph_deploy.rgw][DEBUG ] deploying rgw bootstrap to node03
 95 [node03][DEBUG ] write cluster configuration to /etc/ceph/{cluster}.conf
 96 [node03][WARNIN] rgw keyring does not exist yet, creating one
 97 [node03][DEBUG ] create a keyring file
 98 [node03][DEBUG ] create path recursively if it doesn't exist
 99 [node03][INFO  ] Running command: ceph --cluster ceph --name client.bootstrap-rgw --keyring /var/lib/ceph/bootstrap-rgw/ceph.keyring auth get-or-create client.rgw.node03 osd allow rwx mon allow rw -o /var/lib/ceph/radosgw/ceph-rgw.node03/keyring
100 [node03][INFO  ] Running command: systemctl enable ceph-radosgw@rgw.node03
101 [node03][WARNIN] Created symlink /etc/systemd/system/ceph-radosgw.target.wants/ceph-radosgw@rgw.node03.service → /lib/systemd/system/ceph-radosgw@.service.
102 [node03][INFO  ] Running command: systemctl start ceph-radosgw@rgw.node03
103 [node03][INFO  ] Running command: systemctl enable ceph.target
104 [ceph_deploy.rgw][INFO  ] The Ceph Object Gateway (RGW) is now running on host node03 and default port 7480
105 root@node01:~/ceph-deploy#
106 root@node01:~/ceph-deploy#
107 root@node01:~/ceph-deploy#
108 root@node01:~/ceph-deploy#
109 root@node01:~/ceph-deploy#
110 root@node01:~/ceph-deploy# curl http://node02:7480
111 <?xml version="1.0" encoding="UTF-8"?><ListAllMyBucketsResult xmlns="http://s3.amazonaws.com/doc/2006-03-01/"><Owner><ID>anonymous</ID><DisplayName></DisplayName></Owner><Buckets></Buckets></ListAllMyBucketsResult>root@node01:~/ceph-deploy# curl http://node03:7480
112 <?xml version="1.0" encoding="UTF-8"?><ListAllMyBucketsResult xmlns="http://s3.amazonaws.com/doc/2006-03-01/"><Owner><ID>anonymous</ID><DisplayName></DisplayName></Owner><Buckets></Buckets></ListAllMyBucketsResult>root@node01:~/ceph-deploy#
113 root@node01:~/ceph-deploy#
114 root@node01:~/ceph-deploy# ceph -s
115   cluster:
116     id:     9138c3cf-f529-4be6-ba84-97fcab59844b
117     health: HEALTH_OK
118
119   services:
120     mon: 3 daemons, quorum node01,node02,node03 (age 12m)
121     mgr: node01(active, since 12m), standbys: node02, node03
122     osd: 6 osds: 6 up (since 12m), 6 in (since 2w)
123     rgw: 3 daemons active (3 hosts, 1 zones)
124
125   data:
126     pools:   5 pools, 105 pgs
127     objects: 189 objects, 4.9 KiB
128     usage:   90 MiB used, 240 GiB / 240 GiB avail
129     pgs:     105 active+clean
130
131 root@node01:~/ceph-deploy#
132 root@node01:~/ceph-deploy#
133 root@node01:~/ceph-deploy# ceph osd lspools
134 1 device_health_metrics
135 2 .rgw.root
136 3 default.rgw.log
137 4 default.rgw.control
138 5 default.rgw.meta
139 root@node01:~/ceph-deploy#
主要步骤如下:
 1 # node02:上的操作
 2 root@node02:~# apt install radosgw
 3
 4 # node03:上的操作
 5 root@node03:~# apt install radosgw
 6
 7 # ceph-deploy(node01):上的操作 —— 将node02、node03分别加入RGW服务
 8 root@node01:~/ceph-deploy# ceph-deploy rgw create node02
 9 root@node01:~/ceph-deploy# ceph-deploy rgw create node03
10
11 # 验证node02、node03上的服务是否正常:
12 root@node01:~/ceph-deploy# curl http://node02:7480
13 root@node01:~/ceph-deploy# curl http://node03:7480
14
15 # 由于RGW是无状态的服务,可以使用Nginx或HAProxy和Keepalived做个高可用,这里提供一下HAProxy的相关主要的配置内容:
16 listen ceph-rgw
17     bind 192.168.11.200:80
18     mode tcp
19     server rgw1 192.168.11.220:7480 check inter 3s fall 3 rise 5
20     server rgw2 192.168.11.230:7480 check inter 3s fall 3 rise 5
二、Ceph对象存储:创建(RGW)用户
话不多说,直接看下面的详细过程:
 1 root@node01:~/ceph-deploy# radosgw-admin user list
 2 []
 3 root@node01:~/ceph-deploy# radosgw-admin user create --uid='jerry' --display-name='hello jerry'
 4 {
 5     "user_id": "jerry",
 6     "display_name": "hello jerry",
 7     "email": "",
 8     "suspended": 0,
 9     "max_buckets": 1000,
10     "subusers": [],
11     "keys": [
12         {
13             "user": "jerry",
14             "access_key": "84UFQ26AJJ95KTT1KGGH",
15             "secret_key": "tSmIeDKqCD7AneP5Wof0NFKKg0PhAxslsDVj3C3n"
16         }
17     ],
18     "swift_keys": [],
19     "caps": [],
20     "op_mask": "read, write, delete",
21     "default_placement": "",
22     "default_storage_class": "",
23     "placement_tags": [],
24     "bucket_quota": {
25         "enabled": false,
26         "check_on_raw": false,
27         "max_size": -1,
28         "max_size_kb": 0,
29         "max_objects": -1
30     },
31     "user_quota": {
32         "enabled": false,
33         "check_on_raw": false,
34         "max_size": -1,
35         "max_size_kb": 0,
36         "max_objects": -1
37     },
38     "temp_url_keys": [],
39     "type": "rgw",
40     "mfa_ids": []
41 }
42
43 root@node01:~/ceph-deploy# radosgw-admin user list
44 [
45     "jerry"
46 ]
47 root@node01:~/ceph-deploy# radosgw-admin user info --uid=jerry
48 {
49     "user_id": "jerry",
50     "display_name": "hello jerry",
51     "email": "",
52     "suspended": 0,
53     "max_buckets": 1000,
54     "subusers": [],
55     "keys": [
56         {
57             "user": "jerry",
58             "access_key": "84UFQ26AJJ95KTT1KGGH",
59             "secret_key": "tSmIeDKqCD7AneP5Wof0NFKKg0PhAxslsDVj3C3n"
60         }
61     ],
62     "swift_keys": [],
63     "caps": [],
64     "op_mask": "read, write, delete",
65     "default_placement": "",
66     "default_storage_class": "",
67     "placement_tags": [],
68     "bucket_quota": {
69         "enabled": false,
70         "check_on_raw": false,
71         "max_size": -1,
72         "max_size_kb": 0,
73         "max_objects": -1
74     },
75     "user_quota": {
76         "enabled": false,
77         "check_on_raw": false,
78         "max_size": -1,
79         "max_size_kb": 0,
80         "max_objects": -1
81     },
82     "temp_url_keys": [],
83     "type": "rgw",
84     "mfa_ids": []
85 }
86
87 root@node01:~/ceph-deploy#
主要步骤如下:
# 查看所有用户:
root@node01:~/ceph-deploy# radosgw-admin user list

# 创建用户——例如这里的Jerry:
root@node01:~/ceph-deploy# radosgw-admin user create --uid='jerry' --display-name='hello jerry'

# 查看用户Jerry的详细信息:
root@node01:~/ceph-deploy# radosgw-admin user info --uid=jerry

# 至于其它关于radosgw-admin命令详细的信息,例如:修改、删除、停用、启动、配额等情况,请查看如下链接,我也不复制贴过来了:
https://blog.csdn.net/qq_40017427/article/details/106358210
三、Ceph对象存储:客户端工具s3cmd安装配置:
3.1、安装配置s3cmd工具,具体过程如下:
 1 root@node01:~/ceph-deploy# apt install s3cmd
 2 Reading package lists... Done
 3 Building dependency tree
 4 Reading state information... Done
 5 The following additional packages will be installed:
 6   python3-magic
 7 The following NEW packages will be installed:
 8   python3-magic s3cmd
 9 0 upgraded, 2 newly installed, 0 to remove and 73 not upgraded.
10 Need to get 121 kB of archives.
11 After this operation, 540 kB of additional disk space will be used.
12 Do you want to continue? [Y/n] y
13 Get:1 https://mirrors.tuna.tsinghua.edu.cn/ubuntu focal/main amd64 python3-magic all 2:0.4.15-3 [9,376 B]
14 Get:2 https://mirrors.tuna.tsinghua.edu.cn/ubuntu focal-updates/universe amd64 s3cmd all 2.0.2-1ubuntu1 [111 kB]
15 Fetched 121 kB in 1s (169 kB/s)
16 Selecting previously unselected package python3-magic.
17 (Reading database ... 74528 files and directories currently installed.)
18 Preparing to unpack .../python3-magic_2%3a0.4.15-3_all.deb ...
19 Unpacking python3-magic (2:0.4.15-3) ...
20 Selecting previously unselected package s3cmd.
21 Preparing to unpack .../s3cmd_2.0.2-1ubuntu1_all.deb ...
22 Unpacking s3cmd (2.0.2-1ubuntu1) ...
23 Setting up python3-magic (2:0.4.15-3) ...
24 Setting up s3cmd (2.0.2-1ubuntu1) ...
25 Processing triggers for man-db (2.9.1-1) ...
26 root@node01:~/ceph-deploy#
27 root@node01:~/ceph-deploy#
28 root@node01:~/ceph-deploy# s3cmd --configure
29
30 Enter new values or accept defaults in brackets with Enter.
31 Refer to user manual for detailed description of all options.
32
33 Access key and Secret key are your identifiers for Amazon S3. Leave them empty for using the env variables.
34 Access Key: 84UFQ26AJJ95KTT1KGGH
35 Secret Key: tSmIeDKqCD7AneP5Wof0NFKKg0PhAxslsDVj3C3n
36 Default Region [US]:
37
38 Use "s3.amazonaws.com" for S3 Endpoint and not modify it to the target Amazon S3.
39 S3 Endpoint [s3.amazonaws.com]: 192.168.11.220:7480
40
41 Use "%(bucket)s.s3.amazonaws.com" to the target Amazon S3. "%(bucket)s" and "%(location)s" vars can be used
42 if the target S3 system supports dns based buckets.
43 DNS-style bucket+hostname:port template for accessing a bucket [%(bucket)s.s3.amazonaws.com]: 192.168.11.220:7480/%(bucket)s
44
45 Encryption password is used to protect your files from reading
46 by unauthorized persons while in transfer to S3
47 Encryption password:
48 Path to GPG program [/usr/bin/gpg]:
49
50 When using secure HTTPS protocol all communication with Amazon S3
51 servers is protected from 3rd party eavesdropping. This method is
52 slower than plain HTTP, and can only be proxied with Python 2.7 or newer
53 Use HTTPS protocol [Yes]: No
54
55 On some networks all internet access must go through a HTTP proxy.
56 Try setting it here if you can't connect to S3 directly
57 HTTP Proxy server name:
58
59 New settings:
60   Access Key: 84UFQ26AJJ95KTT1KGGH
61   Secret Key: tSmIeDKqCD7AneP5Wof0NFKKg0PhAxslsDVj3C3n
62   Default Region: US
63   S3 Endpoint: 192.168.11.220:7480
64   DNS-style bucket+hostname:port template for accessing a bucket: 192.168.11.220:7480/%(bucket)s
65   Encryption password:
66   Path to GPG program: /usr/bin/gpg
67   Use HTTPS protocol: False
68   HTTP Proxy server name:
69   HTTP Proxy server port: 0
70
71 Test access with supplied credentials? [Y/n] y
72 Please wait, attempting to list all buckets...
73 Success. Your access key and secret key worked fine :-)
74
75 Now verifying that encryption works...
76 Not configured. Never mind.
77
78 Save settings? [y/N] y
79 Configuration saved to '/root/.s3cfg'
80 root@node01:~/ceph-deploy#
主要步骤如下:
# 安装s3cmd客户端工具:
root@node01:~/ceph-deploy# apt install s3cmd -y

# 配置s3cmd客户端工具(按照提示一步步走下去即可):
root@node01:~/ceph-deploy# s3cmd --configure
3.2、使用s3cmd工具创建bucket,上传、下载文件,具体过程如下:
 1 root@node01:~# s3cmd la
 2 root@node01:~# s3cmd ls
 3 root@node01:~# s3cmd mb s3://mybucket
 4 ERROR: S3 error: 403 (SignatureDoesNotMatch)
 5 root@node01:~# vim .s
 6 .s3cfg  .ssh/
 7 root@node01:~# sed -i '/signature_v2/s/False/True/g' /root/.s3cfg   #由于直接使用的是IP地址而为使用域名:修改版本启用V2
 8 root@node01:~# s3cmd mb s3://mybucket
 9 Bucket 's3://mybucket/' created
10 root@node01:~#
11 root@node01:~# s3cmd ls
12 2021-09-01 14:32  s3://mybucket
13 root@node01:~#
14 root@node01:~# s3cmd put /etc/passwd s3://mybucket/
15 upload: '/etc/passwd' -> 's3://mybucket/passwd'  [1 of 1]
16  1899 of 1899   100% in    2s   922.58 B/s  done
17 root@node01:~# s3cmd ls
18 2021-09-01 14:32  s3://mybucket
19 root@node01:~# s3cmd ls s3://mybucket
20 2021-09-01 14:32      1899   s3://mybucket/passwd
21 root@node01:~# ls /opt/
22 root@node01:~# s3cmd get s3://mybucket/passwd /opt/
23 download: 's3://mybucket/passwd' -> '/opt/passwd'  [1 of 1]
24  1899 of 1899   100% in    0s   159.77 kB/s  done
25 root@node01:~# ls /opt/
26 passwd
27 root@node01:~# s3cmd info s3://mybucket/passwd
28 s3://mybucket/passwd (object):
29    File size: 1899
30    Last mod:  Wed, 01 Sep 2021 14:32:59 GMT
31    MIME type: text/plain
32    Storage:   STANDARD
33    MD5 sum:   0bf05629c11b52b6566b3bfff218c054
34    SSE:       none
35    Policy:    none
36    CORS:      none
37    ACL:       hello jerry: FULL_CONTROL
38    x-amz-meta-s3cmd-attrs: atime:1630504988/ctime:1629203718/gid:0/gname:root/md5:0bf05629c11b52b6566b3bfff218c054/mode:33188/mtime:1629203718/uid:0/uname:root
39 root@node01:~#
主要步骤如下:
 1 # 创建bucket:
 2 root@node01:~# s3cmd mb s3://mybucket
 3
 4 # 上传文件:
 5 root@node01:~# s3cmd put /etc/passwd s3://mybucket/
 6
 7 # 下载文件:
 8 root@node01:~# s3cmd get s3://mybucket/passwd /opt/
 9
10 # 查看:
11 root@node01:~# s3cmd ls
12 root@node01:~# s3cmd la
13 root@node01:~# s3cmd ls s3://mybucket
14
15 # 过程遇到的一个小问题(ERROR: S3 error: 403 (SignatureDoesNotMatch))—— 由于直接使用的是IP地址而为使用域名:修改版本启用V2,如下方法解决一下:
16 root@node01:~# sed -i '/signature_v2/s/False/True/g' /root/.s3cfg
四、Ceph Dashboard启用
Ceph Dashboard是通过一个 web 界面,对已经运行的 ceph 集群进行状态查看及功能配置等 功能,而且Ceph-Dashboard还是用 Python 开发的一个 Ceph 的监控面板,用来监控 Ceph 的运行状态。同时提供 REST API 来访问状态数据。它具有如下优缺点:
优点:
- 易部署
- 轻量级
- 灵活(可以自定义开发功能)
缺点:
- 功能相对简单
4.1、安装并启用 dashboard 插件:
新版本需要安装 dashboard 安保,而且必须安装在 mgr 节点,否则报错;由于我这里三台都是mgr(同时活跃节点就是node01——即deploy机器)
  1 root@node01:~/ceph-deploy# ceph -s
  2   cluster:
  3     id:     9138c3cf-f529-4be6-ba84-97fcab59844b
  4     health: HEALTH_OK
  5
  6   services:
  7     mon: 3 daemons, quorum node01,node02,node03 (age 7m)
  8     mgr: node01(active, since 3s), standbys: node02, node03
  9     osd: 6 osds: 6 up (since 7m), 6 in (since 2w)
 10     rgw: 3 daemons active (3 hosts, 1 zones)
 11
 12   data:
 13     pools:   7 pools, 145 pgs
 14     objects: 206 objects, 7.6 KiB
 15     usage:   104 MiB used, 240 GiB / 240 GiB avail
 16     pgs:     145 active+clean
 17
 18 root@node01:~/ceph-deploy#
 19 root@node01:~/ceph-deploy# apt install ceph-mgr-dashboard
 20 Reading package lists... Done
 21 Building dependency tree
 22 Reading state information... Done
 23 The following additional packages will be installed:
 24   javascript-common libjs-sphinxdoc libjs-underscore python3-repoze.lru python3-routes
 25 Suggested packages:
 26   apache2 | lighttpd | httpd
 27 The following NEW packages will be installed:
 28   ceph-mgr-dashboard javascript-common libjs-sphinxdoc libjs-underscore python3-repoze.lru python3-routes
 29 0 upgraded, 6 newly installed, 0 to remove and 73 not upgraded.
 30 Need to get 2,660 kB of archives.
 31 After this operation, 16.6 MB of additional disk space will be used.
 32 Do you want to continue? [Y/n] y
 33 Get:1 https://mirrors.tuna.tsinghua.edu.cn/ubuntu focal/main amd64 python3-repoze.lru all 0.7-2 [12.1 kB]
 34 Get:2 https://mirrors.tuna.tsinghua.edu.cn/ubuntu focal-updates/main amd64 libjs-underscore all 1.9.1~dfsg-1ubuntu0.20.04.1 [99.5 kB]
 35 Get:3 https://mirrors.tuna.tsinghua.edu.cn/ubuntu focal/main amd64 libjs-sphinxdoc all 1.8.5-7ubuntu3 [97.1 kB]
 36 Get:4 https://mirrors.tuna.tsinghua.edu.cn/ubuntu focal/main amd64 python3-routes all 2.4.1-2 [88.1 kB]
 37 Get:5 https://mirrors.tuna.tsinghua.edu.cn/ceph/debian-pacific focal/main amd64 ceph-mgr-dashboard all 16.2.5-1focal [2,357 kB]
 38 Get:6 https://mirrors.tuna.tsinghua.edu.cn/ubuntu focal/main amd64 javascript-common all 11 [6,066 B]
 39 Fetched 2,660 kB in 1s (3,200 kB/s)
 40 Selecting previously unselected package python3-repoze.lru.
 41 (Reading database ... 74577 files and directories currently installed.)
 42 Preparing to unpack .../0-python3-repoze.lru_0.7-2_all.deb ...
 43 Unpacking python3-repoze.lru (0.7-2) ...
 44 Selecting previously unselected package libjs-underscore.
 45 Preparing to unpack .../1-libjs-underscore_1.9.1~dfsg-1ubuntu0.20.04.1_all.deb ...
 46 Unpacking libjs-underscore (1.9.1~dfsg-1ubuntu0.20.04.1) ...
 47 Selecting previously unselected package libjs-sphinxdoc.
 48 Preparing to unpack .../2-libjs-sphinxdoc_1.8.5-7ubuntu3_all.deb ...
 49 Unpacking libjs-sphinxdoc (1.8.5-7ubuntu3) ...
 50 Selecting previously unselected package python3-routes.
 51 Preparing to unpack .../3-python3-routes_2.4.1-2_all.deb ...
 52 Unpacking python3-routes (2.4.1-2) ...
 53 Selecting previously unselected package ceph-mgr-dashboard.
 54 Preparing to unpack .../4-ceph-mgr-dashboard_16.2.5-1focal_all.deb ...
 55 Unpacking ceph-mgr-dashboard (16.2.5-1focal) ...
 56 Selecting previously unselected package javascript-common.
 57 Preparing to unpack .../5-javascript-common_11_all.deb ...
 58 Unpacking javascript-common (11) ...
 59 Setting up javascript-common (11) ...
 60 Setting up python3-repoze.lru (0.7-2) ...
 61 Setting up libjs-underscore (1.9.1~dfsg-1ubuntu0.20.04.1) ...
 62 Setting up libjs-sphinxdoc (1.8.5-7ubuntu3) ...
 63 Setting up python3-routes (2.4.1-2) ...
 64 Setting up ceph-mgr-dashboard (16.2.5-1focal) ...
 65 Processing triggers for man-db (2.9.1-1) ...
 66 root@node01:~/ceph-deploy#
 67 root@node01:~/ceph-deploy# ceph -s
 68   cluster:
 69     id:     9138c3cf-f529-4be6-ba84-97fcab59844b
 70     health: HEALTH_OK
 71
 72   services:
 73     mon: 3 daemons, quorum node01,node02,node03 (age 7m)
 74     mgr: node01(active, since 3s), standbys: node02, node03
 75     osd: 6 osds: 6 up (since 7m), 6 in (since 2w)
 76     rgw: 3 daemons active (3 hosts, 1 zones)
 77
 78   data:
 79     pools:   7 pools, 145 pgs
 80     objects: 206 objects, 7.6 KiB
 81     usage:   104 MiB used, 240 GiB / 240 GiB avail
 82     pgs:     145 active+clean
 83
 84 root@node01:~/ceph-deploy#
 85 root@node01:~/ceph-deploy#
 86 root@node01:~/ceph-deploy# ceph mgr module enable dashboard
 87 root@node01:~/ceph-deploy# ceph mgr module ls | grep dashboard
 88         "dashboard",
 89 root@node01:~/ceph-deploy#
 90 root@node01:~/ceph-deploy#
 91 root@node01:~/ceph-deploy#
 92 root@node01:~/ceph-deploy# ceph config set mgr mgr/dashboard/ssl false
 93 root@node01:~/ceph-deploy#
 94 root@node01:~/ceph-deploy# ceph config set mgr mgr/dashboard/node01/server_addr 192.168.11.210
 95 root@node01:~/ceph-deploy# echo $?
 96 0
 97 root@node01:~/ceph-deploy# ceph config set mgr mgr/dashboard/node01/server_port 2000
 98 root@node01:~/ceph-deploy# lsof -i:2000
 99 root@node01:~/ceph-deploy# systemctl restart ceph-mgr
100 ceph-mgr@node01.service  ceph-mgr.target
101 root@node01:~/ceph-deploy# systemctl restart ceph-mgr@node01.service
102 root@node01:~/ceph-deploy# lsof -i:2000
103 root@node01:~/ceph-deploy# lsof -i:2000
104 COMMAND   PID USER   FD   TYPE DEVICE SIZE/OFF NODE NAME
105 ceph-mgr 5485 ceph   29u  IPv4  59814      0t0  TCP node01:cisco-sccp (LISTEN)
106 root@node01:~/ceph-deploy# lsof -i:2000
107 COMMAND   PID USER   FD   TYPE DEVICE SIZE/OFF NODE NAME
108 ceph-mgr 5485 ceph   29u  IPv4  59814      0t0  TCP node01:cisco-sccp (LISTEN)
109 root@node01:~/ceph-deploy# ss -ntl
110 State                    Recv-Q                   Send-Q                                      Local Address:Port                                     Peer Address:Port                  Process
111 LISTEN                   0                        5                                          192.168.11.210:2000                                          0.0.0.0:*
112 LISTEN                   0                        512                                        192.168.22.210:6800                                          0.0.0.0:*
113 LISTEN                   0                        512                                        192.168.11.210:6800                                          0.0.0.0:*
114 LISTEN                   0                        512                                        192.168.22.210:6801                                          0.0.0.0:*
115 LISTEN                   0                        512                                        192.168.11.210:6801                                          0.0.0.0:*
116 LISTEN                   0                        512                                        192.168.22.210:6802                                          0.0.0.0:*
117 LISTEN                   0                        512                                        192.168.11.210:6802                                          0.0.0.0:*
118 LISTEN                   0                        512                                        192.168.22.210:6803                                          0.0.0.0:*
119 LISTEN                   0                        512                                        192.168.11.210:6803                                          0.0.0.0:*
120 LISTEN                   0                        512                                        192.168.22.210:6804                                          0.0.0.0:*
121 LISTEN                   0                        512                                        192.168.11.210:6804                                          0.0.0.0:*
122 LISTEN                   0                        512                                        192.168.22.210:6805                                          0.0.0.0:*
123 LISTEN                   0                        512                                        192.168.11.210:6805                                          0.0.0.0:*
124 LISTEN                   0                        4096                                        127.0.0.53%lo:53                                            0.0.0.0:*
125 LISTEN                   0                        512                                        192.168.22.210:6806                                          0.0.0.0:*
126 LISTEN                   0                        512                                        192.168.11.210:6806                                          0.0.0.0:*
127 LISTEN                   0                        128                                               0.0.0.0:22                                            0.0.0.0:*
128 LISTEN                   0                        512                                        192.168.22.210:6807                                          0.0.0.0:*
129 LISTEN                   0                        512                                        192.168.11.210:6807                                          0.0.0.0:*
130 LISTEN                   0                        512                                        192.168.11.210:6808                                          0.0.0.0:*
131 LISTEN                   0                        4096                                              0.0.0.0:7480                                          0.0.0.0:*
132 LISTEN                   0                        512                                        192.168.11.210:6809                                          0.0.0.0:*
133 LISTEN                   0                        128                                             127.0.0.1:6010                                          0.0.0.0:*
134 LISTEN                   0                        512                                        192.168.11.210:3300                                          0.0.0.0:*
135 LISTEN                   0                        512                                        192.168.11.210:6789                                          0.0.0.0:*
136 LISTEN                   0                        128                                                  [::]:22                                               [::]:*
137 LISTEN                   0                        4096                                                 [::]:7480                                             [::]:*
138 LISTEN                   0                        128                                                 [::1]:6010                                             [::]:*
139 root@node01:~/ceph-deploy#
140 root@node01:~/ceph-deploy#
141 root@node01:~/ceph-deploy# echo '123456789'> passwd.txt
142 root@node01:~/ceph-deploy# ceph dashboard set-login-credentials tom -i passwd.txt
143 ******************************************************************
144 ***          WARNING: this command is deprecated.              ***
145 *** Please use the ac-user-* related commands to manage users. ***
146 ******************************************************************
147 Username and password updated
148 root@node01:~/ceph-deploy#
主要步骤如下:
 1 # 重点:在活跃的mgr节点上安装(当然你也可以用上次课的方式——全部活跃)
 2 root@node01:~/ceph-deploy# apt install ceph-mgr-dashboard -y
 3
 4 # 启用Dashboard模块:
 5 root@node01:~/ceph-deploy# ceph mgr module enable dashboard
 6
 7 # 注:模块启用后还不能直接访问,需要配置关闭 SSL 或启用 SSL 及指定监听地址
 8 root@node01:~/ceph-deploy# ceph config set mgr mgr/dashboard/ssl false
 9
10 # 设置Dashboard的地址端口并检查确认(如果:没有看到端口起来,重启一下服务再检查):
11 root@node01:~/ceph-deploy# ceph config set mgr mgr/dashboard/node01/server_addr 192.168.11.210
12 root@node01:~/ceph-deploy# ceph config set mgr mgr/dashboard/node01/server_port 2000
13 root@node01:~/ceph-deploy# lsof -i:2000
14 root@node01:~/ceph-deploy# systemctl restart ceph-mgr
15
16 # 设置dashboard账户密码:
17 root@node01:~/ceph-deploy# echo '123456789'> passwd.txt
18 root@node01:~/ceph-deploy# ceph dashboard set-login-credentials tom -i passwd.txt
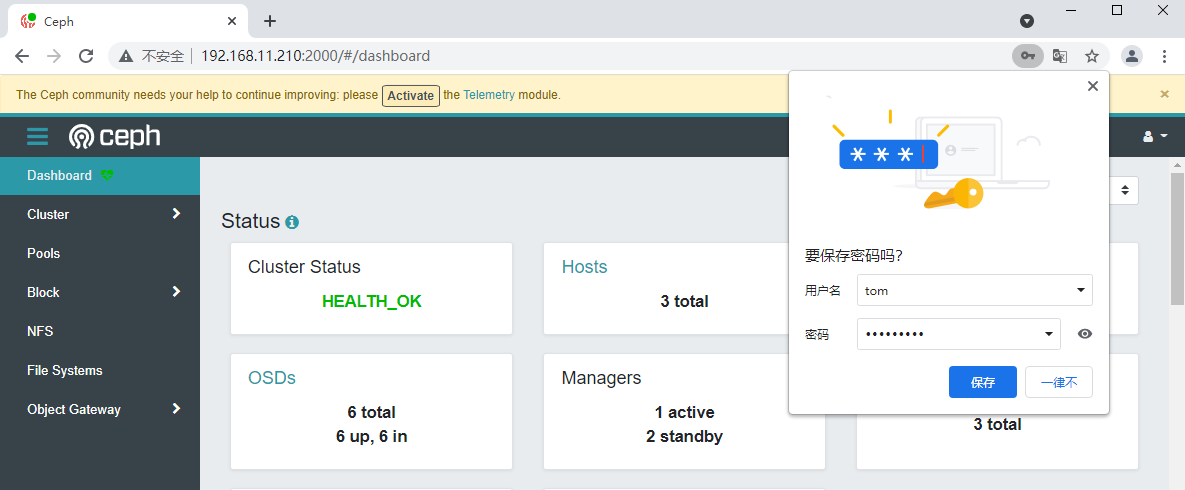
使用浏览器登陆验证:
4.2、再来个鸡肋功能:Dashboard启动用SSL:
具体详细过程如下:
 1 root@node01:~/ceph-deploy# ceph dashboard create-self-signed-cert
 2 Self-signed certificate created
 3 root@node01:~/ceph-deploy#
 4 root@node01:~/ceph-deploy# ceph config set mgr mgr/dashboard/ssl true
 5 root@node01:~/ceph-deploy#
 6 root@node01:~/ceph-deploy# ceph mgr services
 7 {
 8     "dashboard": "http://192.168.11.210:2000/"
 9 }
10 root@node01:~/ceph-deploy# ceph mgr services
11 {
12     "dashboard": "http://192.168.11.210:2000/"
13 }
14 root@node01:~/ceph-deploy# ceph mgr services
15 {
16     "dashboard": "http://192.168.11.210:2000/"
17 }
18 root@node01:~/ceph-deploy# ceph mgr services
19 {
20     "dashboard": "http://192.168.11.210:2000/"
21 }
22 root@node01:~/ceph-deploy# ceph mgr services
23 {
24     "dashboard": "http://192.168.11.210:2000/"
25 }
26 root@node01:~/ceph-deploy# ceph mgr services
27 {
28     "dashboard": "http://192.168.11.210:2000/"
29 }
30 root@node01:~/ceph-deploy# ceph mgr services
31 {
32     "dashboard": "http://192.168.11.210:2000/"
33 }
34 root@node01:~/ceph-deploy# systemctl restart ceph-mgr@node01.service
35 root@node01:~/ceph-deploy# ceph mgr services
36 {
37     "dashboard": "http://192.168.11.210:2000/"
38 }
39 root@node01:~/ceph-deploy# ceph mgr services
40 {
41     "dashboard": "http://192.168.11.210:2000/"
42 }
43 root@node01:~/ceph-deploy# ceph mgr services
44 {}
45 root@node01:~/ceph-deploy# ceph mgr services
46 {}
47 root@node01:~/ceph-deploy# ceph mgr services
48 {
49     "dashboard": "https://192.168.11.210:8443/"
50 }
51 root@node01:~/ceph-deploy#
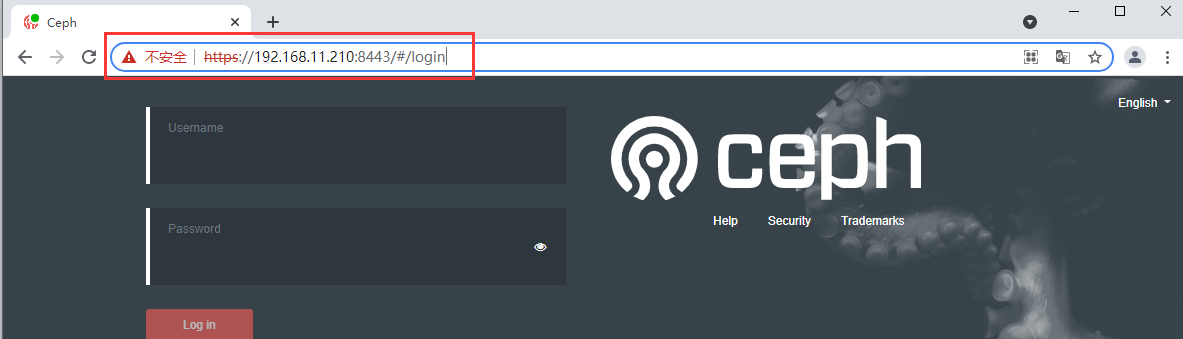
主要就两步即可:
1 # 自签证书:
2 root@node01:~/ceph-deploy# ceph dashboard create-self-signed-cert
3
4 # 启用SSL功能
5 root@node01:~/ceph-deploy# ceph config set mgr mgr/dashboard/ssl true
6
7 # 查看状态(不行重启一下呢):
8 root@node01:~/ceph-deploy# ceph mgr services
好了,Dashboard就这样吧!
五、使用 Prometheus 监控 Ceph
5.1、先安装部署Prometheus服务器端(具体详细过程如下):
 1 root@node01:/usr/local/src# ls
 2 root@node01:/usr/local/src# rz -E
 3 rz waiting to receive.
 4 root@node01:/usr/local/src# ls
 5 prometheus-2.23.0.linux-amd64.tar.gz
 6 root@node01:/usr/local/src# tar zxf prometheus-2.23.0.linux-amd64.tar.gz
 7 root@node01:/usr/local/src# ls
 8 prometheus-2.23.0.linux-amd64  prometheus-2.23.0.linux-amd64.tar.gz
 9 root@node01:/usr/local/src# mv prometheus-2.23.0.linux-amd64 /usr/local/
10 root@node01:/usr/local/src# cd /usr/local/
11 root@node01:/usr/local# ln -s prometheus-2.23.0.linux-amd64 prometheus
12 root@node01:/usr/local# ll
13 total 44
14 drwxr-xr-x 11 root root 4096 Sep  2 12:08 ./
15 drwxr-xr-x 14 root root 4096 Feb  2  2021 ../
16 drwxr-xr-x  2 root root 4096 Feb  2  2021 bin/
17 drwxr-xr-x  2 root root 4096 Feb  2  2021 etc/
18 drwxr-xr-x  2 root root 4096 Feb  2  2021 games/
19 drwxr-xr-x  2 root root 4096 Feb  2  2021 include/
20 drwxr-xr-x  4 root root 4096 Aug 17 20:24 lib/
21 lrwxrwxrwx  1 root root    9 Feb  2  2021 man -> share/man/
22 lrwxrwxrwx  1 root root   29 Sep  2 12:08 prometheus -> prometheus-2.23.0.linux-amd64/
23 drwxr-xr-x  4 3434 3434 4096 Nov 26  2020 prometheus-2.23.0.linux-amd64/
24 drwxr-xr-x  2 root root 4096 Feb  2  2021 sbin/
25 drwxr-xr-x  4 root root 4096 Feb  2  2021 share/
26 drwxr-xr-x  2 root root 4096 Sep  2 12:08 src/
27 root@node01:/usr/local# cd prometheus
28 root@node01:/usr/local/prometheus# pwd
29 /usr/local/prometheus
30 root@node01:/usr/local/prometheus# vim /etc/systemd/system/prometheus.service
31 root@node01:/usr/local/prometheus# cat /etc/systemd/system/prometheus.service
32 [Unit]
33 Description=Prometheus Server
34 Documentation=https://prometheus.io/docs/introduction/overview/
35 After=network.target
36 [Service]
37 Restart=on-failure
38 WorkingDirectory=//usr/local/prometheus/
39 ExecStart=/usr/local/prometheus/prometheus --config.file=/usr/local/prometheus/prometheus.yml
40 [Install]
41 WantedBy=multi-user.target
42 root@node01:/usr/local/prometheus# systemctl daemon-reload
43 root@node01:/usr/local/prometheus# systemctl enable prometheus.service --now
44 Created symlink /etc/systemd/system/multi-user.target.wants/prometheus.service → /etc/systemd/system/prometheus.service.
45 root@node01:/usr/local/prometheus# systemctl status prometheus.service
46 ● prometheus.service - Prometheus Server
47      Loaded: loaded (/etc/systemd/system/prometheus.service; enabled; vendor preset: enabled)
48      Active: active (running) since Thu 2021-09-02 12:11:20 CST; 19s ago
49        Docs: https://prometheus.io/docs/introduction/overview/
50    Main PID: 11155 (prometheus)
51       Tasks: 7 (limit: 2245)
52      Memory: 20.3M
53      CGroup: /system.slice/prometheus.service
54              └─11155 /usr/local/prometheus/prometheus --config.file=/usr/local/prometheus/prometheus.yml
55
56 Sep 02 12:11:20 node01 prometheus[11155]: level=info ts=2021-09-02T04:11:20.865Z caller=head.go:645 component=tsdb msg="Replaying on-disk memory mappable chunks if any"
57 Sep 02 12:11:20 node01 prometheus[11155]: level=info ts=2021-09-02T04:11:20.865Z caller=head.go:659 component=tsdb msg="On-disk memory mappable chunks replay completed" duration=4.692µs
58 Sep 02 12:11:20 node01 prometheus[11155]: level=info ts=2021-09-02T04:11:20.865Z caller=head.go:665 component=tsdb msg="Replaying WAL, this may take a while"
59 Sep 02 12:11:20 node01 prometheus[11155]: level=info ts=2021-09-02T04:11:20.865Z caller=head.go:717 component=tsdb msg="WAL segment loaded" segment=0 maxSegment=0
60 Sep 02 12:11:20 node01 prometheus[11155]: level=info ts=2021-09-02T04:11:20.865Z caller=head.go:722 component=tsdb msg="WAL replay completed" checkpoint_replay_duration=22.351µs wal_replay_duration=327.424µs t>
61 Sep 02 12:11:20 node01 prometheus[11155]: level=info ts=2021-09-02T04:11:20.866Z caller=main.go:742 fs_type=EXT4_SUPER_MAGIC
62 Sep 02 12:11:20 node01 prometheus[11155]: level=info ts=2021-09-02T04:11:20.868Z caller=main.go:745 msg="TSDB started"
63 Sep 02 12:11:20 node01 prometheus[11155]: level=info ts=2021-09-02T04:11:20.868Z caller=main.go:871 msg="Loading configuration file" filename=/usr/local/prometheus/prometheus.yml
64 Sep 02 12:11:20 node01 prometheus[11155]: level=info ts=2021-09-02T04:11:20.868Z caller=main.go:902 msg="Completed loading of configuration file" filename=/usr/local/prometheus/prometheus.yml totalDuration=585>
65 Sep 02 12:11:20 node01 prometheus[11155]: level=info ts=2021-09-02T04:11:20.868Z caller=main.go:694 msg="Server is ready to receive web requests."
66
67 root@node01:/usr/local/prometheus# systemctl restart prometheus.service
68 root@node01:/usr/local/prometheus#
主要步骤如下:
 1 # 上传二进制文件到/usr/local/src目录下,并解压到/usr/local目录下并创建软链接;编写systemd文件,最后启动:
 2 root@node01:/usr/local/src# tar zxf prometheus-2.23.0.linux-amd64.tar.gz
 3 root@node01:/usr/local# ln -s prometheus-2.23.0.linux-amd64 prometheus

 4 root@node01:/usr/local/prometheus# cat /etc/systemd/system/prometheus.service
 5 [Unit]
 6 Description=Prometheus Server
 7 Documentation=https://prometheus.io/docs/introduction/overview/
 8 After=network.target
 9 [Service]
10 Restart=on-failure
11 WorkingDirectory=//usr/local/prometheus/
12 ExecStart=/usr/local/prometheus/prometheus --config.file=/usr/local/prometheus/prometheus.yml
13 [Install]
14 WantedBy=multi-user.target

15 root@node01:/usr/local/prometheus# systemctl daemon-reload
16 root@node01:/usr/local/prometheus# systemctl enable prometheus.service --now
17 Created symlink /etc/systemd/system/multi-user.target.wants/prometheus.service → /etc/systemd/system/prometheus.service.
18 root@node01:/usr/local/prometheus# systemctl status prometheus.service
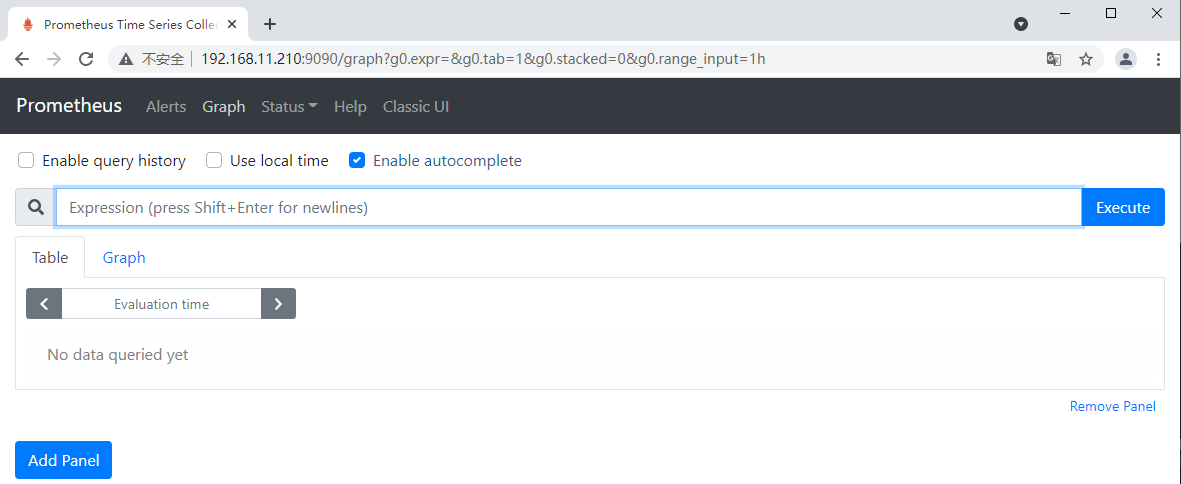
登陆浏览器界面验证一下:
5.2、安装部署Prometheus的node_exporter(三台node都装)
具体详细过程如下:
 1 root@node03:~# tar -zxvf node_exporter-1.0.1.linux-amd64.tar.gz -C /usr/local/
 2 node_exporter-1.0.1.linux-amd64/
 3 node_exporter-1.0.1.linux-amd64/NOTICE
 4 node_exporter-1.0.1.linux-amd64/node_exporter
 5 node_exporter-1.0.1.linux-amd64/LICENSE
 6 root@node03:~# ln -sv /usr/local/node_exporter-1.0.1.linux-amd64 /usr/local/node_exporter
 7 '/usr/local/node_exporter' -> '/usr/local/node_exporter-1.0.1.linux-amd64'
 8 root@node03:~# ll /usr/local/
 9 total 44
10 drwxr-xr-x 11 root root 4096 Sep  2 12:44 ./
11 drwxr-xr-x 14 root root 4096 Feb  2  2021 ../
12 drwxr-xr-x  2 root root 4096 Feb  2  2021 bin/
13 drwxr-xr-x  2 root root 4096 Feb  2  2021 etc/
14 drwxr-xr-x  2 root root 4096 Feb  2  2021 games/
15 drwxr-xr-x  2 root root 4096 Feb  2  2021 include/
16 drwxr-xr-x  4 root root 4096 Aug 17 20:25 lib/
17 lrwxrwxrwx  1 root root    9 Feb  2  2021 man -> share/man/
18 lrwxrwxrwx  1 root root   42 Sep  2 12:44 node_exporter -> /usr/local/node_exporter-1.0.1.linux-amd64/
19 drwxr-xr-x  2 3434 3434 4096 Jun 16  2020 node_exporter-1.0.1.linux-amd64/
20 drwxr-xr-x  2 root root 4096 Feb  2  2021 sbin/
21 drwxr-xr-x  4 root root 4096 Feb  2  2021 share/
22 drwxr-xr-x  2 root root 4096 Feb  2  2021 src/
23 root@node03:~# vim /etc/systemd/system/node-exporter.service
24 root@node03:~# systemctl daemon-reload
25 root@node03:~# systemctl start node-exporter.service
26 root@node03:~# systemctl enable node-exporter.service
27 Created symlink /etc/systemd/system/multi-user.target.wants/node-exporter.service → /etc/systemd/system/node-exporter.service.
28 root@node03:~# ss -ntl|grep 9100
29 LISTEN  0        4096                    *:9100                *:*
30 root@node03:~#
31 root@node03:~# cat /etc/systemd/system/node-exporter.service
32 [Unit]
33 Description=Prometheus Node Exporter
34 After=network.target
35
36 [Service]
37 ExecStart=/usr/local/node_exporter/node_exporter
38
39 [Install]
40 WantedBy=multi-user.target
41 root@node03:~#
主要步骤如下(这边只记录了node03的过程,node01和node02步骤过程一样):
 1 # 解压到/usr/local目录下:
 2 root@node03:~# tar -zxvf node_exporter-1.0.1.linux-amd64.tar.gz -C /usr/local/
 3
 4 # 创建软连接:
 5 root@node03:~# ln -sv /usr/local/node_exporter-1.0.1.linux-amd64 /usr/local/node_exporter
 6
 7 # 创建systemd文件并重新加载启动:
 8 root@node03:~# vim /etc/systemd/system/node-exporter.service
 9 root@node03:~# systemctl daemon-reload
10 root@node03:~# systemctl start node-exporter.service
11 root@node03:~# systemctl enable node-exporter.service
12
13 ################ systemd 文件内容 ###############
14 root@node03:~# cat /etc/systemd/system/node-exporter.service
15 [Unit]
16 Description=Prometheus Node Exporter
17 After=network.target
18
19 [Service]
20 ExecStart=/usr/local/node_exporter/node_exporter
21
22 [Install]
23 WantedBy=multi-user.target
24 root@node03:~#
登陆浏览器界面验证一下:

5.3、Prometheus服务器端添加node节点:
修改配置文件,重启服务并登陆浏览器查看;具体步骤如下:
1 root@node01:/usr/local/prometheus# tail -n3 /usr/local/prometheus/prometheus.yml
2   - job_name: 'Ceph-node'
3     static_configs:
4     - targets: ['192.168.11.210:9100','192.168.11.220:9100','192.168.11.230:9100']
5 root@node01:/usr/local/prometheus# systemctl restart prometheus.service

################################################# 邪恶的分割线 —— 中文躺了一下,宝宝玩电脑 —— 集群都不知道为什么起不来了:回复快照重新开始吧 #################################################
5.3、通过 Prometheus监控Ceph:
由于Ceph manager 内部的模块中包含了 prometheus 的监控模块,并监听在每个 manager 节点的 9283 端口,该端口用于将采集到的信息通过 http 接口向 prometheus 提供数据。所以下面先启用相关功能:
1 # 启用功能:
2 root@node01:/usr/local# ceph mgr  module enable  prometheus
3
4 # 查看端口是否起来:
5 root@node01:/usr/local# ss -ntlp|grep 9283
6 LISTEN    0         5            192.168.11.210:9283            0.0.0.0:*        users:(("ceph-mgr",pid=918,fd=27))
7 root@node01:/usr/local#
浏览器查看一下:

修改Prometheus配置文件并重启:
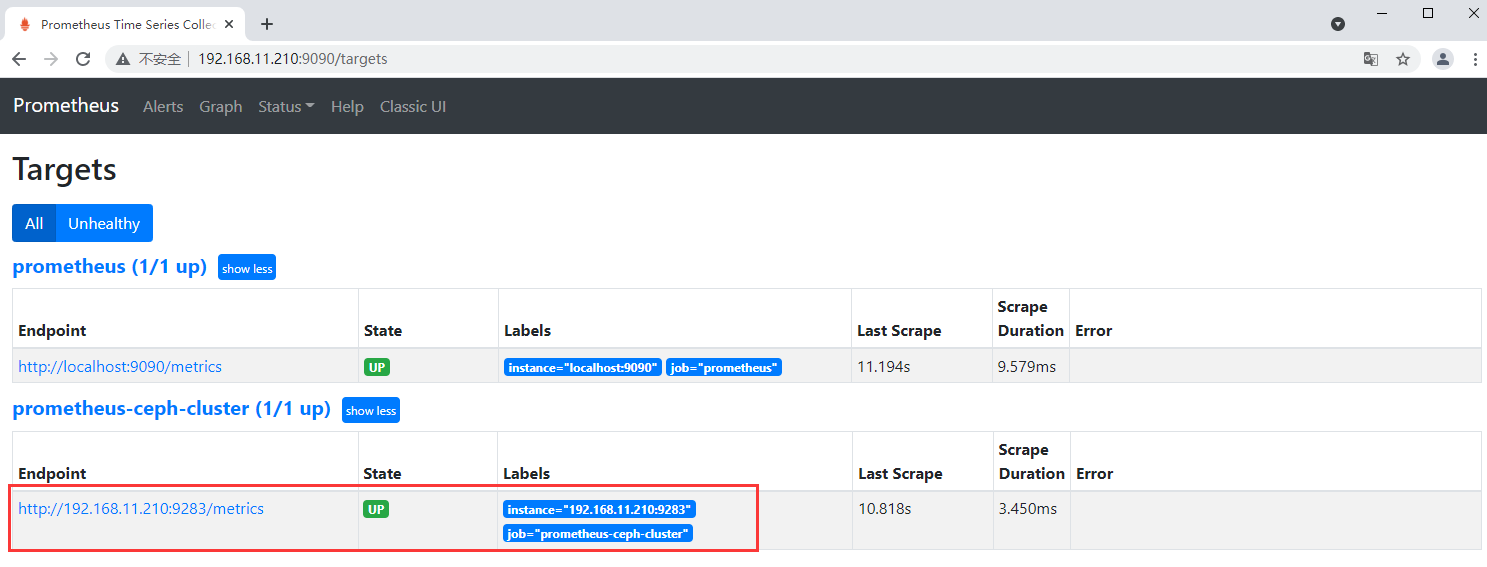
 1 root@node01:/usr/local/prometheus# vim prometheus.yml
 2 root@node01:/usr/local/prometheus# systemctl restart prometheus.service
 3 root@node01:/usr/local/prometheus#
 4 root@node01:/usr/local/prometheus#
 5 root@node01:/usr/local/prometheus#
 6 root@node01:/usr/local/prometheus#
 7 root@node01:/usr/local/prometheus#
 8 root@node01:/usr/local/prometheus#
 9 root@node01:/usr/local/prometheus# tail prometheus.yml
10     static_configs:
11     - targets: ['localhost:9090']
12
13   - job_name: 'prometheus-ceph-cluster'
14
15     # metrics_path defaults to '/metrics'
16     # scheme defaults to 'http'.
17
18     static_configs:
19     - targets: ['192.168.11.210:9283']
20 root@node01:/usr/local/prometheus#
浏览器查看验证:
5.4、通过 Grafana 展示监控数据:
先安装部署Grafana,具体过程如下:
 1 root@node01:~# apt-get install -y adduser libfontconfig1
 2 Reading package lists... Done
 3 Building dependency tree
 4 Reading state information... Done
 5 adduser is already the newest version (3.118ubuntu2).
 6 adduser set to manually installed.
 7 The following additional packages will be installed:
 8   fontconfig-config fonts-dejavu-core
 9 The following NEW packages will be installed:
10   fontconfig-config fonts-dejavu-core libfontconfig1
11 0 upgraded, 3 newly installed, 0 to remove and 85 not upgraded.
12 Need to get 1,184 kB of archives.
13 After this operation, 3,525 kB of additional disk space will be used.
14 Get:1 https://mirrors.tuna.tsinghua.edu.cn/ubuntu focal/main amd64 fonts-dejavu-core all 2.37-1 [1,041 kB]
15 Get:2 https://mirrors.tuna.tsinghua.edu.cn/ubuntu focal/main amd64 fontconfig-config all 2.13.1-2ubuntu3 [28.8 kB]
16 Get:3 https://mirrors.tuna.tsinghua.edu.cn/ubuntu focal/main amd64 libfontconfig1 amd64 2.13.1-2ubuntu3 [114 kB]
17 Fetched 1,184 kB in 1s (1,482 kB/s)
18 Selecting previously unselected package fonts-dejavu-core.
19 (Reading database ... 74549 files and directories currently installed.)
20 Preparing to unpack .../fonts-dejavu-core_2.37-1_all.deb ...
21 Unpacking fonts-dejavu-core (2.37-1) ...
22 Selecting previously unselected package fontconfig-config.
23 Preparing to unpack .../fontconfig-config_2.13.1-2ubuntu3_all.deb ...
24 Unpacking fontconfig-config (2.13.1-2ubuntu3) ...
25 Selecting previously unselected package libfontconfig1:amd64.
26 Preparing to unpack .../libfontconfig1_2.13.1-2ubuntu3_amd64.deb ...
27 Unpacking libfontconfig1:amd64 (2.13.1-2ubuntu3) ...
28 Setting up fonts-dejavu-core (2.37-1) ...
29 Setting up fontconfig-config (2.13.1-2ubuntu3) ...
30 Setting up libfontconfig1:amd64 (2.13.1-2ubuntu3) ...
31 Processing triggers for man-db (2.9.1-1) ...
32 Processing triggers for libc-bin (2.31-0ubuntu9.2) ...
33 root@node01:~# wget https://dl.grafana.com/oss/release/grafana_7.5.1_amd64.deb
34 --2021-09-02 16:17:39--  https://dl.grafana.com/oss/release/grafana_7.5.1_amd64.deb
35 Resolving dl.grafana.com (dl.grafana.com)... 199.232.198.217, 199.232.194.217, 2a04:4e42:4d::729, ...
36 Connecting to dl.grafana.com (dl.grafana.com)|199.232.198.217|:443... connected.
37 HTTP request sent, awaiting response... 200 OK
38 Length: 55597840 (53M) [application/vnd.debian.binary-package]
39 Saving to: ‘grafana_7.5.1_amd64.deb’
40
41 grafana_7.5.1_amd64.deb                              100%[====================================================================================================================>]  53.02M  7.98MB/s    in 8.9s
42
43 2021-09-02 16:17:49 (5.93 MB/s) - ‘grafana_7.5.1_amd64.deb’ saved [55597840/55597840]
44
45 root@node01:~# ls
46 ceph-deploy  grafana_7.5.1_amd64.deb  snap
47 root@node01:~# dpkg -i grafana_7.5.1_amd64.deb
48 Selecting previously unselected package grafana.
49 (Reading database ... 74661 files and directories currently installed.)
50 Preparing to unpack grafana_7.5.1_amd64.deb ...
51 Unpacking grafana (7.5.1) ...
52 Setting up grafana (7.5.1) ...
53 Adding system user `grafana' (UID 113) ...
54 Adding new user `grafana' (UID 113) with group `grafana' ...
55 Not creating home directory `/usr/share/grafana'.
56 ### NOT starting on installation, please execute the following statements to configure grafana to start automatically using systemd
57  sudo /bin/systemctl daemon-reload
58  sudo /bin/systemctl enable grafana-server
59 ### You can start grafana-server by executing
60  sudo /bin/systemctl start grafana-server
61 Processing triggers for systemd (245.4-4ubuntu3.11) ...
62 root@node01:~# systemctl status gra
63 grafana-server.service  graphical.target
64 root@node01:~# systemctl status grafana-server.service
65 ● grafana-server.service - Grafana instance
66      Loaded: loaded (/lib/systemd/system/grafana-server.service; disabled; vendor preset: enabled)
67      Active: inactive (dead)
68        Docs: http://docs.grafana.org
69 root@node01:~# systemctl enable grafana-server.service --now
70 Synchronizing state of grafana-server.service with SysV service script with /lib/systemd/systemd-sysv-install.
71 Executing: /lib/systemd/systemd-sysv-install enable grafana-server
72 Created symlink /etc/systemd/system/multi-user.target.wants/grafana-server.service → /lib/systemd/system/grafana-server.service.
73 root@node01:~# systemctl status grafana-server.service
74 ● grafana-server.service - Grafana instance
75      Loaded: loaded (/lib/systemd/system/grafana-server.service; enabled; vendor preset: enabled)
76      Active: active (running) since Thu 2021-09-02 16:18:40 CST; 1s ago
77        Docs: http://docs.grafana.org
78    Main PID: 12671 (grafana-server)
79       Tasks: 8 (limit: 2245)
80      Memory: 23.4M
81      CGroup: /system.slice/grafana-server.service
82              └─12671 /usr/sbin/grafana-server --config=/etc/grafana/grafana.ini --pidfile=/var/run/grafana/grafana-server.pid --packaging=deb cfg:default.paths.logs=/var/log/grafana cfg:default.paths.data=/var>
83
84 Sep 02 16:18:40 node01 grafana-server[12671]: {"@level":"debug","@message":"datasource: registering query type handler","@timestamp":"2021-09-02T16:18:40.822136+08:00","queryType":"grafana_api"}
85 Sep 02 16:18:40 node01 grafana-server[12671]: {"@level":"debug","@message":"datasource: registering query type handler","@timestamp":"2021-09-02T16:18:40.822143+08:00","queryType":"arrow"}
86 Sep 02 16:18:40 node01 grafana-server[12671]: {"@level":"debug","@message":"datasource: registering query type handler","@timestamp":"2021-09-02T16:18:40.822150+08:00","queryType":"annotations"}
87 Sep 02 16:18:40 node01 grafana-server[12671]: {"@level":"debug","@message":"datasource: registering query type handler","@timestamp":"2021-09-02T16:18:40.822156+08:00","queryType":"table_static"}
88 Sep 02 16:18:40 node01 grafana-server[12671]: {"@level":"debug","@message":"datasource: registering query type handler","@timestamp":"2021-09-02T16:18:40.822162+08:00","queryType":"random_walk_with_error"}
89 Sep 02 16:18:40 node01 grafana-server[12671]: {"@level":"debug","@message":"datasource: registering query type handler","@timestamp":"2021-09-02T16:18:40.822167+08:00","queryType":"server_error_500"}
90 Sep 02 16:18:40 node01 grafana-server[12671]: {"@level":"debug","@message":"datasource: registering query type handler","@timestamp":"2021-09-02T16:18:40.822173+08:00","queryType":"logs"}
91 Sep 02 16:18:40 node01 grafana-server[12671]: {"@level":"debug","@message":"datasource: registering query type handler","@timestamp":"2021-09-02T16:18:40.822178+08:00","queryType":"node_graph"}
92 Sep 02 16:18:40 node01 grafana-server[12671]: {"@level":"debug","@message":"datasource: registering query type fallback handler","@timestamp":"2021-09-02T16:18:40.822185+08:00"}
93 Sep 02 16:18:40 node01 grafana-server[12671]: t=2021-09-02T16:18:40+0800 lvl=info msg="HTTP Server Listen" logger=http.server address=[::]:3000 protocol=http subUrl= socket=
94
95 root@node01:~# ss -ntlp|grep 3000
96 LISTEN    0         4096                      *:3000                  *:*        users:(("grafana-server",pid=12671,fd=8))
97 root@node01:~#
主要步骤如下:
1 root@node01:~# apt-get install -y adduser libfontconfig1
2 root@node01:~# wget https://dl.grafana.com/oss/release/grafana_7.5.1_amd64.deb
3 root@node01:~# dpkg -i grafana_7.5.1_amd64.deb
4 root@node01:~# systemctl enable grafana-server.service --now
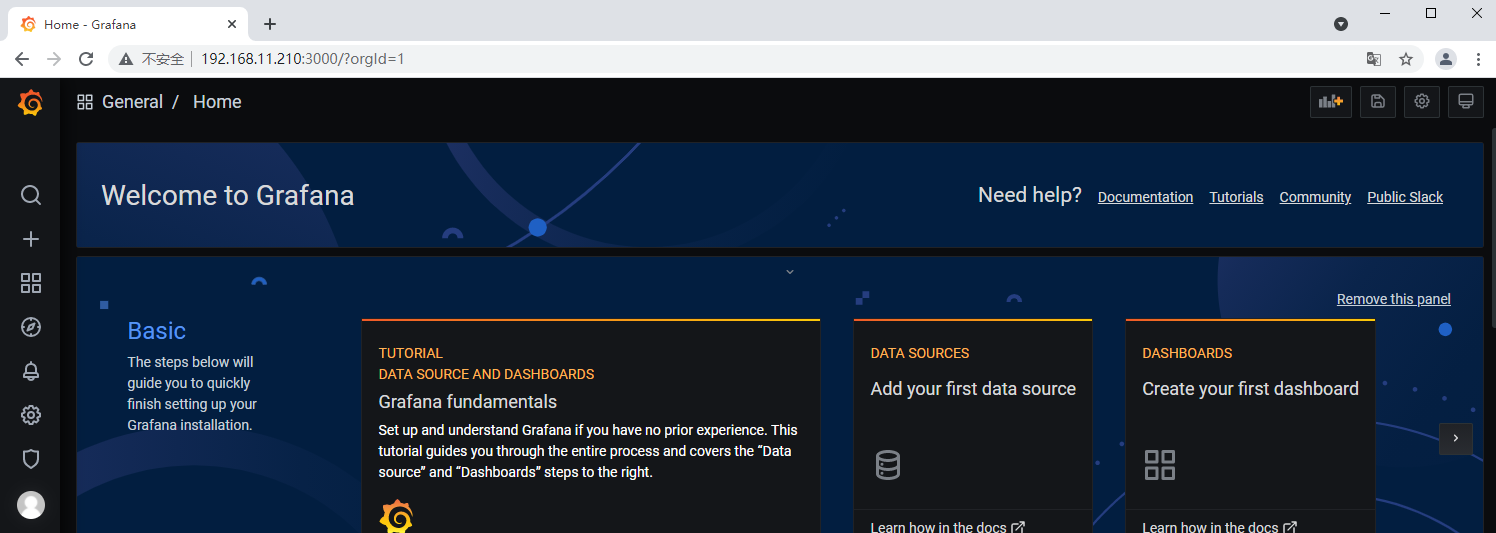
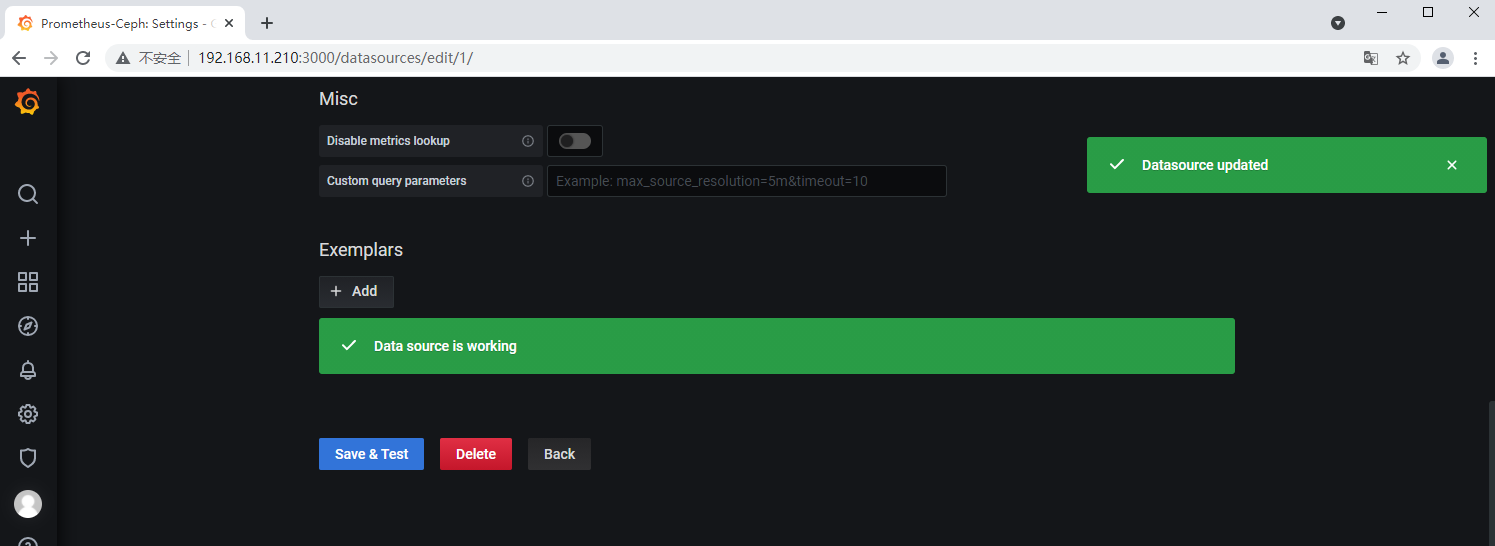
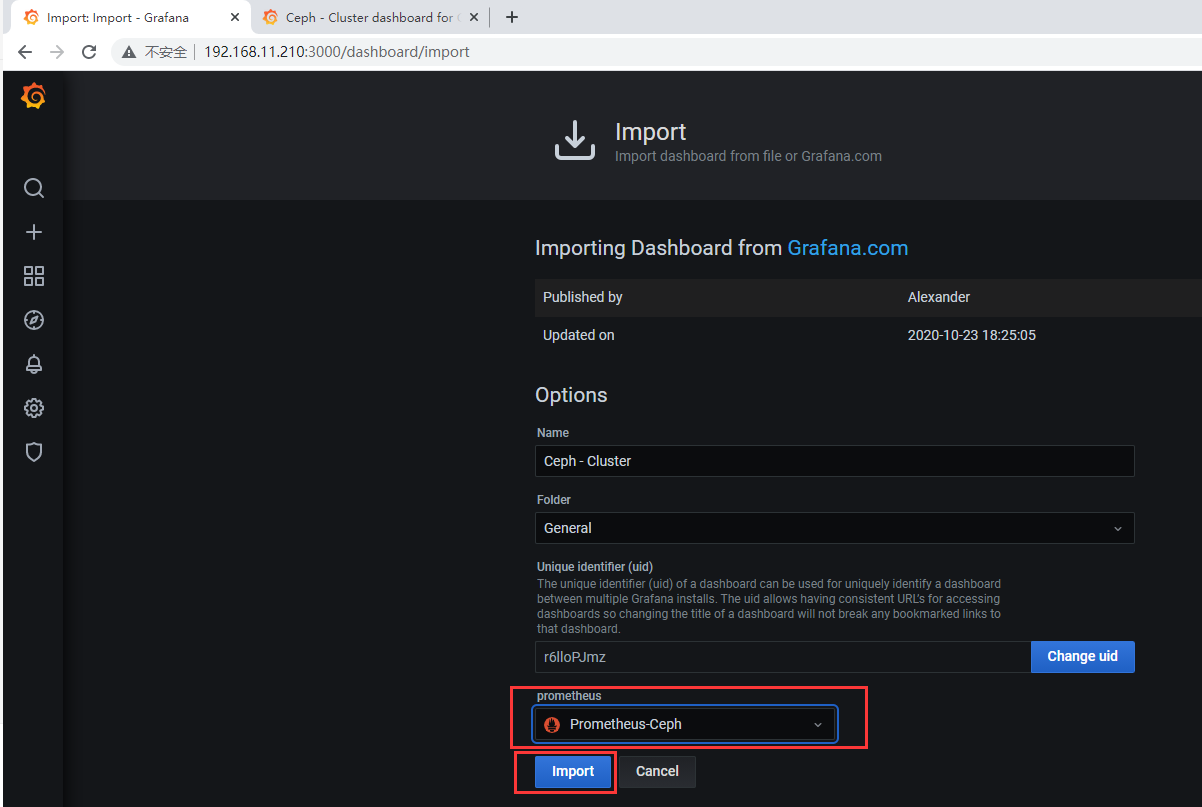
下面是图形化配置:


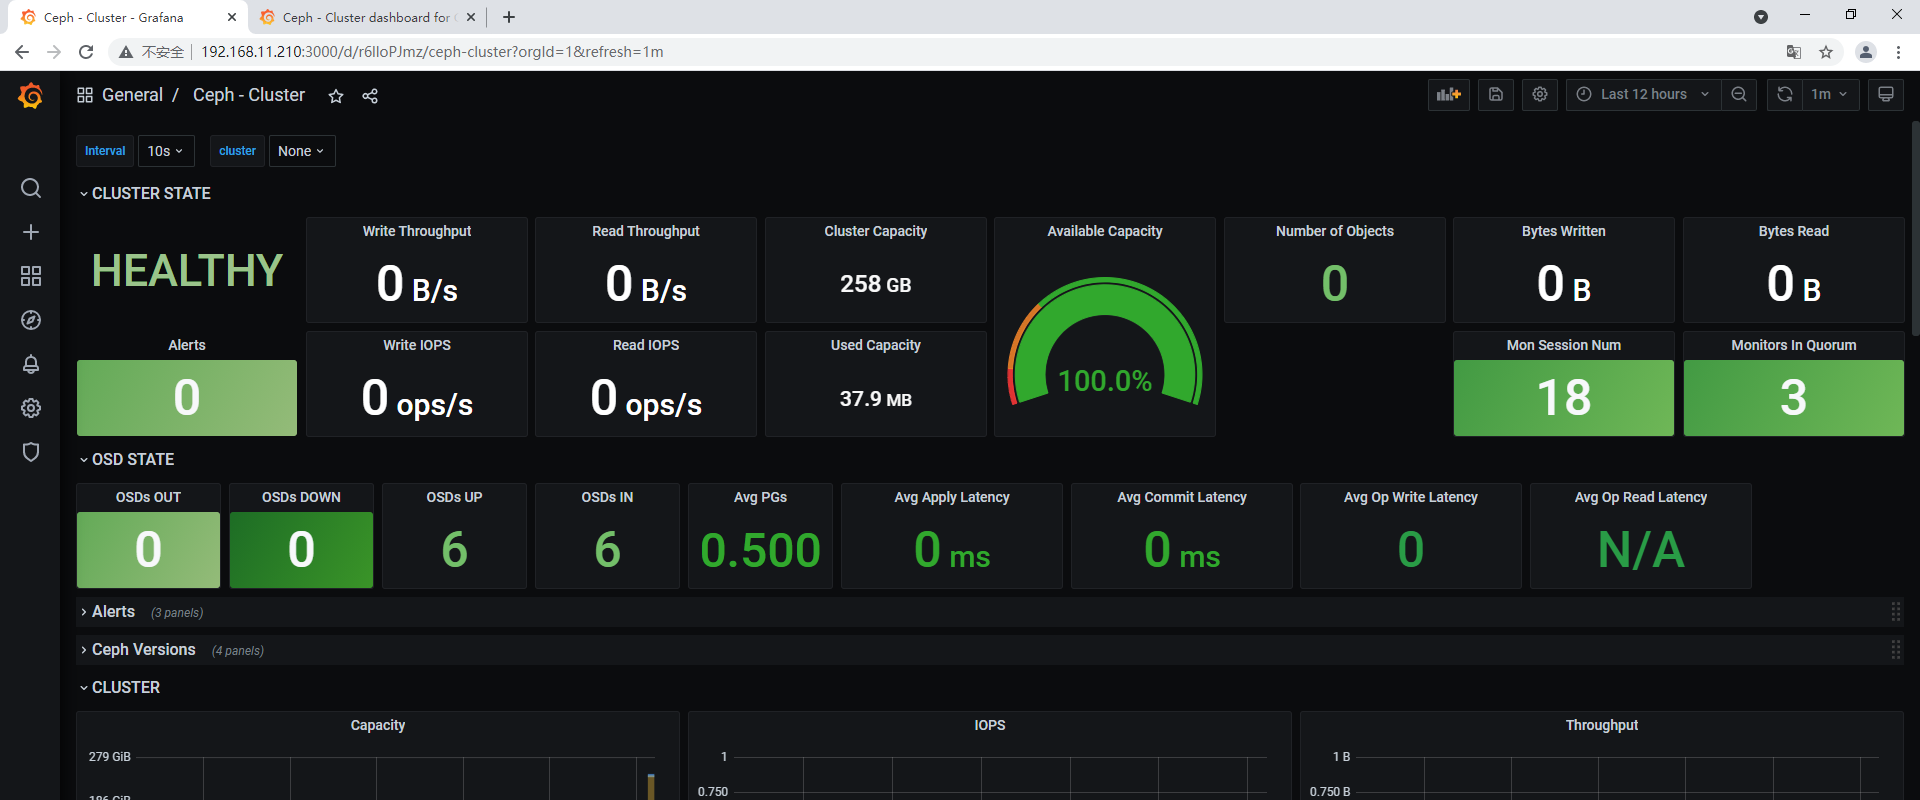
至于其它模板:可以登陆官网查询:https://grafana.com/grafana/dashboards
最终结果如下图:
今天就到这里吧,至于Docker相关基础:查看我以前的截图笔记吧(当然我的博客园里面也有相关文章):
文档:马哥Docker
链接:http://note.youdao.com/noteshare?id=c91e30129443ebb3381814ea8cf33c62
其实这里有个小哥整理了一下:https://blog.csdn.net/zisefeizhu/article/details/83472190