1.安装python3
2.设置python3的环境变量
3.进入命令行模式,输入
pip install django 1.10.3
4.验证是否安装完成
pip show django
5.django官网
https://docs.djangoproject.com/en/2.1/intro/tutorial01/
mac安装可能出现的问题:
有些mac上默认有安装的python2.7版本,如果你自己安装了python3,使用python3安装django,使用manage.py时可能会提示命令不存在;
解决办法,把安装在python3下面的那些django的.py挪到python2.7下面,或者去安装好的django的目录下面。
来源:https://docs.djangoproject.com/en/2.1/intro/tutorial01/
该教程是创建一个用于投票的网页。
1.使用命令创建site
进入要创建site的目录,输入命令:
$ django-admin startproject mysite
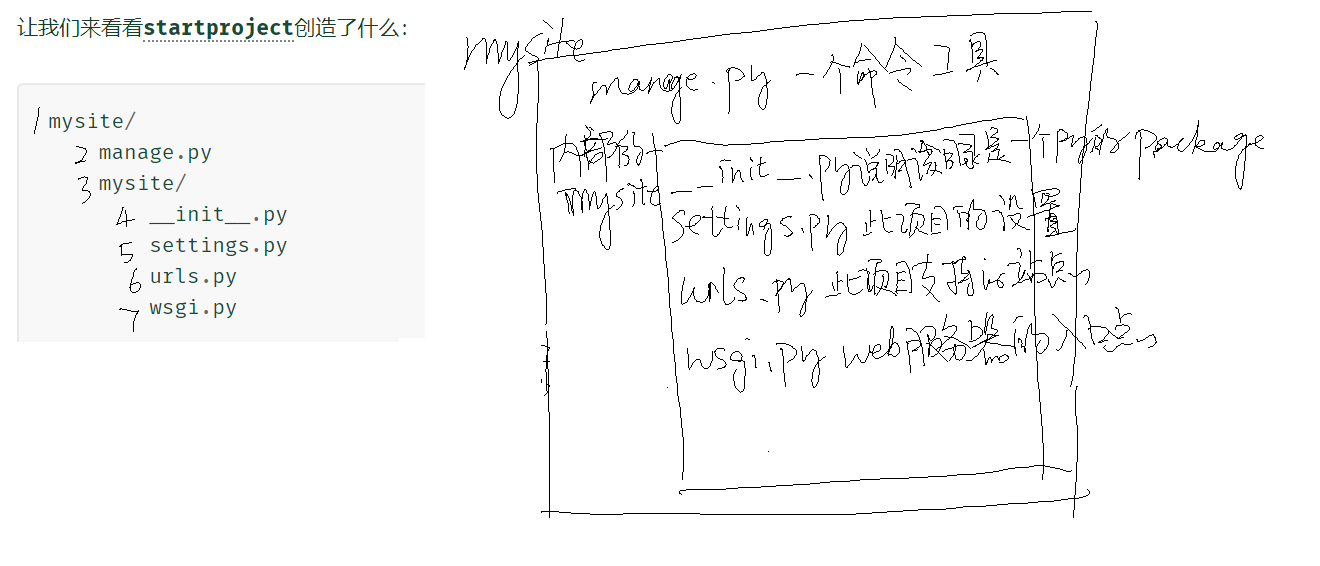
2.让我们来看看startproject创造了什么:
mysite/
    manage.py
    mysite/
        __init__.py
        settings.py
        urls.py
        wsgi.py
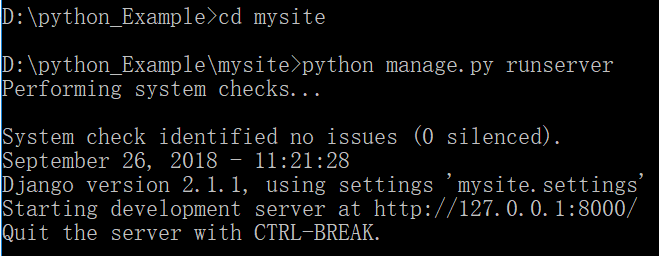
3.步骤1已经创建了一个site,现在启动验证一下:
$ python manage.py runserver
4.创建投票模块
$ python manage.py startapp polls
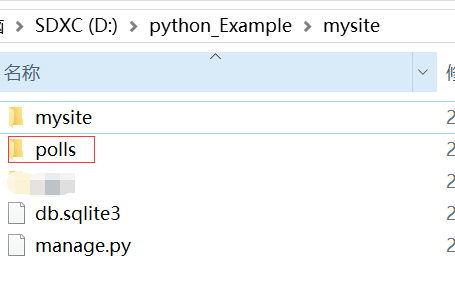
polls的目录如下:
polls/
    __init__.py
    admin.py
    apps.py
    migrations/
        __init__.py
    models.py
    tests.py
    views.py
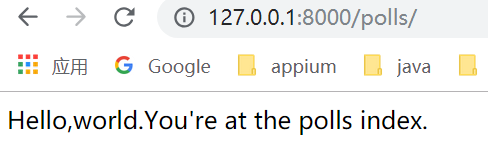
编辑polls页面的内容:

from django.http import HttpResponse


def index(request):
    return HttpResponse("Hello, world. You're at the polls index.")
polls/urls.py
from django.urls import path

from . import views

urlpatterns = [
    path('', views.index, name='index'),
]
mysite/urls.py
from django.contrib import admin
from django.urls import include, path

urlpatterns = [
    path('polls/', include('polls.urls')),
    path('admin/', admin.site.urls),
]
mysite/settings.py 设置当地时区
TIME_ZONE = 'Asia/Shanghai'
重新启动,查看polls页面是否生效:
$ python manage.py runserver
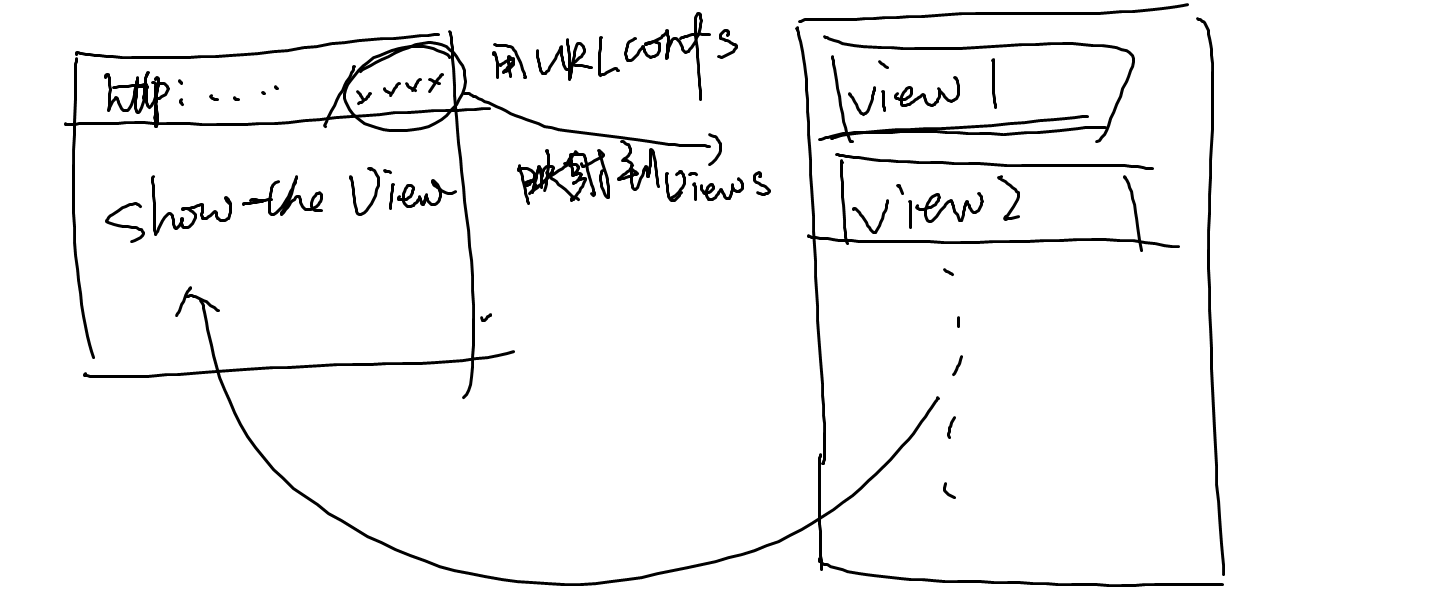
在Django中,网页和其他内容由视图提供。每个视图都由一个简单的Python函数(或基于类的视图的方法)表示。Django将通过检查所请求的URL(确切地说,是域名后面的URL部分)来选择视图。
在我们的民意调查申请中,我们将有以下四种view:
- 问题“索引”页面 - 显示最新的几个问题。
- 问题“详细信息”页面 - 显示问题文本,没有结果,但有一个表单可以投票。
- 问题“结果”页面 - 显示特定问题的结果。
- 投票行动 - 处理特定问题中特定选择的投票。
为了从URL到视图,Django使用所谓的“URLconfs”。URLconf将URL模式映射到视图。
原理:
实现步骤:
1.编辑polls/views.python的内容
from django.http import HttpResponse
from .models import Question
def index(request):
output=','.join([q.question_text for q in last_question_list])
return HttpResponse(output)
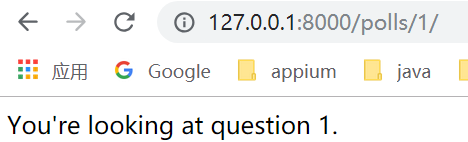
def detail(request,question_id):
response="You're looking at question %s."
return HttpResponse(response % question_id)
def results(request,question_id):
response="You're looking at the results of question %s."
return HttpResponse(response % question_id)
def vote(request,question_id):
return HttpResponse("You're voting on question %s." % question_id)
2.编辑urlConf的映射 polls/urls.py
from django.urls import path

from . import views

urlpatterns = [
    # ex: /polls/
    path('', views.index, name='index'),
    # ex: /polls/5/
    path('<int:question_id>/', views.detail, name='detail'),
    # ex: /polls/5/results/
    path('<int:question_id>/results/', views.results, name='results'),
    # ex: /polls/5/vote/
    path('<int:question_id>/vote/', views.vote, name='vote'),
]
测试一下
当前编辑的django页面,是默认的UI,如果想要改变页面展示,就需要用到模板。
模板的原理是这样的:
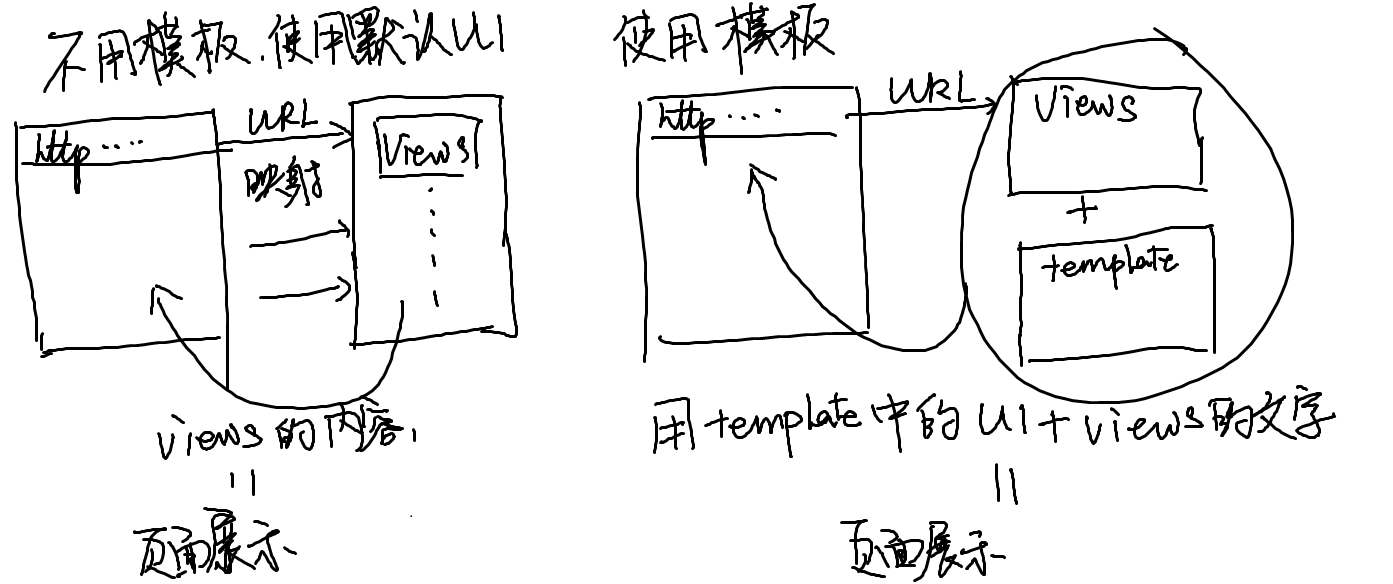
实际步骤:
1.编辑views.py,将template和content做好映射
from django.shortcuts import render
from django.http import HttpResponse
from django.template import loader
from .models import Question
def index(request):
    latest_question_list=Question.objects.order_by('-pub_date')[:5]
    context={'latest_question_list':latest_question_list,}
    return render(request,'polls/index.html',context)
    '''
    #template的另一种显示方法
    template=loader.get_template('polls/index.html')
    context={'latest_question_list':latest_question_list,}
    return HttpResponse(template.render(context,request))
    '''
    '''
    #不使用template的写法
    output=','.join([q.question_text for q in last_question_list])
    return HttpResponse(output)
    '''
2.编写template的内容
创建文件夹和文件
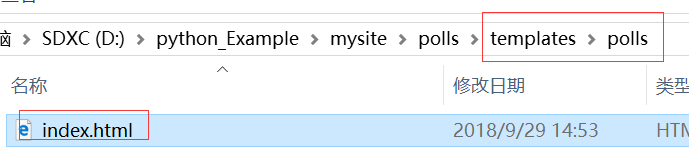
编辑index.html
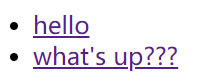
{% if latest_question_list %}
    <ul>
    {% for question in latest_question_list %}
        <li><a href="/polls/{{ question.id }}/">{{ question.question_text }}</a></li>
    {% endfor %}
    </ul>
{% else %}
    <p>No polls are available.</p>
{% endif %}
查看结果: