学习了一个月的Android,接触了人生中第一个安卓项目,对于一个小白来说,总结是很重要的学习方法,以下我把学到的东西总结以下:
1. 1》okhttp3用法解析(边贴代码边熟悉)
public class OkhttpService  {

    public static final MediaType JSON = MediaType.parse("application/json; charset=utf-8"); //json请求
    public static final MediaType XML = MediaType.parse("application/xml; charset=utf-8");
    private static OkhttpService instance;
    private OkHttpClient client;

    private OkhttpService() {
        client = new OkHttpClient(); //获取OkthhpClient实例
    }
    public static OkhttpService getInstance() {
        return instance == null ? instance = new OkhttpService() : instance;
    }

    //魔盒批量封装 (post提交json数据)
    注:RequestBody body = RequestBody.create(JSON, json); //json数据为body
        Request是OkHttp中访问的请求,Builder是辅助类。Response即OkHttp中的响应。

    public String insertBoxProd(List<BoxProdInfo>  boxProd)throws IOException{
        HttpUrl route = HttpUrl.parse("http://115.29.165.110:8085/RfService.svc/V1.0/Mh/InsertBoxProd/");
        String json = new Gson().toJson(boxProd); //将boxProd序列化为json
        Request request = new Request.Builder()
                .url(route)
                .post(RequestBody.create(JSON, json)) //使用Request的post方法来提交请求体RequestBody
                .build();
        Response response = client.newCall(request).execute();
        boolean  isOk=response.isSuccessful();
        return response.body().string();  //response.body()返回ResponseBody类
}

    //网点提交盒子收货上架
    public String receiverBox(String userCode, List<BoxReceiverInfo> boxReceiverInfos)throws IOException{
        HttpUrl route=HttpUrl.parse("http://115.29.165.110:8085/RfService.svc/V1.0/Mh/ReceiveBox/")
                .newBuilder()
                .addPathSegment(userCode)
                .build();
        String json=new Gson().toJson(boxReceiverInfos);
        Request request=new Request.Builder()
                .url(route)
                .put(RequestBody.create(JSON,json))
                .build();
        Response response=client.newCall(request).execute();
        boolean  isOk=response.isSuccessful();
        return response.body().string();
    }
}
注:以上两个方法需要在前台访问。且需要返回结果提示给前台(接口中需提供 States(返回状态:成功或失败),Description(结果描述),Data(数据)等)

eg:String  result = OkhttpService.getInstance().receiverBox(userCode,boxReceiverInfos).toString();

2》官方文档总结
(1)配置
    导入Jar包
    通过构建方式导入=== meaven

(2)基本要求
  Request请求
  Response响应

(3)基本使用
 《--》Http  GET

 okHtttpClient  client=new okHtttpClient();

 String run(String  url)throws  IOException{
     Request request = new Request.Builder().url(url).build();
     Response response = client.newCall(request).execute();
    if (response.isSuccessful()) {
       return response.body().string();
    }else{
     throw new IOException("Unexpected code " + response);
    }
}
注:Request是OkHttp中访问的请求,Builder是辅助类,Response即OkHttp中的响应

《--》Http POST

》》》POST提交Json数据

public static final MediaType JSON = MediaType.parse("application/json; charset=utf-8");
OkHttpClient client = new OkHttpClient();
String post(String url, String json) throws IOException {
    RequestBody body = RequestBody.create(JSON, json);
    Request request = new Request.Builder()
    .url(url)
    .post(body)
    .build();
    Response response = client.newCall(request).execute();
    if (response.isSuccessful())
    {
        return response.body().string();
    } else
    {
        throw new IOException("Unexpected code " + response);
    }
}
注:使用Request的post方法来提交请求体RequestBody

》》》POST提交键值对
OkHttp也可以通过POST方式把键值对数据传送到服务器

OkHttpClient client = new OkHttpClient();
String post(String url, String json) throws IOException {
    RequestBody formBody = new FormEncodingBuilder()
    .add("platform", "android")
    .add("name", "bug")
    .add("subject", "XXXXXXXXXXXXXXX")
    .build();

    Request request = new Request.Builder()
    .url(url)
    .post(body)
    .build();

    Response response = client.newCall(request).execute();
    if (response.isSuccessful())
    {
        return response.body().string();
    } else {
        throw new IOException("Unexpected code " + response);
    }
}
(3)案例

布局文件:
  <LinearLayout xmlns:android="http://schemas.android.com/apk/res/android"
  android:layout_width="match_parent"
  android:layout_height="match_parent"
  android:orientation="vertical">

      <LinearLayout android:layout_width="match_parent"
       android:layout_height="wrap_content"
       android:gravity="center_horizontal"
       android:orientation="horizontal">
               <Button android:id="@+id/bt_get"
               android:layout_width="wrap_content"
               android:layout_height="wrap_content"
               android:text="乌云Get请求"/>

               <Button android:id="@+id/bt_post"
               android:layout_width="wrap_content"
               android:layout_height="wrap_content"
               android:text="乌云Post请求"/>

 LinearLayout>

     <TextView android:id="@+id/tv_show"
     android:layout_width="match_parent"
     android:layout_height="wrap_content"/>

LinearLayout>

Java代码:
由于android本身是不允许在UI线程做网络请求操作的,所以我们自己写个线程完成网络操作

import android.os.Bundle;
import android.support.v7.app.AppCompatActivity;
import android.util.Log;
import android.view.View;
import android.widget.Button;
import com.squareup.okhttp.FormEncodingBuilder;
import com.squareup.okhttp.OkHttpClient;
import com.squareup.okhttp.Request;
import com.squareup.okhttp.RequestBody;
import com.squareup.okhttp.Response;

public class MainActivity extends AppCompatActivity implements View.OnClickListener {

       private Button bt_get;
       private Button bt_post;
       final OkHttpClient client = new OkHttpClient();

       @Override
       protected void onCreate(Bundle savedInstanceState) {
       super.onCreate(savedInstanceState);
       setContentView(R.layout.activity_main2);
       bt_get=(Button)findViewById(R.id.bt_get);
       bt_post=(Button)findViewById(R.id.bt_post);
       bt_get.setOnClickListener(this);
       bt_post.setOnClickListener(this);
   }
   @Override
   public void onClick(View view) {
       switch (view.getId()){
            case R.id.bt_get:
               getRequest();
               break;

            case R.id.bt_post:
               postRequest();
               break;
       }
   }
   private void getRequest() {
        final Request request=new Request.Builder()
             .get()
             .tag(this)
             .url("http://www.wooyun.org")
             .build();
        new Thread(new Runnable() {
            @Override
            public void run() {
                 Response response = null;
                 try {
                         response = client.newCall(request).execute();
                         if (response.isSuccessful()) {
                              Log.i("WY","打印GET响应的数据:" + response.body().string());
                         } else {
                             throw new IOException("Unexpected code " + response);
                         }
                     } catch (IOException e) {
                      e.printStackTrace();
                     }
              }
        }).start();
   }

   private void postRequest() {
        RequestBody formBody = new FormEncodingBuilder()
              .add("","")
              .build();
        final Request request = new Request.Builder()
              .url("http://www.wooyun.org")
              .post(formBody)
              .build();
        new Thread(new Runnable() {
            @Override
            public void run() {
                Response response = null;
                try {
                     response = client.newCall(request).execute();
                     if (response.isSuccessful()) {
                          Log.i("WY","打印POST响应的数据:" + response.body().string());
                     } else {
                          throw new IOException("Unexpected code " + response);
                     }
                } catch (IOException e) {
                     e.printStackTrace();
                }
             }
         }).start();
   }
}

剩下的简单说明:
同步Get
下载一个文件,打印他的响应头,以string形式打印响应体。
响应体的 string() 方法对于小文档来说十分方便、高效。但是如果响应体太大(超过1MB),应避免适应 string()方法 ,因为他会将把整个文档加载到内存中。对于超过1MB的响应 body,应使用流的方式来处理body。

异步Get
在一个工作线程中下载文件,当响应可读时回调Callback接口。读取响应时会阻塞当前线程。OkHttp现阶段不提供异步api来接收响应体。
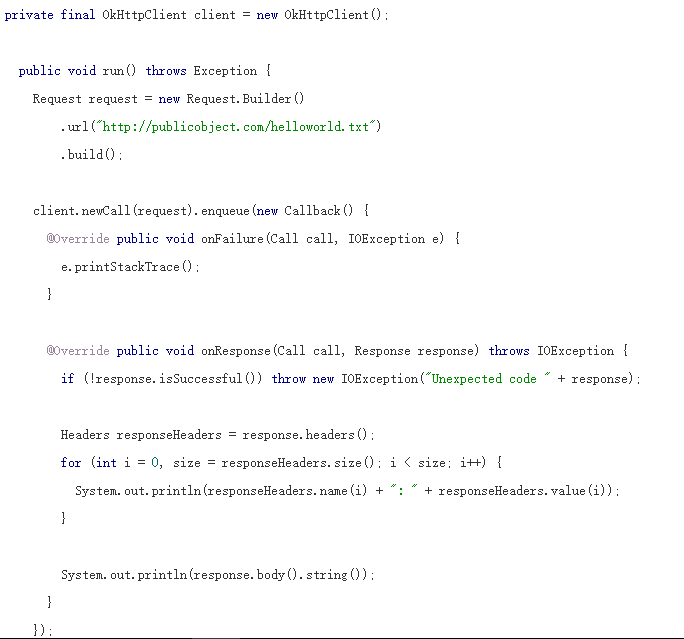
提取响应头
典型的HTTP头 像是一个 Map

Post方式提交String
使用HTTP POST提交请求到服务。这个例子提交了一个markdown文档到web服务,以HTML方式渲染markdown。因为整个请求体都在内存中,因此避免使用此api提交大文 档 (大于1MB)。
待续。。。。。。。。。
部分出自 http://m.2cto.com/net/201605/505364.html