nodejs的出现让前端人员可以使用js打造后台,也许哪天就真的摆脱了对java或者php的依赖了.
今天跟大家分享一个利用nodejs接受前端post请求,并实现视频转码的这样一个例子.视频转码用到的是ffmpeg,nodejs取到表单的参数采用的是目录multiparty;具体实现如下:
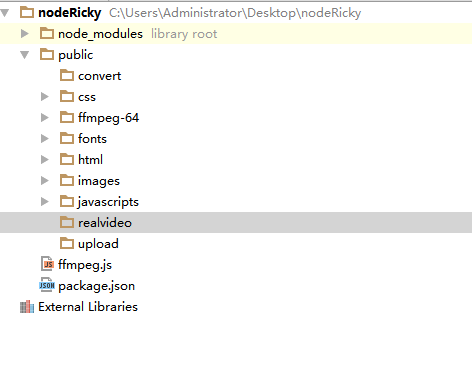
1.项目主要文件结构

2.ffmpeg.js文件是启动文件
|
1
2
3
4
5
6
7
8
9
10
11
12
13
14
15
16
17
18
19
20
21
22
23
24
25
26
27
28
29
30
31
32
33
34
35
36
37
38
39
40
41
42
43
44
45
46
47
48
49
50
51
|
const express = require('express');const path = require('path');const multiparty=require('multiparty');const ffmpeg=require('fluent-ffmpeg');const fs=require('fs');const bodyParser = require('body-parser');const app=express();app.use(express.static(path.join(__dirname, 'public')));//设置静态文件根路径app.use(bodyParser.urlencoded({ extended: false }));app.get('/',function (req,res) { res.sendfile('./public/html/login.html')})app.post('/ffuser/login',function (req,res) { var form = new multiparty.Form({uploadDir: './public/upload/'}); form.parse(req, function (err, fields, files) { console.log(files); var filesTmp = JSON.stringify(files, null, 2); var inputFile = files.avatar[0]; var uploadedPath = inputFile.path; var dstPath = './public/realvideo/' + inputFile.originalFilename; var exchangePath='./public/convert/' + inputFile.originalFilename; fs.rename(uploadedPath, dstPath, function (err) { if (err) { console.log('rename error: ' + err); } else { console.log('rename ok') if (inputFile.originalFilename.split('.')[1] == 'MP4' || inputFile.originalFilename.split('.')[1] == 'mp4') { var trans = new ffmpeg({source: dstPath}) .setFfmpegPath('./public/ffmpeg-64/bin/ffmpeg.exe') .withAspect('4:3') .withSize('1280x960') .applyAutopadding(true, 'white') .saveToFile(exchangePath, function (retcode, error) { if (error) { console.log(error) } else { console.log(retcode) } }) .on('end',function () { console.log('转码完成!') res.send({code:'success',json:{fields: fields, video: '/convert/'+inputFile.originalFilename}}); }) } } }); });})app.listen(3000,function () { console.log('server start')}) |
3.运行ffmpeg.js,并在浏览器地址栏输入 localhost:3000,页面截图如下:

4.填好用户名和密码,选择好需要上传的视频文件后,点击登录

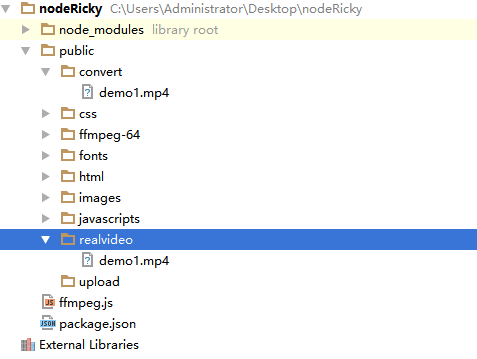
5.操作成功后,视频会先存储在realvideo这个目录下,转码后的视频将会存储在convert这个目录下:

6.页面发起的post请求在收到返回参数后,会自动播放返回的视频文件

7.本示例中所作的视频转码仅仅是尺寸的改变,官网上还有更多的转码操作,如码率等等
转载自:https://www.cnblogs.com/Ricky-Huang/p/5724748.html