vue3+ts+vite发布组件到npm
系统环境
- vue:3.2.6
- vite:2.5.4
- ts:4.3.2
创建项目
npm init vite@latest
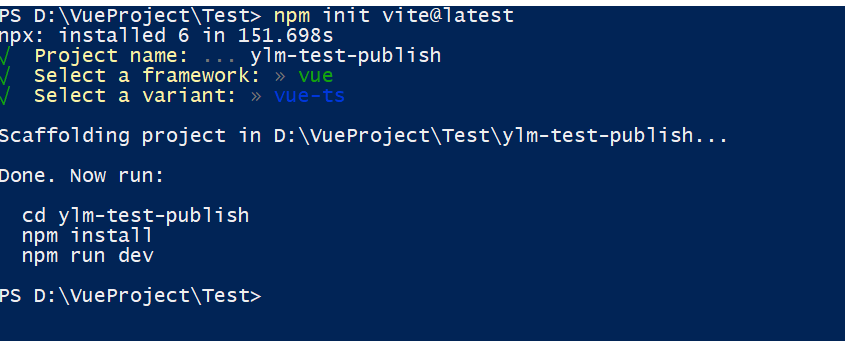
模板选择vue、vue-ts
编写组件
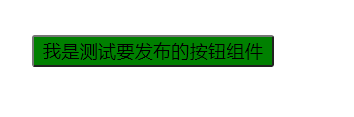
打开项目 在src/components文件夹下新增文件,我这里叫TestPub.vue
编写代码如下
<template>
  <button class="testButtonClass">我是测试要发布的按钮组件</button>
</template>

<script setup lang="ts">

</script>

<style>
.testButtonClass{
  background-color: green;
}
</style>
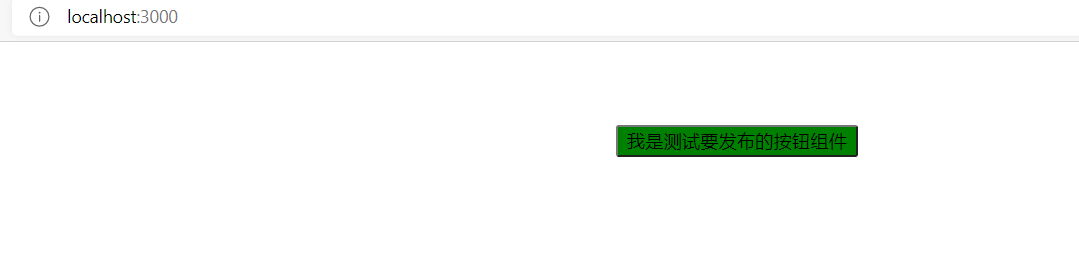
拿到当前项目里测试一下
//app.vue
<script setup lang="ts">
// This starter template is using Vue 3 <script setup> SFCs
// Check out https://v3.vuejs.org/api/sfc-script-setup.html#sfc-script-setup
import TestPub from './components/TestPub.vue'
</script>

<template>
  <test-pub></test-pub>
</template>

<style>
#app {
  font-family: Avenir, Helvetica, Arial, sans-serif;
  -webkit-font-smoothing: antialiased;
  -moz-osx-font-smoothing: grayscale;
  text-align: center;
  color: #2c3e50;
  margin-top: 60px;
}
</style>
运行项目
完美~
编写导出文件
在src目录下新增文件export.ts
编写代码如下:
import TestPub from './components/TestPub.vue';
export { TestPub }
使用vite构建
编辑vite.config.ts文件,新增build属性,参考链接:https://cn.vitejs.dev/guide/build.html#library-mode
import { defineConfig } from 'vite'
import vue from '@vitejs/plugin-vue'
import path from 'path'
// https://vitejs.dev/config/
export default defineConfig({
  plugins: [vue()],
  build: {
    lib: {
      entry: path.resolve(__dirname, 'src/export.ts'),
      name: 'TestPub',
      fileName: (format) => `testpub.${format}.ts`
    },
    rollupOptions: {
      // 确保外部化处理那些你不想打包进库的依赖
      external: ['vue'],
      output: {
        // 在 UMD 构建模式下为这些外部化的依赖提供一个全局变量
        globals: {
          vue: 'Vue'
        }
      }
    }
  }
})
编写package.json文件
{
  "name": "ylm-test-publish",
  "version": "0.0.2",
  "files": [
    "dist"
  ],
  "module": "./dist/testpub.es.ts",
  "main": "./dist/testpub.umd.ts",
  "exports": {
    ".": {
      "import": "./dist/testpub.es.ts",
      "require": "./dist/testpub.umd.ts"
    },
    "./dist/style.css": {
      "import": "./dist/style.css",
      "require": "./dist/style.css"
    }
  },
  "keywords": [
    "test"
  ],
  "scripts": {
    "dev": "vite",
    "build": "vue-tsc --noEmit && vite build",
    "serve": "vite preview"
  },
  "dependencies": {
    "vue": "^3.2.6"
  },
  "devDependencies": {
    "@vitejs/plugin-vue": "^1.6.1",
    "@vue/compiler-sfc": "^3.2.6",
    "typescript": "^4.3.2",
    "vite": "^2.5.4",
    "vue-tsc": "^0.2.2"
  }
}
构建项目
npm run build
构建完成会在dist文件夹生成这些文件

发布到npm
注册账号过程略
发布:
npm publish
导入到新项目
npm i ylm-test-publish
<script setup lang="ts">
import { TestPub } from 'ylm-test-publish';
import 'ylm-test-publish/dist/style.css'
</script>

<template>
  <test-pub></test-pub>
</template>
若是想通过cdn方式引用需要编写install函数
import xxxComponent from './components/xxxComponent.vue';
const components = [xxxComponent];
// 注册组件

const install = function (App, options) {
    components.forEach((component) => {
        App.component(component.name, component);
    });
};

export { install, xxxComponent }
然后调用的页面
<script src="./xxxComponent.umd.js"></script>
app.use(xxxComponent)