咳,时隔多月又回到了熟悉的博客园。
从现在开始重新去培养写博客的习惯。
主要是用于科研技术方面的,去记录一些我的学习和思考。
会把问题尽量的具体化,新手化
一是记录方便回忆,二是梳理,三也是希望为遇到相关问题的朋友提供多多少少的借鉴和帮助吧
回归正题,如何实现树莓派与Arduino串口通信
首先是接线方式
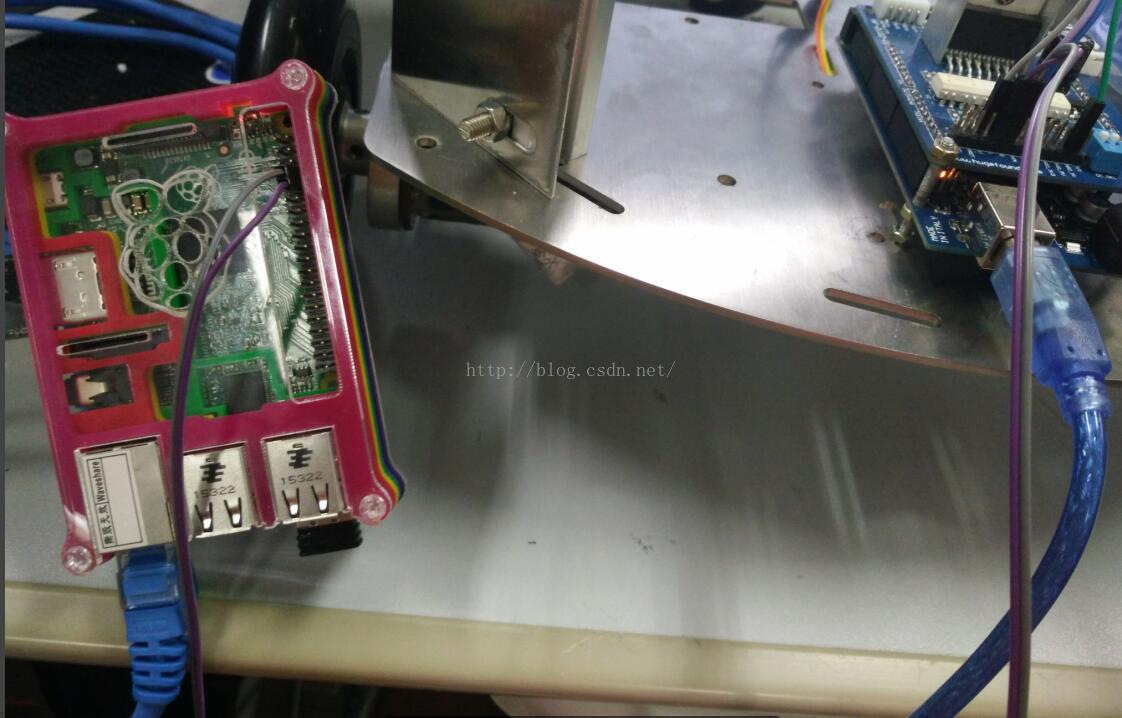
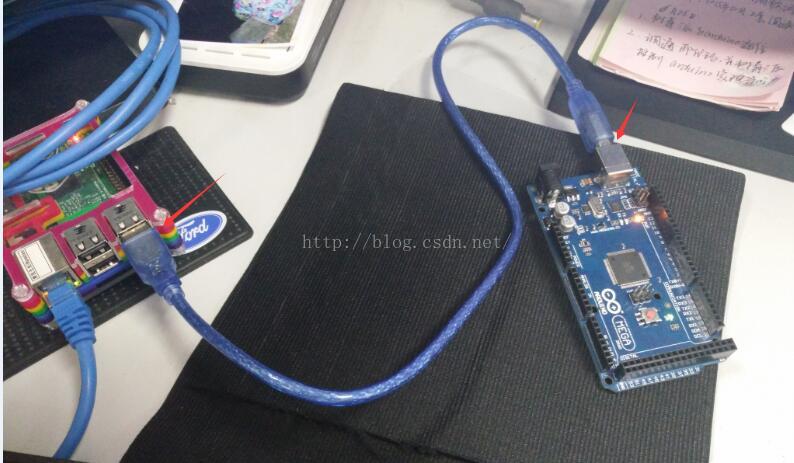
一、树莓派与arduino通过USB进行通信
1、将树莓派与arduino通过usb线进行连接
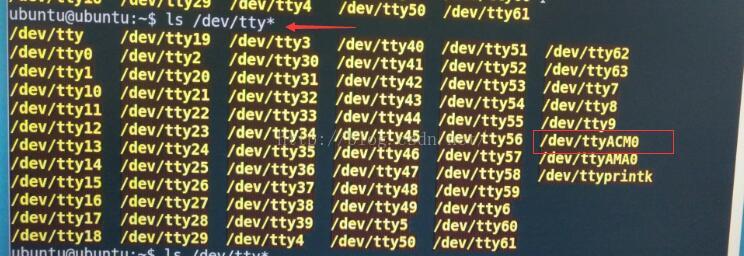
2、在树莓派终端输入 ls /dev/tty*查看两者连接端口的名字。查看有没有ttyACM0 这个文件(注只有在两个硬件USB互连的情况下才会有这个。如果两者没有连接是不会有的) 最新的系统一般都会自动生成。看到ttyACM0就说明二者可以通讯了 接下来上测试代码。
3、编写树莓派与arduino通信代码。
arduino代码:
void setup()
{
Serial.begin(9600); // 9600 bps
}
void loop()
{
if ( Serial.available())
{
if('s' == Serial.read())
Serial.println("Hello Raspberry,I am Arduino.");
}
}
把上面代码通过python IDE下载到arduino中,然后再再与树莓派usb链接。
树莓派代码:
import serial #import serial module
ser = serial.Serial('/dev/ttyACM1', 9600,timeout=1); #open named port at 9600,1s timeot
#try and exceptstructure are exception handler
try:
while 1:
ser.write('s');#writ a string to port
response = ser.readall();#read a string from port
print response;
except:
ser.close();
我这里把上面代码在树莓派中保存为communication.py文件。
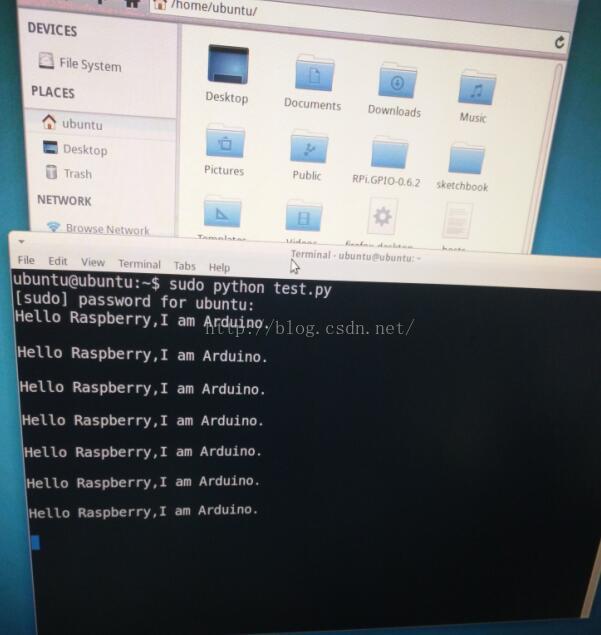
2、在树莓派终端输入sudo python communication.py运行程序。
显示结果:
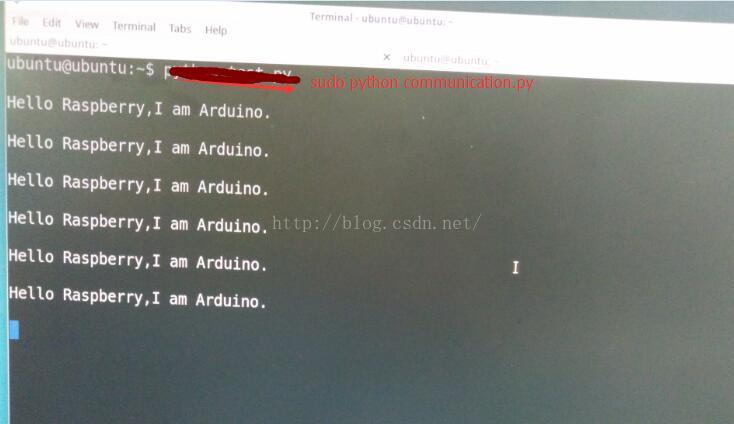
此图是两者之间的通信结果:树莓派向arduino发送一个字符‘s’,arduino向树莓派回复字符串“hello raspberry,i am arduino”。
二、树莓派与arduino通过GPIO引脚通信
1、连接方式:
树莓派的RX ----- arduino的TX
树莓派的TX ----- arduino的RX
树莓派的GND ----- arduino的GND
2、修改树莓派配置文件(要看详细的请移步这里 http://www.eeboard.com/bbs/thread-8574-1-1.html)
(1)修改cmdline.txt
输入
- sudo nano /boot/cmdline.txt
看到
- dwc_otg.lpm_enable=0 console=ttyAMA0,115200 kgdboc=ttyAMA0,115200 console=tty1 root=/dev/mmcblk0p2 rootfstype=ext4 elevator=deadline rootwait
把 console=ttyAMA0,115200 kgdboc=ttyAMA0,115200 删除
变成这样
- dwc_otg.lpm_enable=0 console=tty1 root=/dev/mmcblk0p2 rootfstype=ext4 elevator=deadline rootwait
ctrl+x 按Y保存退出
2.修改inittab 然后禁止掉从串口登录的功能,
输入
- sudo nano /etc/inittab
找到
- T0:23:respawn:/sbin/getty -L ttyAMA0 115200 vt100
这一行 在前面加个#注释掉这一行变成
- #T0:23:respawn:/sbin/getty -L ttyAMA0 115200 vt100
ctrl+x 按Y保存退出
然后重启树莓派,之后树莓派的pin8(GPIO14) pin10(GPIO15)这两个口就可以当成普通的串口来用了 现在你可以像使用一个普通串口那样使用/dev/ttyAMA0了。
3、实验代码及效果
只需要将上面USB通信树莓派上的代码ser = serial.Serial('/dev/ttyACM1', 9600,timeout=1); 中的ttyACM1改成ttyAMA0即可。