组件的复用
这里的工程和上一节的一样
先建立一个组件
MyButton.vue
<template>
    <button @click="count++">You clicked me {{ count }} times</button>
</template>

<script>
    export default {
        name: "MyButton",
        data: () => ({
            count: 0
        })
    }
</script>

<style scoped>

</style>
引用这个组件
About.vue
<template>
    <div class="about">
        <my-button></my-button>
        <my-button></my-button>
        <my-button></my-button>
    </div>
</template>
<script>
    import MyButton from '../components/MyButton'
    export default {
        components: {MyButton}
    }
</script>
页面:

1. MyButton.vue 就是一个组件,其它位置通过import来引入这个组件,就可以来使用了
2. 注意 一个组件的 data 选项必须是一个函数,因此每个实例可以维护一份被返回对象的独立的拷贝
如果不是这样:
data: () => ({
    count: 0
})
而是这样:
data: {
    count: 0
}
额,会报错~

页面也不能正常:

..
通过 Prop 向子组件传递数据
新建一个子组件
MyTitle.vue
<template>
    <h3>{{blog}}</h3>
</template>

<script>
    export default {
        name: "MyTitle",
        props: ['blog']
    }
</script>

<style scoped>

</style>
这里通过自定义的属性blog来传递数据,定义在子组件里面
在父组件里面使用,并传入数据
<template>
    <div class="about">
        <my-title v-for="t in items" :blog="t"></my-title>
    </div>
</template>
<script>
    import MyTitle from '../components/MyTitle'
    export default {
        components: {MyTitle},
        data: () => ({
            items: ['My journey with Vue','Blogging with Vue','Why Vue is so fun']
        })
    }
</script>
将数据绑定到blog属性上 :blog
页面:

当组件变得复杂,我们需要传递的不止一个数据,如果是多个数据可以通过以下方式:
子组件:MyTitle.vue
<template>
    <div>
        <h3>{{blog.title}}</h3>
        <p>{{blog.content}}</p>
    </div>
</template>

<script>
    export default {
        name: "MyTitle",
        props: ['blog']
    }
</script>

<style scoped>

</style>
父组件:About.vue
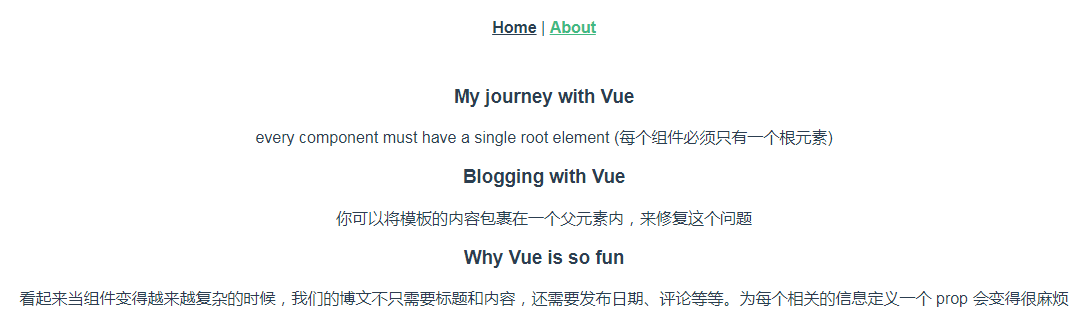
<template>
    <div class="about">
        <my-title v-for="t in items" :blog="t"></my-title>
    </div>
</template>
<script>
    import MyTitle from '../components/MyTitle'
    export default {
        components: {MyTitle},
        data: () => ({
            items: [
                {title:'My journey with Vue',content:'every component must have a single root element (每个组件必须只有一个根元素)'},
                {title:'Blogging with Vue',content:'你可以将模板的内容包裹在一个父元素内,来修复这个问题'},
                {title:'Why Vue is so fun',content:'看起来当组件变得越来越复杂的时候,我们的博文不只需要标题和内容,还需要发布日期、评论等等。为每个相关的信息定义一个 prop 会变得很麻烦'},
            ]
        })
    }
</script>
页面:
通过事件向父级组件发送消息
一些功能可能要求我们和父级组件进行沟通。例如我们可能会引入一个可访问性的功能来放大博文的字号,同时让页面的其它部分保持默认的字号。
Vue 实例提供了一个自定义事件的系统来解决这个问题。我们可以在子组件里调用内建的 $emit 方法并传入事件的名字,来向父级组件触发一个事件
子组件:
<template>
    <div>
        <h3>{{blog.title}}</h3>
        <!--$emit('enlarge-text') 自定义事件,click的时候触发父组件的enlarge-text事件,下同-->
        <button v-on:click="$emit('enlarge-text')">放大</button>
        <button v-on:click="$emit('shrink-text')">缩小</button>
        <p>{{blog.content}}</p>
    </div>
</template>

<script>
    export default {
        name: "MyTitle",
        props: ['blog']
    }
</script>

<style scoped>

</style>
父组件:
<template>
    <div class="about" :style="{ fontSize: postFontSize + 'em' }">
        <!--@enlarge-text和@shrink-text 监听来自子组件的自定义事件-->
        <my-title v-for="t in items" :blog="t" @enlarge-text="postFontSize += 0.1" @shrink-text="postFontSize -= 0.1"></my-title>
    </div>
</template>
<script>
    import MyTitle from '../components/MyTitle'
    export default {
        components: {MyTitle},
        data: () => ({
            // 控制字号
            postFontSize: 1,
            items: [
                {title:'My journey with Vue',content:'every component must have a single root element (每个组件必须只有一个根元素)'},
                {title:'Blogging with Vue',content:'你可以将模板的内容包裹在一个父元素内,来修复这个问题'},
                {title:'Why Vue is so fun',content:'看起来当组件变得越来越复杂的时候,我们的博文不只需要标题和内容,还需要发布日期、评论等等。为每个相关的信息定义一个 prop 会变得很麻烦'},
            ]
        })
    }
</script>
页面:可以点击放大或者缩小

有的时候我们可能想让子组件来决定文本放大多少,那么也就是用一个事件来抛出一个特定的值,只需要修改子组件的$emit,加上第二个参数:

然后当在父级组件监听这个事件的时候,我们可以通过 $event 访问到被抛出的这个值

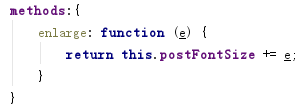
或者,父组件的处理函数是一个方法,那么从子组件传过来的$event变成这个方法的第一个参数:

处理方法:
插槽
匿名插槽【木有名字的插槽:<slot></slot>】
新建一个子组件:
NoNameSlot.vue
<template>
    <p>
        <slot></slot>
    </p>
</template>

<script>
    export default {
        name: "NoNameSlot"
    }
</script>

<style scoped>

</style>
父组件:
<template>
    <div class="about">
        <no-name-slot v-for="i in items">
            {{i.content}}
        </no-name-slot>
    </div>
</template>
<script>
    import NoNameSlot from '../components/NoNameSlot'
    export default {
        components: {NoNameSlot},
        data: () => ({
            items: [
                {title:'My journey with Vue',content:'当组件渲染的时候,这个 <slot></slot> 元素将会被替换为父组件传入的当前内容。'},
                {title:'Blogging with Vue',content:'插槽内可以包含任何模板代码,包括 HTML'},
                {title:'Why Vue is so fun',content:'嗯嗯嗯'},
            ]
        })
    }
</script>
一句话:子组件的 <slot></slot> 会被替换成父组件传入的任何内容,但是如果子元素里面没有<slot></slot>,父组件传入的内容会被抛弃
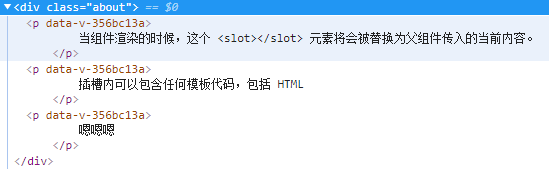
页面:
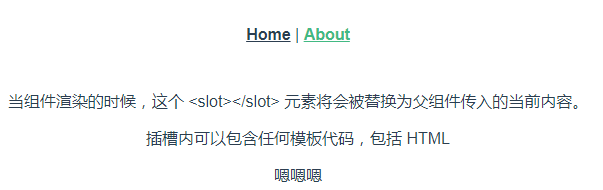
不信你看,三个p
具名插槽【有名字的插槽:<slot name="header"></slot>】
有时候我们需要多个插槽,不同的位置渲染不同的内容,那么就需要具名插槽了
子组件:MyLayout.vue
<template>
    <div id="container">
        <header>
            <slot name="header"></slot>
        </header>
        <main>
            <slot></slot>
        </main>
        <footer>
            <slot name="footer"></slot>
        </footer>
    </div>
</template>

<script>
    export default {
        name: "MyLayout"
    }
</script>

<style scoped>

</style>
父组件:About.vue
<template>
    <div class="about">
        <my-layout>
            <template slot="header">
                <h1>这里是标题啊!</h1>
            </template>
            <p>A paragraph for the main content.</p>
            <p>And another one.</p>
            <template slot="footer">
                <h2>这里是脚丫子</h2>
            </template>
        </my-layout>
    </div>
</template>
<script>
    import MyLayout from '../components/MyLayout'
    export default {
        components: {MyLayout}
    }
</script>
页面:
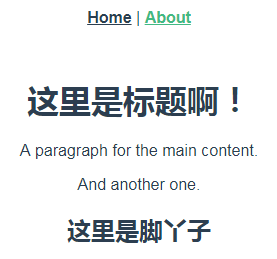
可以看出,父组件在使用的时候,只需要通过指定slot的名字,就可以把指定内容送到对应的插槽上;而那些没有指定名字的,如果存在匿名插槽则会被送到匿名插槽的位置上。如果不存在,则不渲染。

作用域插槽【2.1.0+新增:可从子组件获取数据的可复用的插槽。引申:scope 用于表示一个作为带作用域的插槽的 <template> 元素,它在 2.5.0+ 中被 slot-scope 替代。】
前面两个都是从父组件获取数据,这个恰好反过来,从子组件获取数据。
子组件:
<template>
    <div>
        <!--只需要绑定数据即可-->
        <slot :items="items"></slot>
    </div>
</template>

<script>
    export default {
        name: "MyScopeSlot",
        data: () => ({
            items: ['White','Black','Pink']
        })
    }
</script>

<style scoped>

</style>
父组件:
<template>
    <div class="about">
        <h3>按套路输出数据</h3>
        <my-scope-slot>
            <template slot-scope="childData">
                <ul>
                    <li v-for="item in childData.items">{{item}}</li>
                </ul>
            </template>
        </my-scope-slot>
        <h3>一锅端</h3>
        <my-scope-slot>
            <template slot-scope="childData">
                {{childData.items}}
            </template>
        </my-scope-slot>
        <h3>不使用子组件提供的数据</h3>
        <my-scope-slot>
            作用域插槽退化为匿名插槽
        </my-scope-slot>
    </div>
</template>
<script>
    import MyScopeSlot from '../components/MyScopeSlot'
    export default {
        components: {MyScopeSlot}
    }
</script>
slot-scope 任何名字都可以,注意在父组件里,childData通过引用子组件的 绑定属性名称来获取数据
页面

动态组件【在不同组件之间进行动态切换】
建立三个子组件 ComponentA、ComponentB、ComponentC
<template>
    <h2>组件A</h2>
</template>

<script>
    export default {
        name: "ComponentA"
    }
</script>

<style scoped>

</style>
内容一样,只是改个字母,这里不重复了。
父组件
<template>
    <div class="about">
        <button @click="next">下一个</button>
        <!--切换的关键,参数是组件的名字-->
        <component :is="view"></component>
    </div>
</template>
<script>
    import ComponentA from '../components/ComponentA'
    import ComponentB from '../components/ComponentB'
    import ComponentC from '../components/ComponentC'

    export default {
        components: {ComponentA,ComponentB,ComponentC},
        data: ()=> ({
            index:0,
            componentName:['ComponentA','ComponentB','ComponentC']
        }),
        computed:{
            // 这是一个计算属性,返回当前index对应的组件名字
            view: function () {
                return this.componentName[this.index];
            }
        },
        methods:{
            // 循环index
            next: function () {
                this.index = ++this.index % 3;
            }
        }
    }
</script>
页面:

--
当在这些组件之间切换的时候,你有时会想保持这些组件的状态,以避免反复重渲染导致的性能问题。也就是说,切换是一个销毁/渲染的过程,失效的被销毁,展示的时候重新渲染。那么如果我们不想要这一浪费的行为,我们更希望那些标签的组件实例能够被在它们第一次被创建的时候缓存下来,只需要把组件用<keep-alive>包裹起来:
<!-- 失活的组件将会被缓存!-->
<keep-alive>
  <component v-bind:is="currentTabComponent"></component>
</keep-alive>