目录:
【阐述】:首先应该遇到了一个共同的问题,JMeter3.2之后就没有WebService(SOAP) Request,后来经过查询网上资料得知其实可以用HTTP请求来操作,结果是一样的。
具体资料大家可以参照原文《Jmeter测试SOAP协议(Jmeter 3.3)》感谢作者:stone9159
【步骤】:
如果大家有接口地址是最好啦,不过本人因为没有接口地址,所以就自己手动模拟创建WebService接口模拟服务端。
参考资料:《SoapUI5.0创建WebService接口模拟服务端》感谢作者:sean-zou
1、首先,需要下载SoapUI:
官方下载地址:https://www.soapui.org/downloads/latest-release.html
下载后,一直点击下一步进行安装就可以啦,在此不必陈述。
2、使用SoapUI创建WebService接口模拟服务端需要接口描述文件
新建文件:MathUtil.wsdl
<?xml version="1.0" encoding="UTF-8"?>
<wsdl:definitions targetNamespace="http://sean.com"
        xmlns:apachesoap="http://xml.apache.org/xml-soap"
        xmlns:impl="http://sean.com"
        xmlns:intf="http://sean.com"
        xmlns:wsdl="http://schemas.xmlsoap.org/wsdl/"
        xmlns:wsdlsoap="http://schemas.xmlsoap.org/wsdl/soap/"
        xmlns:xsd="http://www.w3.org/2001/XMLSchema">
 <wsdl:types>
  <schema elementFormDefault="qualified"
          targetNamespace="http://sean.com"
          xmlns="http://www.w3.org/2001/XMLSchema">
   <element name="add">
    <complexType>
     <sequence>
      <element name="x" type="xsd:int"/>
      <element name="y" type="xsd:int"/>
     </sequence>
    </complexType>
   </element>
   <element name="addResponse">
    <complexType>
     <sequence>
      <element name="addReturn" type="xsd:int"/>
     </sequence>
    </complexType>
   </element>
  </schema>
 </wsdl:types>
   <wsdl:message name="addResponse">
      <wsdl:part element="impl:addResponse" name="parameters">
      </wsdl:part>
   </wsdl:message>
   <wsdl:message name="addRequest">
      <wsdl:part element="impl:add" name="parameters">
      </wsdl:part>
   </wsdl:message>
   <wsdl:portType name="MathUtil">
      <wsdl:operation name="add">
         <wsdl:input message="impl:addRequest" name="addRequest">
       </wsdl:input>
         <wsdl:output message="impl:addResponse" name="addResponse">
       </wsdl:output>
      </wsdl:operation>
   </wsdl:portType>
   <wsdl:binding name="MathUtilSoapBinding" type="impl:MathUtil">
      <wsdlsoap:binding style="document"
              transport="http://schemas.xmlsoap.org/soap/http"/>
      <wsdl:operation name="add">
         <wsdlsoap:operation soapAction=""/>
         <wsdl:input name="addRequest">
            <wsdlsoap:body use="literal"/>
         </wsdl:input>
         <wsdl:output name="addResponse">
            <wsdlsoap:body use="literal"/>
         </wsdl:output>
      </wsdl:operation>
   </wsdl:binding>
   <wsdl:service name="MathUtilService">
      <wsdl:port binding="impl:MathUtilSoapBinding" name="MathUtil">
         <wsdlsoap:address
                 location="http://localhost:8080/webservice_create/services/MathUtil"/>
      </wsdl:port>
   </wsdl:service>
</wsdl:definitions>
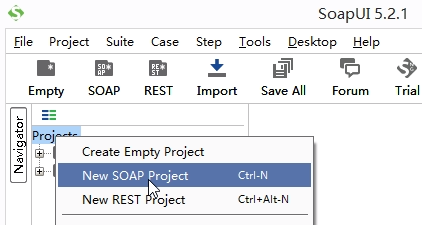
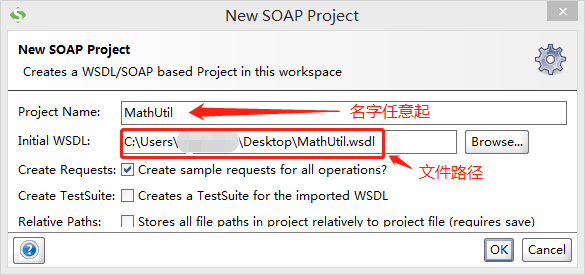
3、打开SoapUI,通过MathUtil.wsdl文件在SoapUI中创建一个SOAP项目:
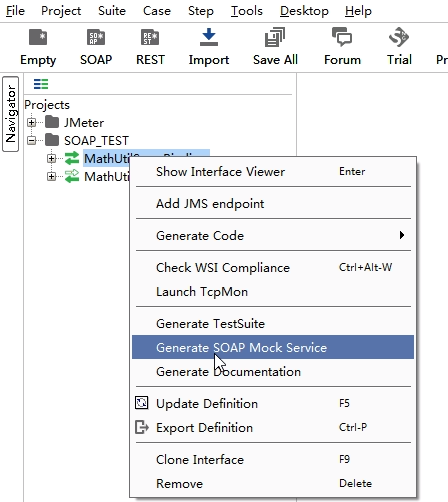
确认后,会在新建的SOAP项目下自动生成模拟客户端
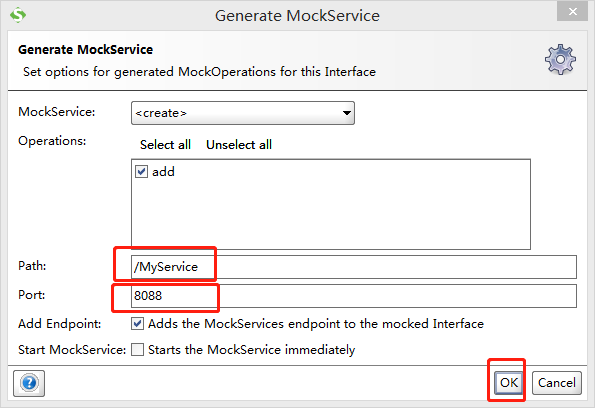
在模拟客户端的基础上创建一个接口模拟服务端(Mock Service):
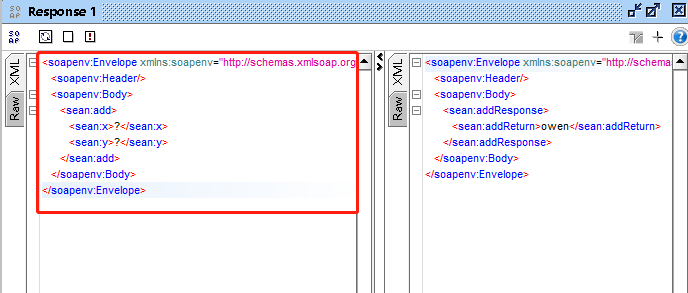
确定后,双击【Response1】
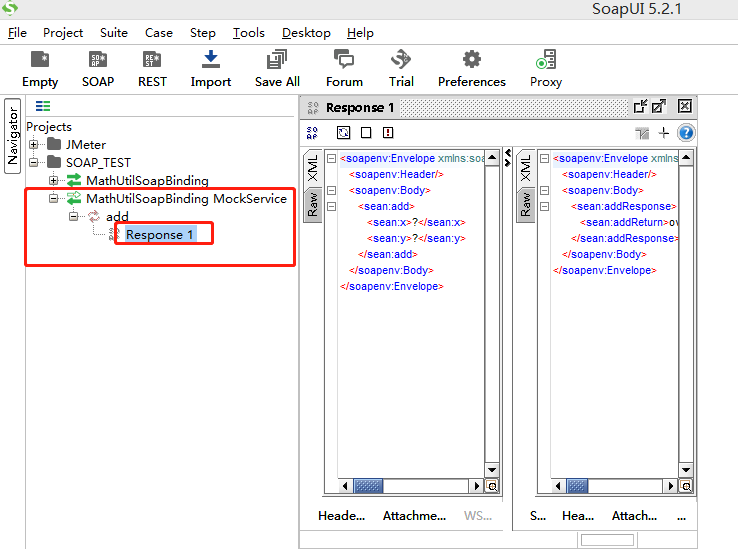
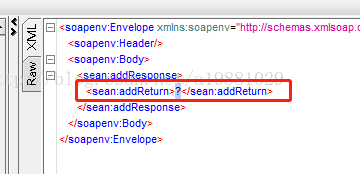
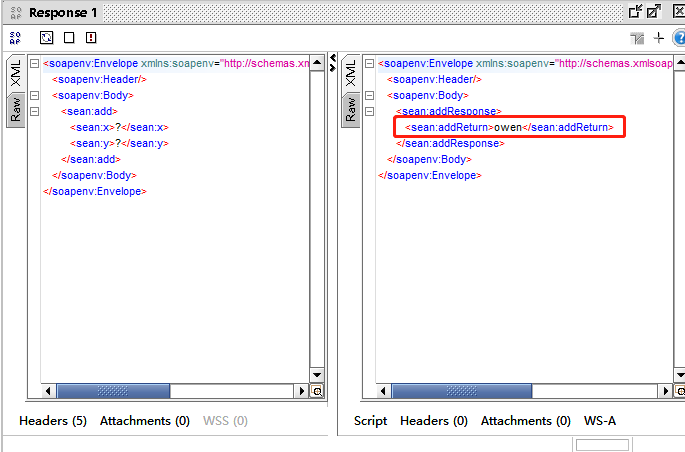
返回值默认为"?",一定要进行修改,否则调用该接口时会报错
双击创建的接口模拟服务端,点击【设置】按钮:
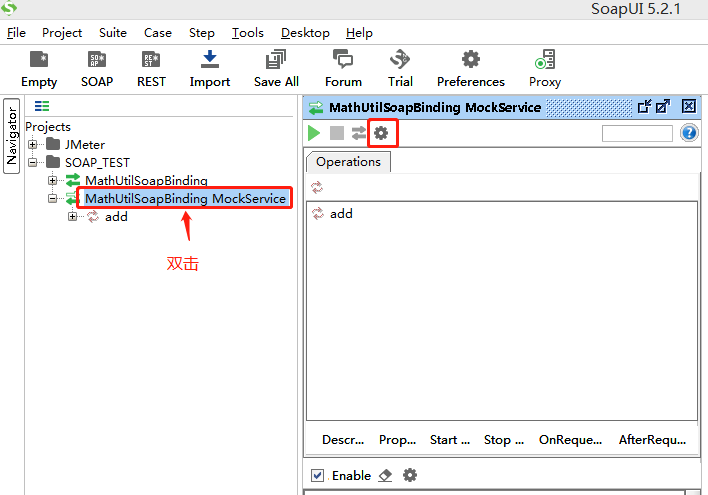
把地址可以自己定义,然后确定:

再返回点击运行按钮,启动服务器
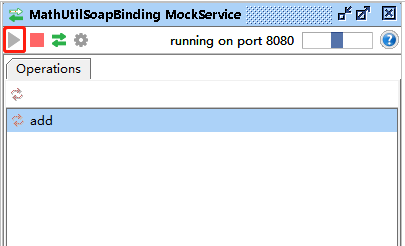
在浏览器中输入ip和端口号:

再点击链接:

此时,创建WebService接口模拟服务端完成!
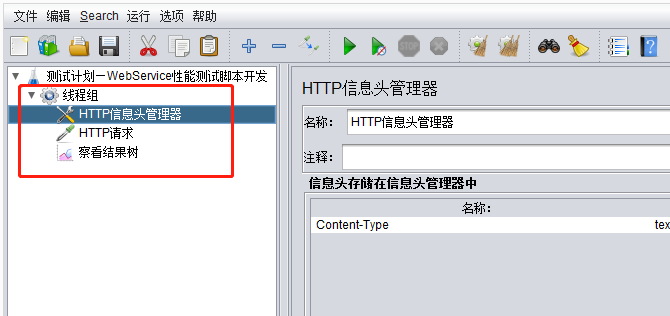
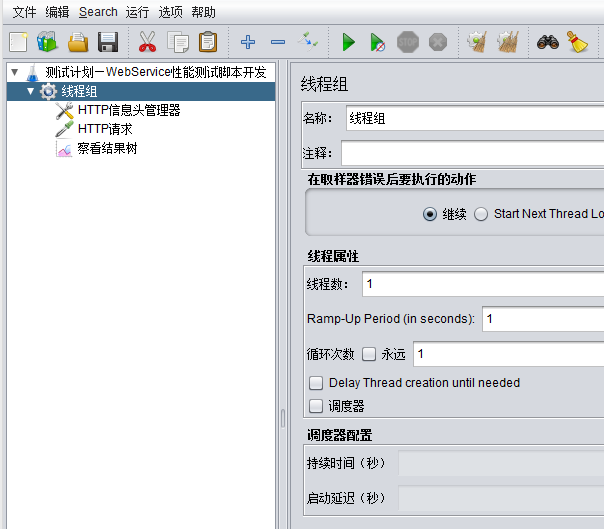
如图所示,建立线程组、HTTP信息头管理器、HTTP请求、查看结果树等
1、建立线程组

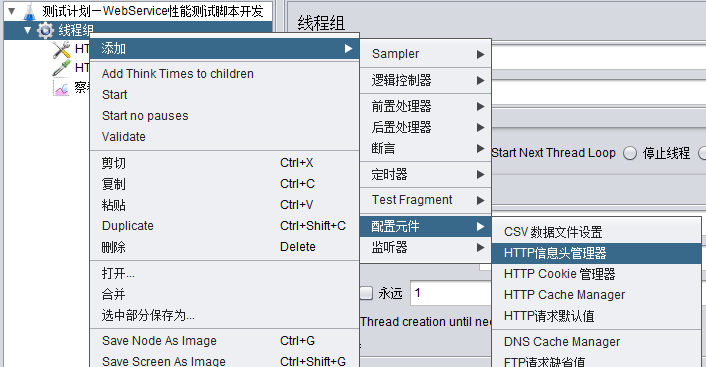
2、建立HTTP信息头管理器
在“HTTP信息头管理器”中,添加一行名称和值,来源于如下图:
Content-Type: text/xml;charset=UTF-8


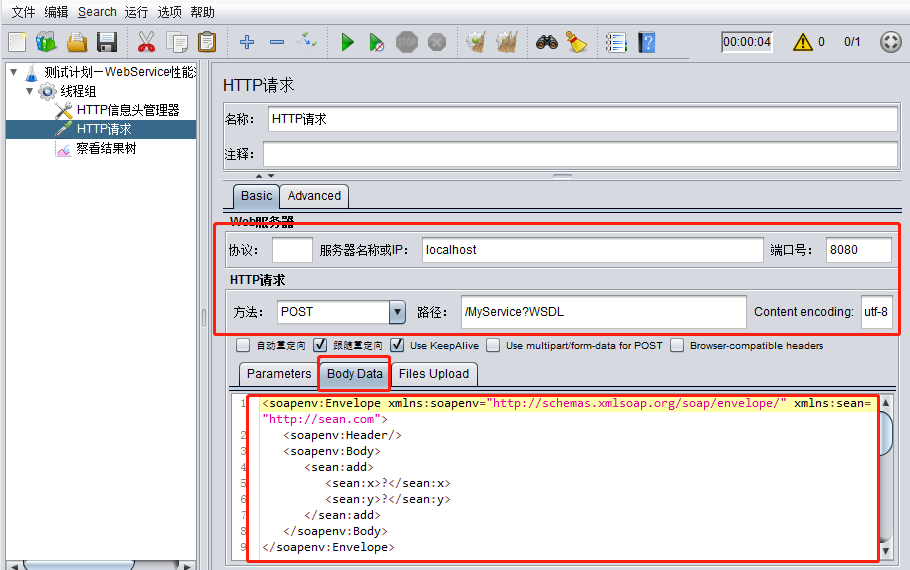
3、建立HTTP请求
填写服务器IP、端口号、HTTP方法、路径、编码,以及打开“Body Data”
Body Data内容填写:
<soapenv:Envelope xmlns:soapenv="http://schemas.xmlsoap.org/soap/envelope/" xmlns:sean="http://sean.com">
   <soapenv:Header/>
   <soapenv:Body>
      <sean:add>
         <sean:x>?</sean:x>
         <sean:y>?</sean:y>
      </sean:add>
   </soapenv:Body>
</soapenv:Envelope>
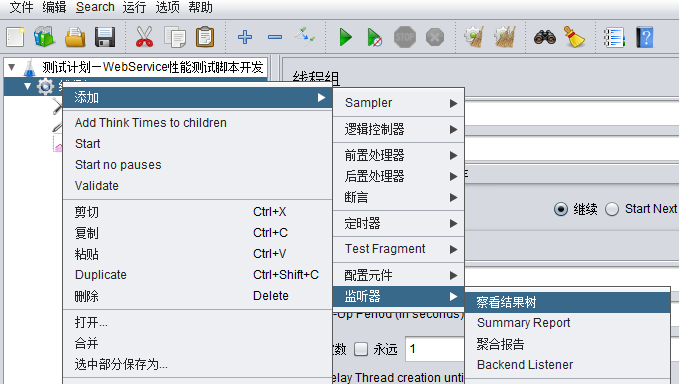
4、建立监听器并运行查看结果
运行之后,查看结果树:
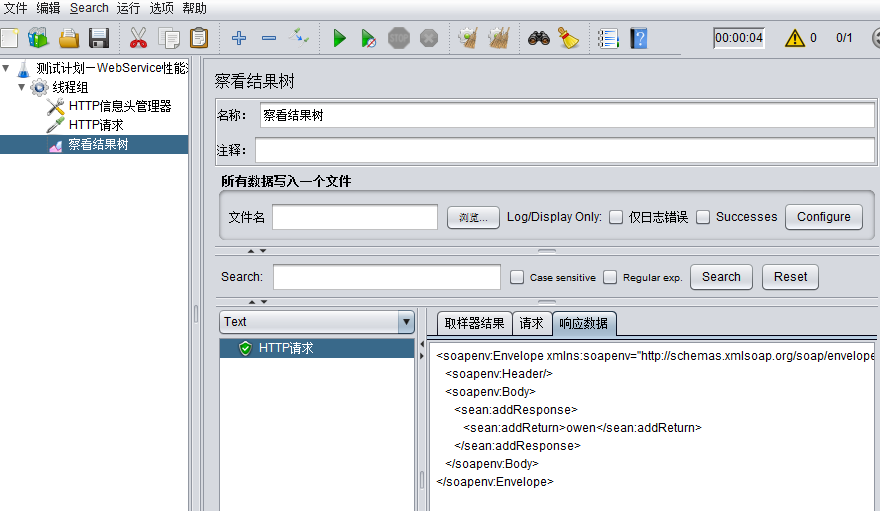
测试成功!