直奔主题:
一般的web项目都是短连接,主动权是交给客户端手里,在客户端不发请求的情况下,服务端是没办法主动给客户端发送消息。但是有些情况下,我们需要长连接,比如常见到的聊天室。网上有很多的案例这里就不多说了!()
java后端部分
首先,我们是需要导入maven节点
     <dependency>
            <groupId>org.springframework.boot</groupId>
            <artifactId>spring-boot-starter-websocket</artifactId>
        </dependency>
传统的玩法,需要一个配置类WebSocketConfiguration,他需要实现WebSocketMessageBrokerConfigurer。重写两个方法configureMessageBroker,registerStompEndpoints
package com.lhf.novel.config.socket;

import org.springframework.context.annotation.Configuration;
import org.springframework.messaging.simp.config.MessageBrokerRegistry;
import org.springframework.web.socket.config.annotation.EnableWebSocketMessageBroker;
import org.springframework.web.socket.config.annotation.StompEndpointRegistry;
import org.springframework.web.socket.config.annotation.WebSocketMessageBrokerConfigurer;

/**
 * WebSocketConfigufation实体类
 *
 * @author zy
 * @since 2020/3/20$
 */
@Configuration
@EnableWebSocketMessageBroker
//@Deprecated
public class WebSocketConfiguration implements WebSocketMessageBrokerConfigurer {

    @Override
    public void configureMessageBroker(MessageBrokerRegistry registry) {
        registry.enableSimpleBroker("/topic");//注册一个队列,主要用来做消息区分的(在我看来)
    }

    @Override
    public void registerStompEndpoints(StompEndpointRegistry registry) {
        registry.addEndpoint("/api").setAllowedOrigins("*").addInterceptors().withSockJS();//通俗易懂简单的来讲,addEndpoint("/api")就是客户端连接的时候url地址,后边的就不解释了。。。
} }
这样客户端就可以连接了。
现在添加一个测试,主动给客户端推送消息********
package com.lhf.novel.config.socket;

import org.springframework.beans.factory.annotation.Autowired;
import org.springframework.messaging.simp.SimpMessagingTemplate;
import org.springframework.scheduling.annotation.Scheduled;
import org.springframework.stereotype.Component;

/**
 * MessageService实体类
 *
 * @author zy
 * @since 2020/3/22
 */
@Component
public class MessageService {
    @Autowired
    private SimpMessagingTemplate messagingTemplate;

    @Scheduled(fixedDelay = 5000)//spring的计划任务,这里表示每五秒执行一次,需要在配置类或者启动类上加一个注解@EnableScheduling,这样才能生效
public void mes() { messagingTemplate.convertAndSend("/topic","125"); } }
这里SimpMessagingTemplate是内置的一个消息模板,这里使用他的convertAndSend()方法,第一个参数是表示向那个通道发送、第二个参数是发送的内容这样客户端就可以连接了。
vue前端部分
首先需要导入两个依赖
npm install socket-client
npm install stompjs
import SockJS from 'sockjs-client';
    import Stomp from 'stompjs';

    export default {
        name: "Index",
        data() {
            return {
                socket: null,
                stompClient: null,
                name: 'admin',
                mes: '',
                cmes: '',
            }
        },
        mounted() {
            this.init();
        },
        destroyed() {
            this.stompClient.destroyed();
        },
        methods: {
            init() {
                let _that = this;
          //连接socket
                this.socket = new SockJS('http://localhost:8080/api');
                let stompClient = Stomp.over(this.socket);
                stompClient.connect({
                    login: 'admin',
                    passcode: '123456'
                }, function (frame) {
                    window.console.log(frame)
          //订阅,这里订阅服务端注册过的topic
                    stompClient.subscribe('/topic', function (message) {
                        window.console.warn(message);
                        _that.cmes = message.body
                        // window.console.log(JSON.parse(message.body));
                    });
                })
                this.stompClient = stompClient;
            },
            send() {
          //这是发送消息
                this.stompClient.send("/mes", {}, "客户端发来消息")
            }
        },
    }
这样前端也差不多完成了
打开开发者模式 F12可以看到,每五秒服务端都会推送一条消息过来。
以上是服务端主动发送消息,聊天窗一定是点多点,或者点对多的模式的,那么就需要有用户的概念,这是就需要加上springsecurity了。
        <dependency>
            <groupId>org.springframework.boot</groupId>
            <artifactId>spring-boot-starter-security</artifactId>
        </dependency>
security配置部分省略。。。我的配置用有两个用户admin 和 root
这样需要一个controller
package com.lhf.novel.config.socket;

import org.springframework.beans.factory.annotation.Autowired;
import org.springframework.messaging.handler.annotation.DestinationVariable;
import org.springframework.messaging.handler.annotation.MessageMapping;
import org.springframework.messaging.handler.annotation.SendTo;
import org.springframework.messaging.simp.SimpMessagingTemplate;
import org.springframework.web.bind.annotation.RestController;

import java.security.Principal;

/**
 * TestController实体类
 *
 * @author zy
 * @since 2020/3/22
 */
@RestController
public class TestController {

    @Autowired
    private SimpMessagingTemplate messagingTemplate;


    @MessageMapping("/mes")
    //@SendTo("/topic")
    public void mes(Principal principal, String mess) {
        System.out.println("name:"+principal.getName());
        System.out.println("mes = " + mess);
        messagingTemplate.convertAndSendToUser("admin","/topic","我来了");
//        return principal.getName()+":发来致电";
    }
}
@MessageMapping和RequestMapping作用是一样的,设置请求路径
@SendTo是在有返回值的情况下返回通道
Principal是SpringSecurity的对象,里边包含用户的所有信息,当然是你自己的。
mess 是接受的消息,这里为了简单我是直接写了一个String类型的,你也可以分装一个对象,这样会好一些,毕竟点对点你得告诉服务器你要发送给谁,发送的内容。
SimpMessagingTemplate: 消息模板 上边用了 convertAndSend()的方法,现在我们需要用到convertAndSendToUser()看方法名字也能看出来,这个是发送给指定用户的,第一个参数是要发送的指定用户,第二个参数通道、第三个是发送的内容(不要被我迷惑了,第 三个参数是个Object的)
<template>
    <div>
        {{ $store.state.realName }}:
        <el-input v-model="mes"/>
        {{ cmes }}
        <el-button @click="send">点击</el-button>
    </div>
</template>

<script>
    import SockJS from 'sockjs-client';
    import Stomp from 'stompjs';

    export default {
        name: "Index",
        data() {
            return {
                socket: null,
                stompClient: null,
                name: 'admin',
                mes: '',
                cmes: '',
            }
        },
        mounted() {
            this.init();
        },
        destroyed() {
            // this.stompClient.destroyed();
        },
        methods: {
            init() {
                let _that = this;
                this.socket = new SockJS('http://localhost:8080/api');
                let stompClient = Stomp.over(this.socket);
                stompClient.connect({
                    login: 'admin',
                    passcode: '123456'
                }, function (frame) {
                    window.console.log(frame)
                    stompClient.subscribe('/user/topic', function (message) {
                        window.console.warn(message);
                        _that.cmes = message.body
                        // window.console.log(JSON.parse(message.body));
                    });
                })
                this.stompClient = stompClient;
            },
            send() {
                this.stompClient.send("/mes", {}, "客户端发来消息")
            }
        },
    }
</script>

<style scoped>

</style>
上诉代码有一点不同就是客户端定订阅的多了一个spring提供的/user,也就是说现在需要订阅 /user/topic两个了
然后看效果图
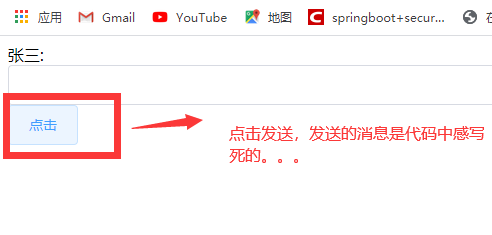
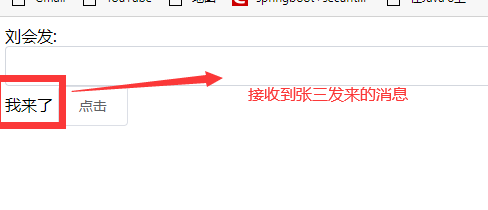
至此结束,文笔不好,欢迎吐槽 1490030544,备注+ 葬月