建立资源字典


1 需要建立一个资源字典项
2 <ResourceDictionary xmlns="http://schemas.microsoft.com/winfx/2006/xaml/presentation"
3                     xmlns:x="http://schemas.microsoft.com/winfx/2006/xaml"
4                     xmlns:local="clr-namespace:WPFdemo8">
5     <SolidColorBrush x:Key="BackGroudColor" Color="Yellow"></SolidColorBrush>
6     <SolidColorBrush x:Key="BackGroudColor1" Color="Blue"></SolidColorBrush>
7 </ResourceDictionary>
 1 在App.xaml 合并资源字典
 2 <Application x:Class="WPFdemo8.App"
 3              xmlns="http://schemas.microsoft.com/winfx/2006/xaml/presentation"
 4              xmlns:x="http://schemas.microsoft.com/winfx/2006/xaml"
 5              xmlns:local="clr-namespace:WPFdemo8"
 6              StartupUri="MainWindow.xaml">
 7     <Application.Resources>
 8         <ResourceDictionary>
 9             <!--合并资源字典-->
10             <ResourceDictionary.MergedDictionaries>
11                 <ResourceDictionary Source="Dictionary1.xaml"/>
12             </ResourceDictionary.MergedDictionaries>
13         </ResourceDictionary>
14     </Application.Resources>
15 </Application>
使用资源字典
 1 <Window x:Class="WPFdemo8.MainWindow"
 2         xmlns="http://schemas.microsoft.com/winfx/2006/xaml/presentation"
 3         xmlns:x="http://schemas.microsoft.com/winfx/2006/xaml"
 4         xmlns:d="http://schemas.microsoft.com/expression/blend/2008"
 5         xmlns:mc="http://schemas.openxmlformats.org/markup-compatibility/2006"
 6         xmlns:local="clr-namespace:WPFdemo8"
 7         mc:Ignorable="d"
 8         Title="MainWindow" Height="350" Width="525">
 9     <Grid>
10         <Button x:Name="button"  HorizontalAlignment="Left" Margin="26,40,0,0" VerticalAlignment="Top" Width="147" Height="250" Background="{Binding Source={StaticResource BackGroudColor}}"/>
11         <Button x:Name="button_Copy"  HorizontalAlignment="Left" Margin="178,40,0,0" VerticalAlignment="Top" Width="147" Height="250" Background="{Binding Source={StaticResource BackGroudColor1}}"/>
12
13     </Grid>
14 </Window>
扩展,程序集之间使用资源字典。
a.后台代码调用
1,创建一个类库,添加资源字典
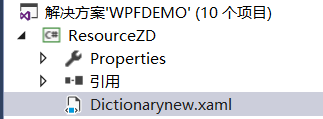
1 <ResourceDictionary xmlns="http://schemas.microsoft.com/winfx/2006/xaml/presentation"
2                     xmlns:x="http://schemas.microsoft.com/winfx/2006/xaml"
3                     xmlns:local="clr-namespace:ResourceZD">
4     <SolidColorBrush x:Key="BackGroudColor" Color="Yellow"></SolidColorBrush>
5     <SolidColorBrush x:Key="BackGroudColor1" Color="Blue"></SolidColorBrush>
6 </ResourceDictionary>
1    private void Window_Loaded(object sender, RoutedEventArgs e)
2         {
3             ResourceDictionary f = new ResourceDictionary();
4             f.Source = new Uri("ResourceZD;component/Dictionarynew.xaml", UriKind.Relative);
5             this.button.Background = (Brush)f["BackGroudColor"];
6         }
另一个程序集调用记得添加引用。
2,前端代码调用
需要先建立一个WPF程序,删掉xaml和配置文件,创建一个WPF自定义控件库 ,会自动生成以下东西
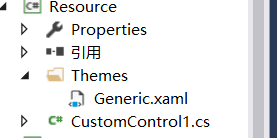
再把项目文件改为类库
 1 Generic.xaml 代码
 2 <ResourceDictionary
 3     xmlns="http://schemas.microsoft.com/winfx/2006/xaml/presentation"
 4     xmlns:x="http://schemas.microsoft.com/winfx/2006/xaml"
 5     xmlns:local="clr-namespace:Resource">
 6
 7     <SolidColorBrush x:Key="{ComponentResourceKey TypeInTargetAssembly={x:Type local:CustomControl1}, ResourceId=BackGroudColor}" Color="Yellow"></SolidColorBrush>
 8
 9
10 </ResourceDictionary>
x:Key不再是字符串,而是一个更加复杂的类型ComponentResourceKey,它有三个属性TypeInTargetAssembly、ResourceId、Assembly,我们这里用到了前面两个;
TypeInTargetAssembly属性需要接收一个Type类型的值,我们赋予{x:Type local:CustomControl1};
ResourceId需要接收一个字符串,名字随便命名
该类库运行会异常,需要重启VS之后就ok了
前端两种调用方法
方法一
CustomControl1.cs 无需处理
前端代码,记得添加引用
 1 <Window x:Class="WPFdemo9.MainWindow"
 2         xmlns="http://schemas.microsoft.com/winfx/2006/xaml/presentation"
 3         xmlns:x="http://schemas.microsoft.com/winfx/2006/xaml"
 4         xmlns:d="http://schemas.microsoft.com/expression/blend/2008"
 5         xmlns:mc="http://schemas.openxmlformats.org/markup-compatibility/2006"
 6         xmlns:local="clr-namespace:WPFdemo9"
 7         xmlns:res="clr-namespace:Resource;assembly=Resource"
 8         mc:Ignorable="d"
 9         Title="MainWindow" Height="755.381" Width="1297.561">
10     <Grid>
11
12         <Button x:Name="button" Content="Button" HorizontalAlignment="Left" Margin="78,63,0,0" VerticalAlignment="Top" Width="259" Height="184" Background="{DynamicResource ResourceKey={ComponentResourceKey TypeInTargetAssembly={x:Type res:CustomControl1}, ResourceId=BackGroudColor}}"/>
13
14
15     </Grid>
16 </Window>
方法二
CustomControl1.cs 修改这个类
 1 using System;
 2 using System.Collections.Generic;
 3 using System.Linq;
 4 using System.Text;
 5 using System.Threading.Tasks;
 6 using System.Windows;
 7 using System.Windows.Controls;
 8 using System.Windows.Data;
 9 using System.Windows.Documents;
10 using System.Windows.Input;
11 using System.Windows.Media;
12 using System.Windows.Media.Imaging;
13 using System.Windows.Navigation;
14 using System.Windows.Shapes;
15
16 namespace Resource
17 {
18     /// <summary>
19     /// 按照步骤 1a 或 1b 操作,然后执行步骤 2 以在 XAML 文件中使用此自定义控件。
20     ///
21     /// 步骤 1a) 在当前项目中存在的 XAML 文件中使用该自定义控件。
22     /// 将此 XmlNamespace 特性添加到要使用该特性的标记文件的根
23     /// 元素中:
24     ///
25     ///     xmlns:MyNamespace="clr-namespace:Resource"
26     ///
27     ///
28     /// 步骤 1b) 在其他项目中存在的 XAML 文件中使用该自定义控件。
29     /// 将此 XmlNamespace 特性添加到要使用该特性的标记文件的根
30     /// 元素中:
31     ///
32     ///     xmlns:MyNamespace="clr-namespace:Resource;assembly=Resource"
33     ///
34     /// 您还需要添加一个从 XAML 文件所在的项目到此项目的项目引用,
35     /// 并重新生成以避免编译错误:
36     ///
37     ///     在解决方案资源管理器中右击目标项目,然后依次单击
38     ///     “添加引用”->“项目”->[浏览查找并选择此项目]
39     ///
40     ///
41     /// 步骤 2)
42     /// 继续操作并在 XAML 文件中使用控件。
43     ///
44     ///     <MyNamespace:CustomControl1/>
45     ///
46     /// </summary>
47     public class CustomControl1 : Control
48     {
49         static CustomControl1()
50         {
51             DefaultStyleKeyProperty.OverrideMetadata(typeof(CustomControl1), new FrameworkPropertyMetadata(typeof(CustomControl1)));
52         }
53         //增加此项
54         public static ComponentResourceKey SolidColorBrushKey
55         {
56             get { return new ComponentResourceKey(typeof(CustomControl1), "BackGroudColor"); }
57         }
58     }
59 }
前端代码,记得添加引用
 1 <Window x:Class="WPFdemo9.MainWindow"
 2         xmlns="http://schemas.microsoft.com/winfx/2006/xaml/presentation"
 3         xmlns:x="http://schemas.microsoft.com/winfx/2006/xaml"
 4         xmlns:d="http://schemas.microsoft.com/expression/blend/2008"
 5         xmlns:mc="http://schemas.openxmlformats.org/markup-compatibility/2006"
 6         xmlns:local="clr-namespace:WPFdemo9"
 7         xmlns:res="clr-namespace:Resource;assembly=Resource"
 8         mc:Ignorable="d"
 9         Title="MainWindow" Height="755.381" Width="1297.561">
10     <Grid>
11         <Button x:Name="button1" Content="Button" HorizontalAlignment="Left" Margin="548,345,0,0" VerticalAlignment="Top" Width="259" Height="184" Background="{DynamicResource ResourceKey={x:Static Member=res:CustomControl1.SolidColorBrushKey}}"/>
12     </Grid>
13 </Window>