Dockerfile 自动制作 Docker 镜像(一)—— 基本命令
前言
a. 本文主要为 Docker的视频教程 笔记。
b. 环境为 CentOS 7.0 云服务器
c. 上一篇:手动制作Docker镜像
Dockerfile 基本命令
编辑 Dockerfile 文件:
FROM centos:7
RUN curl -o /etc/yum.repos.d/CentOS-Base.repo http://mirrors.aliyun.com/repo/Centos-7.repo
RUN curl -o /etc/yum.repos.d/epel.repo http://mirrors.aliyun.com/repo/epel-7.repo
RUN yum install httpd
CMD ["httpd","-D","FOREGROUND"]
Dockerfile 中, FROM 表示要基于哪个镜像,RUN 表示在容器中执行的命令, CMD 表示执行命令,注意在 CMD 命令中每个参数都要使用引号和逗号隔开。
构建:
docker image build -t centos7_httpd . # 可以使用 -t <NAME>:<TAG> 格式的参数表示构建出的镜像名
构建过程:
Sending build context to Docker daemon 2.048kB
Step 1/5 : FROM centos:7
---> 5e35e350aded
Step 2/5 : RUN curl -o /etc/yum.repos.d/CentOS-Base.repo http://mirrors.aliyun.com/repo/Centos-7.repo
---> Running in 2d8d6373ba83
...... # 此处省略
Removing intermediate container 2d8d6373ba83 # 注意此处
---> 44dd8be815d9
Step 3/5 : RUN curl -o /etc/yum.repos.d/epel.repo http://mirrors.aliyun.com/repo/epel-7.repo
---> Running in 7f04af4134f5
...... # 此处省略
Removing intermediate container 7f04af4134f5 # 注意此处
---> 5b6b8fadb9aa
Step 4/5 : RUN yum install httpd -y
---> Running in 97c2e32381fc
...... # 此处省略
Removing intermediate container 97c2e32381fc # 注意此处
---> 47a33ea682ed
Step 5/5 : CMD ["httpd","-D","FOREGROUND"]
---> Running in b62798cd6f92
Removing intermediate container b62798cd6f92 # 注意此处
---> 3a24eb0f4fa0
Successfully built 3a24eb0f4fa0
Successfully tagged centos7_httpd:latest
再次构建时会对不变的命令使用缓存,快了很多。
Sending build context to Docker daemon 2.048kB
Step 1/5 : FROM centos:7
---> 5e35e350aded
Step 2/5 : RUN curl -o /etc/yum.repos.d/CentOS-Base.repo http://mirrors.aliyun.com/repo/Centos-7.repo
---> Using cache
---> 44dd8be815d9
Step 3/5 : RUN curl -o /etc/yum.repos.d/epel.repo http://mirrors.aliyun.com/repo/epel-7.repo
---> Using cache
---> 5b6b8fadb9aa
Step 4/5 : RUN yum install httpd -y
---> Using cache
---> 47a33ea682ed
Step 5/5 : CMD ["httpd","-D","FOREGROUND"]
---> Using cache
---> 3a24eb0f4fa0
Successfully built 3a24eb0f4fa0
Successfully tagged centos7_httpd1:latest
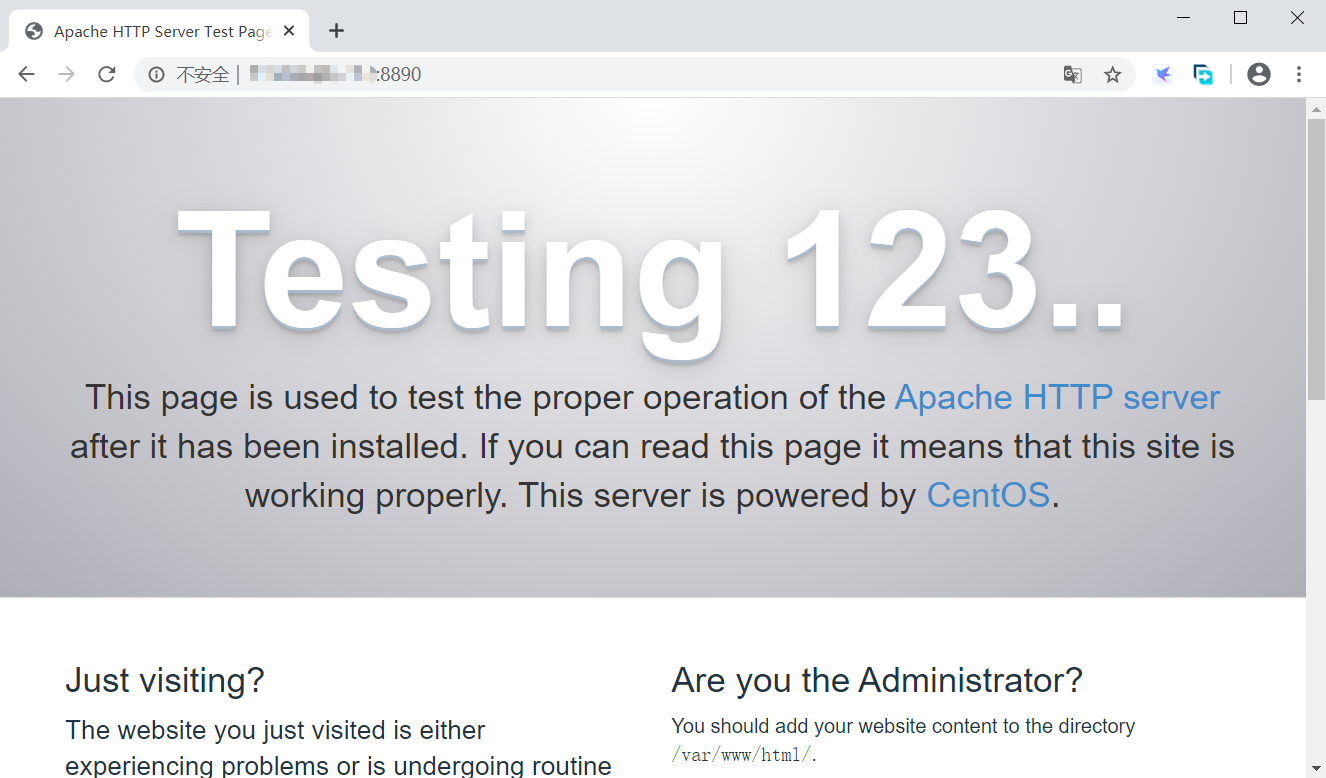
运行镜像 docker run -d -p 8890:80 centos7_httpd,可以访问成功。
注意以上特别标注的地方:Docker 执行每个 RUN 命令时实际上都是在上一个基础上新建一个容器,执行完成后立即保存,在此基础上再执行下一个,直至完成。
因此需要注意的是,很多命令是不生效的,比如 cd 命令,在下一条命令又会变回原始工作路径。如果一定要执行,可以在 dockerfile 中使用 WORKDIR 命令来设置目录,或使用 “&&” 符号关联多条命令。同时注意修改 host 文件也是不会生效的,因为 Docker 每次启动新容器都会修改它的 host 以设置网络。
TIPS: 使用 docker image prune 删除名字和标签均为 “<none> ” 的镜像(强制删除有容器使用的镜像 和 构建过程中被终止时会产生)。
后记
这篇应该是发布时间在一天中最早的了。身为上班社畜,感觉周六似乎是睡不了懒觉的了,又是工作日的时间起床,233333。不过这篇是提前写好的,因为感觉学习不是一个线性的过程,很多时候前面的内容需要学习后面内容后才能理解的更加深刻和透彻,在写后面内容有关文章时,也在不断补充和完善之前的文章(也包括文章结构的调整,这也许就是传说中的重构doge)。