Introduction
This article describes how to create a common toolbar for all pages in a website using master page. If a web application has common set of actions in many web pages such as Save, Export or Print we can use a common tool bar across all the pages. It gives consistency in look and feel as well as implementation. Before going to deep of the application it is worth to look into new asp.net 2.0 Object hierarchies of page framework when using with MasterPage. Following diagram shows object hierarchies would look like at runtime.
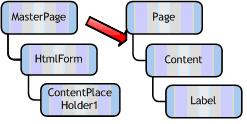
At this point, the page and master page are two separate objects, each with their own children. When it comes time for the master page to do its job, the master page replaces the page’s children with itself.
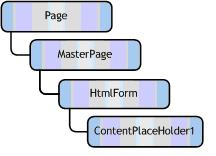
The master page’s next step is to look for Content controls in the controls formerly associated with the page. When the master page finds a Content control that matches a ContentPlaceHolder, it moves the controls into the matching ContentPlaceHolder. In our sample program, the master page will find a match for ContentPlaceHolder1, and copy over the Label. Now, master page is like any other control in the page. When request for this page, first the page load of content page will fire and then the master page’s load event. This is the key point in common toolbar application.
Now let us continue with our application. We can go forward step by step.
Step 1: Creating a master page and designing toolbar with events
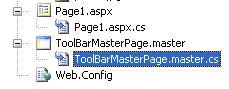
a) Start with new website in Visual Studio 2005 and add new master page as ToolBarMasterPage.master and add a web page as Page1.aspx with masterpage.
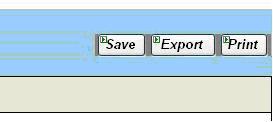
b) Place three buttons in the master page as shown below;
c) Declare a delegate for handle all the events from common toolbar.
public delegate void ToolBarDelegate(object sender, EventArgs e);
This declaration defines a delegate named ToolBarDelegate, which will encapsulate any method that takes object and EventArgs as two parameters and returns nothing.
d) Declare events and delegate for each toolbar triggers
public event ToolBarDelegate SaveEvent; ToolBarDelegate SaveFun;
public event ToolBarDelegate ExportEvent; ToolBarDelegate ExportFun;
public event ToolBarDelegate PrintEvent; ToolBarDelegate PrintFun;The above code declares the events and delegates instances for each controls in the toolbar.
e) Raise Events from Master page.
protected void btnSave_Click(object sender, EventArgs e) { if (SaveFun!= null) SaveFun(sender, e); }
protected void btnExport_Click(object sender, EventArgs e) { if (ExportFun != null) ExportFun(sender,e); }
protected void btnPrint_Click(object sender, EventArgs e) { if (PrintFun != null) PrintFun(sender, e); }
The above code demonstrates how to raise events from master page when common toolbar items trigger an event.
Step 2 : Create a Content page to use Common toolbar.
a) Place a label control in the Pagel.aspx and give value to the ID as lblInfo
b) In the page load method get the MasterPage object of the content page.
ToolBarMasterPage toolbarMasterPage = (ToolBarMasterPage)this.Master; c) Add handler to the Mastepage events.
toolbarMasterPage.SaveEvent += new ToolBarDelegate(SaveData);toolbarMasterPage.ExportEvent += new ToolBarDelegate(ExportData);toolbarMasterPage.PrintEvent += new ToolBarDelegate(PrintData);d) Implement the handler methods.
private void SaveData(object sender, EventArgs e) { //Write Code for saving data. lblInfo.Text = "Saving....."; lblInfo.Visible = true; }
private void ExportData(object sender, EventArgs e) { //Write code for Exporting data. lblInfo.Text = "Exporting....."; lblInfo.Visible = true; }
private void PrintData(object sender, EventArgs e) { //Write code for Printing Data. lblInfo.Text = "Printing....."; lblInfo.Visible = true; }The above methods are actual implementaion of toolbar actions.
Step 3 : Run the application.
a) Right click the Page1.aspx and click set as start page option. This will display the page as shown in the following picture.

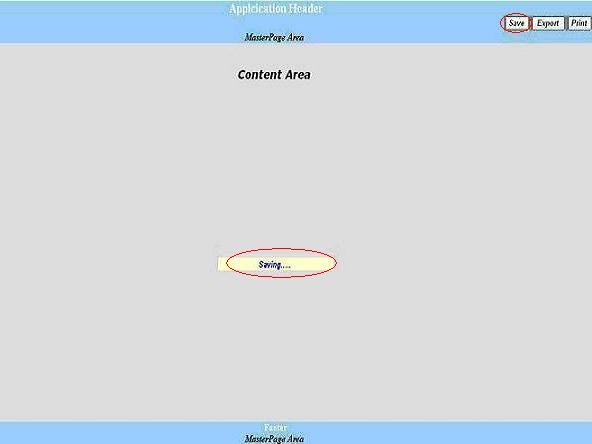
b) Run the application and Click the ‘Save’ Button of the common tool bar on the master page area. This will display ‘Saving... ’ text in the content page area. Picture below shows this.
Step 4 : Disabling a Toolbar control in any page.
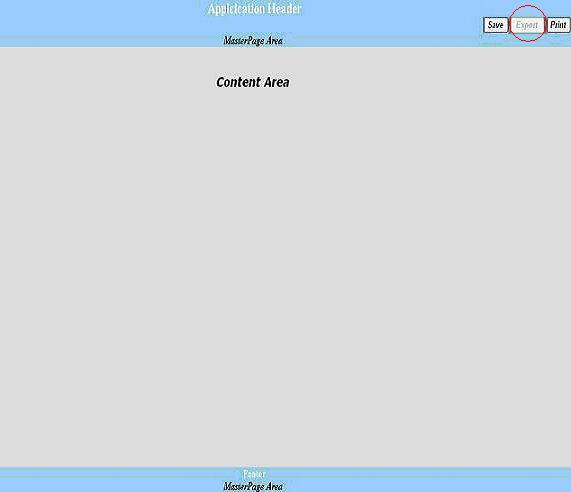
a) if we remove or comment below line from the contente page page_load method the ‘Export’ button of in the tool bar will automatically disabled.
toolbarMasterPage.ExportEvent += new ToolBarDelegate(ExportData); The below diagram shows the toolbar with disabled ‘Export’ button.
This happens automatically because of this line of code in the paga_load of masterpage.
if (ExportFun == null) btnExport.Enabled = false;
I hope this article will help you to create a useful toolbar with common actions for your ASP.NET 2.0 applications.
http://www.codeproject.com/Articles/15169/Creating-a-Common-Toolbar-in-ASP-NET-2-0-using-Mas