集成Jpush
1.用Android Studio创建一个Demo
2.创建激光推送开发者账号,要创建极光推送开发者帐号,请访问极光推送官方网站https://www.jiguang.cn/push
3.在Portal上创建应用
使用注册账号登陆,进入极光控制台后,点击“创建应用”按钮。创建帐号进入极光推送后,首先显示的是创建应用的界面。填上你的应用程序的名称,以及 Android包名这二项就可以了。
4.手动集成,导入相关文件 http://docs.jiguang.cn/jpush/client/Android/android_guide/

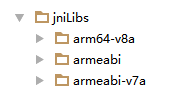
注意:在Android studio中需要建立jni文件夹,在更名为jniLibs,把so文件导进去。
再复制res中的drawable-hdpi,layout,values文件中的资源导入到建立的工程对应的同名目录下
3.配置AndroidManifest.xml
3.1添加权限(注意改包名)
<permission
        android:name="您应用的包名.permission.JPUSH_MESSAGE"
        android:protectionLevel="signature" />
    <uses-permission android:name="您应用的包名.permission.JPUSH_MESSAGE" />
    <uses-permission android:name="android.permission.RECEIVE_USER_PRESENT" />
    <uses-permission android:name="android.permission.INTERNET" />
    <uses-permission android:name="android.permission.WAKE_LOCK" />
    <uses-permission android:name="android.permission.READ_PHONE_STATE" />
    <uses-permission android:name="android.permission.WRITE_EXTERNAL_STORAGE" />
    <uses-permission android:name="android.permission.READ_EXTERNAL_STORAGE" />
    <uses-permission android:name="android.permission.VIBRATE" />
    <uses-permission android:name="android.permission.MOUNT_UNMOUNT_FILESYSTEMS" />
    <uses-permission android:name="android.permission.ACCESS_NETWORK_STATE" />
    <uses-permission android:name="android.permission.WRITE_SETTINGS" />
    <uses-permission android:name="android.permission.ACCESS_WIFI_STATE" />
3.2复制核心代码(执意更改包名以及appkey)
<!-- Required SDK 核心功能-->
        <!-- 可配置android:process参数将PushService放在其他进程中 -->
        <service
            android:name="cn.jpush.android.service.PushService"
            android:enabled="true"
            android:exported="false" >
            <intent-filter>
                <action android:name="cn.jpush.android.intent.REGISTER" />
                <action android:name="cn.jpush.android.intent.REPORT" />
                <action android:name="cn.jpush.android.intent.PushService" />
                <action android:name="cn.jpush.android.intent.PUSH_TIME" />
            </intent-filter>
        </service>

        <!-- since 1.8.0 option 可选项。用于同一设备中不同应用的JPush服务相互拉起的功能。 -->
        <!-- 若不启用该功能可删除该组件,将不拉起其他应用也不能被其他应用拉起 -->
         <service
             android:name="cn.jpush.android.service.DaemonService"
             android:enabled="true"
             android:exported="true">
             <intent-filter >
                 <action android:name="cn.jpush.android.intent.DaemonService" />
                 <category android:name="您应用的包名"/>
             </intent-filter>
         </service>

        <!-- Required SDK核心功能-->
        <receiver
            android:name="cn.jpush.android.service.PushReceiver"
            android:enabled="true" >
          <intent-filter android:priority="1000">
                <action android:name="cn.jpush.android.intent.NOTIFICATION_RECEIVED_PROXY" />
                <category android:name="您应用的包名"/>
            </intent-filter>
            <intent-filter>
                <action android:name="android.intent.action.USER_PRESENT" />
                <action android:name="android.net.conn.CONNECTIVITY_CHANGE" />
            </intent-filter>
            <!-- Optional -->
            <intent-filter>
                <action android:name="android.intent.action.PACKAGE_ADDED" />
                <action android:name="android.intent.action.PACKAGE_REMOVED" />
                <data android:scheme="package" />
            </intent-filter>
        </receiver>

        <!-- Required SDK核心功能-->
        <activity
            android:name="cn.jpush.android.ui.PushActivity"
            android:configChanges="orientation|keyboardHidden"
            android:theme="@android:style/Theme.NoTitleBar"
            android:exported="false" >
            <intent-filter>
                <action android:name="cn.jpush.android.ui.PushActivity" />
                <category android:name="android.intent.category.DEFAULT" />
                <category android:name="您应用的包名" />
            </intent-filter>
        </activity>
        <!-- SDK核心功能-->
        <activity
            android:name="cn.jpush.android.ui.PopWinActivity"
            android:configChanges="orientation|keyboardHidden"
            android:exported="false"
            android:theme="@style/MyDialogStyle">
            <intent-filter>
                <category android:name="android.intent.category.DEFAULT" />
                <category android:name="您应用的包名" />
            </intent-filter>
        </activity>

        <!-- Required SDK核心功能-->
        <service
            android:name="cn.jpush.android.service.DownloadService"
            android:enabled="true"
            android:exported="false" >
        </service>

        <!-- Required SDK核心功能-->
        <receiver android:name="cn.jpush.android.service.AlarmReceiver" />

        <!-- User defined. 用户自定义的广播接收器-->
         <receiver
             android:name="您自己定义的Receiver"
             android:enabled="true">
             <intent-filter>
                 <!--Required 用户注册SDK的intent-->
                 <action android:name="cn.jpush.android.intent.REGISTRATION" />
                 <!--Required 用户接收SDK消息的intent-->
                 <action android:name="cn.jpush.android.intent.MESSAGE_RECEIVED" />
                 <!--Required 用户接收SDK通知栏信息的intent-->
                 <action android:name="cn.jpush.android.intent.NOTIFICATION_RECEIVED" />
                 <!--Required 用户打开自定义通知栏的intent-->
                 <action android:name="cn.jpush.android.intent.NOTIFICATION_OPENED" />
                 <!-- 接收网络变化 连接/断开 since 1.6.3 -->
                 <action android:name="cn.jpush.android.intent.CONNECTION" />
                 <category android:name="您应用的包名" />
             </intent-filter>
         </receiver>

        <!-- Required. For publish channel feature -->
        <!-- JPUSH_CHANNEL 是为了方便开发者统计APK分发渠道。-->
        <!-- 例如: -->
        <!-- 发到 Google Play 的APK可以设置为 google-play; -->
        <!-- 发到其他市场的 APK 可以设置为 xxx-market。 -->
        <!-- 目前这个渠道统计功能的报表还未开放。-->
        <meta-data android:name="JPUSH_CHANNEL" android:value="developer-default"/>
        <!-- Required. AppKey copied from Portal -->
        <meta-data android:name="JPUSH_APPKEY" android:value="您应用的Appkey"/>
4.创建自己的广播接收器MyReceiver
/**
 * 自定义接收器
 * <p>
 * 如果不定义这个 Receiver,则:
 * 1) 默认用户会打开主界面
 * 2) 接收不到自定义消息
 */
public class MyReceiver extends BroadcastReceiver {
    private static final String TAG = "JPush";
    private List<String> list = new ArrayList<>();
    public void onReceive(Context context, Intent intent) {
        Bundle bundle = intent.getExtras();
        if (JPushInterface.ACTION_REGISTRATION_ID.equals(intent.getAction())) {
            String regId = bundle.getString(JPushInterface.EXTRA_REGISTRATION_ID);
            Log.d(TAG, "[MyReceiver] 接收Registration Id : " + regId);
        } else if (JPushInterface.ACTION_MESSAGE_RECEIVED.equals(intent.getAction())) {
            Log.d(TAG, "收到了自定义消息。消息内容是:" + bundle.getString(JPushInterface.EXTRA_MESSAGE));
            // 自定义消息不会展示在通知栏,完全要开发者写代码去处理

            String content = bundle.getString(JPushInterface.EXTRA_MESSAGE);
            Toast.makeText(context, content, Toast.LENGTH_SHORT).show();
        } else if (JPushInterface.ACTION_NOTIFICATION_RECEIVED.equals(intent.getAction())) {
            // 在这里可以做些统计,或者做些其他工作
        } else if (JPushInterface.ACTION_NOTIFICATION_OPENED.equals(intent.getAction())) {
            String content = bundle.getString(JPushInterface.EXTRA_ALERT);
//此处,我们取出的是通知的内容。还可以取出别的信息,这个大家可自行处理

//           在这里可以自己写代码去定义用户点击后的行为
            Intent i = new Intent(context, TestActivity.class);
            i.putExtra("content", content);
            i.setFlags(Intent.FLAG_ACTIVITY_NEW_TASK);
            context.startActivity(i);
        } else {
        }
    }
}
5.集成Jpush Android SDK的混淆
在工程的混淆文件proguard.jar中添加以下配置
-dontoptimize
-dontpreverify
-dontwarn cn.jpush.**
-keep class cn.jpush.* { ; }
-dontwarn cn.jiguang.**
-keep class cn.jiguang.* { ; }
6.注册(最好在application中注册)
JPushInterface.init(this);
这样,在极光推送控制台推送消息,程序就可以接收了。