一、前言
Elasticsearch 作为开源搜索引擎服务器,其核心功能在于索引和搜索数据。索引是把文档写入 Elasticsearch 的过程,搜索是匹配查询条件找出文档的过程,实现全文检索一个分析过程,分析过程主要分为两步,第一步是词条化,分词器把输入文本转化为一个个的词条流;第二步是过滤,在这个阶段有若干个过滤器处理词条流中的词条,比如停用词过滤器会从词条流中去除不相干的词条,同义词过滤器会添加新词条或者改变已有词条,小写过滤器会把所有词条变成小写。
Elasticsearch 内置多种分词器可供使用,在索引和查询过程中我们可以指定分词器,也可以通过安装插件的方式使用第三方分词工具。比如目前使用最多的第三方插件 elasticsearch-analysis-ik,其代码托管在 GItHub 上,项目地址为:https://github.com/medcl/elasticsearch-analysis-ik,统一版本号之后的 IK 版本与 Elasticsearch 的版本一致。
二、安装 IK 分词插件
2.1 参照官方文档安装IK分词器
1)直接到 https://github.com/medcl/elasticsearch-analysis-ik/releases 下载对应版本 zip 包
在 elasticsearch的 plugin 目录下新建 ik 目录,然后将其解压到 ik 目录
[root@masternode ~]$ unzip /usr/software/elasticsearch-analysis-ik-5.6.0.zip
目录结构如下:
[esuser@masternode ik]$ pwd
/opt/elk/elasticsearch-5.6.0/plugins/ik
[esuser@masternode ik]$ ll
total 1420
-rw-r--r-- 1 esuser esuser 263965 May 30 21:43 commons-codec-1.9.jar
-rw-r--r-- 1 esuser esuser  61829 May 30 21:43 commons-logging-1.2.jar
drwxr-xr-x 2 esuser esuser    319 May 30 23:08 config
-rw-r--r-- 1 esuser esuser  51384 May 30 21:43 elasticsearch-analysis-ik-5.6.0.jar
-rw-r--r-- 1 esuser esuser 736658 May 30 21:43 httpclient-4.5.2.jar
-rw-r--r-- 1 esuser esuser 326724 May 30 21:43 httpcore-4.4.4.jar
-rw-r--r-- 1 esuser esuser   2666 May 30 21:43 plugin-descriptor.properties
2)使用 elasticsearch-plugin 命令安装
[esuser@masternode elasticsearch-5.6.0]$ ./bin/elasticsearch-plugin install https://github.com/medcl/elasticsearch-analysis-ik/releases/download/v5.6.0/elasticsearch-analysis-ik-5.6.0.zip
安装 ik 插件之后,修改目录的访问权限为 esuer,如下:
[root@masternode plugins]# chown -R esuser:esuser ik
在 IK 插件的配置文件(/opt/elk/elasticsearch-5.6.0/plugins/ik/config/IKAnalyzer.cfg.xml)中可以指定词库的位置,也可以自定义字典 hotwords.dic,每一个词语一行,然后添加到配置文件中,多个配置文件之间使用英文分号隔开。
比如下面的设置:
<?xml version="1.0" encoding="UTF-8"?>
<!DOCTYPE properties SYSTEM "http://java.sun.com/dtd/properties.dtd">
<properties>
        <comment>IK Analyzer 扩展配置</comment>
        <!--用户可以在这里配置自己的扩展字典 -->
        <entry key="ext_dict">extra_main.dic;hotwords.dic</entry>
        <!--用户可以在这里配置自己的扩展停止词字典-->
        <entry key="ext_stopwords">extra_stopword.dic</entry>
        <!--用户可以在这里配置远程扩展字典 -->
        <!-- <entry key="remote_ext_dict">words_location</entry> -->
        <!--用户可以在这里配置远程扩展停止词字典-->
        <!-- <entry key="remote_ext_stopwords">words_location</entry> -->
</properties>
设置好词典之后,重启 Elasticsearch,如下:
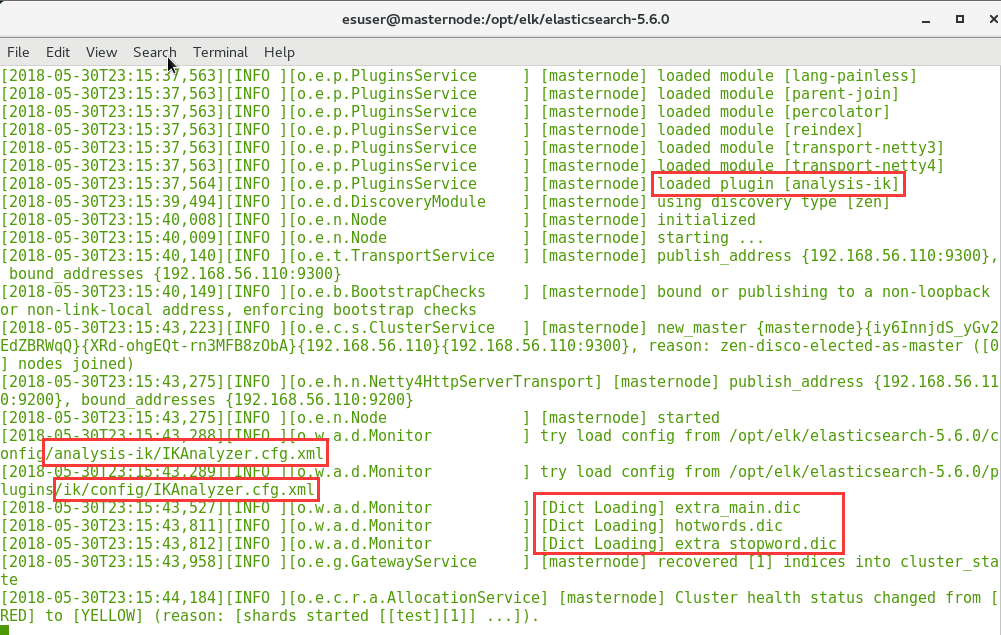
发现日志中已经加载了我们上面设置的词典,表明 IK 分词器插件已经安装成功。
2.2、IK 分词算法比较
IK 分词器主要使用两种分词算法:ik_max_word 和 ik_smart,两者的区别如下:
ik_max_word:会将文本做最细粒度的拆分,比如会将"中华人民共和国国歌"拆分为"中华人民共和国,中华人民,中华,华人,人民共和国,人民,人,民,共和国,共和,和,国国,国歌",会穷尽各种可能的组合;
ik_smart:会做最粗粒度的拆分,即智能切分,比如会将"中华人民共和国国歌"拆分为"中华人民共和国,国歌"。
三、安装 Head 插件
Elastic-Head(简称 Head)是一个 HTML5 编写的集群操作和管理工具,可以对集群进行很多操作。在 Head 插件中可以显示集群的拓扑结构,执行索引和节点级别的操作,同时也能够输入 RESTful 命令和 Elasticsearch 交互。ES5.0之后,head 不再作为插件放在其 {es_home}/plugins 目录下,而是变为独立运行的本地或 server 服务,需要单独运行。如果让 head 作为 server 程序部署和运行,则需要借助 npm 和 grunt 组件完成。npm 是随同 node.js 一起安装的包管理工具,能解决 node.js 代码部署上的很多问题。grunt 是一个基于任务的 Javascript 命令行构建工具,grunt 及其插件是通过 npm 安装并管理的。
3.1 安装 Git
elasticsearch-head 是一款开源软件,被托管在 Github 上面,所以如果我们要使用它,需要先安装 git,通过 git 获取 elasticsearch-head。
安装 git 的源码包
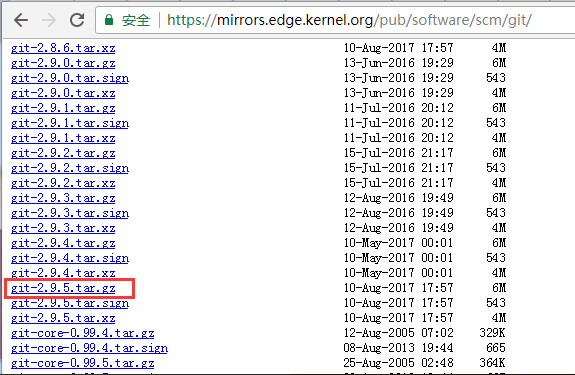
1)进入 git 官网:https://git-scm.com/download,获取 linux 版本的 git,或者直接访问所有版本的目录:https://mirrors.edge.kernel.org/pub/software/scm/git/,比如下载 git-2.9.5.tar.gz,如下:
2)安装 gcc、g++ 以及编译 git 所需要的包
安装 gcc 编译器
[root@masternode ~]# yum install gcc
安装 g++ 编译器
[root@masternode ~]# yum install gcc-c++
安装编译所依赖的其他包
[root@masternode ~]# yum install curl-devel expat-devel gettext-devel openssl-devel zlib-devel
[root@masternode ~]# yum install gcc perl-ExtUtils-MakeMaker
3)编译并安装 git
[root@masternode ~]# tar zxvf /usr/software/git-2.9.5.tar.gz
[root@masternode git-2.9.5]# ./configure --prefix=/opt/git/git-2.9.5 && make install
编译并指定安装目录 /opt/git/git-2.9.5,然后安装。
4)设置 git 的环境变量
[root@masternode bin]# vi /etc/profile
在文件最后一行添加
export PATH=/opt/git/git-2.9.5/bin:$PATH
保存后执行
[root@masternode bin]# source /etc/profile
使配置文件生效
3.2 安装 Node.js
运行 elasticsearch-head 会用到 grunt,而 grunt 需要 npm 包管理器,所以 node.js 是必须要安装的。
安装编译后的可执行文件 Node.js
访问 node.js 的官网: https://nodejs.org/en/
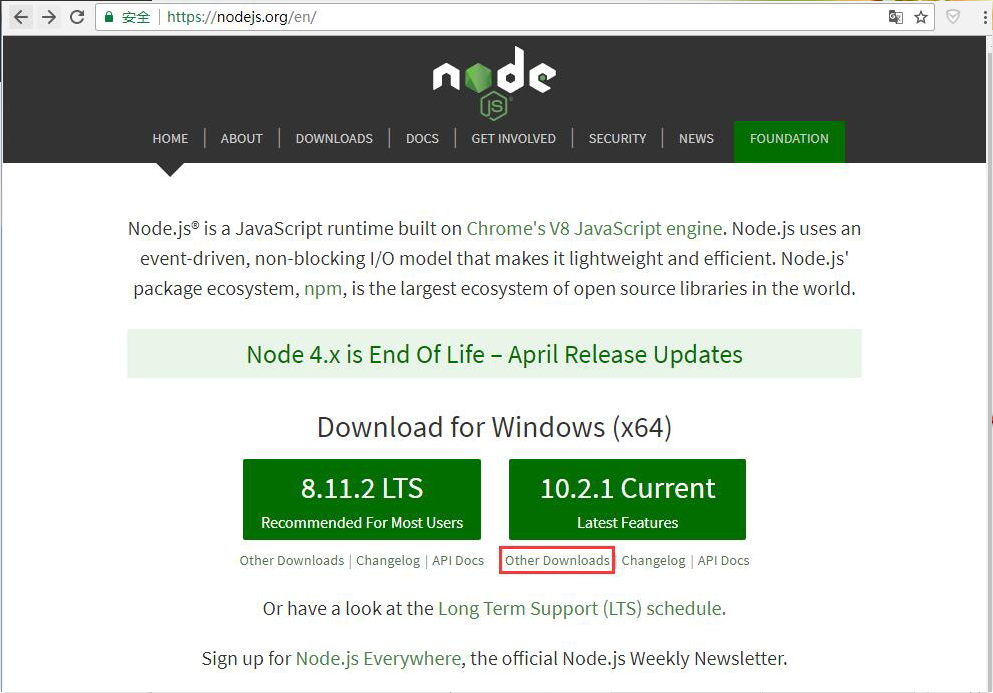
选择 LTS 版本,如下:
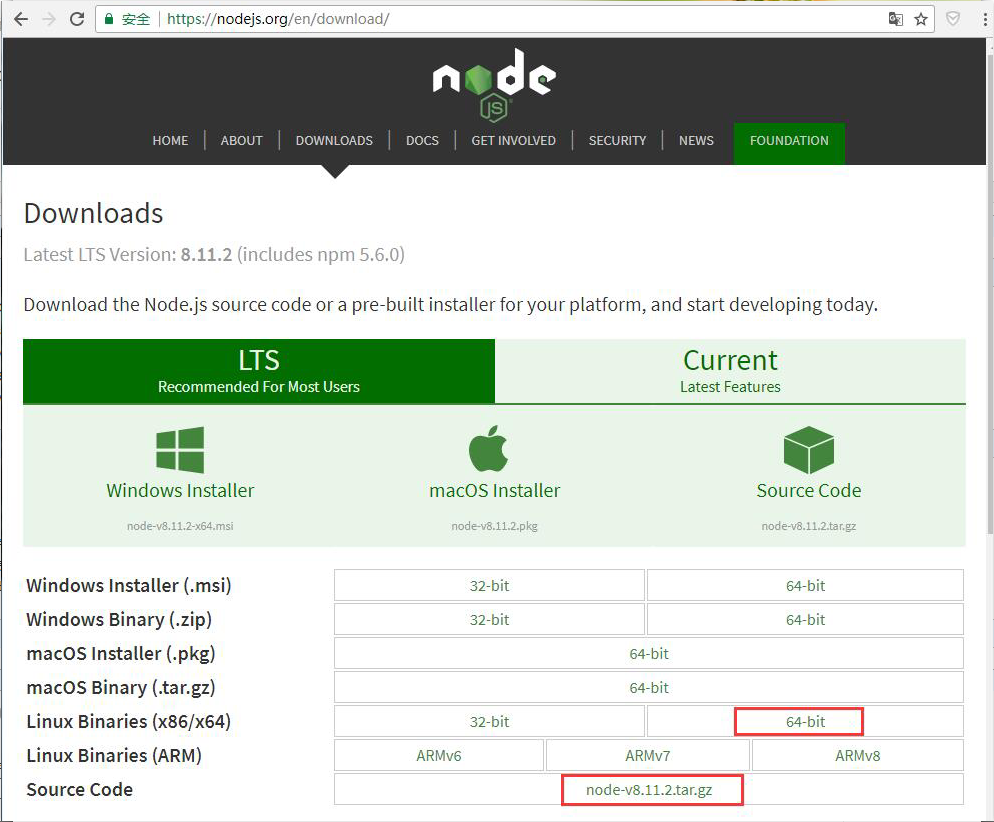
一般开放源代码软件都会至少有两个版本发布:
Source Code 是源代码版,你需要自己编译成可执行软件。
Linux Binaries 是二进制可执行版,已经给你编译好了,直接下载解压就可以使用。
此处下载二进制包 node-v8.11.2-linux-x64.tar.xz,然后解压:
[root@masternode software]# xz -d node-v8.11.2-linux-x64.tar.xz
[root@masternode software]# tar -xvf node-v8.11.2-linux-x64.tar -C /opt/nodejs
[root@masternode software]# vi /etc/profile
然后输入双引号里面的命令:":$",跳到文件最后一行
将下面这行拷贝到文件最底部,并保存
export PATH=/opt/nodejs/node-v8.11.2-linux-x64/bin:$PATH
更新 profile,使更改生效
[root@masternode software]# source /etc/profile
安装 cnpm
由于使用 npm 安装依赖包太慢(都是国外的),所以使用国内淘宝的镜像吧,安装 cnpm
[root@masternode software]# npm install -g cnpm --registry=https://registry.npm.taobao.org
3.3 验证以上软件
可以通过查看其版本号来验证以上安装的软件,如下:
[root@masternode software]# node -v
v8.11.2
[root@masternode software]# npm -v
5.6.0
[root@masternode software]# cnpm -v
cnpm@5.3.0 (/opt/nodejs/node-v8.11.2-linux-x64/lib/node_modules/cnpm/lib/parse_argv.js)
npm@5.10.0 (/opt/nodejs/node-v8.11.2-linux-x64/lib/node_modules/cnpm/node_modules/npm/lib/npm.js)
node@8.11.2 (/opt/nodejs/node-v8.11.2-linux-x64/bin/node)
npminstall@3.6.2 (/opt/nodejs/node-v8.11.2-linux-x64/lib/node_modules/cnpm/node_modules/npminstall/lib/index.js)
prefix=/opt/nodejs/node-v8.11.2-linux-x64
linux x64 3.10.0-862.el7.x86_64
registry=https://registry.npm.taobao.org
如上所示,说明 Node 环境已经配置成功。
3.4 安装 head 插件
[root@masternode ~]# cd /opt/eshead
使用 git 命令下载 elasticsearch-head 到本地:
[root@masternode eshead]# git clone git://github.com/mobz/elasticsearch-head.git
[root@masternode eshead]# cd elasticsearch-head
安装 elasticsearch-head 依赖包:
[root@masternode elasticsearch-head]# cnpm install
如果运行 # cnpm install 之后出现如下错误:
optional install error: Package require os(darwin) not compatible with your platform(linux)
可运行如下命令解决:
[root@masternode elasticsearch-head]# cnpm rebuild node-sass
然后再次运行 # cnpm install 进行安装:
[root@masternode elasticsearch-head]# cnpm install
修改 Head 插件的配置文件
[root@masternode elasticsearch-head]# vi Gruntfile.js
找到如下元素,将 hostname 的值修改为 '*',表示允许所有 IP 可以访问 head 插件:
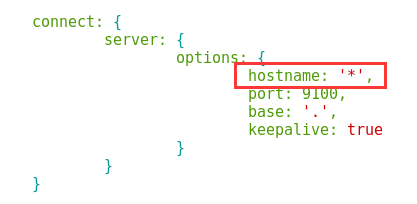
保存后退出 vi。
修改 Elasticsearch 的配置文件
编辑 /opt/elk/elasticsearch-5.6.0/config/elasticsearch.yml,添加如下设置:
http.cors.enabled: true
http.cors.allow-origin: "*"
3.5 开启 9100 端口
如果需要在别的机器上访问 head 插件,防火墙必须放行 9100 端口。
永久开启 9100 端口
[root@masternode elasticsearch-head]# firewall-cmd --zone=public --add-port=9100/tcp --permanent
重启防火墙
[root@masternode elasticsearch-head]# firewall-cmd --reload
3.6 分别启动 Elasticsearch 和 head 插件
将 head 插件的目录所有者修改为 esuser:
[root@masternode opt]# chown -R esuser:esuser eshead
启动 Elasticsearch,如下:
[esuser@masternode elasticsearch-5.6.0]$ pwd
/opt/elk/elasticsearch-5.6.0
[esuser@masternode elasticsearch-5.6.0]$ ./bin/elasticsearch
启动 head 插件,如下:
[esuser@masternode elasticsearch-head]$ pwd
/opt/eshead/elasticsearch-head
[esuser@masternode elasticsearch-head]$ ./node_modules/grunt/bin/grunt server
(node:6654) ExperimentalWarning: The http2 module is an experimental API.
Running "connect:server" (connect) task
Waiting forever...
Started connect web server on http://localhost:9100
如上,表示 elasticsearch-head 插件启动成功。
3.7 访问 head 插件
浏览器输入 http://192.168.56.110:9100,单节点返回如下页面。前提是 Gruntfile.js 中的 hostname 修改为 '*',且防火墙放行 9100 端口。
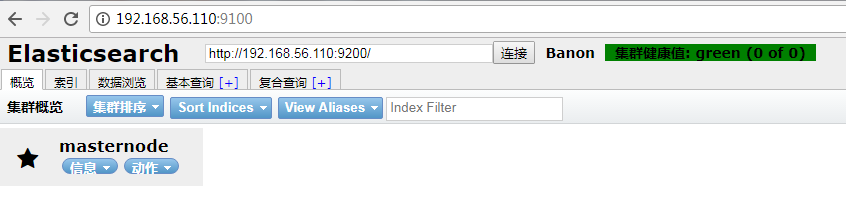
实心五角星 表示主节点(master node)。
集群返回如下页面:

实心圆圈 表示工作节点(data node)。
创建索引之后显示如下:
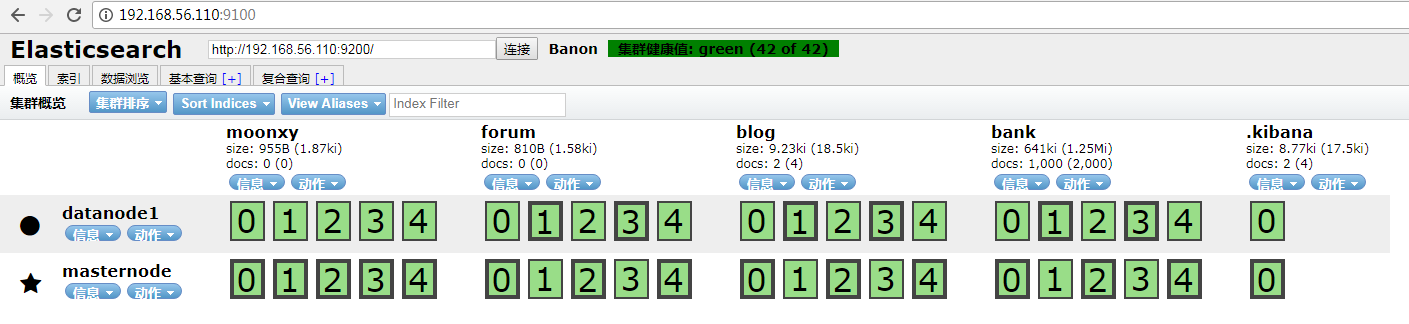
其中每一个绿色小方格均代表一个数据分片(shard),横向每一行均代表一个节点(node),纵向每一列均代表一个索引(index)。
附录
其他安装细节可参考如下文章: