三、方法 1、length 2、index()3、get() reverse()4、not()5、filter()6、find()7、each()8、addBack()9、attr()10、toggleClass()
        11、append()12、after()/before()13、on()14、one()15、hover()16、text()/html()17、animate()18、hide()show()19、prop()等显示隐藏
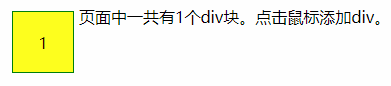
1.获取元素个数length
$("img").size();
size()方法1.8以后版本已废弃,改用length
 --》
--》
    <style type="text/css">
        div {
        border:1px solid green;
        background:yellow;
        margin:5px;
        padding:20px;
        text-align:center;
        height:20px;
        20px;
        float:left;
        }
    </style>
<body>
   页面中一共有<span>0</span>个div块。点击鼠标添加div。
    <script>
        $(function () {
            document.onclick = function () {
                var i = $("div").length + 1;
                $(document.body).append($("<div>" + i + "</div>"))
                $("span").html(i);
            }
        })
    </script>
</body>
2、index()
![]()
div{
	border:1px solid #003a75;
	background:#fcff9f;
	margin:5px; padding:5px;
	text-align:center;
	height:20px; 20px;
	float:left;
}
<div>0</div><div>1</div><div>2</div><div>3</div><div>4</div><div>5</div>
<script>
       $(function(){
            $("div").click(function(){
                   var idx = $("div").index(this);
                   $("span").html(idx.toString());
                    })
       })
</script>
3.get() reverse()
![]()
  div {
           border:1px solid green;
           color:aquamarine;
           margin:5px;
           padding:5px;
           height:20px;
           20px;
           float:left;
        }
<div style="background:#FFFFFF">1</div>
    <div style="background:#CCCCCC">2</div>
    <div style="background:#999999">3</div>
    <div style="background:#666666">4</div>
    <div style="background:#333333">5</div>
    <div style="background:#000000">6</div>
    <script>
        function disp(divs) {
            for (var i = 0; i < divs.length;i++){
                $(document.body).append($("<div style='background:"+divs[i].style.background+";'>"+divs[i].innerHTML+"</div>"));
            }
        }
        $(function () {
            var aDiv = $("div").get();    //转化为div对象数组
            disp(aDiv.reverse());          //反序,传给处理函数
        })
    </script>
4、not()方法
![]()
div{
	background:#fcff9f;
	margin:5px; padding:5px;
	height:40px; 40px;
	float:left;
}
.green{ background:#66FF66; }
.gray{ background:#CCCCCC; }
#blueone{ background:#5555FF; }
.myClass{
	border:2px solid #000000;
}
<body>
	<div></div>
	<div id="blueone"></div>
	<div></div>
	<div class="green"></div>
	<div class="green"></div>
	<div class="gray"></div>
	<div></div>
$(function(){
	$("div").not(".green, #blueone").addClass("myClass");
});
</body>
$("li[title]").not("[title*=isaac]") //所有设置了title 属性的li标记,但不包括title值中任意匹配字符串isaac的。
注意:not()方法所接受的参数不包含特定的元素,只能是通用的表达式。
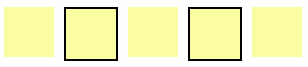
5、过滤 filter()方法
![]()
div{
	margin:5px; padding:5px;
	height:40px; 40px;
	float:left;
}
.myClass1{
	background:#fcff9f;
}
.myClass2{
	border:2px solid #000000;
}
<body>
	<div></div>
	<div class="middle"></div>
	<div class="middle"></div>
	<div class="middle"></div>
	<div class="middle"></div>
	<div></div>
<script>
$(function(){
   $("div").addClass("myClass1").filter("[class*=middle]").addClass("myClass2");
});
</script>
</body>
$("li").filter("[title*=isaac]") 等同 $("li[title*=isaac]") //注意:filter中的参数,不能直接是等于匹配,只能是前匹配^= 后匹配&=,任意匹配*=
div{
	margin:5px; padding:5px;
	height:40px; 40px;
	float:left;
}
.myClass1{
	background:#fcff9f;
}
.myClass2{
	border:2px solid #000000;
}
   <div id="first"></div>
	<div id="second"></div>
	<div id="third"></div>
	<div id="fourth"></div>
	<div id="fifth"></div>
$(function(){
	$("div").addClass("myClass1").filter(function(index){
		return index == 1 || $(this).attr("id") == "fourth";
	}).addClass("myClass2");
});
6、find()

.myClass{
	background:#ffde00;
}
<body>
	<p><span>Hello</span>, how are you?</p>
<script>
$(function(){
	$("p").find("span").addClass("myClass");
});
</script>
</body>
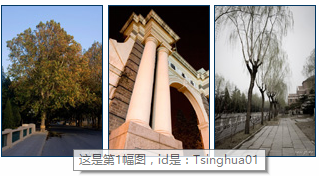
7、each() 遍历
img{
border:1px solid #003863;
}
<img src="01.jpg" id="Tsinghua01">
<img src="02.jpg" id="Tsinghua02">
<img src="03.jpg" id="Tsinghua03">
<img src="04.jpg" id="Tsinghua04">
<img src="05.jpg" id="Tsinghua05">
<script language="javascript">
$(function(){
$("img").each(function(index){
var i= parseInt(index)+1;
this.title = "这是第" + i+ "幅图,id是:" + this.id;
});
});
</script>
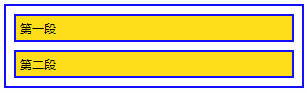
8、andSelf()已废弃 改为addBack() 把之前的元素集添加到当前集合中
.myBackground{
	background:#ffde00;
}
.myBorder{
	border:2px solid #0000FF;
}
p{
	margin:8px; padding:4px;
	font-size:12px;
}
<div>
	<p>第一段</p>
	<p>第二段</p>
<script>
$(function(){
	$("div").find("p").addClass("myBackground").andSelf().addClass("myBorder");
});
</script>
</div>
9、attr()设置或返回被选元素的属性和值

        <div>第0项 <span></span></div>
	<div>第1项 <span></span></div>
	<div>第2项 <span></span></div>
   $(function(){
       $("div").attr("id",function(){
         return "div-id"+index;
     }).each(function(){
           $(this).find("span").html("(id='"+this.id+"')");
     })
})
更换背景图
 $("img").click(function () {
     var i = $(this).attr("src");
     $("body").css("background-image", "url(" + i + ")");
            })
10、toggleClass() //对添加和移除类进行切换


<p>高亮?</p>
$(function(){
    $("p").click(function(){
       $(this).toggleClass("highlight");
   })

})
也可用on方法
$("p").on("click",function(){
             $(this).toggleClass("highlight");
           })
11、append() //在被选元素的结尾插入指定的内容
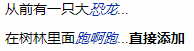
<p>从前有一只大<em title="Dinosaur">恐龙</em>...</p>
<p>在树林里面<em>跑啊跑</em>...</p>
$(function(){
    $("p").eq(1).append("<b>直接添加</b>")
})
12、after() //在被选元素后插入指定内容 before() //在被选元素前插入指定的内容
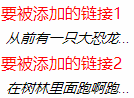
<a>要被添加的链接1</a>
<a>要被添加的链接2</a>
<p>从前有一只大恐龙</p>
<p>在树林里面跑啊跑</p>
$(function(){
   $("p:eq(0)").after($("a:eq(1)"));
})
13、bind()向元素添加事件处理程序目前用on() //想被选元素添加一个或多个事件处理程序,以及当事件发生时运行的函数
on() 方法是 bind()、live() 和 delegate() 方法的新的替代品
语法:$(selector).on(有效事件,childSelector,data,事件发生时运行的函数
hahaha--->
.intro{color:red;}
<p>hahaha</p>
$(function(){
   $("p").on("mouseover mouseout",function(){
      $("p").toggleClass("intro")
  })
})
点击 ------》 
<p>点击</p>
<div></div>
$(function(){
  $("p").on("click",function(){
      $("div").append("<p>点击事件</p>")
   })
})
14.one() //被选元素添加一个或多个事件处理程序,并规定当事件发生时运行的函数,每个元素只能运行一次事件处理程序函数
语法:$(seletor).one(event,data,function)
![]()
div{
   border:1px solid #000;
   background:#fffd77;
   height:50px;50px;
   padding:8px;margin:5px;
   text-align:center;float:left;
}
$(function(){
    for(var i=0;i<10;i++){
        $("body").append($("<div>Click<br>Me!</div>"));
        var iCounter=1;
        $("div").one("click",function(){
            $(this).css({backaground:"red",color:"#fff"}).html(iCounter++);
        })
    }
})
15.hover() //当鼠标指针悬停在被选元素上时要运行的两个函数。方法触发 mouseenter和 mouseleave事件。
 ----->
<img src="12.jpg">
$(function(){
   $("img").hover(function(){$(this).css("opacity",".5")},function(){$(this).css("opacity","1.0")});
})
16、text() //设置或返回被选元素的文本内容

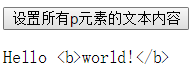
<button>设置所有p元素的文本内容</button>
<p>这是一个段落。</p>
$(document).ready(function(){
	$("button").click(function(){
		$("p").text("Hello <b>world!</b>");
	});
});
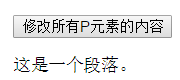
![]()
<button>修改所有P元素的内容</button>
<p>这是一个段落。</p>
$(function(){
  $("button").click(function(){
     $("p").html("Hello<b>world!</b>");
   })
})
17、animate() //执行 CSS 属性集的自定义动画
语法:(selector).animate({styles},speed,easing,callback)
easing:默认swing 开头/结尾慢,中间快 ;liner 匀速
 $("#d1").animate({ "top": "400px", "left": "400px" }, 1000, function () {
            $("#d1").animate({ "top": "0px", "left": "800px" }, 1000);
        });
18、显示隐藏 hideshow伸缩式 ,slideUp/slideDown上下式,fadeOut/fadeIn渐变式
$("#d1").hide();$("#d1")show()
hide(1000);show(1000);
hide(1000,function(){alert("haha")});
19、prop()方法设置或返回被选元素的属性和值

    $("#xy").click(function () {
            if (this.checked) {
                $("[class=xy]").prop("checked", true);
            } else {
                $("[class=xy]").prop("checked",false);
            }
        })