上篇见:Spring Cloud Alibaba 简介(上) - Chen洋 - 博客园 (cnblogs.com)
下篇见:Spring Cloud Alibaba 简介(下) - Chen洋 - 博客园 (cnblogs.com)
概述
服务消费者的创建与服务提供者大同小异,这里采用最原始的一种方式,即显示的使用 LoadBalanceClient 和 RestTemplate 结合的方式来访问。
POM
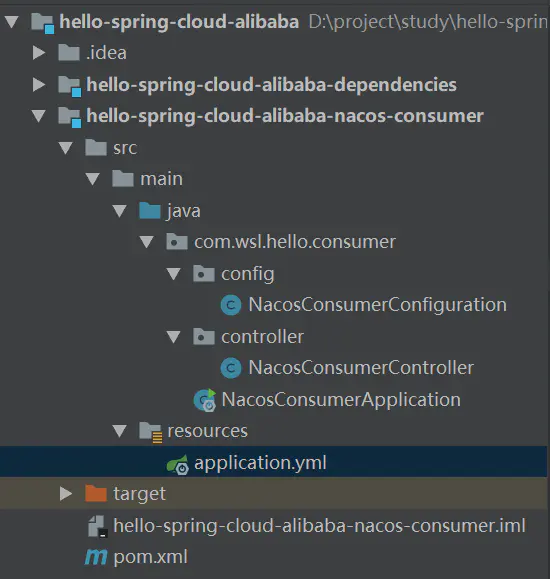
创建一个工程名为 hello-spring-cloud-alibaba-nacos-consumer 的服务消费者项目,pom.xml 配置如下:
<?xml version="1.0" encoding="UTF-8"?>
<project xmlns="http://maven.apache.org/POM/4.0.0" xmlns:xsi="http://www.w3.org/2001/XMLSchema-instance"
         xsi:schemaLocation="http://maven.apache.org/POM/4.0.0 http://maven.apache.org/xsd/maven-4.0.0.xsd">
    <modelVersion>4.0.0</modelVersion>
    <parent>
        <groupId>com.wsl</groupId>
        <artifactId>hello-spring-cloud-alibaba-dependencies</artifactId>
        <version>1.0.0-SNAPSHOT</version>
        <relativePath>../hello-spring-cloud-alibaba-dependencies/pom.xml</relativePath>
    </parent>

    <artifactId>hello-spring-cloud-alibaba-consumer</artifactId>
    <packaging>jar</packaging>

    <properties>
        <java.version>1.8</java.version>
    </properties>

    <dependencies>
        <!-- Spring Boot Begin -->
        <dependency>
            <groupId>org.springframework.boot</groupId>
            <artifactId>spring-boot-starter-web</artifactId>
        </dependency>
        <dependency>
            <groupId>org.springframework.boot</groupId>
            <artifactId>spring-boot-starter-actuator</artifactId>
        </dependency>
        <dependency>
            <groupId>org.springframework.boot</groupId>
            <artifactId>spring-boot-starter-test</artifactId>
            <scope>test</scope>
        </dependency>
        <!-- Spring Boot End -->

        <!-- Spring Cloud Begin -->
        <dependency>
            <groupId>com.alibaba.cloud</groupId>
            <artifactId>spring-cloud-starter-alibaba-nacos-discovery</artifactId>
        </dependency>
        <dependency>
            <groupId>com.alibaba.cloud</groupId>
            <artifactId>spring-cloud-starter-alibaba-nacos-config</artifactId>
        </dependency>
        <!-- Spring Cloud End -->
    </dependencies>

    <build>
        <plugins>
            <plugin>
                <groupId>org.springframework.boot</groupId>
                <artifactId>spring-boot-maven-plugin</artifactId>
                <configuration>
                    <mainClass>com.wsl.consumer.ConsumerApplication</mainClass>
                </configuration>
            </plugin>
        </plugins>
    </build>

</project>
Application
package com.wsl.hello.consumer;

import org.springframework.boot.SpringApplication;
import org.springframework.boot.autoconfigure.SpringBootApplication;
import org.springframework.cloud.client.discovery.EnableDiscoveryClient;

@SpringBootApplication
@EnableDiscoveryClient
public class NacosConsumerApplication {
    public static void main(String[] args) {
        SpringApplication.run(NacosConsumerApplication.class, args);
    }
}
Configuration
创建一个名为 NacosConsumerConfiguration 的 Java 配置类,主要作用是为了注入 RestTemplate
package com.wsl.hello.consumer.config;

import org.springframework.context.annotation.Bean;
import org.springframework.context.annotation.Configuration;
import org.springframework.web.client.RestTemplate;

@Configuration
public class NacosConsumerConfiguration {

    @Bean
    public RestTemplate restTemplate() {
        return new RestTemplate();
    }
}
Controller
创建一个名为NacosConsumerController测试用的 Controller
package com.wsl.hello.consumer.controller;

import org.springframework.beans.factory.annotation.Autowired;
import org.springframework.beans.factory.annotation.Value;
import org.springframework.cloud.client.ServiceInstance;
import org.springframework.cloud.client.loadbalancer.LoadBalancerClient;
import org.springframework.web.bind.annotation.GetMapping;
import org.springframework.web.bind.annotation.RestController;
import org.springframework.web.client.RestTemplate;

@RestController
public class NacosConsumerController {

    @Autowired
    private LoadBalancerClient loadBalancerClient;

    @Autowired
    private RestTemplate restTemplate;

    @Value("${spring.application.name}")
    private String appName;

    @GetMapping(value = "/test/app/name")
    public String test() {
        //使用 LoadBalanceClient 和 RestTemplate 结合的方式来访问
        ServiceInstance serviceInstance = loadBalancerClient.choose("nacos-provider");
        String url = String.format("http://%s:%s/test/%s", serviceInstance.getHost(), serviceInstance.getPort(), appName);
        return restTemplate.getForObject(url, String.class);
    }
}
application.yml
spring:
  application:
    name: nacos-consumer
  cloud:
    nacos:
      discovery:
        server-addr: 127.0.0.1:8848

server:
  port: 9091

management:
  endpoints:
    web:
      exposure:
        include: "*"
启动工程
通过浏览器访问 http://localhost:8848/nacos,即 Nacos Server 网址
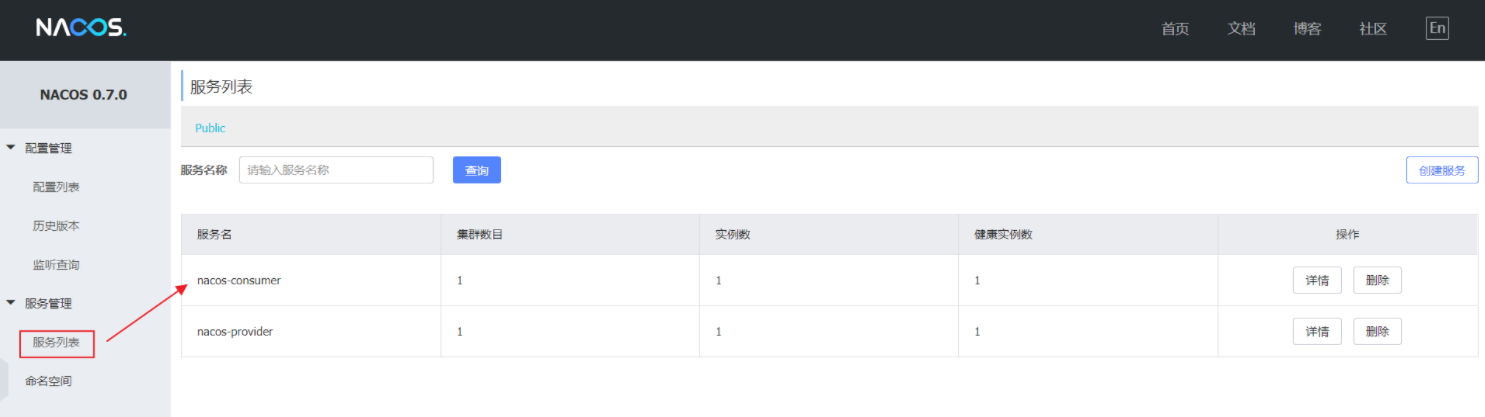
你会发现多了一个名为 nacos-consumer 的服务
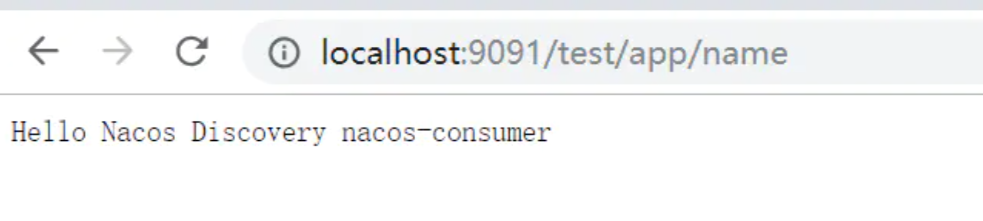
这时打开 http://localhost:9091/test/app/name ,你会在浏览器上看到:
Hello Nacos Discovery nacos-consumer
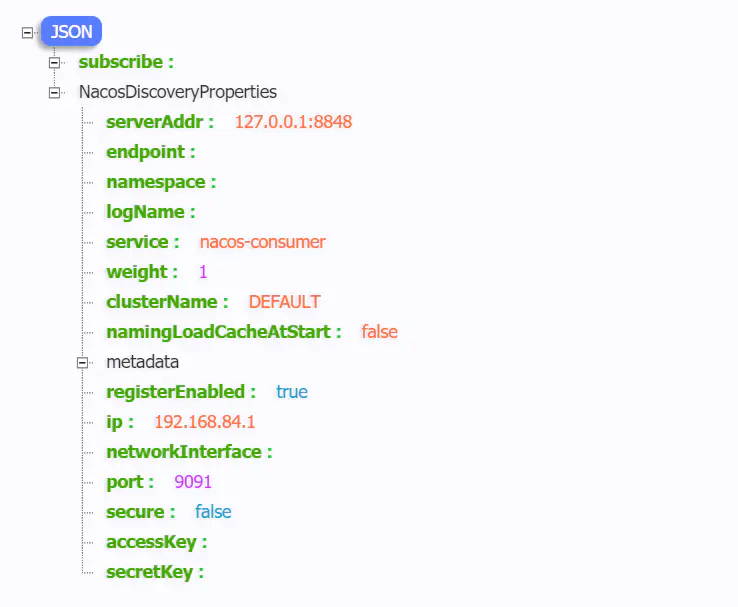
服务的端点检查
通过浏览器访问 http://localhost:9091/actuator/nacos-discovery 你会在浏览器上看到:
6.Spring Cloud Alibaba 创建服务消费者(Feign)
概述
Feign 是一个声明式的伪 Http 客户端,它使得写 Http 客户端变得更简单。使用 Feign,只需要创建一个接口并注解。它具有可插拔的注解特性,可使用 Feign 注解和 JAX-RS 注解。Feign 支持可插拔的编码器和解码器。Feign 默认集成了 Ribbon,Nacos 也很好的兼容了 Feign,默认实现了负载均衡的效果
- Feign 采用的是基于接口的注解
- Feign 整合了 ribbon
POM
创建一个工程名为 hello-spring-cloud-alibaba-nacos-consumer-feign 的服务消费者项目,pom.xml 配置如下:
<?xml version="1.0" encoding="UTF-8"?>
<project xmlns="http://maven.apache.org/POM/4.0.0" xmlns:xsi="http://www.w3.org/2001/XMLSchema-instance"
         xsi:schemaLocation="http://maven.apache.org/POM/4.0.0 http://maven.apache.org/xsd/maven-4.0.0.xsd">
    <modelVersion>4.0.0</modelVersion>
    <parent>
        <groupId>com.wsl</groupId>
        <artifactId>hello-spring-cloud-alibaba-dependencies</artifactId>
        <version>1.0.0-SNAPSHOT</version>
        <relativePath>../hello-spring-cloud-alibaba-dependencies/pom.xml</relativePath>
    </parent>
    <artifactId>hello-spring-cloud-alibaba-consumer-feign</artifactId>
    <packaging>jar</packaging>

    <name>hello-spring-cloud-alibaba-consumer-feign</name>
    <description>Demo project for Spring Cloud Alibaba</description>

    <properties>
        <java.version>1.8</java.version>
    </properties>

    <dependencies>
        <!-- Spring Boot Begin -->
        <dependency>
            <groupId>org.springframework.boot</groupId>
            <artifactId>spring-boot-starter-web</artifactId>
        </dependency>
        <dependency>
            <groupId>org.springframework.boot</groupId>
            <artifactId>spring-boot-starter-actuator</artifactId>
        </dependency>
        <dependency>
            <groupId>org.springframework.boot</groupId>
            <artifactId>spring-boot-starter-test</artifactId>
            <scope>test</scope>
        </dependency>
        <!-- Spring Boot End -->

        <!-- Spring Cloud Begin -->
        <dependency>
            <groupId>com.alibaba.cloud</groupId>
            <artifactId>spring-cloud-starter-alibaba-nacos-discovery</artifactId>
        </dependency>
        <dependency>
            <groupId>org.springframework.cloud</groupId>
            <artifactId>spring-cloud-starter-openfeign</artifactId>
        </dependency>
        <dependency>
            <groupId>com.alibaba.cloud</groupId>
            <artifactId>spring-cloud-starter-alibaba-sentinel</artifactId>
        </dependency>
        <dependency>
            <groupId>com.alibaba.cloud</groupId>
            <artifactId>spring-cloud-starter-alibaba-nacos-config</artifactId>
        </dependency>
        <!-- Spring Cloud End -->
    </dependencies>

    <build>
        <plugins>
            <plugin>
                <groupId>org.springframework.boot</groupId>
                <artifactId>spring-boot-maven-plugin</artifactId>
                <configuration>
                    <mainClass>com.wsl.consumer.ConsumerFeignApplication</mainClass>
                </configuration>
            </plugin>
        </plugins>
    </build>

</project>
主要增加了 org.springframework.cloud:spring-cloud-starter-openfeign 依赖
Application
通过 @EnableFeignClients 注解开启 Feign 功能
package com.wsl.hello.consumer.feign;

import org.springframework.boot.SpringApplication;
import org.springframework.boot.autoconfigure.SpringBootApplication;
import org.springframework.cloud.client.discovery.EnableDiscoveryClient;
import org.springframework.cloud.openfeign.EnableFeignClients;

@SpringBootApplication
@EnableDiscoveryClient
@EnableFeignClients
public class NacosConsumerFeignApplication {
    public static void main(String[] args) {
        SpringApplication.run(NacosConsumerFeignApplication.class, args);
    }
}
创建 Feign 接口
通过 @FeignClient("服务名") 注解来指定调用哪个服务。代码如下:
package com.wsl.hello.consumer.feign.service;

import org.springframework.cloud.openfeign.FeignClient;
import org.springframework.web.bind.annotation.GetMapping;
import org.springframework.web.bind.annotation.PathVariable;

@FeignClient(value = "nacos-provider")
public interface FeignService {
    @GetMapping(value = "/test/{message}")
    String test(@PathVariable("message") String message);
}
Controller
package com.wsl.hello.consumer.feign.controller;

import com.wsl.hello.consumer.feign.service.FeignService;
import org.springframework.beans.factory.annotation.Autowired;
import org.springframework.web.bind.annotation.GetMapping;
import org.springframework.web.bind.annotation.RestController;

@RestController
public class NacosConsumerFeignController {

    @Autowired
    private FeignService FeignService;

    @GetMapping(value = "/test/hi")
    public String test() {
        return FeignService.test("Hi Feign");
    }
}
application.yml
spring:
  application:
    name: nacos-consumer-feign
  cloud:
    nacos:
      discovery:
        server-addr: 127.0.0.1:8848

server:
  port: 9092

management:
  endpoints:
    web:
      exposure:
        include: "*"
目录结构:

启动工程
通过浏览器访问 http://localhost:8848/nacos,即 Nacos Server 网址
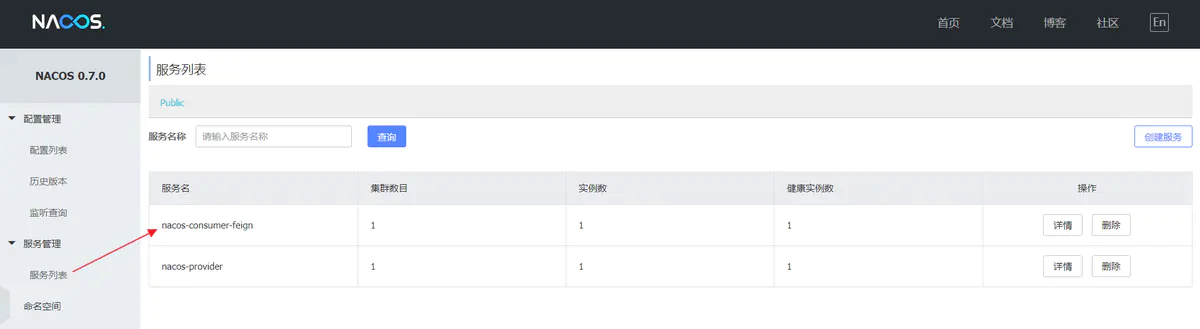
你会发现多了一个名为 nacos-consumer-feign 的服务
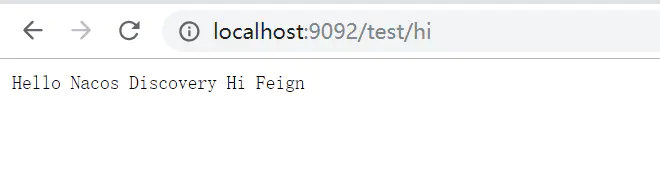
这时打开 http://localhost:9092/test/hi ,你会在浏览器上看到:
Hello Nacos Discovery Hi Feign
测试负载均衡
-
idea启动多个实例
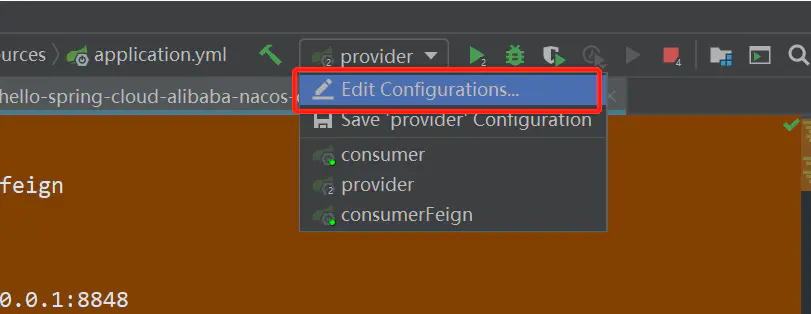
在这里选√
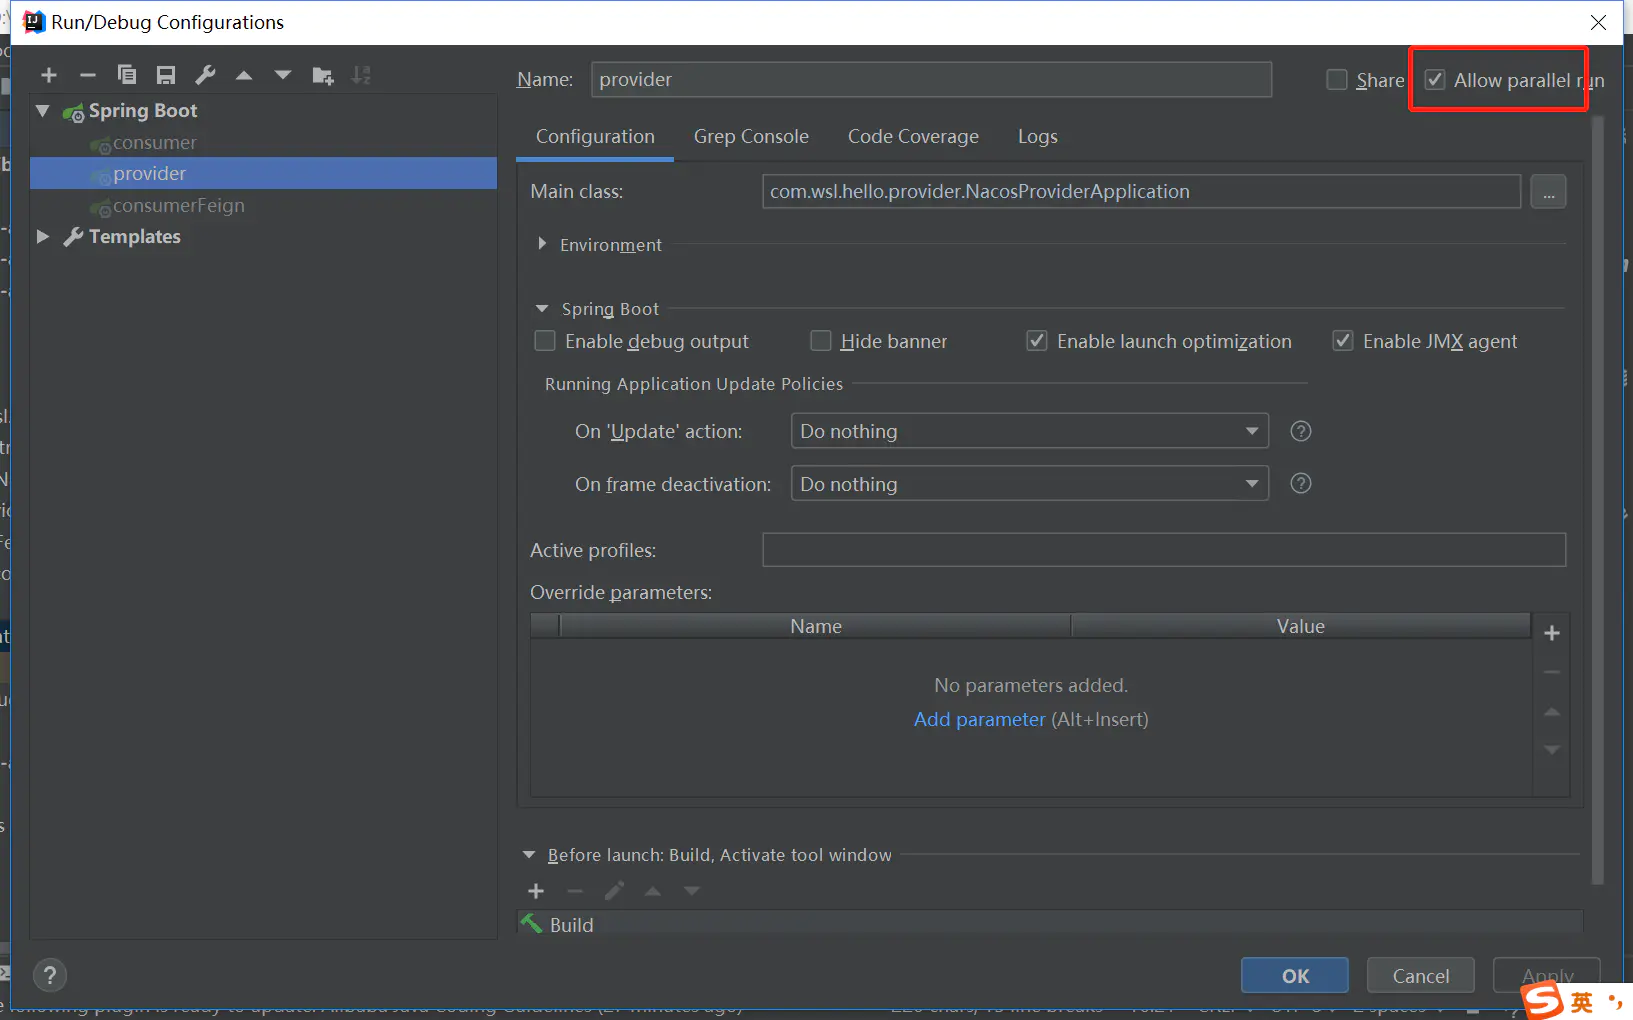
- 然后修改yml文件里的端口号再启动一个就可以了。
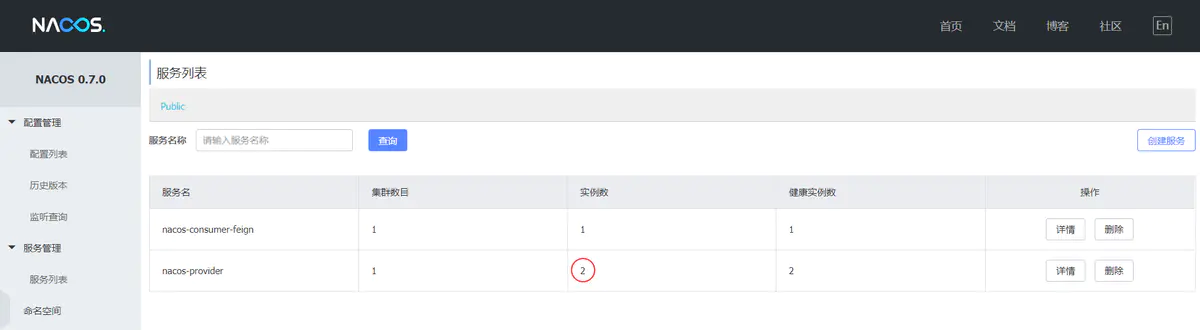
- 启动多个
consumer-provider实例,效果图如下:
- 修改
consumer-provider项目中的Controller代码,用于确定负载均衡生效
package com.wsl.hello.provider.controller;

import org.springframework.beans.factory.annotation.Value;
import org.springframework.web.bind.annotation.GetMapping;
import org.springframework.web.bind.annotation.PathVariable;
import org.springframework.web.bind.annotation.RestController;

@RestController
public class NacosProviderController {

    @Value("${server.port}")
    private String port;

    @GetMapping(value = "/test/{message}")
    public String test(@PathVariable String message) {
        return "Hello Nacos Discovery " + message + " i am from port " + port;
    }
}
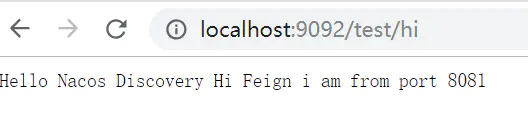
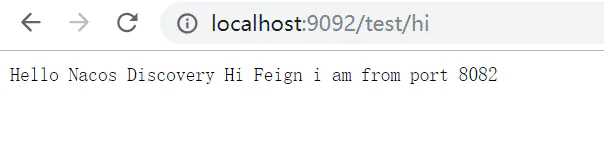
在浏览器上多次访问 http://localhost:9092/test/hi,浏览器交替显示:
7.Spring Cloud Alibaba 熔断(Sentinel)
概述
在微服务架构中,根据业务来拆分成一个个的服务,服务与服务之间可以通过 RPC 相互调用,在 Spring Cloud 中可以用 RestTemplate + LoadBalanceClient 和 Feign 来调用。为了保证其高可用,单个服务通常会集群部署。由于网络原因或者自身的原因,服务并不能保证 100% 可用,如果单个服务出现问题,调用这个服务就会出现线程阻塞,此时若有大量的请求涌入,Servlet 容器的线程资源会被消耗完毕,导致服务瘫痪。服务与服务之间的依赖性,故障会传播,会对整个微服务系统造成灾难性的严重后果,这就是服务故障的 “雪崩” 效应。
为了解决这个问题,业界提出了熔断器模型。
阿里巴巴开源了 Sentinel 组件,实现了熔断器模式,Spring Cloud 对这一组件进行了整合。在微服务架构中,一个请求需要调用多个服务是非常常见的,如下图:
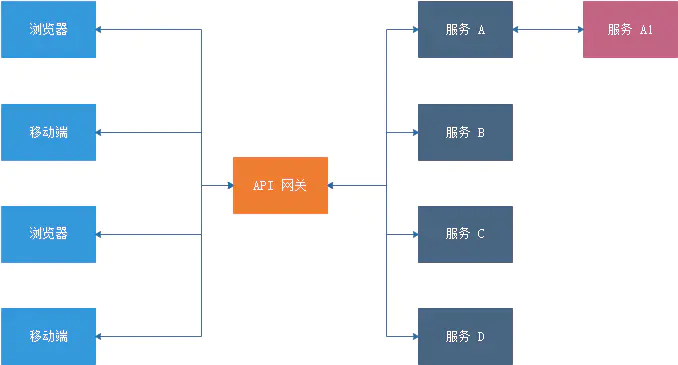
较底层的服务如果出现故障,会导致连锁故障。当对特定的服务的调用的不可用达到一个阀值熔断器将会被打开。
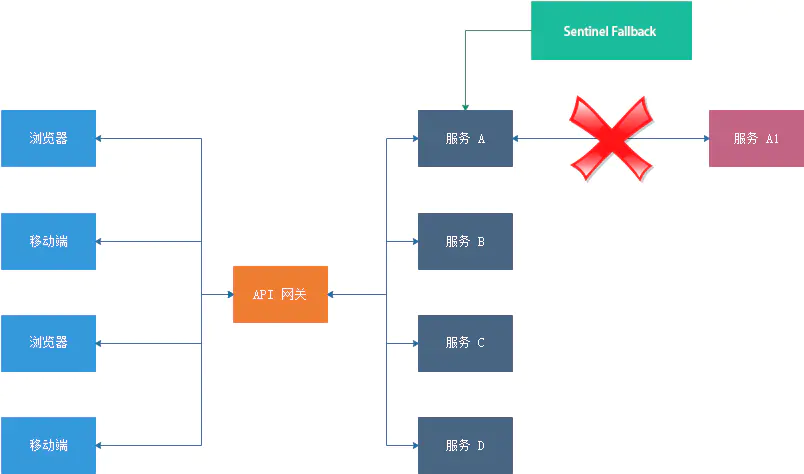
熔断器打开后,为了避免连锁故障,通过 fallback 方法可以直接返回一个固定值。
什么是 Sentinel
随着微服务的流行,服务和服务之间的稳定性变得越来越重要。 Sentinel 以流量为切入点,从流量控制、熔断降级、系统负载保护等多个维度保护服务的稳定性。
Sentinel 的特征
- 丰富的应用场景: Sentinel 承接了阿里巴巴近 10 年的 双十一大促流量 的核心场景,例如秒杀(即突发流量控制在系统容量可以承受的范围)、消息削峰填谷、实时熔断下游不可用应用等。
- 完备的实时监控: Sentinel 同时提供实时的监控功能。您可以在控制台中看到接入应用的单台机器秒级数据,甚至 500 台以下规模的集群的汇总运行情况。
- 广泛的开源生态: Sentinel 提供开箱即用的与其它开源框架/库的整合模块,例如与 Spring Cloud、Dubbo、gRPC 的整合。您只需要引入相应的依赖并进行简单的配置即可快速地接入 Sentinel。
- 完善的 SPI 扩展点: Sentinel 提供简单易用、完善的 SPI 扩展点。您可以通过实现扩展点,快速的定制逻辑。例如定制规则管理、适配数据源等。
Feign 中使用 Sentinel
如果要在您的项目中引入 Sentinel,使用 group ID 为 org.springframework.cloud 和 artifact ID 为 spring-cloud-starter-alibaba-sentinel 的 starter。
<dependency>
    <groupId>com.alibaba.cloud</groupId>
    <artifactId>spring-cloud-starter-alibaba-sentinel</artifactId>
</dependency>
Sentinel 适配了 Feign 组件。但默认是关闭的。需要在配置文件中配置打开它,在配置文件增加以下代码:
feign:
  sentinel:
    enabled: true
在 Service 中@FeignClient注解增加 fallback属性用来指定类
package com.wsl.hello.consumer.feign.service;

import com.wsl.hello.consumer.feign.service.fallback.FallbackServiceImpl;
import org.springframework.cloud.openfeign.FeignClient;
import org.springframework.web.bind.annotation.GetMapping;
import org.springframework.web.bind.annotation.PathVariable;

@FeignClient(value = "nacos-provider", fallback = FallbackServiceImpl.class)
public interface FeignService {
    @GetMapping(value = "/test/{message}")
    String test(@PathVariable("message") String message);
}
创建熔断器类并实现对应的 Feign 接口
package com.wsl.hello.consumer.feign.service.fallback;

import com.wsl.hello.consumer.feign.service.FeignService;

@Component
public class FallbackServiceImpl implements FeignService {

    @Override
    public String test(String message) {
        return "test fallback";
    }
}
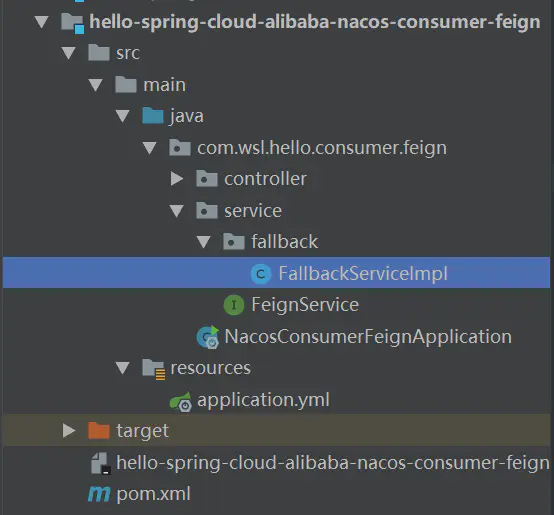
目录结构:
测试熔断器
此时我们关闭服务提供者,再次请求 http://localhost:9092/test/hi 浏览器会显示:
test fallback