前言
EF已经发布很久了,也有越来越多的人在使用EF。如果你已经能够非常熟练的使用EF的功能,那么就不需要看了。本文意在将自己使用EF的方式记录下来备忘,也是为了给刚刚入门的同学一些指导。看完此文,你应该就学会以CodeFirst的方式操作数据库了。
本文主要内容
- CodeFirst生成数据库的流程
- 初始化配置
- 数据库实体构造技巧
- 主外键设置
- decimal精度修改
项目框架搭建
本文所使用的开发工具是vs2015(EF6.1.3)
第一步:新建一个空白项目

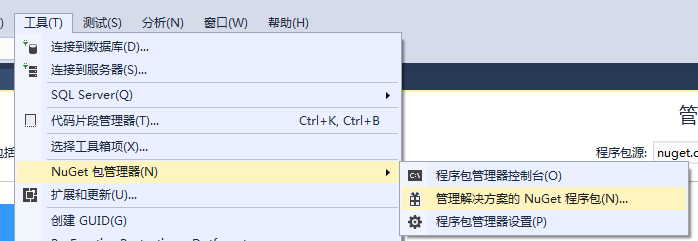
第二步:引用EntityFramework

DbContext的初始化配置
DbContext作为操作数据库的网关,十分重要。我们需要对它进行一些类的初始化操作,例如:解决团队开发中,多人迁移数据库造成的修改覆盖问题。
代码如下:

using System;
using System.Collections.Generic;
using System.Data.Entity;
using System.Linq;
using System.Text;
using System.Threading.Tasks;
using System.Data.Entity.ModelConfiguration.Conventions;
namespace EFDemo.Core.EF
{
    /// <summary>
    /// EF访问数据库的接口
    /// </summary>
    public class MyDbContext : System.Data.Entity.DbContext
    {
        public MyDbContext()
            : base("EFDemo")
        {
            //解决团队开发中,多人迁移数据库造成的修改覆盖问题。
            Database.SetInitializer<MyDbContext>(null);
            //base.Configuration.AutoDetectChangesEnabled = false;
            ////关闭EF6.x 默认自动生成null判断语句
            //base.Configuration.UseDatabaseNullSemantics = true;
        }
        public MyDbContext(System.Data.Common.DbConnection oConnection)
            : base(oConnection, true)
        {
            this.Configuration.LazyLoadingEnabled = true;
        }
        protected override void OnModelCreating(DbModelBuilder modelBuilder)
        {
            //表名不用复数形式
            modelBuilder.Conventions.Remove<PluralizingTableNameConvention>();
            //移除一对多的级联删除约定,想要级联删除可以在 EntityTypeConfiguration<TEntity>的实现类中进行控制
            modelBuilder.Conventions.Remove<OneToManyCascadeDeleteConvention>();
            //多对多启用级联删除约定,不想级联删除可以在删除前判断关联的数据进行拦截
            modelBuilder.Conventions.Remove<ManyToManyCascadeDeleteConvention>();

            base.OnModelCreating(modelBuilder);
        }
        //将实体对象写在这里,就可以生成对应的数据。 如下:
        //public DbSet<Demo> Demo { get; set; }


    }


}
项目位置:

Migrations下Configuration类的初始化配置
Configuration类的初始化配置十分重要,我们需要通过配置解决一系列迁移问题。例如:允许自动迁移,自动迁移默认情况下不扔掉列在我们的数据库中的表。如果我们不希望这样的行为,我们可以告诉迁移明确允许数据丢失的配置类的AutomaticMigrationDataLossAllowed属性设置为true。
代码如下:
namespace EFDemo.Core.Migrations
{
    using System;
    using System.Data.Entity;
    using System.Data.Entity.Migrations;
    using System.Linq;

    internal sealed class Configuration : DbMigrationsConfiguration<EFDemo.Core.EF.MyDbContext>
    {
        public Configuration()
        {
            //允许自动迁移
            //不然会报错Unable to update database to match the current model because there are pending changes and automatic migration is disabled. Either write the pending model changes to a code-based migration or enable automatic migration. Set DbMigrationsConfiguration.AutomaticMigrationsEnabled to true to enable automatic migration.You can use the Add-Migration command to write the pending model changes to a code-based migration.

            //允许自动迁移
            AutomaticMigrationsEnabled = true;
            //自动迁移默认情况下不扔掉列在我们的数据库中的表。如果我们不希望这样的行为,我们可以告诉迁移明确允许数据丢失的配置类的AutomaticMigrationDataLossAllowed属性设置为true。
            AutomaticMigrationDataLossAllowed = true;
        }

        protected override void Seed(EF.MyDbContext context)
        {

            //  This method will be called after migrating to the latest version.

            //  You can use the DbSet<T>.AddOrUpdate() helper extension method
            //  to avoid creating duplicate seed data. E.g.
            //
            //    context.People.AddOrUpdate(
            //      p => p.FullName,
            //      new Person { FullName = "Andrew Peters" },
            //      new Person { FullName = "Brice Lambson" },
            //      new Person { FullName = "Rowan Miller" }
            //    );
            //
        }
    }
}
项目位置:

数据库对应实体对象的定义
CodeFirst模式需要我们先定义实体,然后通过实体生成数据。
通常我们设计数据库表时,每个表都有(ID,是否删除,备注,添加人,添加时间,修改人,修改时间)等字段。我们可以用基类处理
基类实体:

省市区表:
班级表:
学生表:
 View Code
班级表和学生表是一对多的关系,省市区表和学生表是一对多的关系,同时学生表中有多个省市区表的外键。
项目位置:

使用命令生成数据库
第一步:将实体对象加入到DbContext中,
如下:
//将实体对象写在这里,就可以生成对应的数据。 如下:
        //public DbSet<Demo> Demo { get; set; }

        public DbSet<Public_Area> Public_Area { get; set; }
        public DbSet<T_Classes> T_Classes { get; set; }
        public DbSet<T_Student> T_Student { get; set; }
第二步:在EFDemo.Core项目下的App.config文件夹中添加生成数据库的配置项

配置文件代码如下:
name="EFDemo"中的EFDemo要和DbContex中的一致。
<?xml version="1.0" encoding="utf-8"?>
<configuration>
  <configSections>
    <!-- For more information on Entity Framework configuration, visit http://go.microsoft.com/fwlink/?LinkID=237468 -->
    <section name="entityFramework" type="System.Data.Entity.Internal.ConfigFile.EntityFrameworkSection, EntityFramework, Version=6.0.0.0, Culture=neutral, PublicKeyToken=b77a5c561934e089" requirePermission="false" />
  </configSections>
  <connectionStrings>
    <!--生成数据库的连接字符串-->
    <add name="EFDemo" connectionString="Data Source=.;Initial Catalog=EFDemoDB;User ID=sa;Password=123456;MultipleActiveResultSets=True;Application Name=EntityFramework" providerName="System.Data.SqlClient" />
  </connectionStrings>
  <entityFramework>
    <defaultConnectionFactory type="System.Data.Entity.Infrastructure.LocalDbConnectionFactory, EntityFramework">
      <parameters>
        <parameter value="mssqllocaldb" />
      </parameters>
    </defaultConnectionFactory>
    <providers>
      <provider invariantName="System.Data.SqlClient" type="System.Data.Entity.SqlServer.SqlProviderServices, EntityFramework.SqlServer" />
    </providers>
  </entityFramework>
</configuration>
第三步:执行更新命令
启动项目一定要选择EFDemo.Core

生成数据库如下:


主外键关系设置
班级和学生一对多关系的设置:

一个表中的多个外键是另一个表中的主键的情况:学生表和省市县表

生成的数据库如下:

需要注意的是:这种情况,在Public_Area表中不能反向设置 public virtual List<T_Student> T_Student ,不然会报错。
decimal怎么保存四位小数
decimal默认保留两位小数,我们需要通过如下设置让其保留四位小数。
在DbContext中配置班级表中的Money字段让其保留四位小数:

执行Update-Database命令:
结果如下:

使用EF操作数据库数据
第一步:
让EFDemo.Web应用EFDemo.Core程序集。
第二步:
配置EFDemo.Web中的webconfig中的数据库连接字符串:
 <connectionStrings>
    <!--操作数据库的连接字符串-->
    <add name="EFDemo" connectionString="Data Source=.;Initial Catalog=EFDemoDB;User ID=sa;Password=123456;MultipleActiveResultSets=True;Application Name=EntityFramework" providerName="System.Data.SqlClient" />
  </connectionStrings>
第三步:
使用EF向数据库添加数据
    public ActionResult Index()
        {
            using (var db = new Core.EF.MyDbContext())
            {
                Public_Area area1 = new Public_Area()
                {
                    ID = Guid.NewGuid(),
                    Name = "河南",
                    ParentID = Guid.NewGuid()

                };
                db.Public_Area.Add(area1);
                Public_Area area2 = new Public_Area()
                {
                    ID = Guid.NewGuid(),
                    Name = "郑州",
                    ParentID = area1.ID

                };
                db.Public_Area.Add(area2);
                Public_Area area3 = new Public_Area()
                {
                    ID = Guid.NewGuid(),
                    Name = "新郑",
                    ParentID = area2.ID

                };
                db.Public_Area.Add(area3);

                //添加测试数据
                T_Classes classes = new T_Classes()
                {
                    Name = "高中三班",
                    Money = 2000
                };
                db.T_Classes.Add(classes);
                T_Student student = new T_Student()
                {
                    ClassesID = classes.ID,
                    Name = "张三",
                    Phone = "15236265820",
                    Sex = true,
                    ProvinceID = area1.ID,
                    CityID = area2.ID,
                    CountyID = area3.ID,
                };
                db.T_Student.Add(student);
                db.SaveChanges();
            }
            return View();
        }
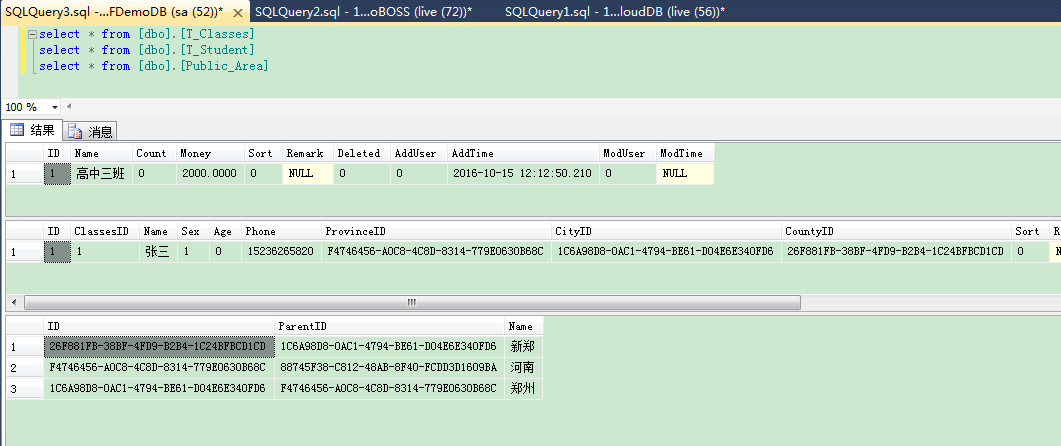
第四步:
查看数据库数据
Demo完整代码下载
转载自:http://www.cnblogs.com/eggTwo/p/5959158.html