版本控制介绍
版本控制是指对软件开发过程中各种程序代码、配置文件及说明文档等文件变更的管理,是软件配置管理的核心思想之一。
版本控制最主要的功能就是追踪文件的变更。它将什么时候、什么人更改了文件的什么内容等信息忠实地了记录下来。每一次文件的改变,文件的版本号都将增加。除了记录版本变更外,版本控制的另一个重要功能是并行开发。软件开发往往是多人协同作业,版本控制可以有效地解决版本的同步以及不同开发者之间的开发通信问题,提高协同开发的效率。并行开发中最常见的不同版本软件的错误(Bug)修正问题也可以通过版本控制中分支与合并的方法有效地解决。
具体来说,在每一项开发任务中,都需要首先设定开发基线,确定各个配置项的开发初始版本,在开发过程中,开发人员基于开发基线的版本,开发出所需的目标版本。当发生需求变更时,通过对变更的评估,确定变更的影响范围,对被影响的配置项的版本进行修改,根据变更的性质使配置项的版本树继续延伸或产生新的分支,形成新的目标版本,而对于不受变更影响的配置项则不应发产生变动。同时,应能够将变更所产生的对版本的影响进行记录和跟踪。必要时还可以回退到以前的版本。例如当开发需求或需求变更被取消时,就需要有能力将版本回退到开发基线版本。在曾经出现过的季度升级包拆包和重新组包的过程中,其实就是将部分配置项的版本回退到开发基线,将对应不同需求的不同分支重新组合归并,形成新的升级包版本。
版本控制是软件配置管理的核心功能。所有置于配置库中的元素都应自动予以版本的标识,并保证版本命名的唯一性。版本在生成过程中,自动依照设定的使用模型自动分支、演进。除了系统自动记录的版本信息以外,为了配合软件开发流程的各个阶段。还需要定义、收集一些元数据来记录版本的辅助信息和规范开发流程,并为今后对软件过程的度量做好准备。当然如果选用的工具支持,这些辅助数据将能直接统计出过程数据,从而方便软件过程改进活动的进行。对于配置库中的各个基线控制项,应该根据其基线的位置和状态来设置相应的访问权限。一般来说,对于基线版本之前的各个版本都应处于被锁定的状态,如需要对它们进行变更,则应按照变更控制的流程来进行操作。
常用的版本控制工具:
- gitlab
- subversion
gitlab部署
#配置yum源
[root@localhost ~]# curl -o /etc/yum.repos.d/CentOS-Base.repo https://mirrors.aliyun.com/repo/Centos-8.repo
[root@localhost ~]# sed -i -e '/mirrors.cloud.aliyuncs.com/d' -e '/mirrors.aliyuncs.com/d' /etc/yum.repos.d/CentOS-Base.repo
[root@localhost ~]# sed -i 's/$releasever/8/g' /etc/yum.repos.d/CentOS-Base.repo

#安装epel源
[root@localhost ~]#  yum -y install epel-release

#安装依赖包
[root@localhost ~]# yum -y install  git curl openssh-server openssh-clients postfix cronie python3-policycoreutils policycoreutils-python-utils

#启动postfix服务并设置开机自启
[root@localhost ~]# systemctl enable --now postfix

#下载gitlab的rpm包
[root@localhost ~]# cd /usr/local/src/
[root@localhost src]# wget https://mirrors.tuna.tsinghua.edu.cn/gitlab-ce/yum/el8/gitlab-ce-13.9.7-ce.0.el8.x86_64.rpm

#安装gitlab
[root@localhost src]# rpm -ivh gitlab-ce-13.9.7-ce.0.el8.x86_64.rpm

#修改配置文件
[root@localhost src]# vim /etc/gitlab/gitlab.rb
...................................
...................................
external_url 'http://192.168.248.130' gitlab的服务器ip地址或域名
...................................
...................................

#重载配置文件并重启gitlab
[root@localhost src]# gitlab-ctl reconfigure
[root@localhost src]# gitlab-ctl restart
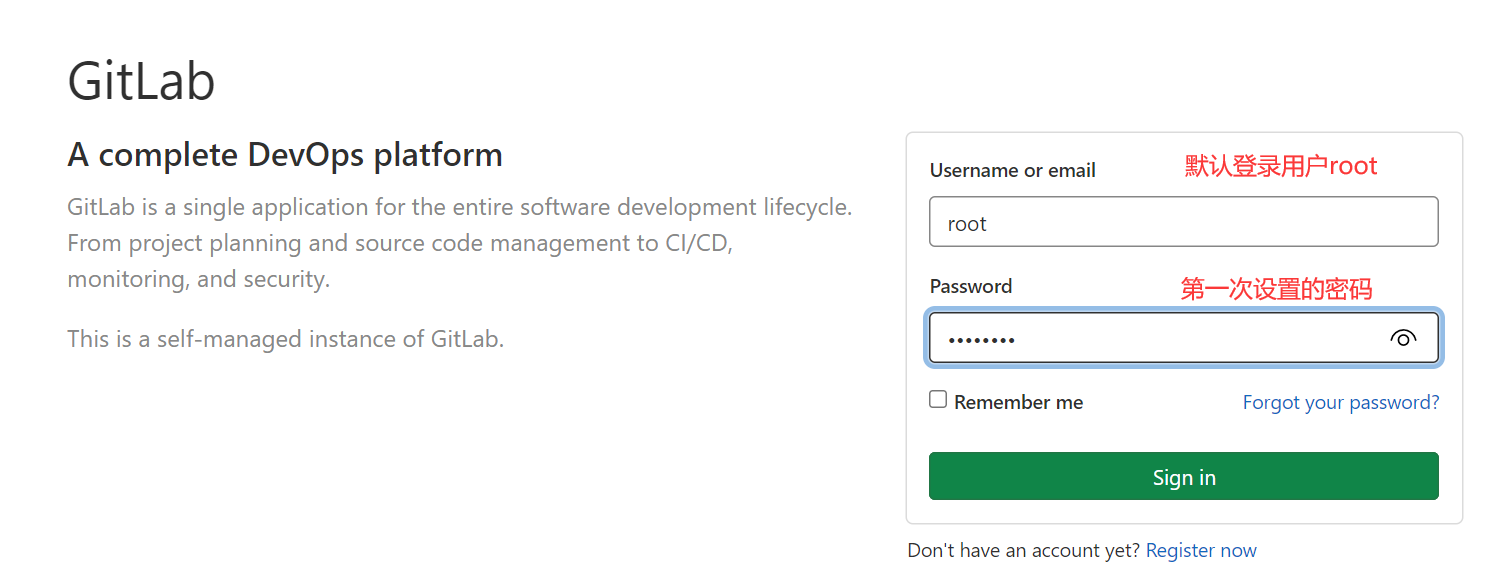
在浏览器中使用gitlab服务器的ip访问,页面如下图所示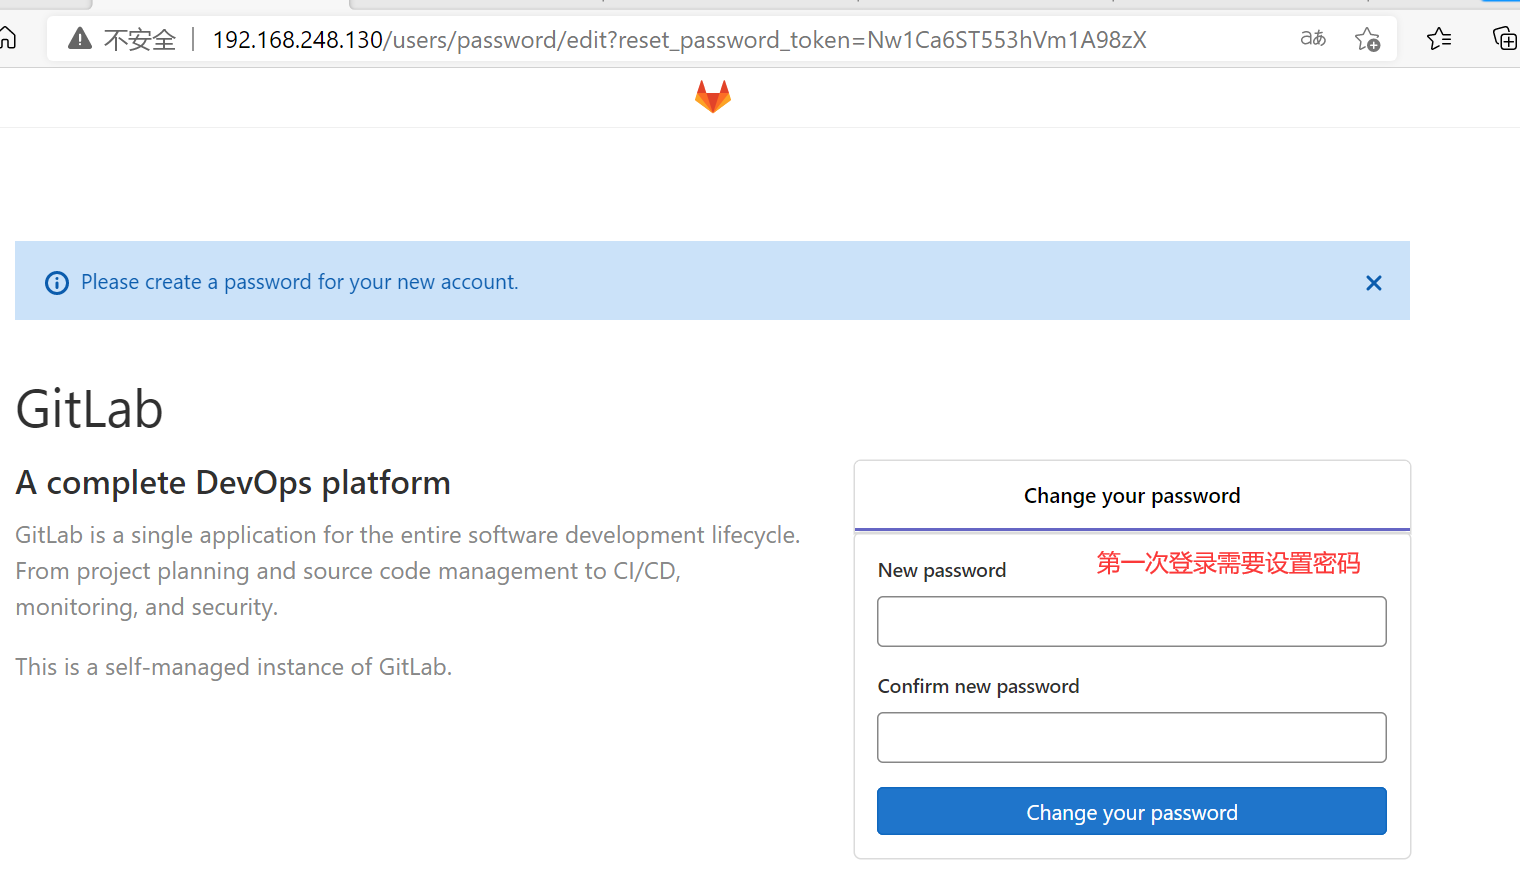
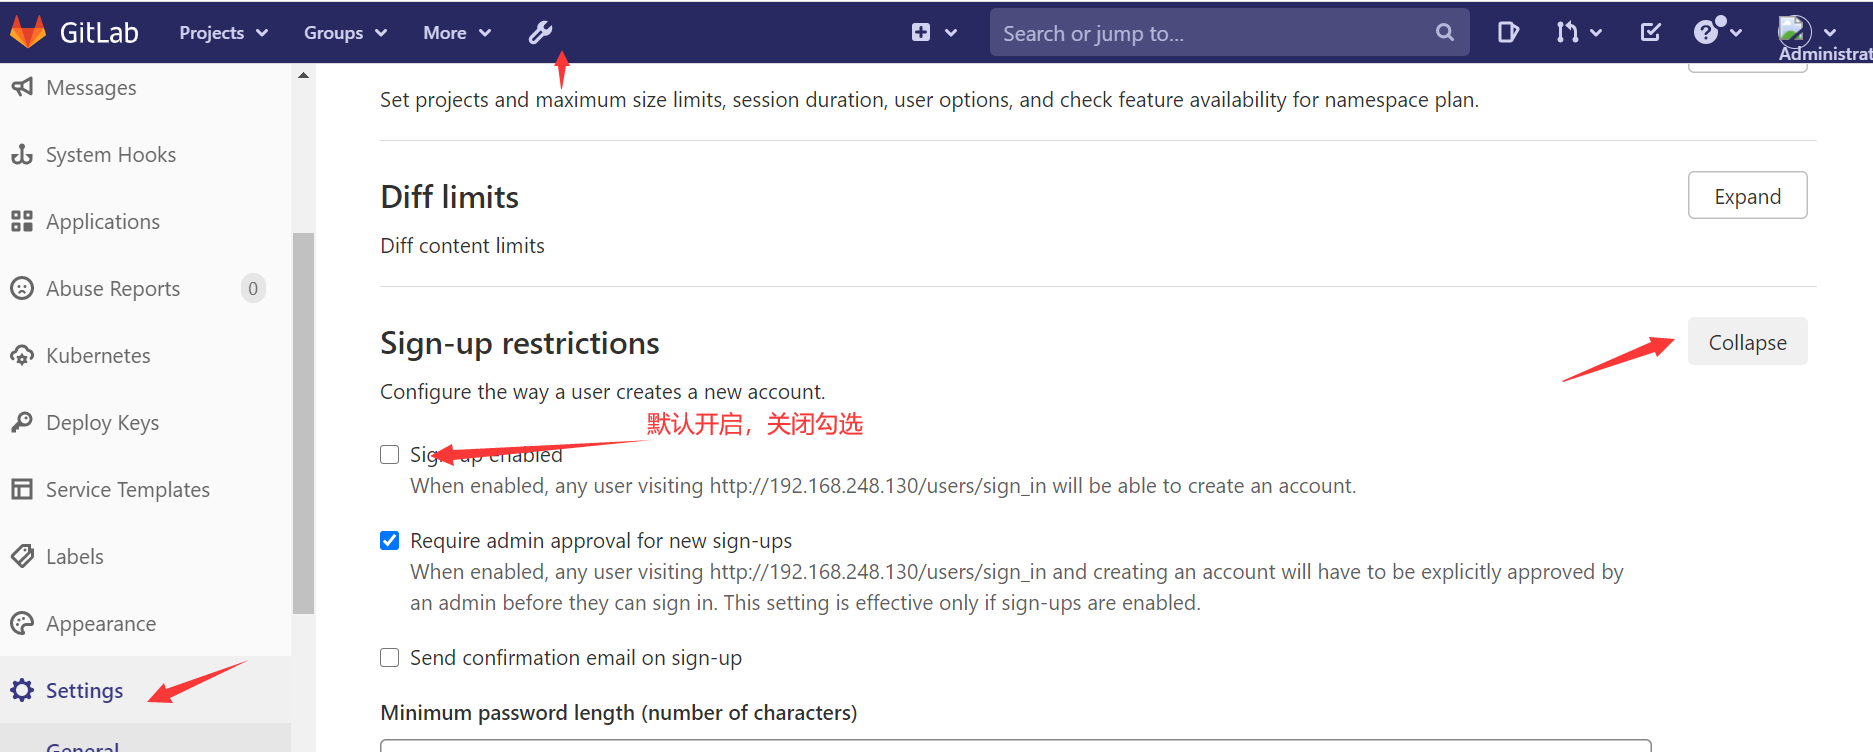
关闭账号注册,默认开启
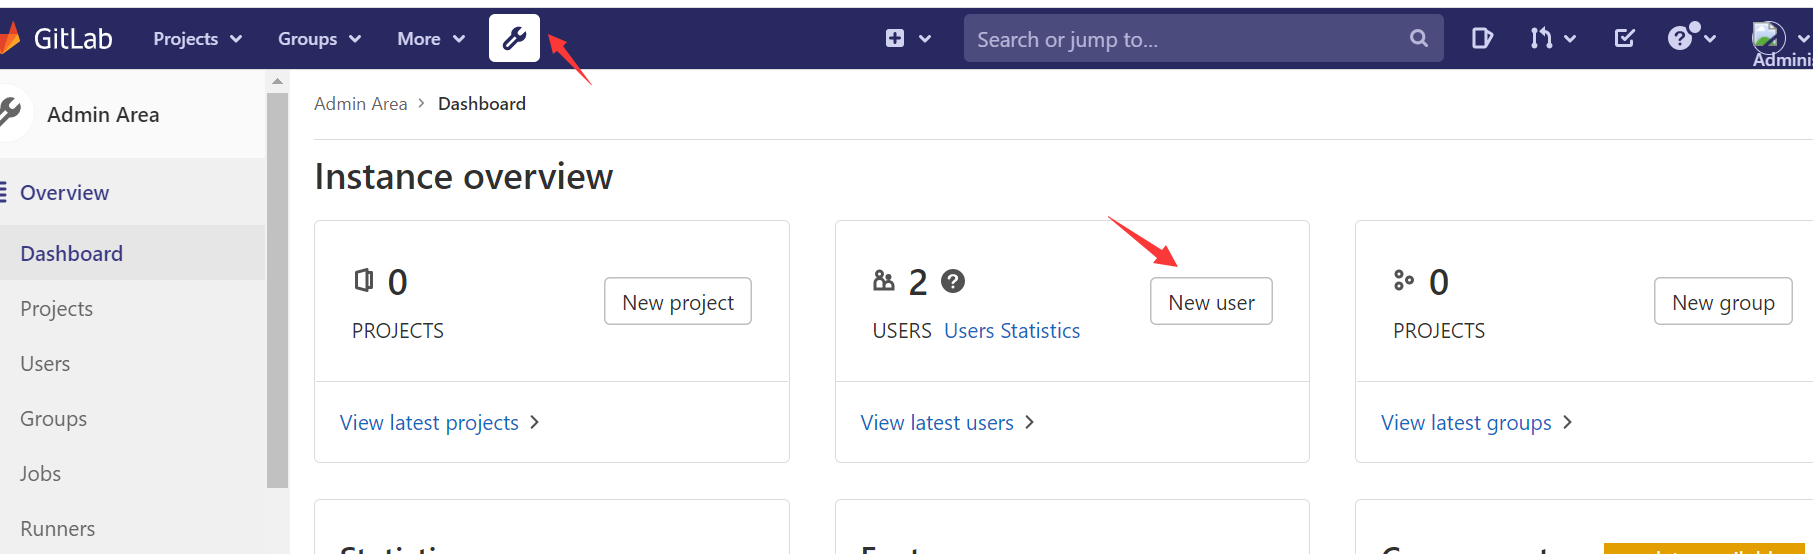
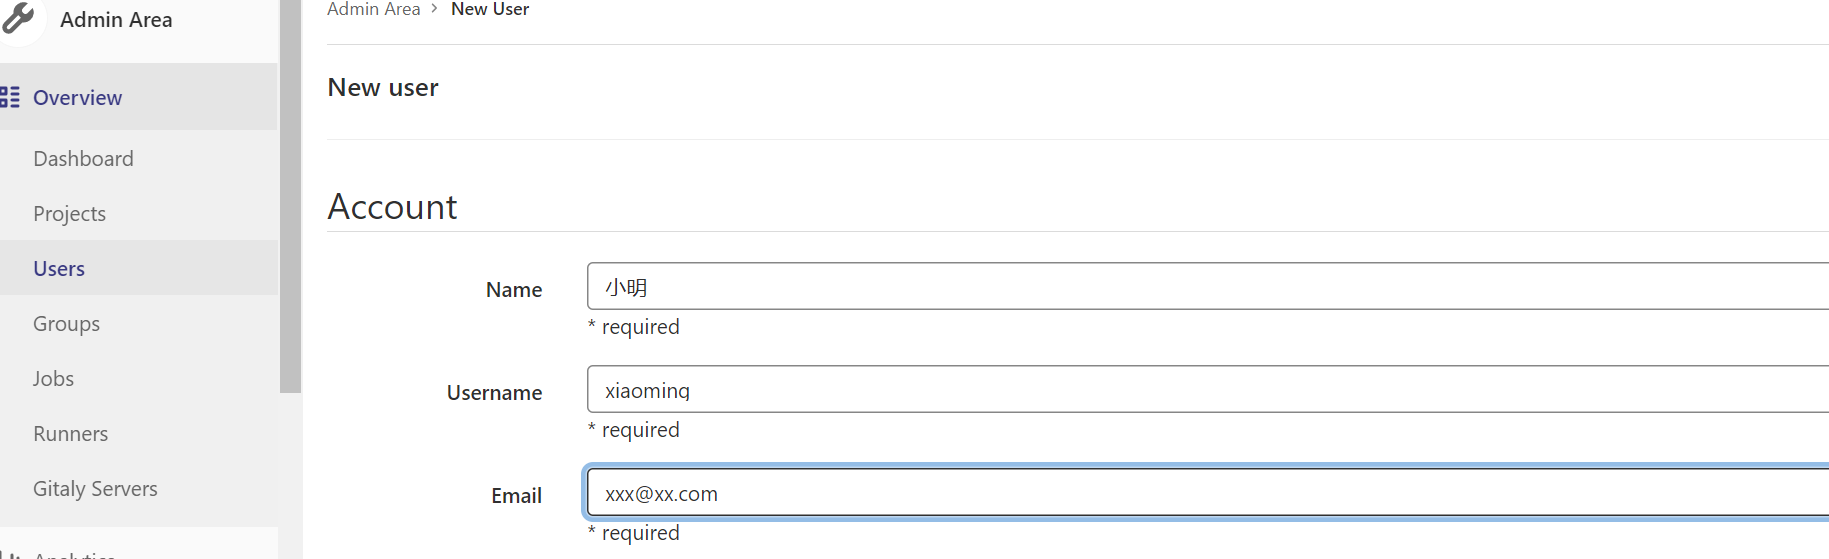
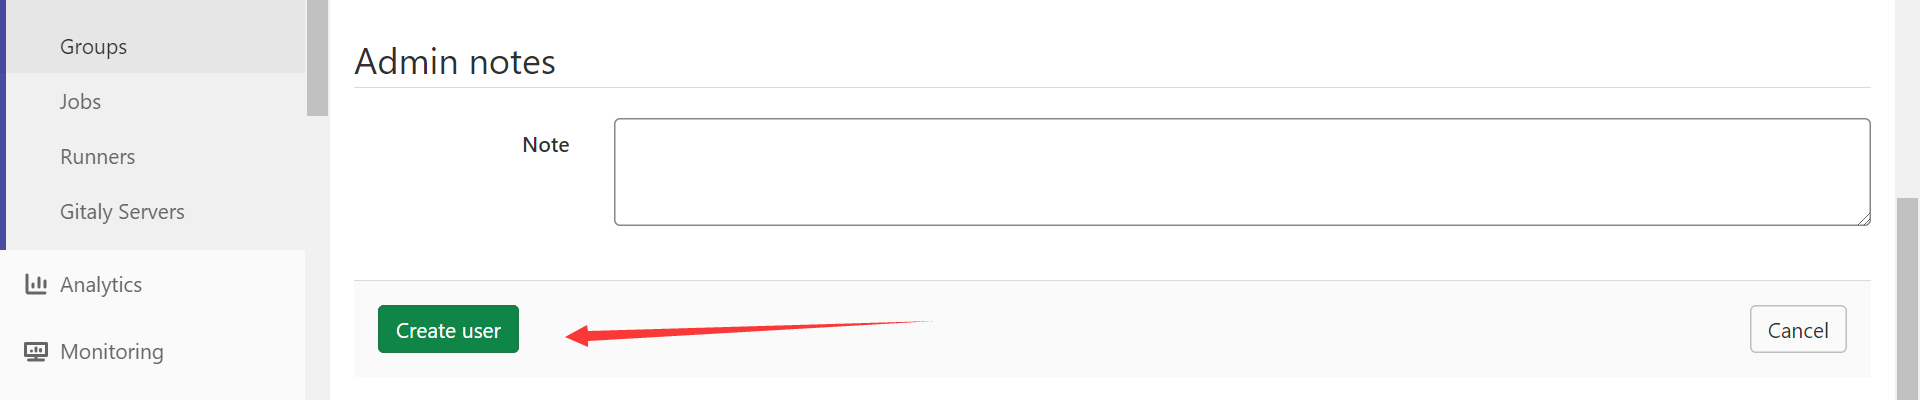
创建用户
创建用户会发送邮件,在首次登录时会设置密码,也可以创建用户后设置密码,用户首登录强制修改密码

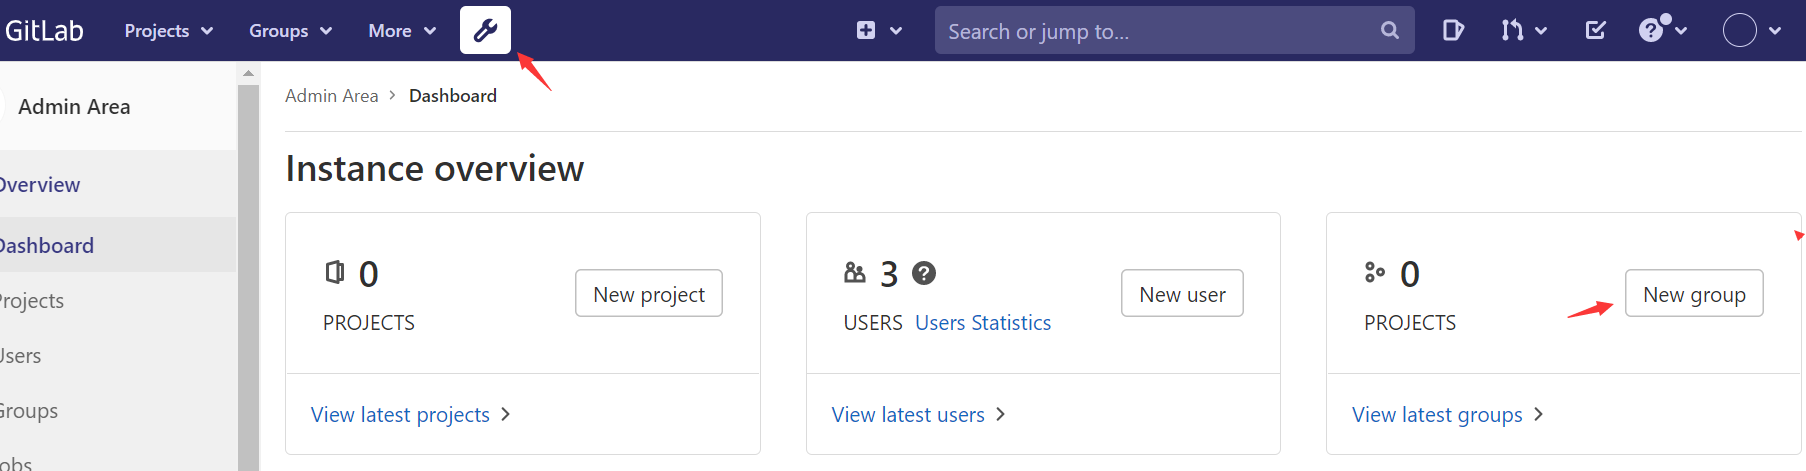
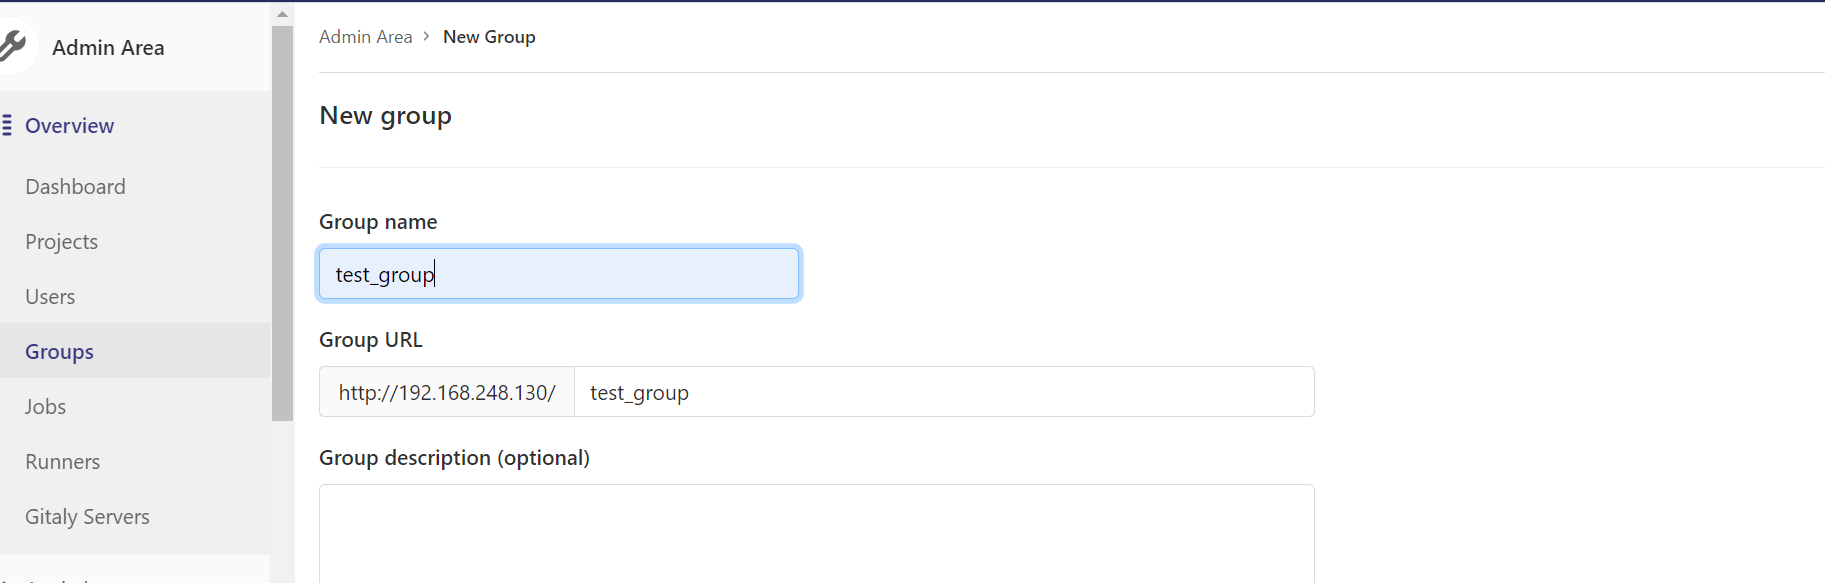
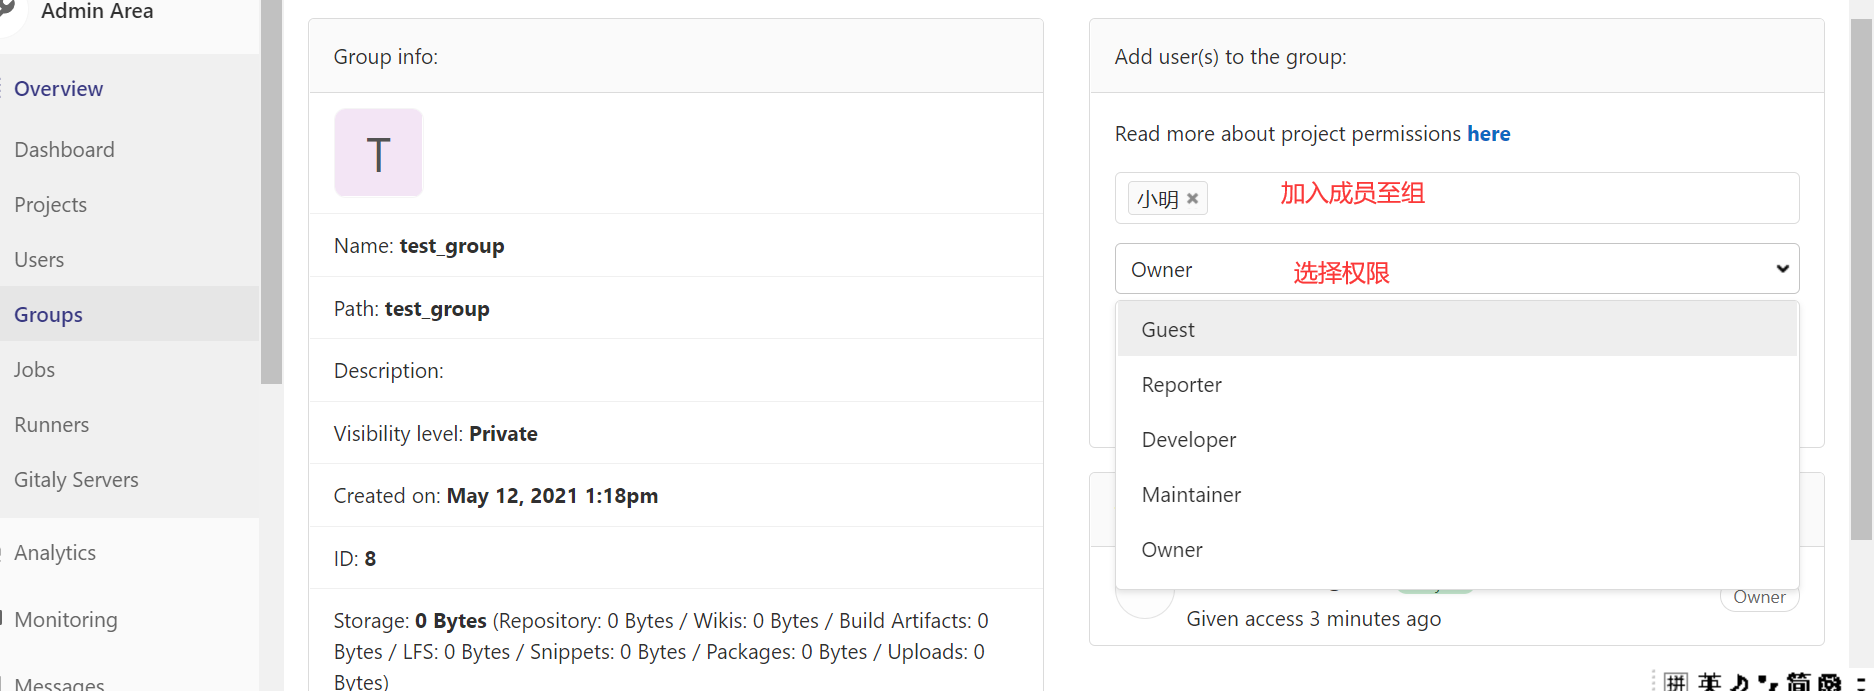
创建组

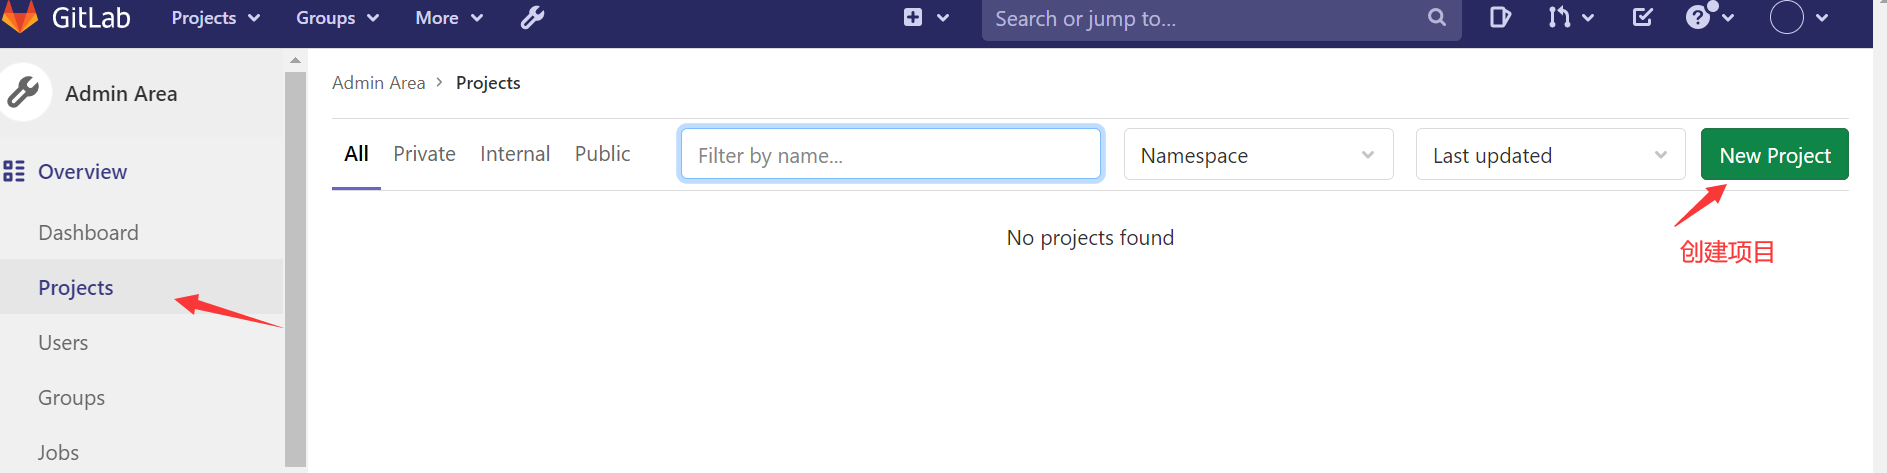
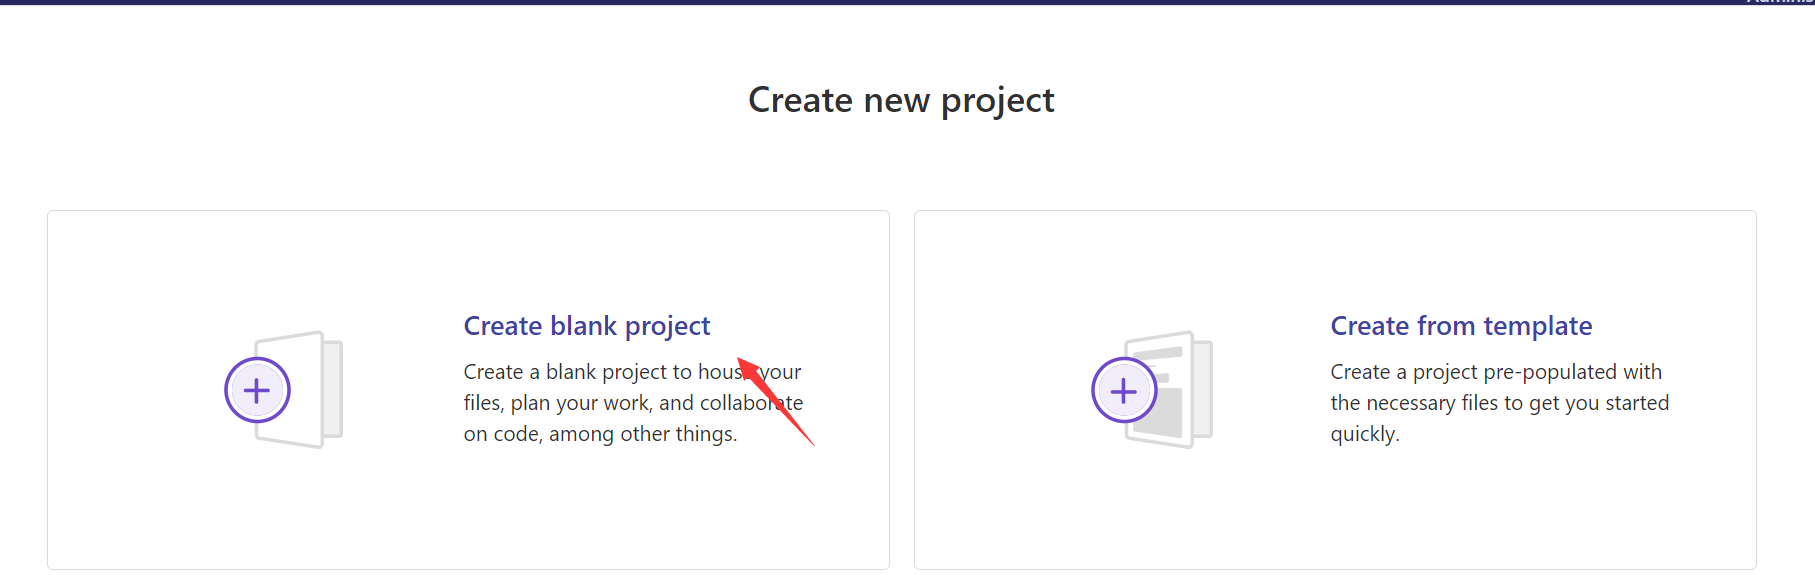
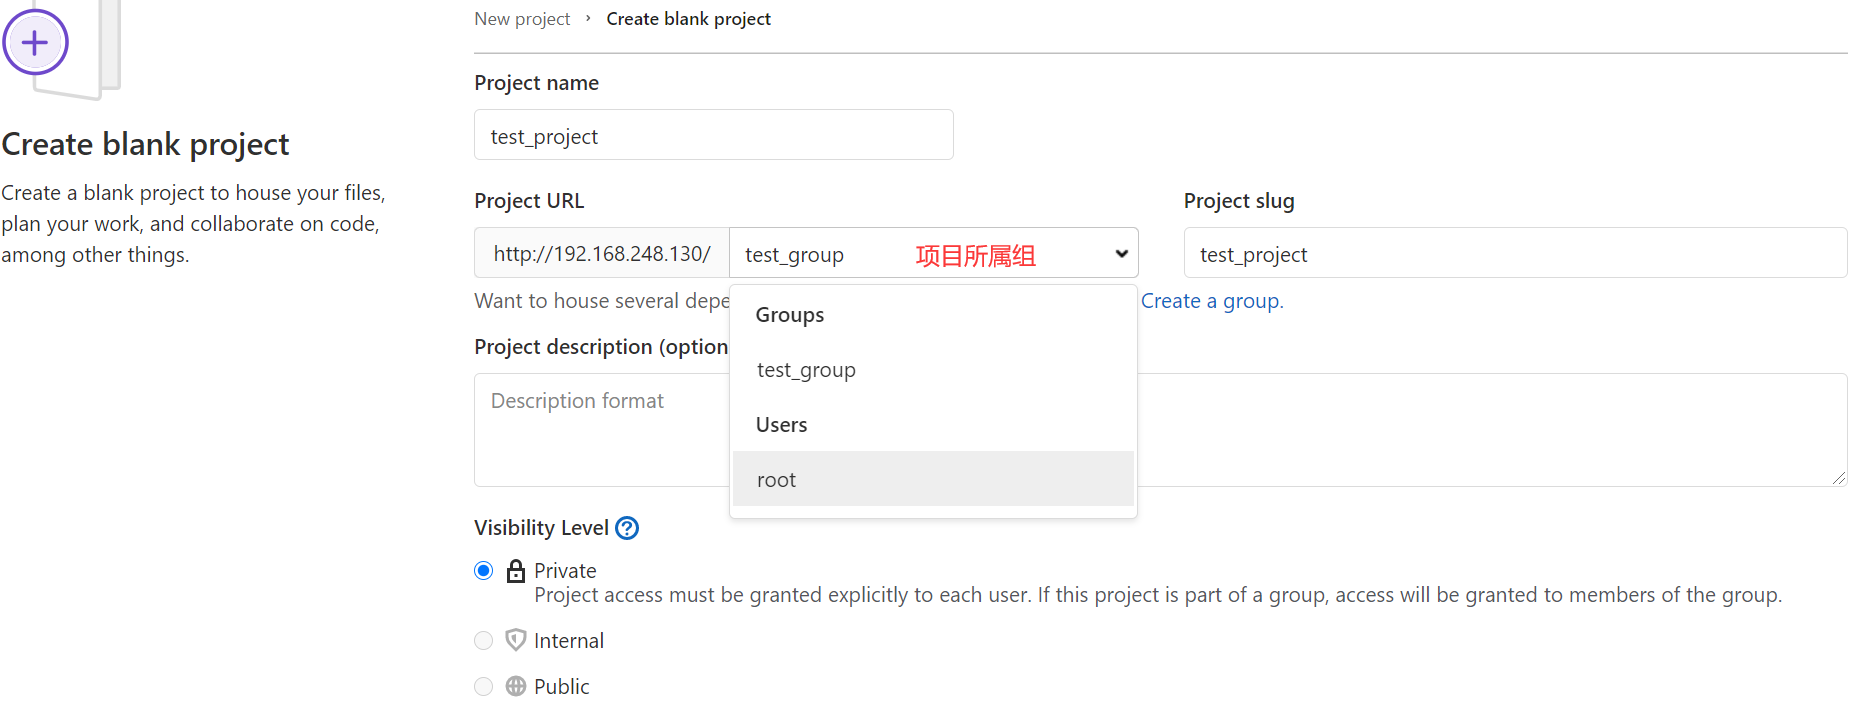
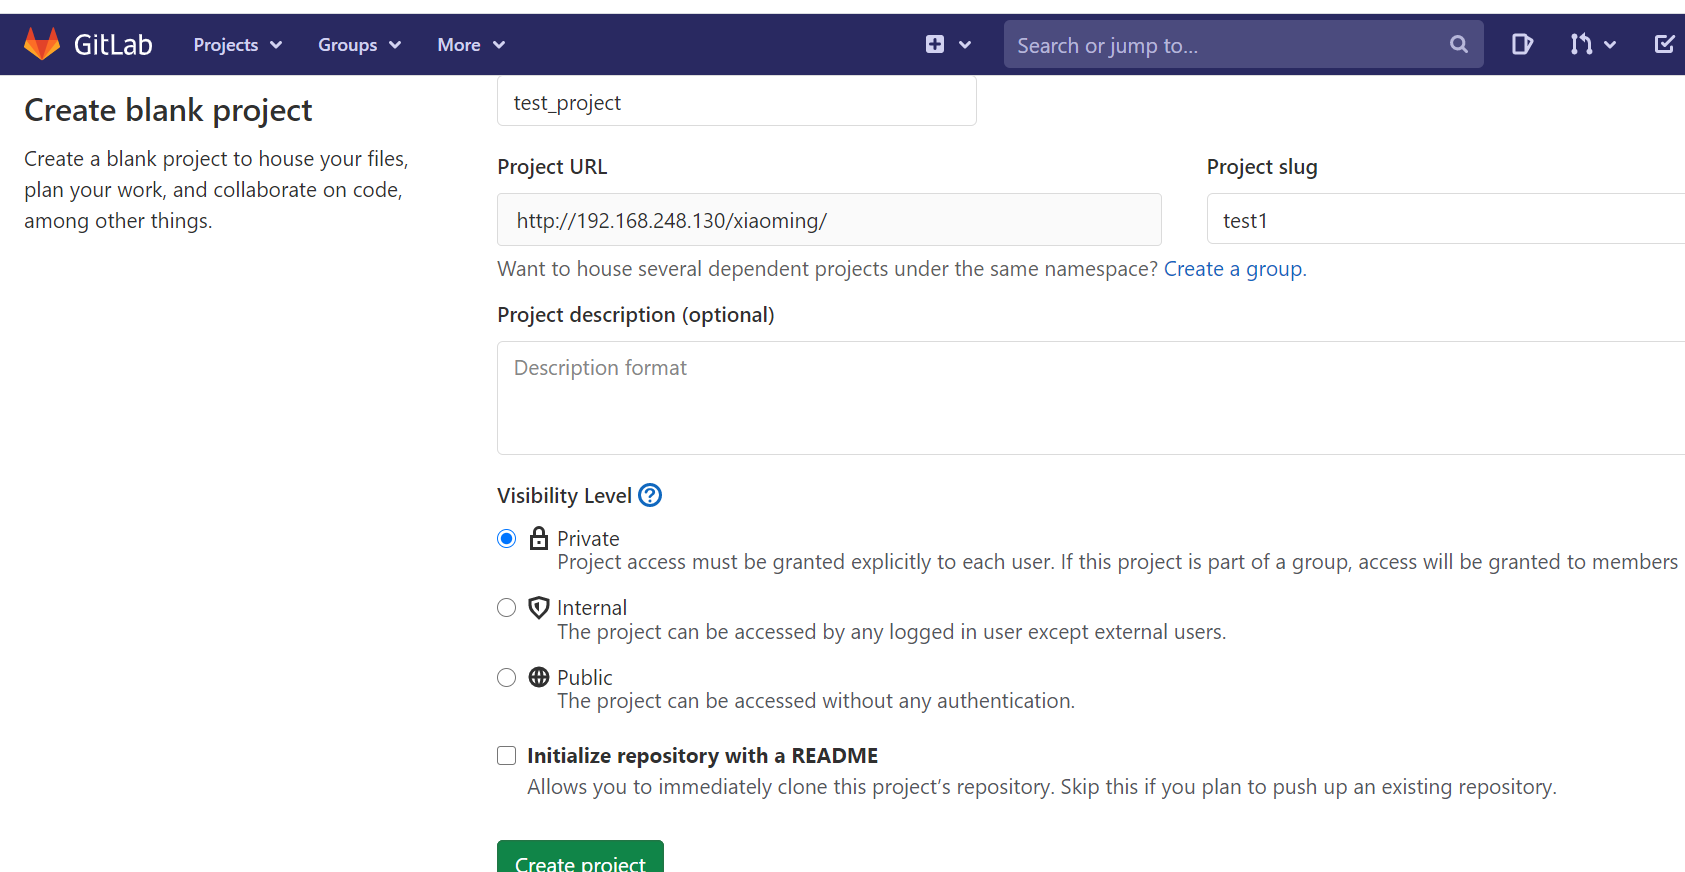
创建项目
登录xiaoming账户创建子项目
gitlab常用命令
gitlab-ctl   #客户端命令行操作行
gitlab-ctl    stop  #停止gitlab
gitlab-ctl    start  #启动
gitlab-ctl    restart  #重启
gitlab-ctl    status  #查看组键运行状态
gitlab-ctl    tail  xxx  #查看某个组件的日志
git 命令使用
git config --global  user.name  "name" #设置全局用户名
git  config --global user.email  xxx@xx.com  #设置全局邮箱
git config --global --list #列出用户全局设置
git clone URL  #clone项目到本地
git add  ./  #添加指定文件,目录或当前目录下所有数据到暂存区
gie commit -m  "add v1"  #提交文件到本地工作区(本地仓库)
git status  #查看本地工作区和暂存区的状态
git push  #提交代码到服务器
git  pull  #拉取gitlab到本地

git log # 查看操作日志
vim .gitignore  #定义忽略某些指定文件或者目录不上传至gitlab
git  reset  --hard  HEAD^^  #git版本回滚,HEAD为当前版本,一个^为上一个版本, ^^上上个版本
git reflog  #获取每次提交的ID,可以使用--hard根据提交的ID版本进行回退
git  reset --hard  版本号  #回退到指定ID的版本

git branch #查看当前所处的分支
git checkout  -b develop  #创建并切换到一个新分支
git checkout  develop  #切换分支

#分支合并
git pull
git merge origin/develop
git push
#clone项目到本地
[root@localhost ~]# git status
fatal: not a git repository (or any of the parent directories): .git
[root@localhost ~]# git clone http://192.168.248.130/xiaoming/test1.git
Cloning into 'test1'...
Username for 'http://192.168.248.130': xiaoming
Password for 'http://xiaoming@192.168.248.130':
warning: You appear to have cloned an empty repository.
[root@localhost ~]# ls
test1

[root@localhost ~]# cd test1/
[root@localhost test1]# vim index.html
<!DOCTYPE  html>
<html lang="en">
<head>
	<meta charset="UTF-8">
	<title>Test</title>
</head>
<body>
	<h1>This  Is  Test v1</h1>
</body>
</html>

#将文件加入到暂存区
[root@localhost test1]# git add index.html

#提交文件到本地仓库
[root@localhost test1]# git  commit -m "add index.html"

#将本地的master分支推送到origin主机
[root@localhost test1]# git push -u origin master

#clone新的版本
[root@localhost test1]# git clone http://192.168.248.130/xiaoming/test1.git
[root@localhost test1]# echo   hahah >> index.html
[root@localhost test1]# cp index.html  xxx.html
[root@localhost test1]# git add ./
[root@localhost test1]# git commit -m "v2
[root@localhost test1]# git push

#回滚到上一个版本
[root@localhost test1]# git reset --hard HEAD^
[root@localhost test1]# git add ./
[root@localhost test1]# git commit -m "v1"
[root@localhost test1]# git pull
[root@localhost test1]# git push
[root@localhost test1]# ls
index.html