基于p5.js绘制的页面
柏林噪声函数
用于程序模拟生成自然纹理。
柏林噪声是一个非常强大算法,经常用于程序生成随机内容,在游戏和其他像电影等多媒体领域广泛应用
柏林噪声绝大部分应用在2维,3维层面上,但某种意义上也能拓展到4维。柏林噪声在1维层面上可用于卷轴地形、模拟手绘线条等。
如果将柏林噪声拓展到4维层面,以第4维,即w轴代表时间,就能利用柏林噪声做动画。例如,2D柏林噪声可以通过插值生成地形,而3D柏林噪声则可以模拟海平面上起伏的波浪。下面是柏林噪声在不同维度的图像以及在游戏中的应用场景。

360度的范围

我们可以查看周期(0.8,0,0.4)这个范围内起伏变化的
2π大概6.283的大致范围
p5的噪点函数介绍
noiseDetail(x,y)
语法
noiseDetail(lod, falloff)
参数
lod 数字:噪音该使用的八度数
falloff 数字:每个八度的衰退因数
默认 noiseDetail(0.5, 0.75)
第一个八度的影响力为 50% 。这衰退值能通过加多一个参数而改变。比如说如果衰退因数为 0.75 那表示每个八度将会有其前者的 75% 的影响力(减少 25%),是不是摸不着头脑
任何介于 0.0 与 1.0 的值都能被接受,不过注意高于 0.5 的值可能会造成 noise() 函数会返回大于 1.0 的值。
noise(x,y) 噪声值
柏林噪声与 random() 函数最主要的不同点在于前者是在一个无限的 n 维空间内定义的,这空间内每一对坐标都相对于一个固定的半随机值(
noiseSedd()函数)返回的值一定会在 0.0 至 1.0 之间
输入坐标的值并不重要,只有个别坐标之间的距离需要被注意(如在循环内使用 noise() 时)。
一般来说坐标之间的距离越小,生成噪声随机数列将会越平滑。介于 0.005-0.03 之间的距离应该适合大多数应用场合
      // 根据上面的可以知道,减少0.2
      noiseDetail(1, .8)
      // radians(deg)  角度转成弧度
	// TWO_PI  2π
      for (let i = 0; i < TWO_PI; i += radians(1)) {
        let x = this.offset * cos(i) + this.offset
        let y = this.offset * sin(i) + this.offset
        // 由于偏移值 0.4
        // 起点
        // 0.8 0.4
        console.log(x,y,noise(x, y));
用到 p5关于api介绍
beginShape() endShape()
记录创建形状的顶点,停止记录
beginShape();
vertex(20, 20);
vertex(40, 20);
vertex(40, 40);
vertex(60, 40);
vertex(60, 60);
vertex(20, 60);
endShape(CLOSE);
push(), pop()
    push(); // 启动一个新的绘制状态
    strokeWeight(10);
    fill(204, 153, 0);
    translate(50, 0);
    ellipse(0, 50, 33, 33); // Middle circle
    pop(); // 恢复原始状态
radians(deg) 角度转成弧度
map
map(值,开始,结束,开始,结束)
例如 我的鼠标x, 0到最大的宽度内,展示0-255的值
let num=map(mouseX,0,width,0,255)
看了源码好像类似于线性插值,线性插值可以看之前的文章
(n, start1, stop1, start2, stop2)
 newval = (n - start1) / (stop1 - start1) * (stop2 - start2) + start2;
绘制具有一定随机噪点的荷叶形状
  const shadowColor = 'rgba(0,0,0,0.05)'
    class lotusLeaf {
    constructor(x, y, offset, scale) {
      this.x = x
      this.y = y
      this.offset = offset
      this.scale = scale
      this.color = color(71, 184, 151)
    }

    drawShape(vertices, offset, color) {
      fill(color)
      beginShape()
      vertices.map(v => vertex(v.x + offset, v.y + offset))
      endShape()
    }

    show() {
      push()
      translate(this.x, this.y)
      noiseDetail(1, .8)
      let vertices = []
      // radians(deg)  角度转成弧度
      for (let i = 0; i < TWO_PI; i += radians(1)) {
        let x = this.offset * cos(i) + this.offset
        let y = this.offset * sin(i) + this.offset

        let r = 180 + map(noise(x, y), 0, 1, -this.scale, this.scale)
        console.log(r);
        let x1 = r * cos(i)
        let y1 = r * sin(i)

        vertices.push({x: x1, y: y1})
      }

      noStroke()
      //当前荷叶
      this.drawShape(vertices, 0, this.color)
      // 偏移值用于绘制,荷叶阴影
      this.drawShape(vertices, 50, shadowColor)
       // 绘制荷叶上的纹理
      vertices.map((v, index) => {
        //根茎有9个
        if ((index + 1) % 40 === 0) {
          strokeWeight(6)
          stroke(23,111,88,40)
          // x,y 是最外点, 就是圆点,当前点的距离
          line(v.x * .1, v.y * .19, v.x * .9, v.y * .86)
        }
      })
      pop()
    }

  }
function setup() {
   createCanvas(windowWidth, windowHeight)

    background(230)
   new lotusLeaf(100, 100, 0.4, 100).show()
}

function draw() {

}
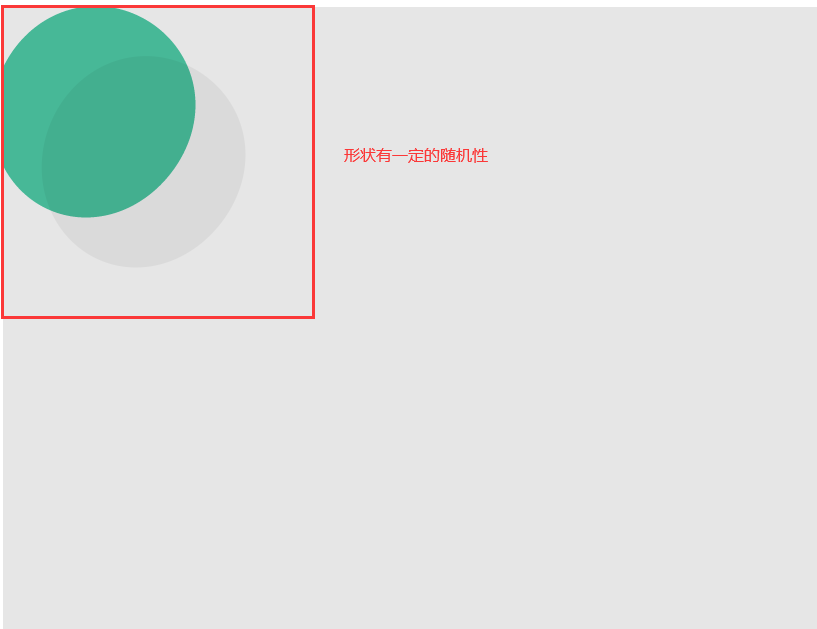
我们发现阴影显示了,其实我们应该先画阴影再画荷叶就不会出现这种情况,因为阴影被荷叶覆盖掉了
绘制涟漪
默认帧率1s 60帧
p5的知识
向量
pos=createVector(width/2,height/2)
pos.x  pos.y 这样使用
代码
  /*==================
  涟漪
  ===================*/
  class Ripple {
    constructor(x, y) {
      this.position = createVector(x, y)
      this.size = random(50, 100)
      // 透明度的值
      this.lifespan = 255
      this.color = color(255, 255, 255)
      this.sizeStep = random(2, 3)
      // 显示的时间
      this.lifeStep = random(2, 10)
    }

    drawShape(x, y, offset, size, color) {
      stroke(color)
      strokeWeight(1)
      noFill()
      circle(x + offset, y + offset, size)
    }

    show() {
      // 设置颜色透明度
      this.color.setAlpha(this.lifespan)
      // 当前圆,颜色白色
      this.drawShape(this.position.x, this.position.y, 0, this.size, this.color)
      //偏移50的圆,颜色另一种
      this.drawShape(this.position.x, this.position.y, 50, this.size, color(shadowColor))
    }

    update() {
      // 圆变大
      this.size += this.sizeStep
      // 时间变短
      this.lifespan -= this.lifeStep
    }
  }
  const ripples = []
  const shadowColor = 'rgba(0,0,0,0.05)'

  function setup() {
    createCanvas(windowWidth, windowHeight)

    background(230)

  }
  function draw() {
    background(230)
      //默认帧率60, 就是每s执行两次
    if (frameCount % 30 === 0) ripples.push(new Ripple(random(width), random(height)))

    ripples.forEach((r, i) => {
      r.update()
      r.show()
      // 如果没有啦 再添加一个涟漪
      if (r.lifespan < 0 ) ripples.splice(i, 1)
    })
  }
  function windowResized() {
    resizeCanvas(windowWidth, windowHeight);
    background(230);
  }