本篇博客为自己学习spring和springmvc的一个总结。主要以代码为主,至于文字性描述理解性东西,可以自行百度。有认识不妥的地方,还望指出,相互学习。
以前很困惑spring中的一些概念,在学习过程中遇到了很都问题,目前基本解决。解决的方法:
① 总结Spring框架的运行流程:在框架中,程序如何运行的?流程是什么? 可以适当的参考一部分源码解析
② 理解IOC本质。因为spring是一个容器框架,所以就是用来装东西的,就像tomcat,作用服务器一样。而IOC就是spring通过主配置文件(applicationContext.xml)的相关配置,为我们程序中自动的(底层通过反射方式,反射在框架中用的很过,私底下自己也在继续的深入的研究)为程序创建我们想要的bean对象。在spring中称之为注入,而所依赖的正是applicationContext.xml的配置。
配置方式:spring中提供了两种配置方式:基于xml方式的配置和基于注解的配置。对于前者可以实现对bean的统一的,清晰的,管理,但是需要手动的写,很麻烦(程序天生的就是为人的懒惰而服务);对于后者当然开发时候自己写的东西就少了,但是在统一管理方面稍差。凡事存在即合理。可以根据自己的需求选择自己的配置方式。
③ 理解AOP。java是一种面向对象的语言。而AOP是面向切面,在我看来是面向逻辑或者业务编程,它是对一组逻辑的抽象和分配。
经典例子,很多系统都有日志。以登录为例子。常规编程流程大致如下:点击登录--->写入日志--->后台处理--->写入日志。因为我们的系统中会有很多功能逻辑代码都是如此去处理日志。假设有一天,需求改变不需要日志了。那么我们如何去处理这些已经存在于整体逻辑单元中的日志代码?无非是找到每一个使用日志的地方,逐一删除。大家可想这样的效率?代码的耦合度?
而AOP变成。就是为了高度的解耦儿产生。它将登录的整个流程进行按照特定的,共同的业务逻辑进行切割,从而抽象出来了一组公共的逻辑单元。然后在根据不同业务模块的需求,在某些业务指定的地方将公共的业务逻辑植入其中,从而形成了一个整体的业务逻辑单元,实现某一模块功能。(这些是自己思考,总结的,刚开始接触的时候,没有理解到这点,也吃了很多闭门羹)有了这样的认识和理解,我们理解spring AOP中的一些常用的概念就很简单:
横切关注点:哪些业务需要拦截,拦截后干什么?
切面:若干个横切关注点的抽象结合。即:抽象出来的公共的业务逻辑单元
连接点:需要拦截的业务。原本剩下的业务逻辑
切入点:连接点的表达式。和通知相似。
通知:将共同的逻辑代码植入的提示。前置,后置,异常,返回,环绕。
IOC:控制反转,依赖注入。配置bean
1.注入方式:setter方法注入,构造器注入,复杂类型注入
 1 <?xml version="1.0" encoding="UTF-8"?>
 2 <beans xmlns="http://www.springframework.org/schema/beans"
 3     xmlns:xsi="http://www.w3.org/2001/XMLSchema-instance"
 4     xmlns:aop="http://www.springframework.org/schema/aop"
 5     xmlns:context="http://www.springframework.org/schema/context"
 6     xmlns:tx="http://www.springframework.org/schema/tx"
 7     xsi:schemaLocation="http://www.springframework.org/schema/beans http://www.springframework.org/schema/beans/spring-beans.xsd
 8         http://www.springframework.org/schema/aop http://www.springframework.org/schema/aop/spring-aop-4.0.xsd
 9         http://www.springframework.org/schema/context http://www.springframework.org/schema/context/spring-context-4.0.xsd
10         http://www.springframework.org/schema/tx http://www.springframework.org/schema/tx/spring-tx-4.0.xsd">
11     <!--
12     person p = new person();
13     p.setname("lisi");
14      -->
15      <!-- setter方法注入:1-空构造  2-属性提供setter方法 -->
16     <bean id="p" class="com.bena.Person">
17         <property name="anme" value="lisi"></property>
18     </bean>
19     <!-- person p1 = new person("lisi",23); -->
20     <!-- 构造器注入:前提:必须提供对应的构造器 -->
21     <bean id="p1" class="com.bena.Person">
22         <constructor-arg value="lisi"></constructor-arg>
23         <constructor-arg value="23"></constructor-arg>
24     </bean>
25     <!-- 复杂类型注入 -->
26     <bean id="addr" class="com.bena.Addrs">
27         <property name="sheng" value="shanxi"></property>
28         <property name="shi" value="xian"></property>
29     </bean>
30     <bean id="person1" class="com.bena.Person1">
31         <property name="name" value="zhangsan"></property>
32         <property name="age" value="23"></property>
33         <!-- <property name="addr" ref="addr"></property> -->
34         <property name="addr">
35         <!-- 匿名对象 -->
36             <bean class="com.bena.Addrs">
37                 <property name="sheng" value="shanxi"></property>
38                 <property name="shi" value="xian"></property>
39             </bean>
40         </property>
41     </bean>
42
43 </beans>
2.继承,模式改变,自动注入(byName,byType)
 1 <?xml version="1.0" encoding="UTF-8"?>
 2 <beans xmlns="http://www.springframework.org/schema/beans"
 3     xmlns:xsi="http://www.w3.org/2001/XMLSchema-instance"
 4     xmlns:aop="http://www.springframework.org/schema/aop"
 5     xmlns:context="http://www.springframework.org/schema/context"
 6     xmlns:tx="http://www.springframework.org/schema/tx"
 7     xsi:schemaLocation="http://www.springframework.org/schema/beans http://www.springframework.org/schema/beans/spring-beans.xsd
 8         http://www.springframework.org/schema/aop http://www.springframework.org/schema/aop/spring-aop-4.0.xsd
 9         http://www.springframework.org/schema/context http://www.springframework.org/schema/context/spring-context-4.0.xsd
10         http://www.springframework.org/schema/tx http://www.springframework.org/schema/tx/spring-tx-4.0.xsd" default-autowire="byName">
11     <!-- 继承 -->
12     <bean id="animal" class="com.bean2.Animal" abstract="true">
13         <property name="name" value="123"></property>
14         <property name="age" value="23"></property>
15     </bean>
16     <!-- 默认单例,通过:scope改变模式:prototype:原型(非单例) -->
17     <bean id="student" class="com.bean2.Student" parent="animal">
18         <property name="num" value="123456"></property>
19     </bean>
20
21     <bean id="teacher" class="com.bean2.Teacher" parent="animal">
22         <property name="jixiao" value="12312"></property>
23     </bean>
24
25     <!-- 自动注入:在beans里添加:default-autowire属性
26            值:1-byName:根据名字注入:bean的id要跟类中的属性名相同
27             2-byType:根据类型注入:只能有一个该类型的bean跟属性的类型匹配
28      -->
29     <bean id="dao" class="com.bean3.Dao"></bean>
30     <bean id="service" class="com.bean3.Service"></bean>
31     <bean id="handler" class="com.bean3.Handler"></bean>
32
33 </beans>
3.自动扫描
 1 <?xml version="1.0" encoding="UTF-8"?>
 2 <beans xmlns="http://www.springframework.org/schema/beans"
 3     xmlns:xsi="http://www.w3.org/2001/XMLSchema-instance"
 4     xmlns:aop="http://www.springframework.org/schema/aop"
 5     xmlns:context="http://www.springframework.org/schema/context"
 6     xmlns:tx="http://www.springframework.org/schema/tx"
 7     xsi:schemaLocation="http://www.springframework.org/schema/beans http://www.springframework.org/schema/beans/spring-beans.xsd
 8         http://www.springframework.org/schema/aop http://www.springframework.org/schema/aop/spring-aop-4.0.xsd
 9         http://www.springframework.org/schema/context http://www.springframework.org/schema/context/spring-context-4.0.xsd
10         http://www.springframework.org/schema/tx http://www.springframework.org/schema/tx/spring-tx-4.0.xsd" default-autowire="byName">
11
12 <!-- 配置扫描路径 -->
13     <context:component-scan base-package="com.bean4"></context:component-scan>
14
15 </beans>
3.注解方式:举例我所接触的注解
@component :标识为spring组件,由spring容器管理
@Autowired:设置自动注入bean。 默认名字为与当前bean的类一致,首字母小写。
@Service:业务层Bean。一般作用于服务层的类,dao层,service层
@Controller:展示层Bean。一般用于控制层的类,controller层
@Repository:应存储层Bean。一般用于model层的类
详细的可以参照: Spring 注解总结
步骤:
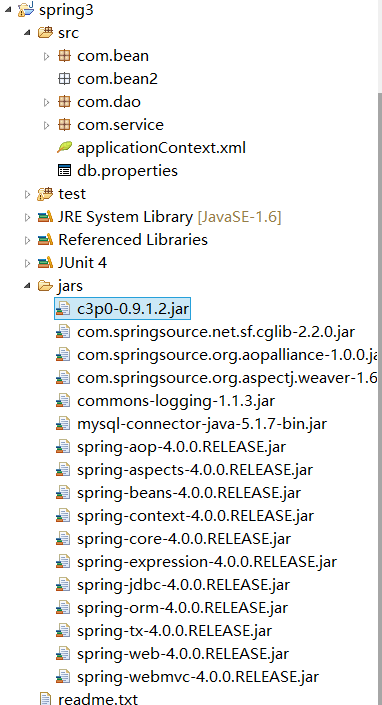
1.下载相应的jar包。搭建环境。本人用的是:spring-framework-4.0.0.RELEASE-dist
2.新建java工程:在工程的根目录新建 lib目录,将相关jar导入

3.创建bean
Goods
 1 package com.bean;
 2
 3 public class Goods {
 4
 5     private int gid;
 6     private int gprice;
 7     private int gnum;
 8     public int getGid() {
 9         return gid;
10     }
11     public void setGid(int gid) {
12         this.gid = gid;
13     }
14     public int getGprice() {
15         return gprice;
16     }
17     public void setGprice(int gprice) {
18         this.gprice = gprice;
19     }
20     public int getGnum() {
21         return gnum;
22     }
23     public void setGnum(int gnum) {
24         this.gnum = gnum;
25     }
26
27 }
Person
 1 package com.bean;
 2
 3 public class Person {
 4
 5     private String name;
 6     private int age;
 7     public String getName() {
 8         return name;
 9     }
10     public void setName(String name) {
11         this.name = name;
12     }
13     public int getAge() {
14         return age;
15     }
16     public void setAge(int age) {
17         this.age = age;
18     }
19
20 }
Users
 1 package com.bean;
 2
 3 public class Users {
 4
 5     private int uid    ;
 6     private String uname;
 7     private int umoney;
 8     public int getUid() {
 9         return uid;
10     }
11     public void setUid(int uid) {
12         this.uid = uid;
13     }
14     public String getUname() {
15         return uname;
16     }
17     public void setUname(String uname) {
18         this.uname = uname;
19     }
20     public int getUmoney() {
21         return umoney;
22     }
23     public void setUmoney(int umoney) {
24         this.umoney = umoney;
25     }
26
27 }