背景
1. 纯粹测试
2. 未考虑安全和授权以及数据处理.
3. 单节点最简单的部署, 验证功能连接的可能性
资料获取以及环境变量的设置
https://downloads.apache.org/hadoop/common/hadoop-3.3.1/hadoop-3.3.1.tar.gz
- 文件不到600m 大小 下载速度还是可以的.
- 设置环境变量
export PATH=$PATH:/app/server/runtime/java/x86_64-linux/bin/:/hadoop/bin:/hadoop/sbin
export HDFS_DATANODE_USER=root
export HDFS_NAMENODE_USER=root
export HDFS_SECONDARYNAMENODE_USER=root
export JAVA_HOME=/app/server/runtime/java/x86_64-linux/
- 注意我这边设置的表简单 直接放到了
/etc/profile.d/app.sh 然后source一下就可以了
- 可以看到我这边使用了比较简单的 root用户运行.
部署单节点的hdfs
前提条件, 我讲hadoop 整个目录放到了 /hadoop 里面, 跟环境变量呼应.
修改配置文件
cd /hadoop/etc/hadoop/
hdfs-site.xml
内容设置为
# 注意肯恩需要先设置一下file 后面的路径.
# 注意我这边是简单的singleNode 所以replication 设置的是 1.
<configuration>
   <!--指定hdfs保存数据的副本数量-->
    <property>
            <name>dfs.replication</name>
            <value>1</value>
    </property>
    <!--指定hdfs中namenode的存储位置-->
    <property>
             <name>dfs.namenode.name.dir</name>
             <value>file:/data/hadoop/tmp/dfs/name</value>
    </property>
    <!--指定hdfs中datanode的存储位置-->
    <property>
             <name>dfs.datanode.data.dir</name>
             <value>file:/data/hadoop/tmp/dfs/data</value>
    </property>
</configuration>
修改另一个配置文件
 core-site.xml
 <configuration>
   <property>
               <name>fs.defaultFS</name>
               <value>hdfs://someip:8020</value>
   </property>
  <property>
            <name>hadoop.tmp.dir</name>
            <value>file:/data/hadoop/tmp</value>
   </property>
       <name>fs.checkpoint.period</name>
       <value>3600</value>
</configuration>
# 注意需要记住ip地址.
直接使用官网介绍的命令就可以
Format the filesystem:
  $ bin/hdfs namenode -format
Start NameNode daemon and DataNode daemon:
  $ sbin/start-dfs.sh
The hadoop daemon log output is written to the $HADOOP_LOG_DIR directory (defaults to $HADOOP_HOME/logs).

Browse the web interface for the NameNode; by default it is available at:

NameNode - http://localhost:9870/
Make the HDFS directories required to execute MapReduce jobs:

  $ bin/hdfs dfs -mkdir /user
  $ bin/hdfs dfs -mkdir /user/<username>
Copy the input files into the distributed filesystem:

  $ bin/hdfs dfs -mkdir input
  $ bin/hdfs dfs -put etc/hadoop/*.xml input
Run some of the examples provided:

  $ bin/hadoop jar share/hadoop/mapreduce/hadoop-mapreduce-examples-3.3.1.jar grep input output 'dfs[a-z.]+'
Examine the output files: Copy the output files from the distributed filesystem to the local filesystem and examine them:

  $ bin/hdfs dfs -get output output
  $ cat output/*
or

View the output files on the distributed filesystem:

  $ bin/hdfs dfs -cat output/*
When you’re done, stop the daemons with:

  $ sbin/stop-dfs.sh
检查一下部署结果
- 打开网页 http://nodeip:9870
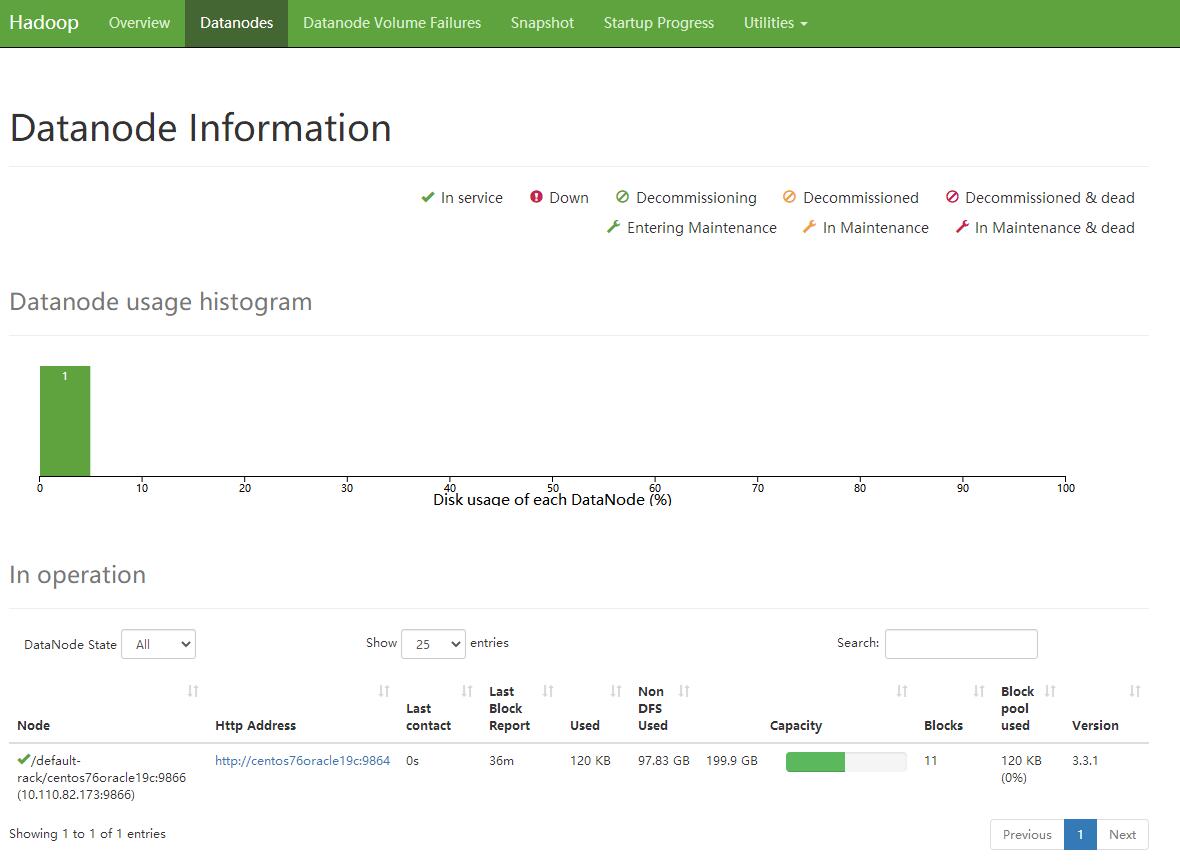
- 展示Node节点的情况的结果
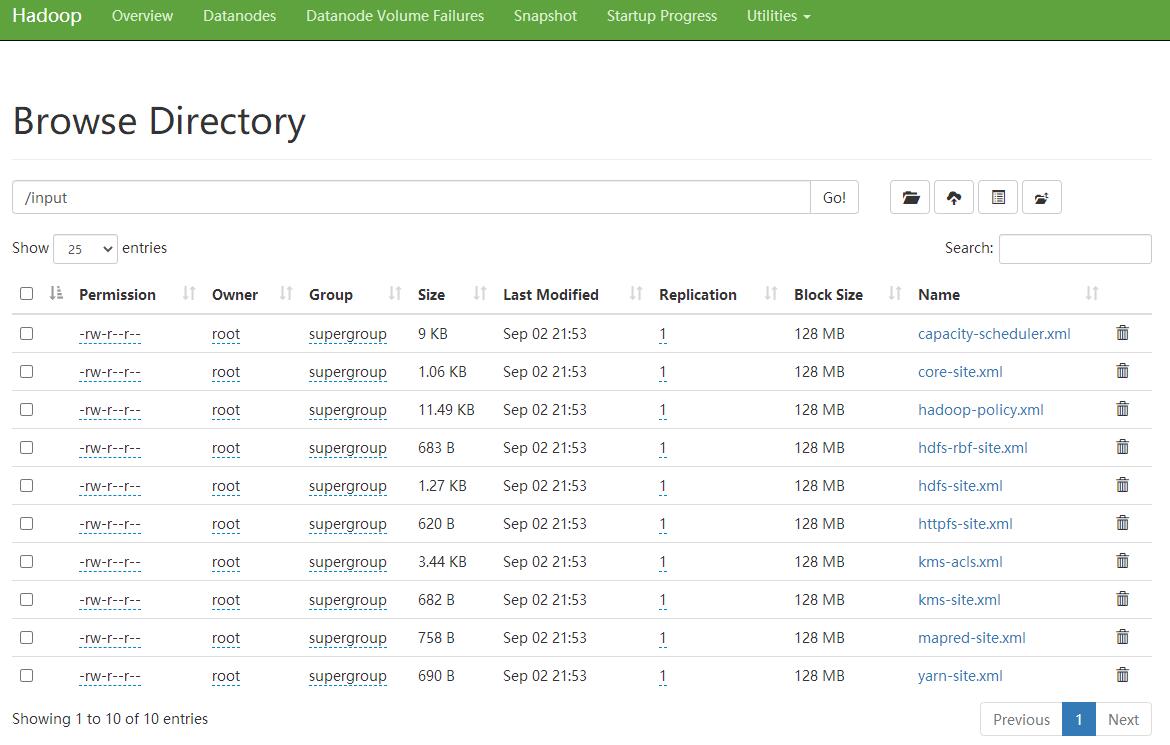
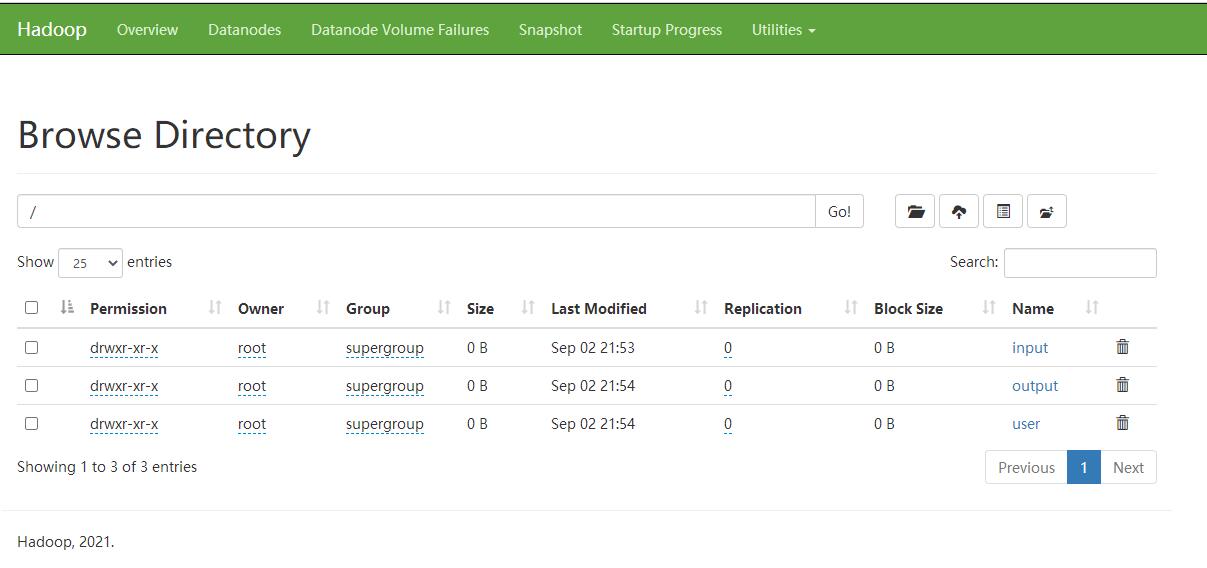
- 展示文件系统, 这里我没考虑权限 好像 控制台权限是没法进行upload和delete的 改天学习下 , 另外不清楚 8020端口的安全设置
- 展示具体的文件夹内的内容