服务提供者与服务消费者
Spring Cloud版本:Hoxton.SR5
1. 简介
上一章已经搭建了一个服务注册中心,微服务中所有服务调用都通过服务注册中心进行,因此就存在调用方和被调用方。也就是服务提供者和服务消费者。
实际情况中可能一个服务既是提供者又是消费者,本章不做讨论。
服务提供者:被其他微服务调用的一方
服务消费者:调用其他微服务的一方
2. 服务提供者
2.1 服务搭建
-
创建一个Spring Boot项目,引入如下依赖:
spring-cloud-starter-netflix-eureka-client:进行服务注册spring-boot-starter-web:接口开发spring-boot-starter-actuator:监控、健康检查
<dependency> <groupId>org.springframework.cloud</groupId> <artifactId>spring-cloud-starter-netflix-eureka-client</artifactId> </dependency> <dependency> <groupId>org.springframework.boot</groupId> <artifactId>spring-boot-starter-web</artifactId> </dependency> <dependency> <groupId>org.springframework.boot</groupId> <artifactId>spring-boot-starter-actuator</artifactId> </dependency> -
在启动类上添加
@EnableDiscoveryClient注解,启动时自动进行服务注册@EnableDiscoveryClient @SpringBootApplication public class SclEurekaClientProviderApplication { public static void main(String[] args) { SpringApplication.run(SclEurekaClientProviderApplication.class, args); } } -
配置文件application.yml
server: port: 8080 spring: application: name: eureka-client-provider eureka: client: register-with-eureka: true # 是否注册到服务注册中心 fetch-registry: false # 是否从注册中心抓取信息,若不存在服务调用设置为false即可,反之则设置为true service-url: defaultZone: http://root:123456@test1:8100/eureka-server1/eureka,http://root:123456@test2:8200/eureka-server2/eureka,http://root:123456@test3:8300/eureka-server3/eureka # 服务注册中心地址 management: endpoint: health: show-details: always # 总是展示详细的健康检查信息 -
开发一个简单的接口
@RestController @RequestMapping("/provider") public class TestController { @GetMapping("/info") public Map<String, String> get() throws Exception { Map<String, String> map = new HashMap<>(); map.put("application.name", "eureka-client-provider"); map.put("server.port", "8080"); return map; } } -
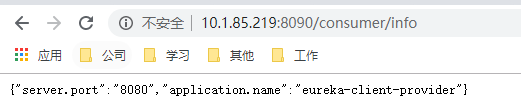
启动项目,并访问服务注册中心、接口、健康检查端点等


2.2 常见问题
上面访问接口可发现,返回的是xml格式的数据,并不是我们期待的json格式数据。
因为eureka默认依赖了jackson-dataformat-xml。xml的优先级高于json,因此返回的是xml格式的数据。只需将jackson-dataformat-xml依赖排除即可。
<dependency>
    <groupId>org.springframework.cloud</groupId>
    <artifactId>spring-cloud-starter-netflix-eureka-client</artifactId>
    <exclusions>
        <exclusion>
            <groupId>com.fasterxml.jackson.dataformat</groupId>
            <artifactId>jackson-dataformat-xml</artifactId>
        </exclusion>
    </exclusions>
</dependency>
3. 服务提供者
-
创建一个Spring Boot项目,引入如下依赖:
-
spring-cloud-starter-netflix-eureka-client:进行服务注册 -
spring-boot-starter-web:接口开发 -
spring-boot-starter-actuator:监控、健康检查 -
spring-cloud-starter-openfeign:声明式接口调用 -
spring-cloud-starter-netflix-hystrix:熔断器,当接口调用异常时直接进行熔断防止出现“雪崩”效应<dependency> <groupId>org.springframework.boot</groupId> <artifactId>spring-boot-starter-actuator</artifactId> </dependency> <dependency> <groupId>org.springframework.cloud</groupId> <artifactId>spring-cloud-starter-netflix-eureka-client</artifactId> <exclusions> <exclusion> <groupId>com.fasterxml.jackson.dataformat</groupId> <artifactId>jackson-dataformat-xml</artifactId> </exclusion> </exclusions> </dependency> <dependency> <groupId>org.springframework.cloud</groupId> <artifactId>spring-cloud-starter-openfeign</artifactId> </dependency> <dependency> <groupId>org.springframework.cloud</groupId> <artifactId>spring-cloud-starter-netflix-hystrix</artifactId> </dependency> <dependency> <groupId>org.springframework.boot</groupId> <artifactId>spring-boot-starter-web</artifactId> </dependency>
-
-
在启动类添加
@EnableHystrix、@EnableFeignClients、@EnableDiscoveryClient,启用熔断器、openfeign、服务注册等@EnableHystrix @EnableFeignClients @EnableDiscoveryClient @SpringBootApplication public class SclEurekaClientConsumerApplication { public static void main(String[] args) { SpringApplication.run(SclEurekaClientConsumerApplication.class, args); } } -
配置文件application.yml
server: port: 8090 spring: application: name: eureka-client-consumer eureka: client: register-with-eureka: true # 是否注册到服务注册中心 fetch-registry: true # 是否从注册中心抓取信息,若不存在服务调用设置为false即可,反之则设置为true service-url: defaultZone: http://root:123456@test1:8100/eureka-server1/eureka,http://root:123456@test2:8200/eureka-server2/eureka,http://root:123456@test3:8300/eureka-server3/eureka # 服务注册中心地址 feign: hystrix: enabled: true # 启用Hystrix management: endpoints: web: exposure: include: info,health,hystrix-stream # actuator暴露端点 endpoint: health: show-details: always # 总是展示详细的健康检查信息 -
添加openFeign配置类,指定日志输入等级
@Configuration public class FeignConfig { @Bean Logger.Level feignLoggerLevel() { return Logger.Level.FULL; } } -
添加Feign接口进行接口调用,并指定接口异常进行熔断后的回调处理方法
@FeignClient里的name属性的值对应服务注册中心的服务名称。即列表里的Application
@FeignClient(name = "eureka-client-provider", configuration = FeignConfig.class, fallbackFactory = TestFeignFallback.class) public interface TestFeign { @GetMapping("/provider/info") Map<String, String> getTest(); } @Component class TestFeignFallback implements FallbackFactory<TestFeign> { private static final Logger log = LoggerFactory.getLogger(TestFeignFallback.class); @Override public TestFeign create(Throwable throwable) { return new TestFeign() { @Override public Map<String, String> getTest() { log.info("接口调用异常,触发熔断机制。 异常原因: ", throwable); return new HashMap<>(); } }; } } -
添加一个接口,在接口中调用服务提供者提供的接口
@RestController @RequestMapping("/consumer") public class TestController { private final TestFeign feign; @Autowired public TestController(TestFeign feign) { this.feign = feign; } @GetMapping("/info") public Map<String, String> get() { return this.feign.getTest(); } } -
启动项目,并访问服务注册中心、接口、健康检查端点、Hystrix监控端点等