结构体同数组和指针一样,是C语言的核心部分之一,用法简单明了。
* 当一个整体由多个数据构成时,我们可以用数组来表示这个整体,但是数组有个特点:内部的每一个元素都必须是相同类型的数据。
* 在实际应用中,我们通常需要由不同类型的数据来构成一个整体,比如学生这个整体可以由姓名、年龄、身高等数据构成,这些数据都具有不同的类型,姓名可以是字符串类型,年龄可以是整型,身高可以是浮点型。
* 为此,C语言专门提供了一种构造类型来解决上述问题,这就是结构体,它允许内部的元素是不同类型的。
1.定义形式
结构体内部的元素,也就是组成成分,我们一般称为"成员"。
结构体的一般定义形式为:

 1 struct 结构体名{
 2
 3     类型名1 成员名1;
 4
 5     类型名2 成员名2;
 6
 7     ……
 8
 9     类型名n 成员名n;
10
11 };
struct是关键字,是结构体类型的标志。
2.举例
比如,我们定义一个学生
struct Student {
    char *name; // 姓名
    int age; // 年龄
    float height; // 身高
};
上面定义了一个叫做Student的结构体,共有name、age、height3个成员。
前面只是定义了名字为Student的结构体类型,并非定义了一个结构体变量,就像int一样,只是一种类型。
接下来定义一个结构体变量,方式有好多种。
1.先定义结构体类型,再定义变量
1 struct Student {
2     char *name;
3     int age;
4 };
5
6 struct Student stu;
第6行定义了一个结构体变量,变量名为stu。struct和Student是连着使用的。
2.定义结构体类型的同时定义变量
struct Student {
    char *name;
    int age;
} stu;
结构体变量名为stu
3.直接定义结构体类型变量,省略类型名
struct {
    char *name;
    int age;
} stu;
结构体变量名为stu
1.不允许对结构体本身递归定义
如下做法是错误的,注意第3行
1 struct Student {
2     int age;
3     struct Student stu;
4 };
2.结构体内可以包含别的结构体
 1 struct Date {
 2     int year;
 3     int month;
 4     int day;
 5 };
 6
 7 struct Student {
 8     char *name;
 9     struct Date birthday;
10 };
注意第9行
3.定义结构体类型,只是说明了该类型的组成情况,并没有给它分配存储空间,就像系统不为int类型本身分配空间一样。只有当定义属于结构体类型的变量时,系统才会分配存储空间给该变量
1 struct Student {
2     char *name;
3     int age;
4 };
5
6 struct Student stu;
第1~4行并没有分配存储空间,当执行到第6行时,系统才会分配存储空间给stu变量。
4.结构体变量占用的内存空间是其成员所占内存之和,而且各成员在内存中按定义的顺序依次排列
比如下面的Student结构体:
1 struct Student {
2     char *name; // 姓名
3     int age; // 年龄
4     float height; // 身高
5 };
在16位编译器环境下,一个Student变量共占用内存:2 + 2 + 4 = 8字节。
将各成员的初值,按顺序地放在一对大括号{}中,并用逗号分隔,一一对应赋值。
比如初始化Student结构体变量stu
1 struct Student {
2     char *name;
3     int age;
4 };
5
6 struct Student stu = {"MJ", 27};
struct Student stu;
stu = {"MJ", 27};
1.一般对结构体变量的操作是以成员为单位进行的,引用的一般形式为:结构体变量名.成员名
1 struct Student {
2     char *name;
3     int age;
4 };
5
6 struct Student stu;
7
8 // 访问stu的age成员
9 stu.age = 27;
第9行对结构体的age成员进行了赋值。"."称为成员运算符,它在所有运算符中优先级最高
2.如果某个成员也是结构体变量,可以连续使用成员运算符"."访问最低一级成员
 1 struct Date {
 2      int year;
 3      int month;
 4      int day;
 5 };
 6
 7 struct Student {
 8     char *name;
 9     struct Date birthday;
10 };
11
12 struct Student stu;
13
14 stu.birthday.year = 1986;
15 stu.birthday.month = 9;
16 stu.birthday.day = 10;
注意第14行以后的代码
3.相同类型的结构体变量之间可以进行整体赋值
 1 struct Student {
 2     char *name;
 3     int age;
 4 };
 5
 6 struct Student stu1 = {"MJ", 27};
 7
 8 // 将stu1直接赋值给stu2
 9 struct Student stu2 = stu1;
10
11 printf("age is %d", stu2.age);
注意第9行。输出结果为:
1.定义
跟结构体变量一样,结构体数组也有3种定义方式
struct Student {
    char *name;
    int age;
};
struct Student stu[5]; //定义1
struct Student {
    char *name;
    int age;
} stu[5]; //定义2
struct {
    char *name;
    int age;
} stu[5]; //定义3
上面3种方式,都是定义了一个变量名为stu的结构体数组,数组元素个数是5
2.初始化
struct {
    char *name;
    int age;
} stu[2] = { {"MJ", 27}, {"JJ", 30} };
也可以用数组下标访问每一个结构体元素,跟普通数组的用法是一样的
将结构体变量作为函数参数进行传递时,其实传递的是全部成员的值,也就是将实参中成员的值一一赋值给对应的形参成员。因此,形参的改变不会影响到实参。
 1 #include <stdio.h>
 2
 3 // 定义一个结构体
 4 struct Student {
 5     int age;
 6 };
 7
 8 void test(struct Student stu) {
 9     printf("修改前的形参:%d
", stu.age);
10     // 修改实参中的age
11     stu.age = 10;
12
13     printf("修改后的形参:%d
", stu.age);
14 }
15
16 int main(int argc, const char * argv[]) {
17
18     struct Student stu = {30};
19     printf("修改前的实参:%d
", stu.age);
20
21     // 调用test函数
22     test(stu);
23
24
25     printf("修改后的实参:%d
", stu.age);
26     return 0;
27 }
* 首先在第4行定义了一个结构体类型Student
* 在第18行定义了一个结构体变量stu,并在第22行将其作为实参传入到test函数
输出结果为: ,形参是改变了,但是实参一直没有变过
* 每个结构体变量都有自己的存储空间和地址,因此指针也可以指向结构体变量
* 结构体指针变量的定义形式:struct 结构体名称 *指针变量名
* 有了指向结构体的指针,那么就有3种访问结构体成员的方式
- 结构体变量名.成员名
- (*指针变量名).成员名
- 指针变量名->成员名
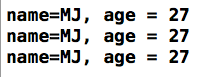
 1 #include <stdio.h>
 2
 3 int main(int argc, const char * argv[]) {
 4     // 定义一个结构体类型
 5     struct Student {
 6         char *name;
 7         int age;
 8     };
 9
10     // 定义一个结构体变量
11     struct Student stu = {"MJ", 27};
12
13     // 定义一个指向结构体的指针变量
14     struct Student *p;
15
16     // 指向结构体变量stu
17     p = &stu;
18
19     /*
20      这时候可以用3种方式访问结构体的成员
21      */
22     // 方式1:结构体变量名.成员名
23     printf("name=%s, age = %d
", stu.name, stu.age);
24
25     // 方式2:(*指针变量名).成员名
26     printf("name=%s, age = %d
", (*p).name, (*p).age);
27
28     // 方式3:指针变量名->成员名
29     printf("name=%s, age = %d
", p->name, p->age);
30
31     return 0;
32 }
输出结果: