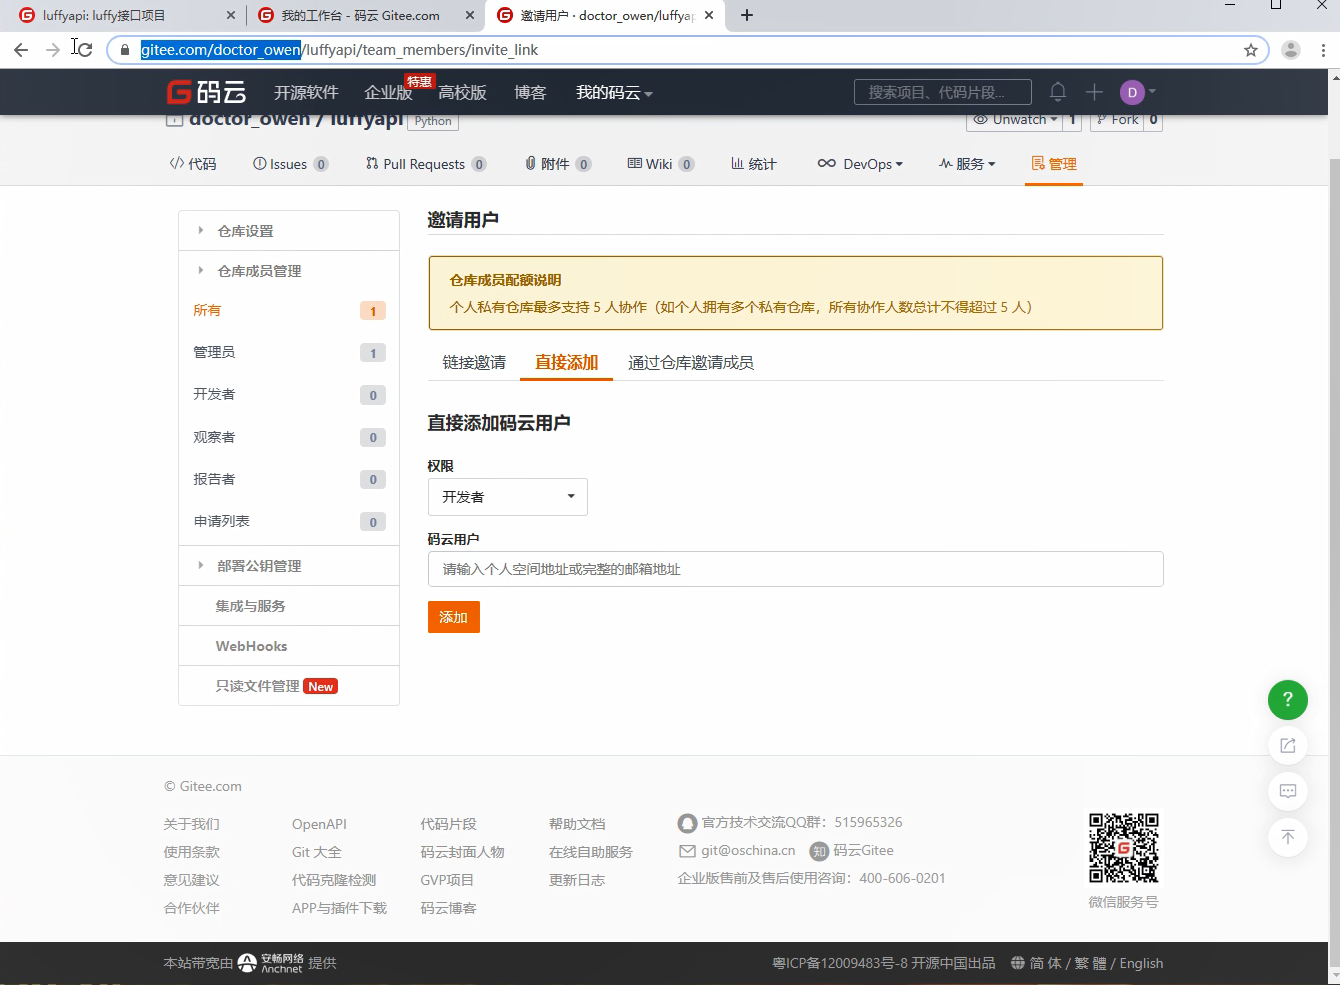
git成员管理(第二种添加账户)
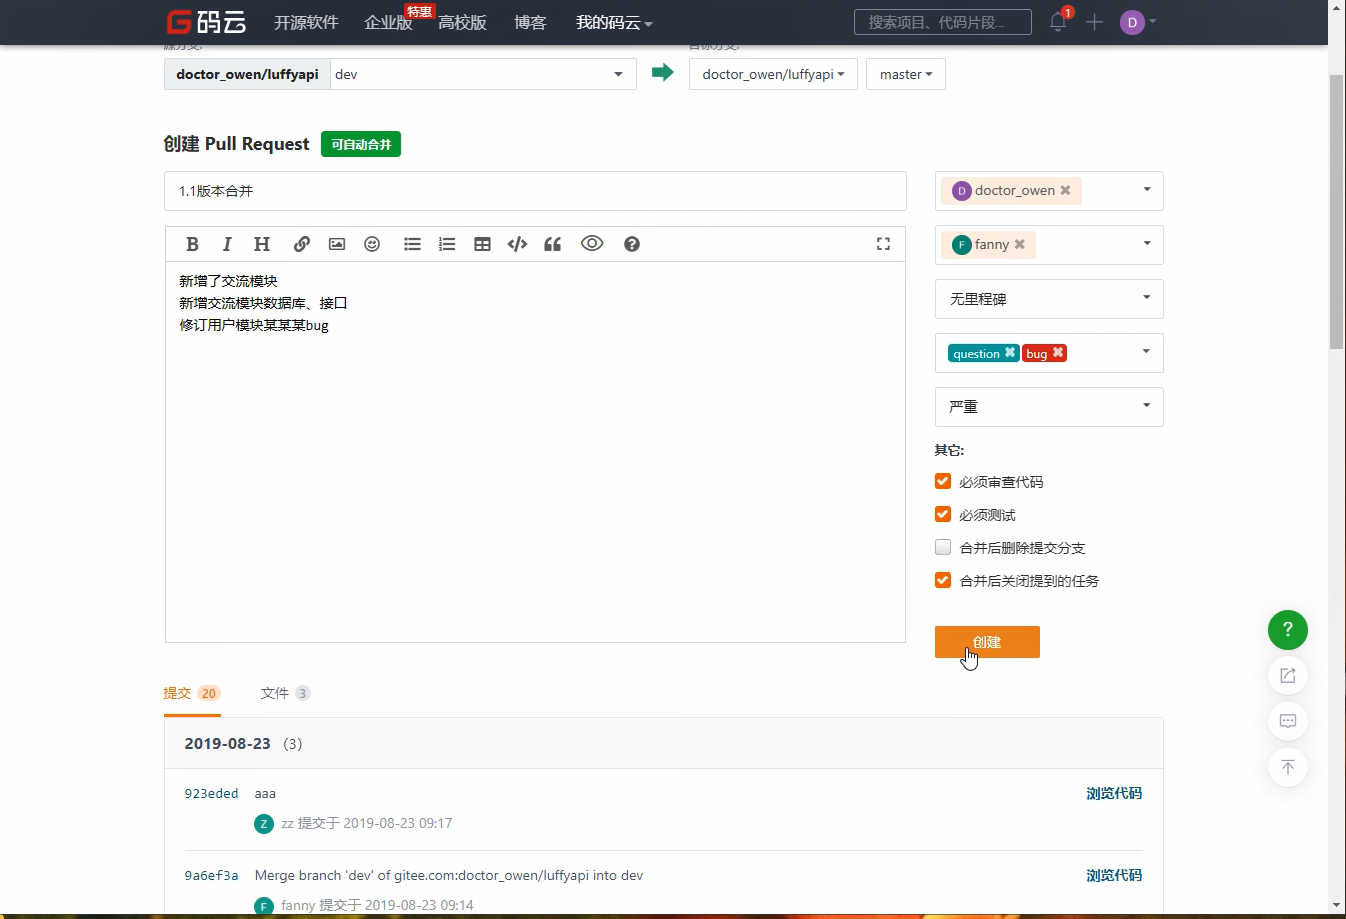
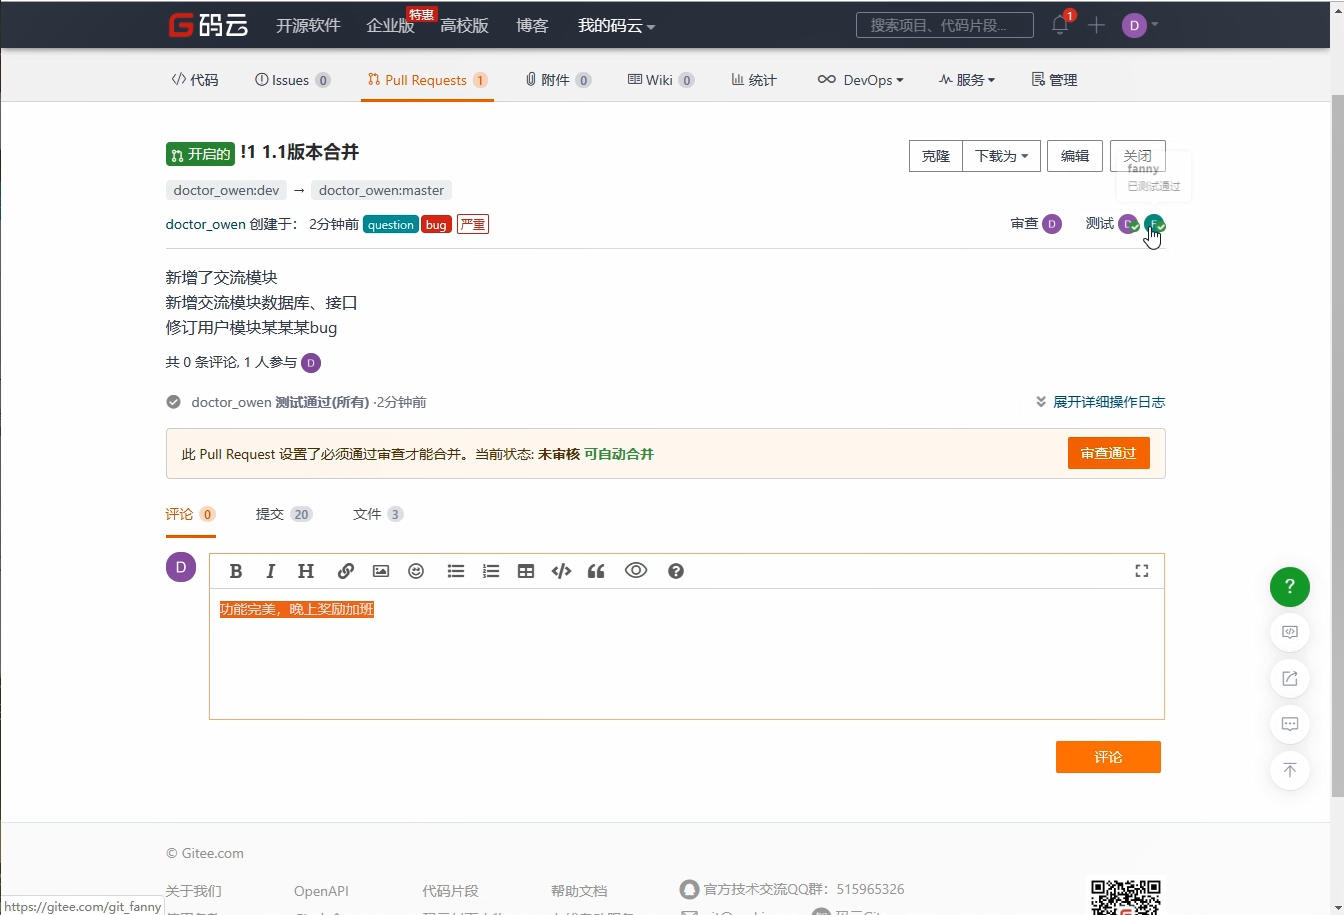
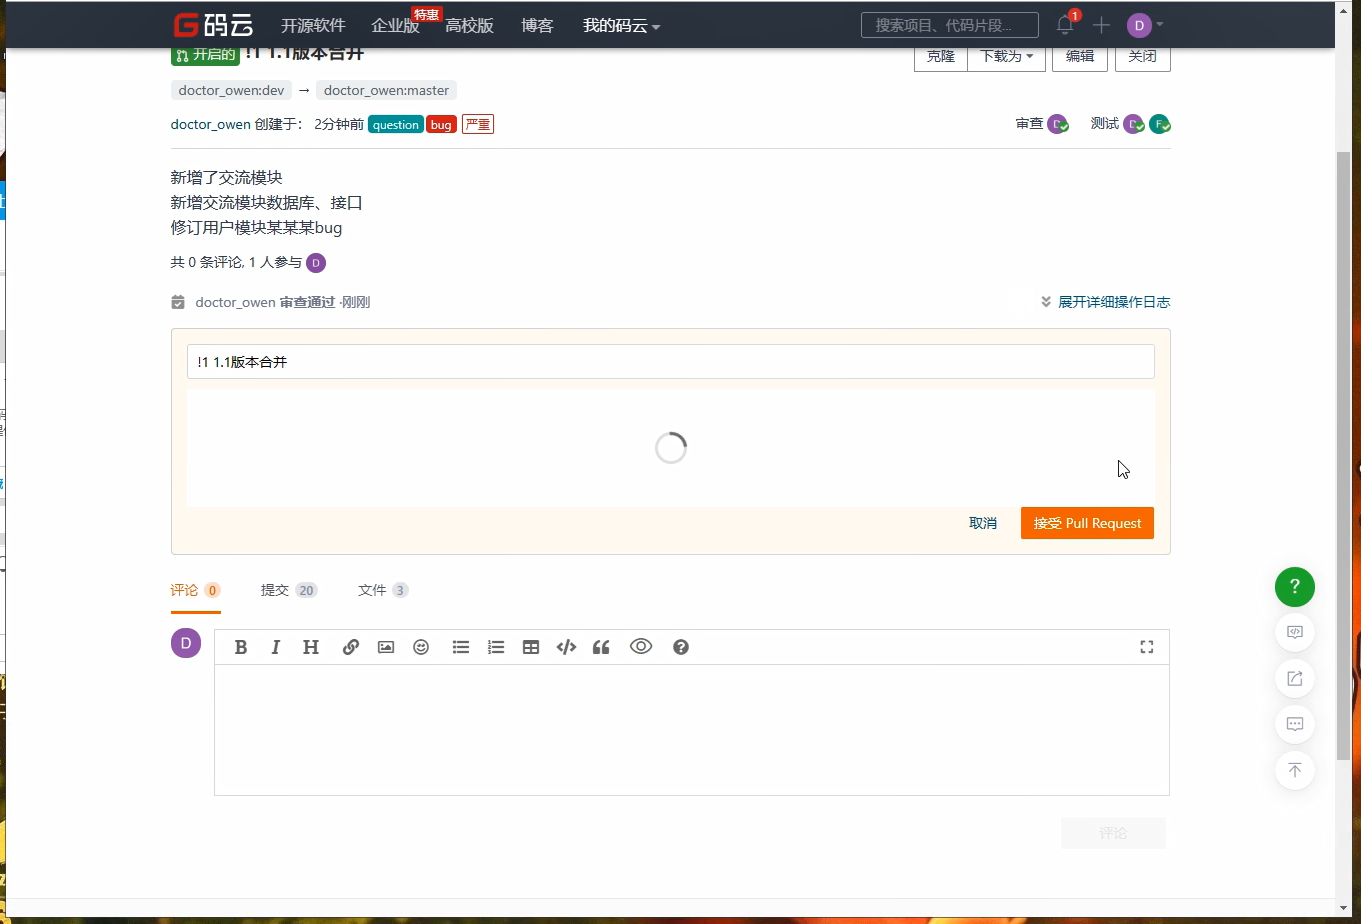
git分支管理

redis数据库(非及时数据使用)
1.安装redis与可视化操作工具
    选择安装路径、圈中默认配置环境变量

2.在服务中管理redis服务器的开启关闭

3.命令行简单使用redis:
    启动客户端:redis-cli
    支持:字符串、字典、列表、集合、有序集合
    使用方法:https://www.runoob.com/redis/redis-tutorial.html

4.特点:可持久化存储、单线程单进程并发、内存中的数据库(效率高)
python使用redis数据库
依赖:
    pip3 install redis


1.直接使用

    import redis
    r = redis.Redis(host='127.0.0.1', port=6379)


2.连接池使用

    import redis
    pool = redis.ConnectionPool(host='127.0.0.1', port=6379)
    r = redis.Redis(connection_pool=pool)

3.作为缓存数据库使用

    a.依赖:
        pip install django-redis
    b.将缓存存储位置配置到redis中:settings.py
        CACHES = {
            "default": {
                "BACKEND": "django_redis.cache.RedisCache",
                "LOCATION": "redis://127.0.0.1:6379",
                "OPTIONS": {
                    "CLIENT_CLASS": "django_redis.client.DefaultClient",
                    "CONNECTION_POOL_KWARGS": {"max_connections": 100}
                }
            }
        }

    c.操作cache模块直接操作缓存:views.py
        from django.core.cache import cache