本例子主要使用了eureka集群作为注册中心来保证高可用,客户端来做ribbon服务提供者的负载均衡。
负载均衡有两种,第一种是nginx,F5这种集中式的LB,对所有的访问按照某种策略分发。
第二种是客户端知道所有的服务的地址,在客户端做负载均衡,客户端自己去发送。
github地址:https://github.com/linjiaqin/scdemo
一. eureka注册中心的搭建
1.为了实现HA(高可用性),采用集群方式搭建,由mu01(192.168.0.100),cu01(192.168.0.1), cu02(192.168.0.2)三台机子组成
为了不写ip地址而使用主机名表示,首先修改/etc/hosts文件,将对应的hostname和ip写入该文件,然后source生效
2.idea新建一个module,spring assistant类型,选择springcloud,web和eureka server两个模板。
为其启动类加上@EnableEurekaServer
package com.ljq;

import org.springframework.boot.SpringApplication;
import org.springframework.boot.autoconfigure.SpringBootApplication;
import org.springframework.cloud.netflix.eureka.server.EnableEurekaServer;

@EnableEurekaServer
@SpringBootApplication
public class ServerApplication {

	public static void main(String[] args) {
		SpringApplication.run(ServerApplication.class, args);
	}

}
3.编写配置文件
配置文件application-backone.properties
#服务名和服务暴露的接口
spring.application.name=backup_one
server.port=8762

eureka.instance.hostname=cu01
#本项目是注册中心所以不需要自己向自己注册和检索服务,如果是eureka集群就要
#eureka.client.register-with-eureka=false
#eureka.client.fetch-registry=false

#eureka.client.serviceUrl.defaultZone :设置与Eureka Server交互的地址,查询服务和注册服务都需要依赖这个地址。
# 默认是http://localhost:8761/eureka ;多个地址可使用 , 分隔。
eureka.client.serviceUrl.defaultZone=http://mu01:8761/,http://cu02:8763/
配置文件application-backtwo.properties
#服务名和服务暴露的接口
spring.application.name=backup_two
server.port=8763

eureka.instance.hostname=cu02
#本项目是注册中心所以不需要自己向自己注册和检索服务,如果是eureka集群就要
#eureka.client.register-with-eureka=false
#eureka.client.fetch-registry=false

#eureka.client.serviceUrl.defaultZone :设置与Eureka Server交互的地址,查询服务和注册服务都需要依赖这个地址。
# 默认是http://localhost:8761/eureka ;多个地址可使用 , 分隔。
eureka.client.serviceUrl.defaultZone=http://mu01:8761/,http://cu01:8762/
配置文件application-master.properties
#服务名和服务暴露的接口
spring.application.name=master
server.port=8761

eureka.instance.hostname=mu01
#本项目是注册中心所以不需要自己向自己注册和检索服务,如果是eureka集群就要
#eureka.client.register-with-eureka=false
#eureka.client.fetch-registry=false

#eureka.client.serviceUrl.defaultZone :设置与Eureka Server交互的地址,查询服务和注册服务都需要依赖这个地址。
# 默认是http://localhost:8761/eureka ;多个地址可使用 , 分隔。
eureka.client.serviceUrl.defaultZone=http://cu01:8762/,http://cu02:8763/
4.如果在本机模拟的话,在idea中打开3个terminal,分别执行下面的命令,开启了eureka集群,后面那里不需要使用配置文件的全名
mvn spring-boot:run -Dspring.profiles.active=master
mvn spring-boot:run -Dspring.profiles.active=backone
mvn spring-boot:run -Dspring.profiles.active=backtwo
5.在集群中开启的话,为了不每一次都登录到多台机子上,写一个一键启动脚本,自动ssh到每台机子上去开启。
这里bash脚本是linux脚本,sh脚本是unix脚本,虽然通用,但是语法有些不同。
因为是阻塞式进程,所以使用nohup ... > /dev/null,使得该进程能在后台执行。
同时ssh之后还要export javahome/bin,不知为什么这么玄学,ssh之后用的不是该用户环境变量之中的java
#!/bin/bash
echo "start eureka server..."
num=0
server=("master" "backone" "backtwo")
for host in mu01 cu01 cu02
do
echo ${server[$num]}
ssh $host "export JAVA_HOME=/data/home/hadoop/jdk1.8.0_40;
CLASSPATH=.:$JAVA_HOMElib/tools.jar:$JAVA_HOME/lib/dt.jar;
export CLASSPATH;
PATH=$JAVA_HOME/bin:$PATH;
export PATH;
java -version;
cd /software/home/linjiaqing/eureka;
nohup java -jar server-0.0.1-SNAPSHOT.jar --spring.profiles.active=${server[$num]} > /dev/null"
num=$(($num+1))
done
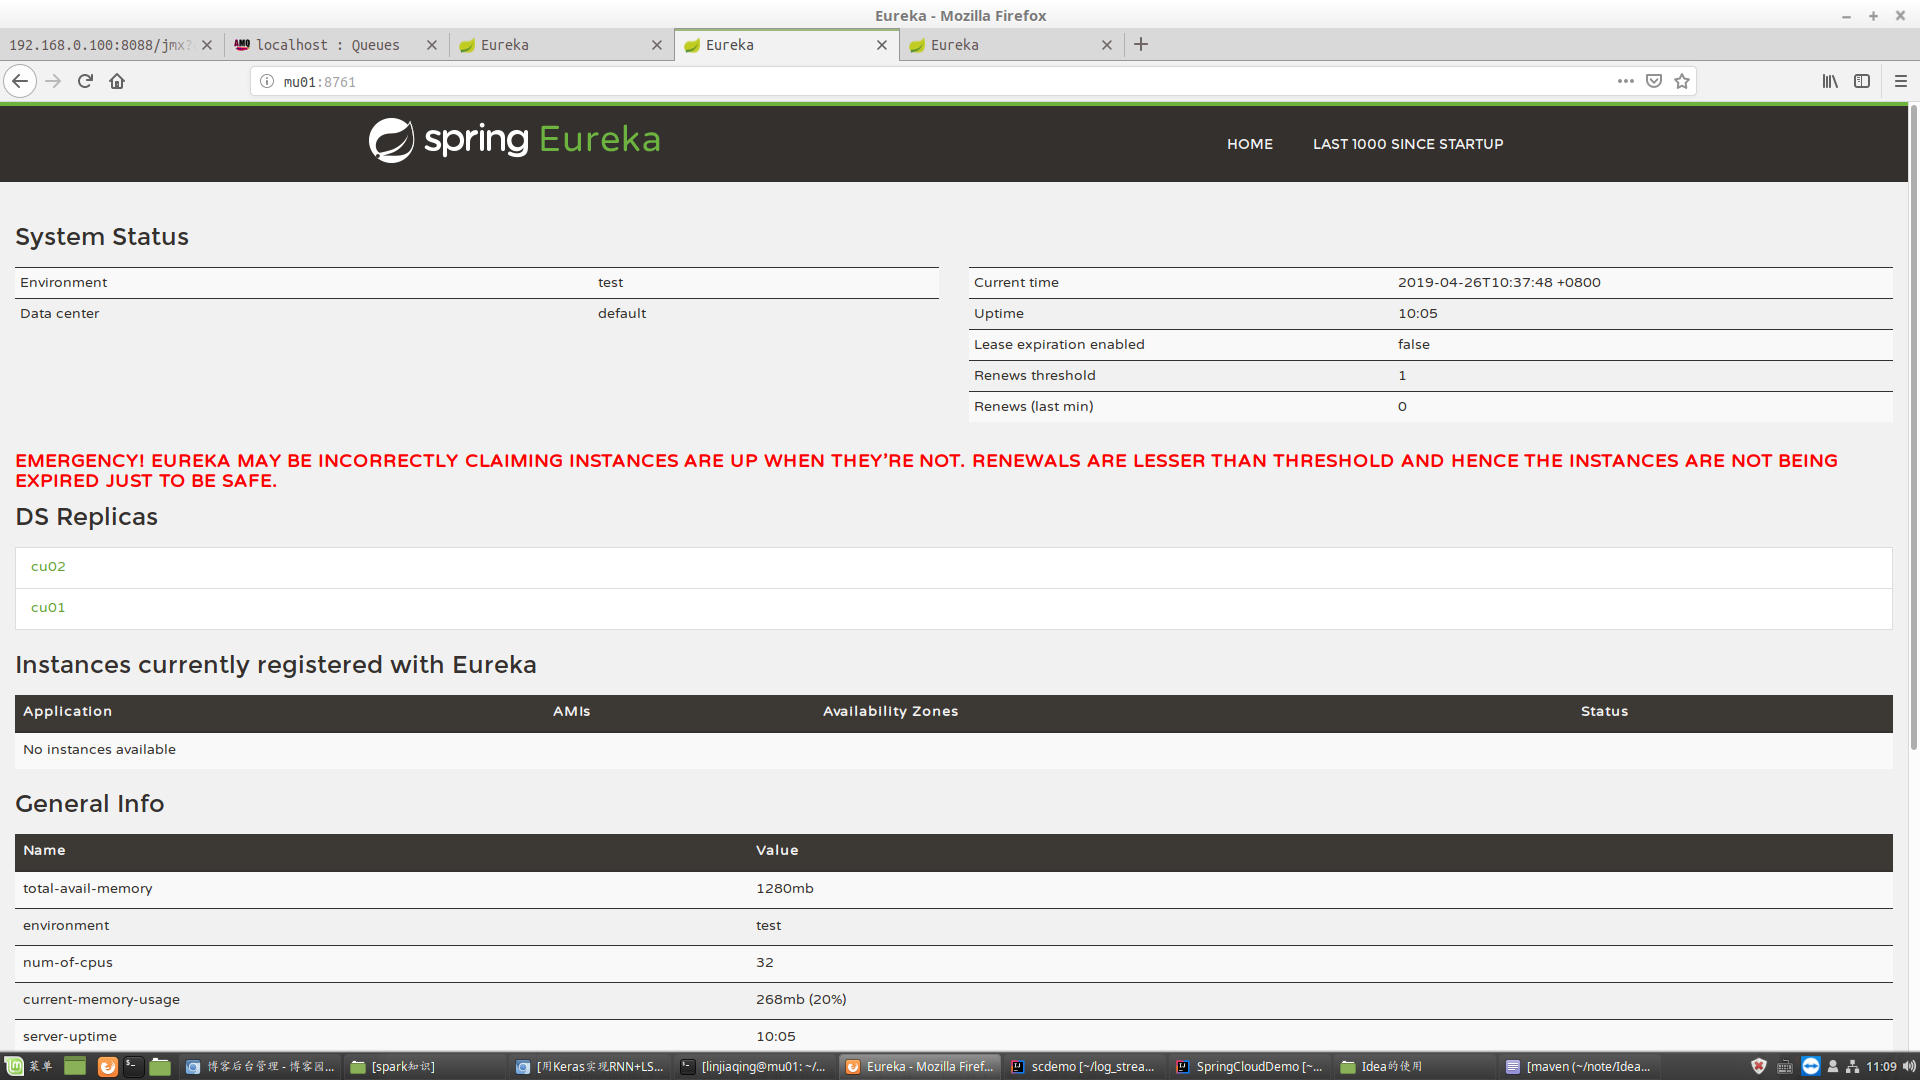
打开浏览器,下面是效果图,每个节点都能看到备份
二. 服务提供者
1.引导类加上注解EnableEurekaClient,说明他是一个服务提供者
package com.ljq;

import org.springframework.boot.SpringApplication;
import org.springframework.boot.autoconfigure.SpringBootApplication;
import org.springframework.cloud.netflix.eureka.EnableEurekaClient;

@SpringBootApplication
@EnableEurekaClient
//服务提供者用这个注解
public class ProviderApplication {

	public static void main(String[] args) {
		SpringApplication.run(ProviderApplication.class, args);
	}

}
2.Controller
package com.ljq;

import org.springframework.beans.factory.annotation.Value;
import org.springframework.web.bind.annotation.RequestMapping;
import org.springframework.web.bind.annotation.RestController;

@RestController
public class ljqController {
    @Value("${server.port}")
    String port;

    @RequestMapping("/")
    public String home(){
        return "Hello world, port is:" + port;
    }
}
3.配置文件
spring.application.name=eureka-client-service-provider
server.port=20001
eureka.client.serviceUrl.defaultZone=http://mu01:8761/eureka,http://cu01:8762/eureka,http://cu02:8763/eureka
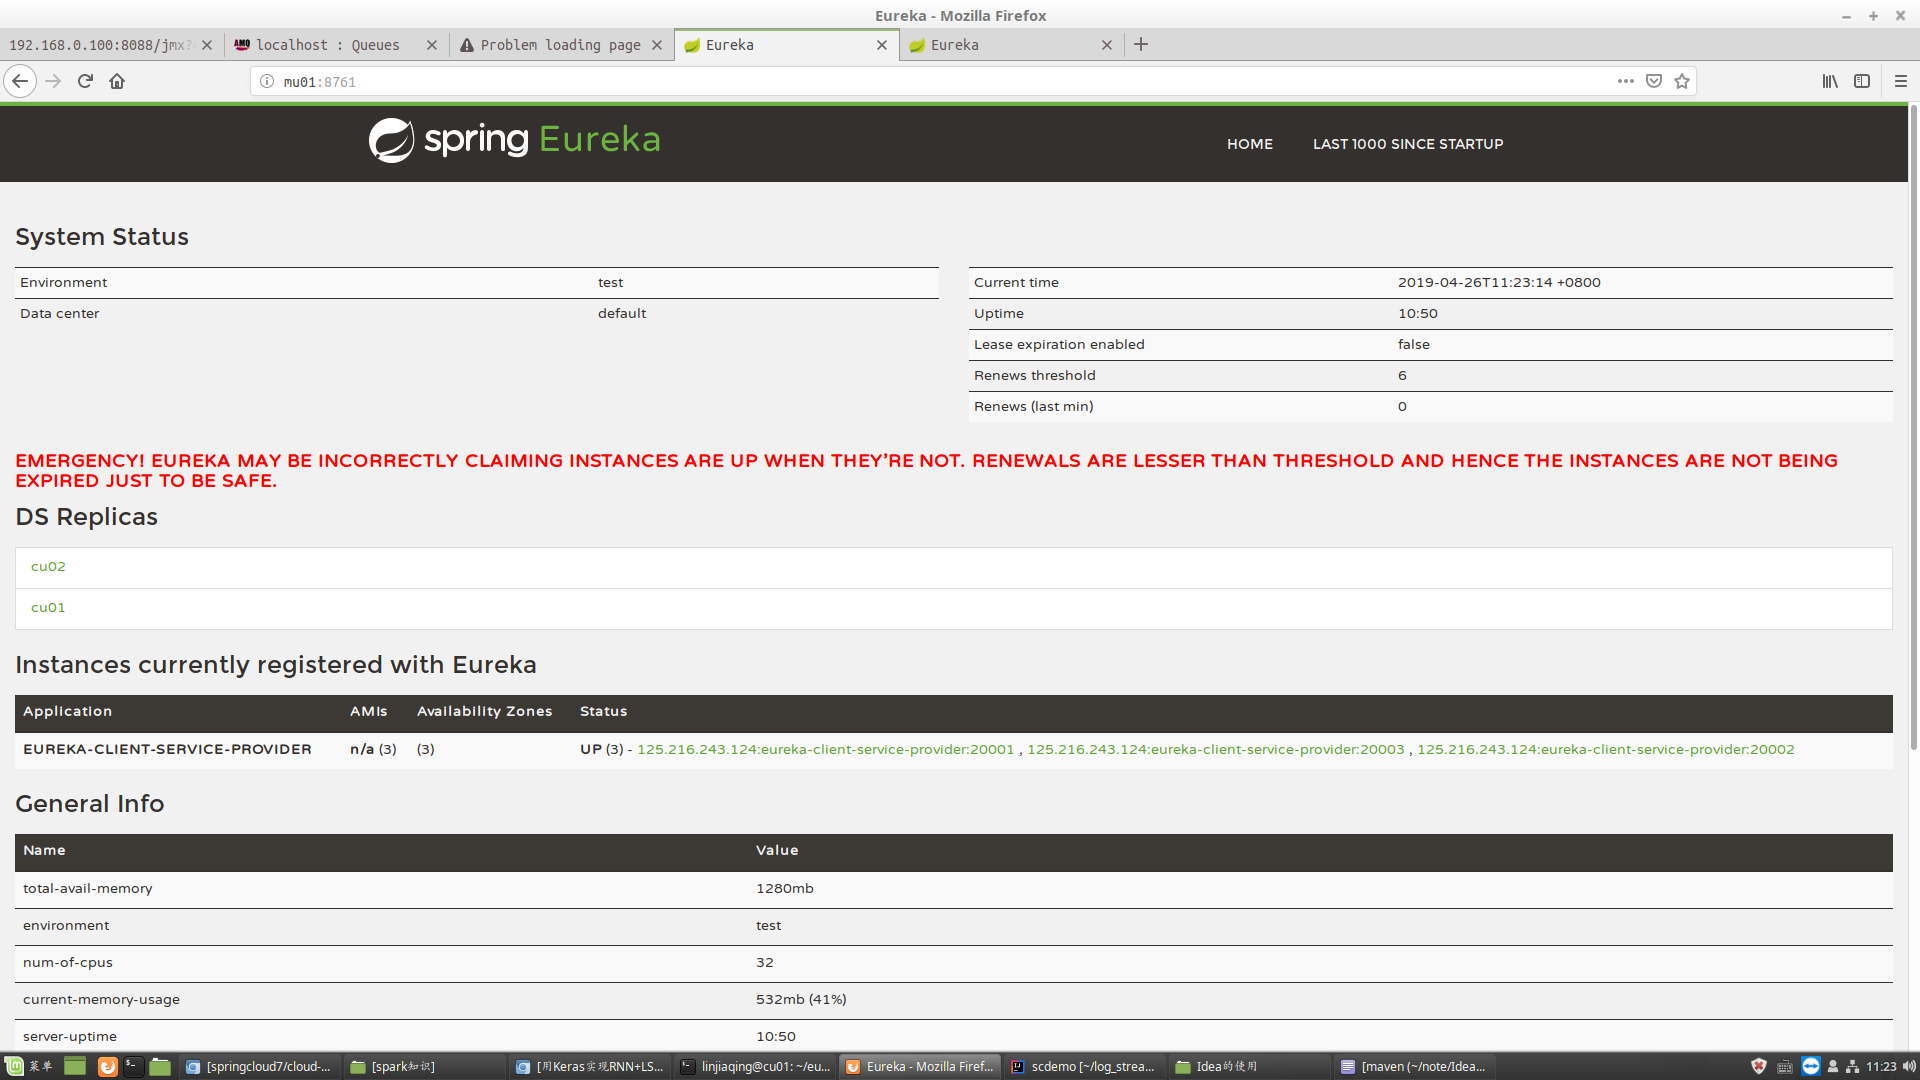
4.启动,IDEA打开三个客户端,分别使用命令mvn spring-boot:run -Dserver.port=20001,20002,20003如下图可以看到它去eureka的某个节点上注册了


5.HA的体现,将cu01的进程kill之后,发现服务会自动去mu01上注册
三 服务消费者使用负载均衡
1.ljqConfig
这里是一个beanconfig,为了RestTemplate能够被只用
package com.ljq;

import org.springframework.cloud.client.loadbalancer.LoadBalanced;
import org.springframework.context.annotation.Bean;
import org.springframework.context.annotation.Configuration;
import org.springframework.web.client.RestTemplate;

@Configuration
public class ljqConfig {
    @Bean
    @LoadBalanced
    public RestTemplate restTemplate(){
        return new RestTemplate();
    }
}
2.ljqController
使用服务提供者的名字http://eureka-client-service-provider/,不用再使用地址
package com.ljq;
import org.springframework.beans.factory.annotation.Autowired;
import org.springframework.web.bind.annotation.GetMapping;
import org.springframework.web.bind.annotation.RestController;
import org.springframework.web.client.RestTemplate;
@RestController
public class ljqController {
@Autowired
private RestTemplate restTemplate;
//这里不写eureka的注册中心,而是写服务提供者的应用名
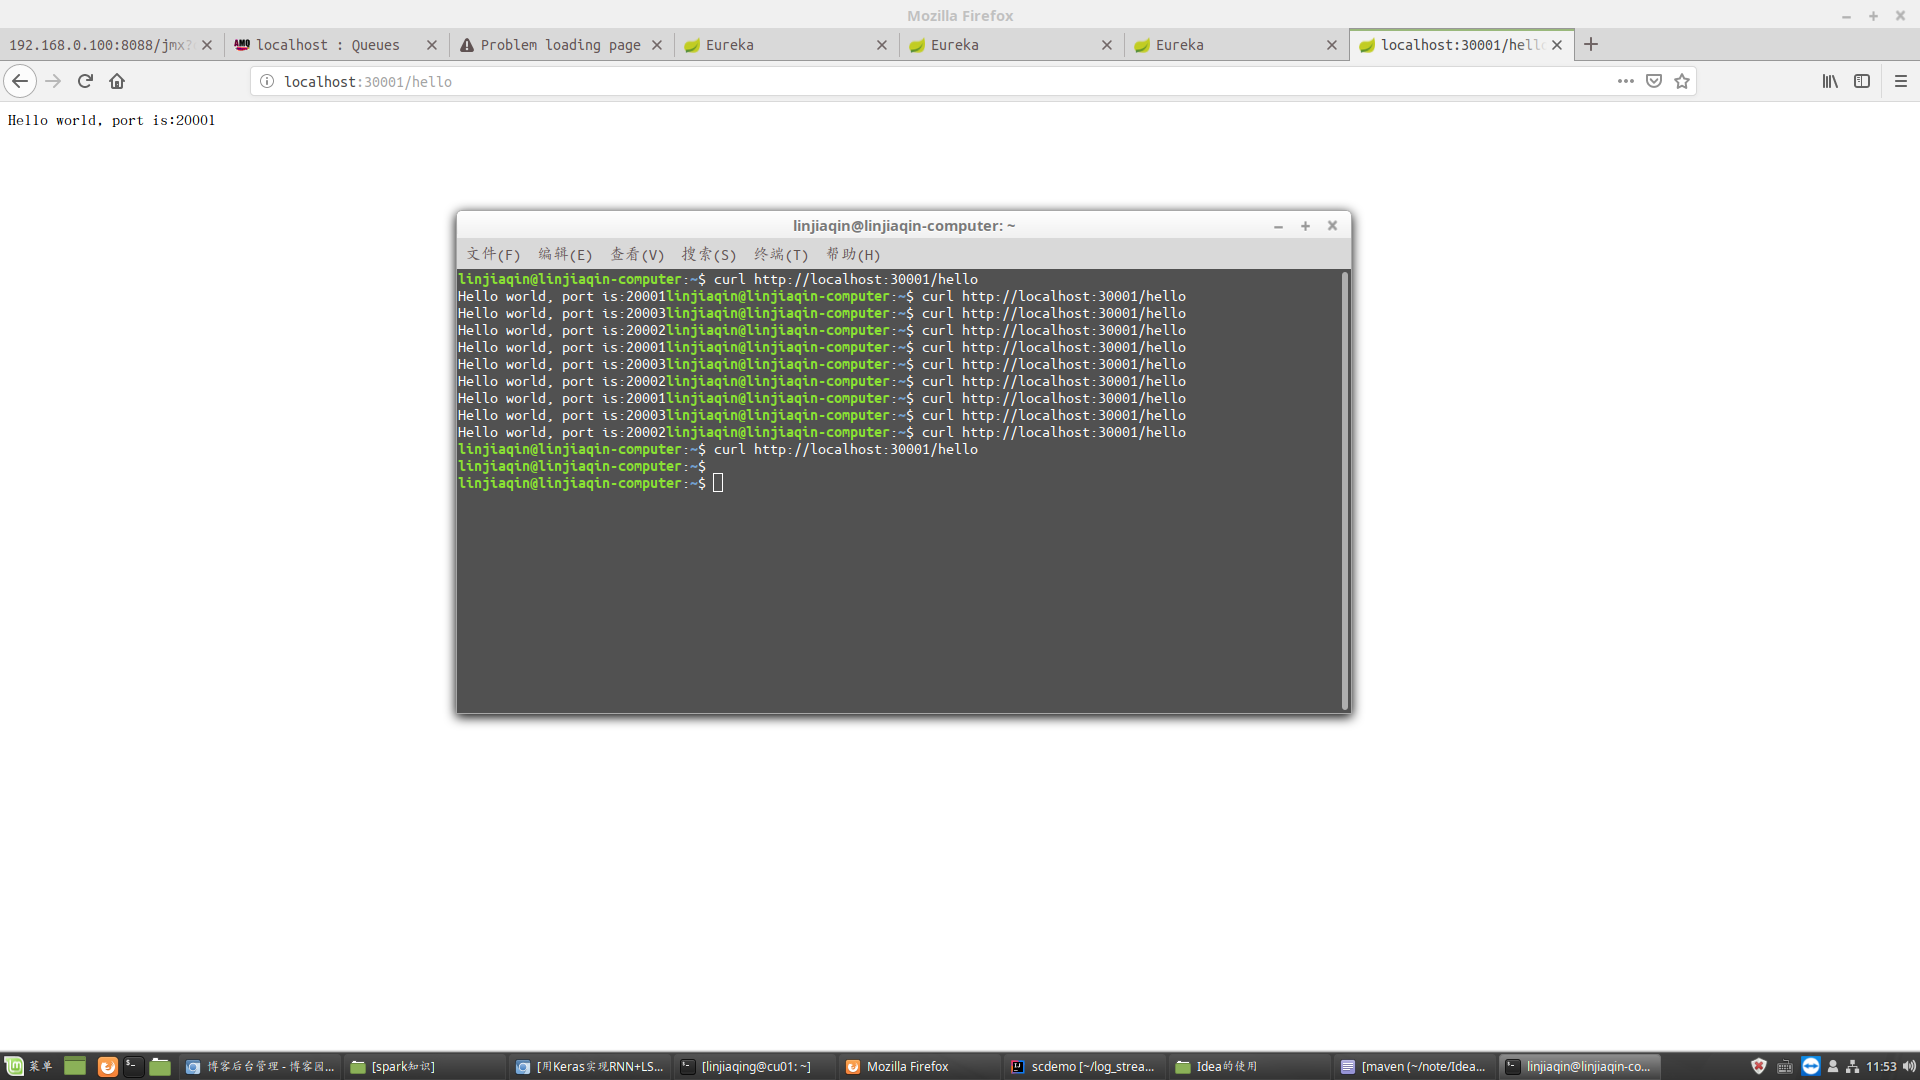
@GetMapping(value = "/hello")
public String hello(){
return restTemplate.getForEntity("http://eureka-client-service-provider/", String.class).getBody();
}
}
3.引导类的EnableDiscoveryClient注解表明是消费者
package com.ljq;

import org.springframework.boot.SpringApplication;
import org.springframework.boot.autoconfigure.SpringBootApplication;
import org.springframework.cloud.client.discovery.EnableDiscoveryClient;

@SpringBootApplication
@EnableDiscoveryClient
public class ConsumerApplication {

	public static void main(String[] args) {
		SpringApplication.run(ConsumerApplication.class, args);
	}

}
4.配置文件
spring.application.name=ribbon-consumer
server.port=30001
eureka.client.serviceUrl.defaultZone=http://mu01:8761/eureka,http://cu01:8762/eureka,http://cu02:8763/eureka
5.消费者启动后也去eureka中注册了
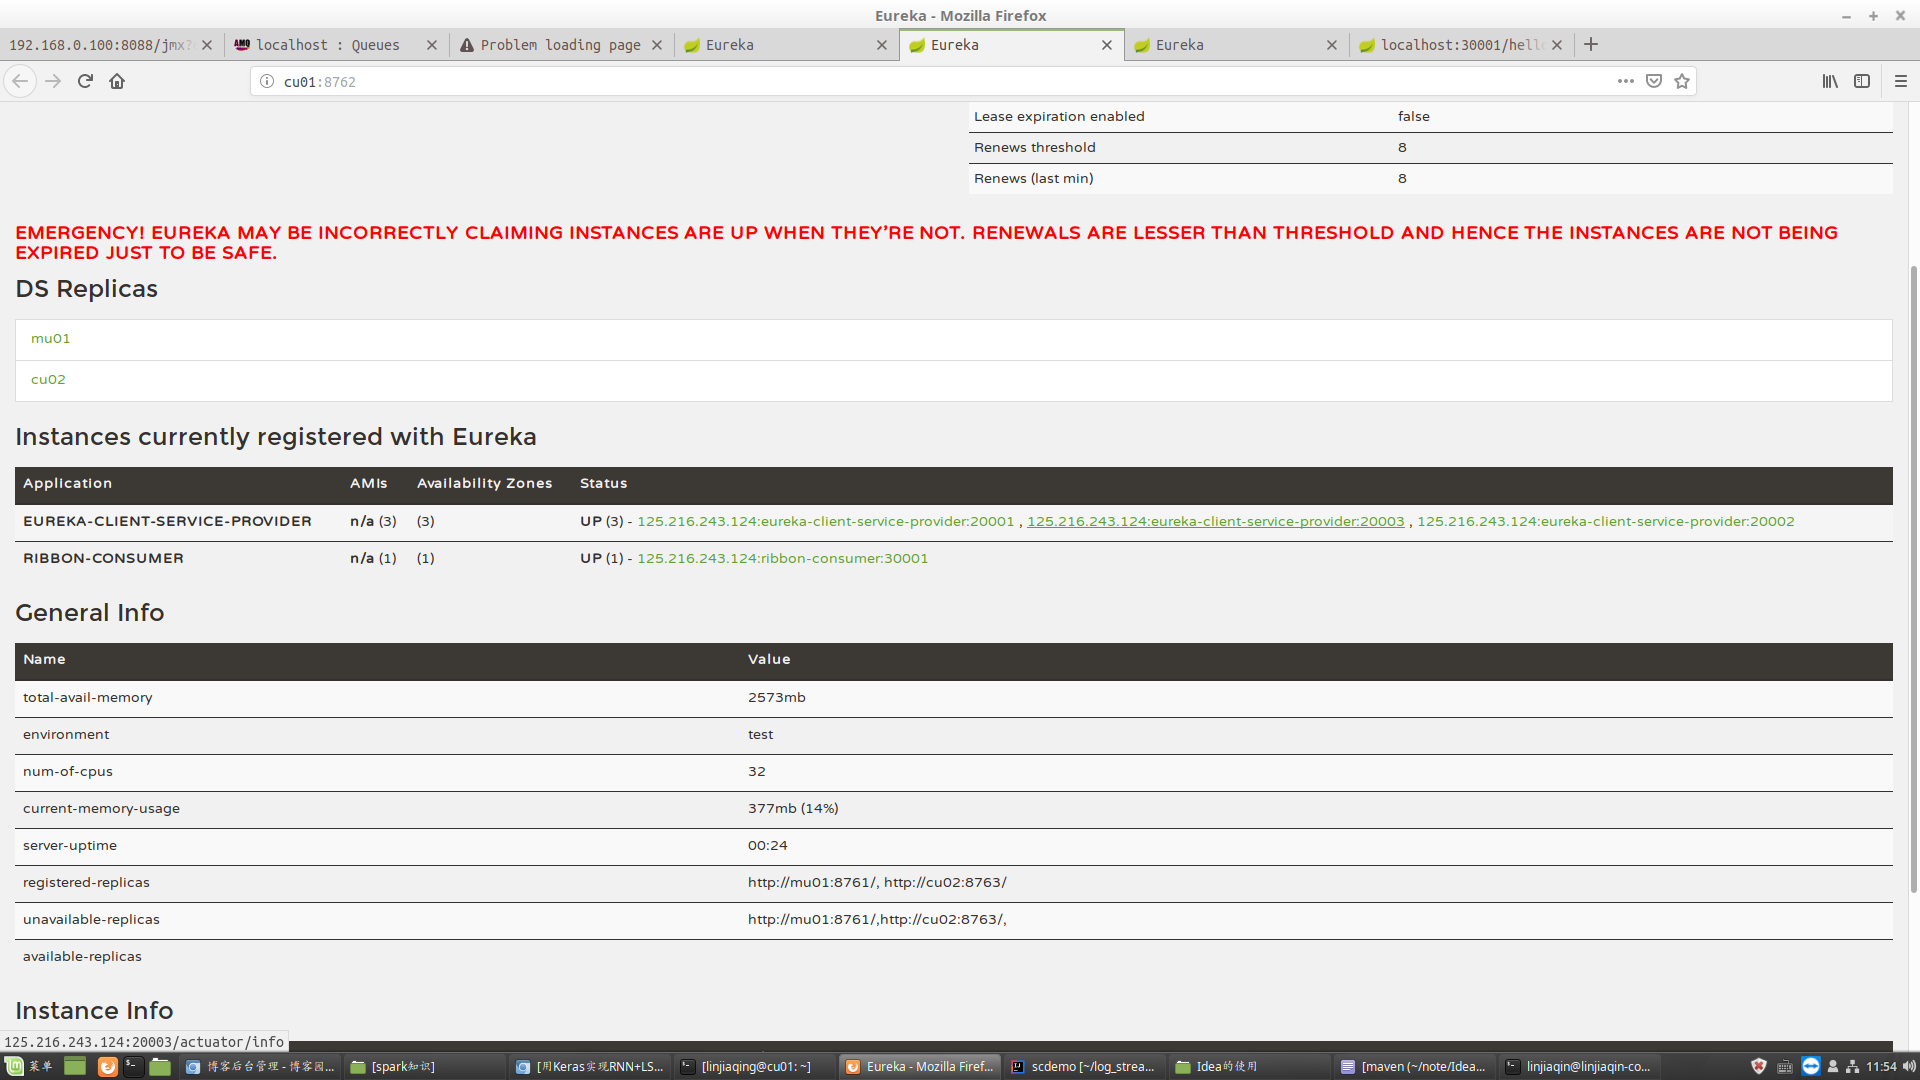
可以看到已经有了ribbon负载均衡的效果